
If you’re looking for a quick weeknight dinner that tastes like it came from your favorite restaurant, these Honey Butter Garlic Chicken Bites are about to become your new obsession! Imagine tender, juicy pieces of chicken coated in a sweet and savory glaze that’s bursting with buttery garlic flavor and just a hint of honey sweetness. This easy chicken recipe comes together in under 30 minutes and requires just one pan, making cleanup a breeze.
These honey garlic chicken bites are incredibly versatile—serve them over rice for a complete meal, toss them into a salad for extra protein, or serve them as an appetizer at your next gathering. They’re perfect for busy families, meal preppers, and anyone who wants maximum flavor with minimal effort. The combination of honey, butter, and garlic creates an addictive glaze that coats every piece of chicken, making this dish a guaranteed crowd-pleaser. Whether you’re cooking for picky eaters or hosting a dinner party, these sticky chicken bites deliver restaurant-quality taste right from your own kitchen.
History / Background
While Honey Butter Garlic Chicken Bites don’t have ancient culinary roots, they’re part of a delicious modern trend in American home cooking that combines Asian-inspired sweet and savory glazes with Western cooking techniques. The concept of bite-sized chicken pieces coated in flavorful sauces gained massive popularity in the 2000s and 2010s, partly thanks to the rise of appetizer culture and the influence of Asian cuisine on American cooking.
The honey-garlic combination has long been beloved in Chinese-American cuisine, where honey garlic chicken has been a takeout staple for decades. This recipe takes that classic flavor profile and simplifies it for the modern home cook, eliminating deep-frying and complicated steps while maintaining all the sweet, sticky, garlicky goodness that makes these dishes so addictive.
The “bites” format became especially popular on social media platforms like Pinterest and Instagram, where home cooks began sharing their versions of quick, bite-sized meals that were both photogenic and family-friendly. The butter addition is distinctly American, adding richness and helping the sauce cling beautifully to each piece of chicken. Today, honey butter garlic chicken bites represent the perfect fusion of convenience cooking and crave-worthy flavors—a testament to how home cooks have adapted restaurant favorites into accessible weeknight meals.
Why You’ll Love This Recipe
These honey butter garlic chicken bites are everything you want in a weeknight dinner recipe and more! The combination of sweet honey, rich butter, and aromatic garlic creates a flavor explosion that rivals any restaurant dish, but it’s so simple that even beginner cooks can master it on their first try.
Here’s why this recipe deserves a permanent spot in your dinner rotation:
- Ready in Under 30 Minutes – From start to finish, you’ll have dinner on the table faster than ordering takeout
- One-Pan Wonder – Everything cooks in a single skillet, which means minimal cleanup and maximum convenience
- Budget-Friendly – Uses affordable chicken breast or thighs and simple pantry ingredients
- Kid-Approved – The sweet and savory glaze appeals to even the pickiest eaters
- Meal Prep Friendly – Make a big batch and enjoy delicious lunches all week long
- Versatile Serving Options – Works as a main dish, appetizer, salad topper, or rice bowl protein
- No Marinating Required – Unlike many chicken recipes, this one delivers incredible flavor without any advance prep
- Naturally Gluten-Free – Just use gluten-free soy sauce or coconut aminos
- Restaurant-Quality Taste – That sticky, glossy glaze rivals anything you’d get at your favorite Asian fusion restaurant
- Customizable Heat Level – Easily adjust spiciness by adding red pepper flakes or sriracha
Ingredient Notes
Let’s talk about what makes these honey butter garlic chicken bites so incredibly delicious. Each ingredient plays a crucial role in creating that perfect sweet, savory, and buttery flavor combination.
Chicken Breast or Thighs: The star of the show! I recommend using boneless, skinless chicken breast cut into 1-inch cubes for a leaner option, or chicken thighs for extra juiciness and flavor. Thighs are more forgiving and won’t dry out as easily, making them perfect for beginner cooks. Substitution: You can use chicken tenderloins cut into chunks, or even shrimp for a seafood twist.
Honey: Provides natural sweetness and helps create that gorgeous glossy glaze. Use pure honey rather than honey-flavored syrup for the best flavor. Different honey varieties (clover, wildflower, orange blossom) will subtly affect the taste. Substitution: Maple syrup, agave nectar, or even brown sugar mixed with a little water can work in a pinch.
Butter: Unsalted butter is preferred so you can control the salt level. The butter adds richness and helps the sauce coat the chicken beautifully. It also mellows the garlic and creates that restaurant-quality mouthfeel. Substitution: For a dairy-free version, use ghee or coconut oil, though the flavor will be slightly different.
Garlic: Fresh minced garlic is essential here—about 4-6 cloves depending on your love for garlic. Fresh garlic provides aromatic, pungent flavor that transforms the simple sauce into something magical. Substitution: In a pinch, you can use 1-2 teaspoons of garlic powder, but fresh is always best.
Soy Sauce: Adds umami depth and saltiness that balances the honey’s sweetness. Use low-sodium soy sauce to control the salt level better. Substitution: Tamari for gluten-free, coconut aminos for soy-free, or Worcestershire sauce for a different flavor profile.
Olive Oil or Vegetable Oil: Needed for searing the chicken and preventing sticking. Choose an oil with a high smoke point. Substitution: Avocado oil, canola oil, or grapeseed oil all work well.
Optional Seasonings: Salt, black pepper, red pepper flakes for heat, dried oregano or Italian seasoning for herbaceous notes, and fresh parsley or green onions for garnish.
Equipment Needed
You don’t need any fancy gadgets to make these delicious honey butter garlic chicken bites. Here’s what you’ll need:
- Large Skillet or Frying Pan – A 12-inch skillet works best to give the chicken pieces enough room to sear properly without overcrowding
- Sharp Knife – For cutting chicken into uniform 1-inch pieces
- Cutting Board – Preferably one designated for raw meat
- Measuring Cups and Spoons – For accurate ingredient measurements
- Wooden Spoon or Spatula – For stirring and coating the chicken in the glaze
- Small Bowl – For mixing the sauce ingredients before adding to the pan
- Tongs or Fork – For flipping chicken pieces while cooking
- Meat Thermometer (Optional but recommended) – To ensure chicken reaches 165°F internal temperature
- Garlic Press or Microplane (Optional) – Makes mincing garlic easier

Honey Butter Garlic Chicken Bites Recipe
- Total Time: 25 minutes
- Yield: 4 servings 1x
- Diet: Gluten Free
Description
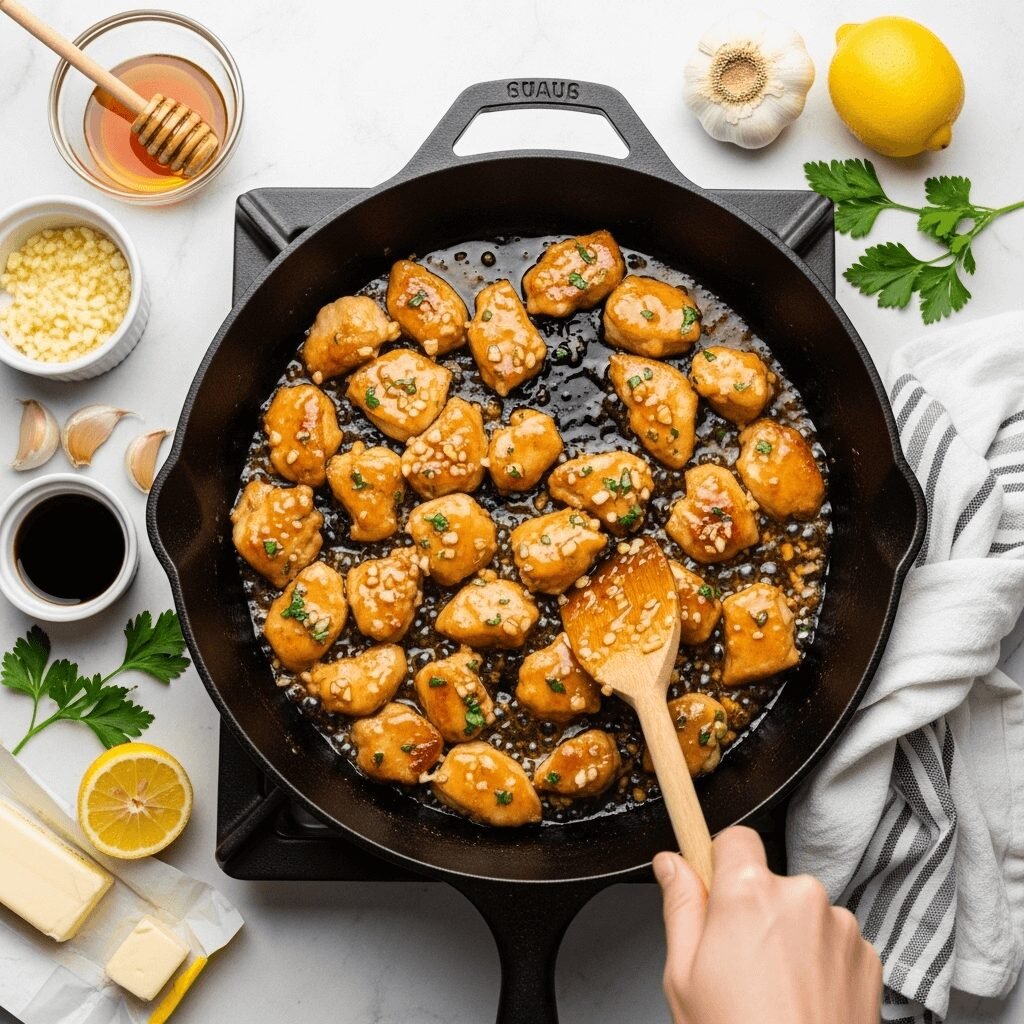
These Honey Butter Garlic Chicken Bites are tender pieces of chicken coated in a sweet, sticky glaze made with honey, butter, and fresh garlic. Ready in just 25 minutes, this easy one-pan recipe is perfect for busy weeknights and delivers restaurant-quality flavor that the whole family will love.
Ingredients
For the Chicken:
- 1.5 lbs boneless, skinless chicken breast or thighs, cut into 1-inch cubes
- 2 tablespoons olive oil or vegetable oil
- ½ teaspoon salt
- ¼ teaspoon black pepper
- ¼ teaspoon garlic powder
For the Honey Butter Garlic Sauce:
- 4 tablespoons unsalted butter
- 4-6 cloves garlic, minced (about 2 tablespoons)
- ⅓ cup honey
- 2 tablespoons soy sauce (use tamari for gluten-free)
- 1 tablespoon lemon juice or apple cider vinegar
- ¼ teaspoon red pepper flakes (optional, for heat)
For Garnish:
- 2 tablespoons fresh parsley, chopped
- 2 green onions, sliced
- Sesame seeds (optional)
Instructions
Step 1: Prep the Chicken
Pat the chicken pieces dry with paper towels—this is crucial for getting a good sear! Season the chicken cubes with salt, black pepper, and garlic powder. Toss to coat evenly.
Step 2: Sear the Chicken
Heat a large skillet over medium-high heat and add the olive oil. Once the oil is shimmering (but not smoking), add the chicken pieces in a single layer, making sure not to overcrowd the pan. Work in batches if necessary. Cook for 3-4 minutes on the first side without moving them, allowing them to develop a golden-brown crust.
Step 3: Flip and Cook Through
Flip the chicken pieces using tongs and cook for another 3-4 minutes until golden and cooked through. The internal temperature should reach 165°F. Remove the chicken from the skillet and set aside on a plate.
Step 4: Make the Honey Butter Garlic Sauce
In the same skillet, reduce heat to medium. Add the butter and let it melt. Add the minced garlic and sauté for about 30-60 seconds until fragrant—be careful not to burn it! The garlic should be golden and aromatic.
Step 5: Add the Sweet and Savory Elements
Pour in the honey, soy sauce, and lemon juice. Stir everything together and let the sauce simmer for 2-3 minutes, stirring occasionally. The sauce will thicken slightly and become glossy. Add red pepper flakes now if you want some heat.
Step 6: Coat the Chicken
Return the cooked chicken to the skillet and toss everything together, ensuring each piece is generously coated with the honey butter garlic sauce. Cook for another 2-3 minutes, stirring frequently, until the chicken is completely glazed and the sauce has thickened to a sticky consistency.
Step 7: Garnish and Serve
Remove from heat and transfer to a serving dish. Garnish with fresh chopped parsley, sliced green onions, and sesame seeds if desired. Serve immediately over rice, quinoa, or with your favorite sides.
Notes
- Don’t Overcrowd the Pan: If your skillet isn’t large enough, cook the chicken in two batches. Overcrowding will cause the chicken to steam rather than sear, preventing that delicious golden crust.
- Watch the Garlic: Garlic can burn quickly, so keep the heat at medium when making the sauce and stir constantly during the first minute.
- Sauce Thickness: If your sauce seems too thick, add a tablespoon of water or chicken broth. If it’s too thin, let it simmer for an extra minute or two.
- Make It Spicier: Add sriracha, chili garlic sauce, or extra red pepper flakes to the sauce for a spicy kick.
- Gluten-Free Option: Use tamari or coconut aminos instead of regular soy sauce.
- Prep Time: 10 minutes
- Cook Time: 15 minutes
- Category: Dinner, Appetizer
- Method: Stovetop
- Cuisine: American, Asian Fusion
Nutrition
- Serving Size: 1 serving (approximately 6-7 chicken bites)
- Calories: 385
- Sugar: 19g
- Sodium: 520mg
- Fat: 18g
- Saturated Fat: 18g
- Unsaturated Fat: 8g
- Trans Fat: 0g
- Carbohydrates: 22g
- Fiber: 0g
- Protein: 35g
- Cholesterol: 135mg
Note: Nutrition information is approximate and calculated per serving based on the ingredients listed. Values may vary depending on specific brands and modifications.
Tips & Variations
Spicy Honey Garlic Chicken Bites:
Add 1-2 tablespoons of sriracha or your favorite hot sauce to the glaze. You can also increase the red pepper flakes to ½ teaspoon for extra heat that builds with each bite.
Asian-Inspired Variation:
Add 1 tablespoon of rice vinegar and 1 teaspoon of sesame oil to the sauce. Garnish with sesame seeds and serve over jasmine rice with steamed bok choy or broccoli.
Italian Herb Version:
Replace the soy sauce with balsamic vinegar and add 1 teaspoon of dried Italian seasoning. Garnish with fresh basil instead of parsley for a Mediterranean twist.
Lighter Version:
Use just 2 tablespoons of butter instead of 4, and reduce honey to ¼ cup. Add more lemon juice for brightness without the extra calories.
Teriyaki-Style:
Add 1 tablespoon of ginger (freshly grated) to the garlic and use a mixture of honey and brown sugar for deeper caramelization.
BBQ Honey Garlic Bites:
Mix in 2 tablespoons of your favorite BBQ sauce with the honey for a sweet and smoky flavor profile that’s perfect for summer gatherings.
Veggie-Loaded Version:
Toss in bell peppers, snap peas, or broccoli florets during the last few minutes of cooking for a complete one-pan meal.
Sheet Pan Version:
For hands-off cooking, arrange chicken on a lined baking sheet, bake at 400°F for 15 minutes, then toss with the prepared sauce and bake 5 more minutes.
Pro Chef Tips
Pat the Chicken Completely Dry:
Professional chefs know that moisture is the enemy of a good sear. Use paper towels to thoroughly dry each piece of chicken before seasoning. This ensures you get that beautiful golden-brown caramelization instead of steamed, pale chicken.
Cut Uniform Pieces:
Take the time to cut your chicken into evenly-sized 1-inch cubes. This ensures everything cooks at the same rate, preventing some pieces from drying out while others are undercooked. Consistency is key to professional results.
Use a Hot Pan, But Not Too Hot:
Your skillet should be properly preheated over medium-high heat. You’ll know it’s ready when a drop of water sizzles and evaporates within 1-2 seconds. If the pan is too hot, the outside will burn before the inside cooks; too cool, and you’ll miss that caramelized crust.
Don’t Flip Too Early:
Resist the urge to move or flip the chicken constantly. Let each side develop a golden crust (about 3-4 minutes) before flipping. The chicken will naturally release from the pan when it’s ready—if it’s sticking, it needs more time.
Bloom Your Garlic Properly:
When you add garlic to melted butter, keep it moving for just 30-60 seconds. Garlic should be fragrant and lightly golden, not browned or burnt. Burnt garlic tastes bitter and will ruin your entire sauce.
Layer Your Flavors:
The combination of honey (sweet), soy sauce (salty/umami), lemon juice (acid), and butter (fat) creates a perfectly balanced sauce. Each element enhances the others, so don’t skip any component.
Finish with Fresh Herbs:
Always add fresh herbs like parsley or green onions at the very end, off the heat. This preserves their vibrant color and fresh flavor, giving your dish that restaurant-quality finish.
Rest Before Serving:
Let the glazed chicken rest for 2-3 minutes before serving. This allows the juices to redistribute throughout the meat and the glaze to set slightly, creating an even better texture.
Common Mistakes to Avoid
Mistake #1: Overcrowding the Pan
When you add too much chicken to the skillet at once, the temperature drops and the chicken releases moisture, causing it to steam rather than sear. This results in pale, rubbery chicken instead of golden, caramelized pieces. Solution: Cook in batches if needed, leaving space between pieces.
Mistake #2: Using Cold Chicken
Putting refrigerator-cold chicken directly into the pan causes uneven cooking and prevents proper browning. Solution: Let chicken sit at room temperature for 15-20 minutes before cooking, and always pat it completely dry.
Mistake #3: Burning the Garlic
Adding garlic too early or cooking it over too-high heat results in bitter, acrid flavors that permeate the entire dish. Solution: Add garlic to melted butter over medium heat and cook for only 30-60 seconds, stirring constantly.
Mistake #4: Not Tasting and Adjusting
Everyone’s taste preferences are different, and honey sweetness can vary by brand. Solution: Always taste your sauce before adding the chicken back in. Need more salt? Add a splash more soy sauce. Too sweet? Add extra lemon juice or vinegar to balance it out.
Mistake #5: Overcooking the Chicken
Chicken breast can quickly go from juicy to dry when overcooked. Solution: Use a meat thermometer to check for 165°F internal temperature, and remove from heat immediately once it reaches that point. The chicken will continue cooking slightly in the hot sauce.
Storage & Meal Prep
Refrigerator Storage:
Store leftover honey butter garlic chicken bites in an airtight container in the refrigerator for up to 4 days. Let the chicken cool to room temperature before refrigerating, but don’t leave it out for more than 2 hours for food safety. The sauce will thicken as it cools, which is completely normal.
Reheating Instructions:
For best results, reheat in a skillet over medium heat with a tablespoon of water or chicken broth to loosen the sauce. This takes about 5-7 minutes and helps maintain the chicken’s moisture. You can also microwave in 30-second intervals, stirring between each, though this method may result in slightly less tender chicken. Avoid reheating at high temperatures, which can dry out the chicken.
Meal Prep Tips:
These chicken bites are excellent for meal prep! Cook a double batch on Sunday and portion into individual containers with your choice of rice, quinoa, or cauliflower rice, and steamed vegetables. They reheat beautifully and make grab-and-go lunches effortless. The flavors actually deepen and improve after a day in the refrigerator as the chicken continues to absorb the sauce.
Freezer Storage:
While fresh is best, you can freeze these chicken bites for up to 2 months. However, note that the texture of the sauce may change slightly upon thawing—it may separate or become less glossy. To minimize this, freeze the chicken and sauce separately if possible.
Make-Ahead & Freezer Notes
Make-Ahead Options:
You can prep several components in advance to make weeknight cooking even faster. Cut the chicken into cubes up to 24 hours ahead and store in the refrigerator in a covered container. You can also mix together all the sauce ingredients (except butter) in a jar and refrigerate for up to 3 days—just give it a good shake before using.
Freezing Instructions:
To freeze, let the cooked chicken bites cool completely. Transfer to a freezer-safe container or heavy-duty freezer bag, removing as much air as possible. Label with the date and freeze for up to 2 months. For best results, slightly undercook the chicken initially (about 1-2 minutes less than usual) since it will cook a bit more during reheating.
Thawing Method:
The safest way to thaw is overnight in the refrigerator. If you’re short on time, you can use the defrost setting on your microwave, though this may affect texture slightly. Never thaw at room temperature, as this can allow bacteria to grow.
Reheating from Frozen:
You can reheat frozen chicken bites directly without thawing. Place in a skillet with 2-3 tablespoons of water or broth, cover, and heat over medium-low for 10-12 minutes, stirring occasionally, until heated through to 165°F. Alternatively, thaw overnight and reheat using the refrigerator storage method above.
Pro Tip for Freezing:
Flash-freeze the chicken bites on a baking sheet for 1-2 hours before transferring to a container. This prevents them from sticking together, allowing you to remove just the portion you need without thawing the entire batch.
Serving Suggestions
These versatile honey butter garlic chicken bites pair beautifully with so many sides and accompaniments! Here are my favorite ways to serve them:
Over Grains:
- Fluffy white jasmine rice or brown rice
- Cauliflower rice for a low-carb option
- Quinoa for extra protein and fiber
- Fried rice with vegetables
- Coconut rice for a tropical twist
With Vegetables:
- Steamed broccoli with a squeeze of lemon
- Roasted asparagus with parmesan
- Sautéed green beans with garlic
- Stir-fried bok choy or baby spinach
- Roasted Brussels sprouts with balsamic glaze
As Part of a Bowl:
Create a delicious rice bowl with the chicken bites, steamed edamame, shredded carrots, cucumber slices, avocado, and a drizzle of extra sauce. Top with sesame seeds and nori strips for an Instagram-worthy meal!
Bread & Starch Sides:
- Warm dinner rolls or garlic bread
- Buttery egg noodles
- Mashed potatoes (the sauce is incredible over potatoes!)
- Sweet potato fries for a fun contrast
Salads:
These chicken bites transform any ordinary salad into something special. Try them over mixed greens with mandarin oranges, sliced almonds, and Asian sesame dressing.
Beverage Pairings:
- White wine: Riesling or Chardonnay complements the sweet-savory profile
- Iced green tea with lemon
- Sparkling water with lime
- For kids: apple juice or lemonade
Appetizer Style:
Serve with toothpicks as a party appetizer alongside other dipping sauces like sweet chili sauce, ranch, or extra honey butter sauce for dipping.
FAQs Section
Q: Can I use frozen chicken for this recipe?
A: While fresh chicken works best, you can use frozen chicken if properly thawed first. Never cook frozen chicken directly as it will release too much moisture and won’t sear properly. Thaw completely in the refrigerator overnight, then pat very dry with paper towels before cooking. Keep in mind that previously frozen chicken may release more liquid during cooking.
Q: Can I make this recipe dairy-free?
A: Absolutely! Replace the butter with ghee (which is lactose-free) or use coconut oil for a completely dairy-free version. Coconut oil will add a subtle tropical flavor that actually works wonderfully with the honey and garlic. You can also use vegan butter substitutes, though the flavor will be slightly different from traditional butter.
Q: How do I know when the chicken is fully cooked?
A: The most reliable method is using an instant-read meat thermometer—chicken should reach an internal temperature of 165°F. Visually, the chicken should be golden brown on the outside with no pink remaining in the center. When you cut into a piece, the juices should run clear, not pink. If you don’t have a thermometer, cut into the thickest piece to check.
Q: Can I use chicken thighs instead of breast?
A: Yes! Chicken thighs are actually an excellent choice for this recipe. They’re more forgiving than breast meat, stay juicier even if slightly overcooked, and have more flavor due to their higher fat content. They may take 1-2 minutes longer to cook through, so adjust your timing accordingly.
Q: Why is my sauce too thin/thick?
A: Sauce consistency depends on cooking time and heat level. If too thin, continue simmering for another 1-2 minutes to reduce and thicken—the honey will caramelize slightly. If too thick, add a tablespoon of water, chicken broth, or even white wine to thin it out. Remember, the sauce will thicken as it cools, so it should look slightly looser than your desired final consistency.
Q: Can I double this recipe for a crowd?
A: Yes, but you’ll need to work in batches to avoid overcrowding your pan. Double all the ingredients, but cook the chicken in 2-3 batches depending on your pan size, keeping cooked chicken warm in a 200°F oven. Make the full amount of sauce in your pan and toss all the chicken together at the end. A large 14-inch skillet or two separate pans makes this process easier.
Q: How can I make this recipe less sweet?
A: Reduce the honey to 3-4 tablespoons and increase the soy sauce by an extra tablespoon for more savory depth. Adding an extra squeeze of lemon juice or a splash of apple cider vinegar will also cut through the sweetness. You can also add ¼ teaspoon of black pepper or cayenne pepper for spiciness that balances the sweet notes.
Conclusion
There you have it—the easiest, most flavorful honey butter garlic chicken bites that will have your family asking for seconds (and thirds!). This recipe proves that you don’t need complicated techniques or hard-to-find ingredients to create something absolutely delicious. With just 25 minutes and one pan, you can transform simple chicken breast into a restaurant-quality meal that tastes like you spent hours in the kitchen.
The magic is in that gorgeous sweet and savory glaze—sticky, buttery, garlicky perfection that clings to every bite of tender chicken. Whether you’re serving this for a busy weeknight dinner, meal prepping for the week ahead, or impressing guests at your next gathering, these chicken bites deliver every single time.
I’d love to hear how this recipe turns out for you! Did you try any of the variations? What did you serve alongside? Drop a comment below and let me know. And if you loved this recipe as much as I do, please share it on Pinterest so other home cooks can discover it too! Don’t forget to save it to your favorite recipe board for easy access whenever that chicken bite craving hits.
Happy cooking, and here’s to more easy, delicious dinners that bring joy to your table!

