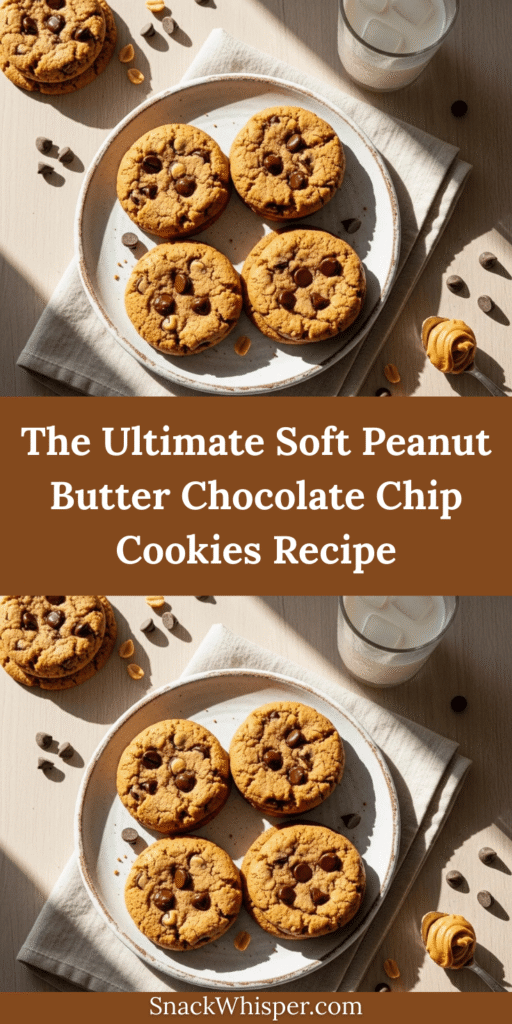
There’s something absolutely magical about biting into a warm, freshly baked cookie that’s soft in the center with slightly crispy edges, loaded with melty chocolate chips and rich peanut butter flavor. These Soft Peanut Butter Chocolate Chip Cookies are the perfect marriage of two beloved flavors that have been conquering taste buds for generations. Unlike traditional peanut butter cookies with their signature fork crosshatch pattern, these cookies embrace a more casual, chunky appearance that’s packed with chocolate chips in every bite.
These cookies are perfect for just about any occasion you can imagine. Pack them in lunchboxes for a midday treat, serve them warm with a cold glass of milk for an after-school snack, bring them to potlucks and bake sales where they’ll disappear in minutes, or wrap them up as heartfelt homemade gifts during the holidays. They’re equally at home on a casual weeknight dessert plate or dressed up on a fancy cookie platter for special celebrations. The combination of creamy peanut butter and semi-sweet chocolate creates a flavor profile that appeals to kids and adults alike, making these cookies a true crowd-pleaser that never goes out of style.
History / Background
The beautiful love story between peanut butter and chocolate dates back to the early 1900s in America, though the two ingredients didn’t officially meet in cookie form until home bakers started experimenting in their kitchens during the mid-20th century. Peanut butter itself became commercially available in the United States in the 1890s, initially marketed as a health food and protein source. By the 1920s and 1930s, peanut butter had become a pantry staple in American households, thanks in large part to the affordability of peanuts and the spread’s long shelf life—crucial factors during the Great Depression.
Traditional peanut butter cookies, with their distinctive crisscross fork pattern, emerged around the 1930s and quickly became an American classic. The fork marks weren’t just decorative; they helped flatten the dense dough to ensure even baking. Chocolate chip cookies, on the other hand, were invented by Ruth Wakefield in 1938 at the Toll House Inn in Massachusetts, creating what would become America’s most beloved cookie.
The genius combination of peanut butter and chocolate chips in one cookie likely evolved organically in home kitchens across America as creative bakers realized that these two flavors were simply meant to be together. This pairing gained even more popularity in the 1980s and 1990s when Reese’s Peanut Butter Cups became a cultural phenomenon, proving once and for all that peanut butter and chocolate were the ultimate flavor power couple. Today, soft peanut butter chocolate chip cookies represent the evolution of classic American baking—taking two iconic recipes and merging them into something even more irresistible.
Why You’ll Love This Recipe
These Soft Peanut Butter Chocolate Chip Cookies strike the perfect balance between nostalgic comfort food and impressive homemade baking. They deliver that coveted bakery-style texture—soft and chewy in the middle with just enough structure to hold together—while being remarkably simple to make at home.
Here’s what makes this recipe truly special:
- Incredibly easy to make – No fancy techniques or complicated steps required; perfect for beginner bakers and busy parents
- Budget-friendly ingredients – Uses pantry staples you probably already have on hand, making these cookies affordable to bake anytime
- Rich, satisfying flavor – The combination of creamy peanut butter and chocolate chips creates an indulgent taste that rivals any bakery cookie
- Soft, chewy texture – These cookies stay wonderfully soft for days, never turning dry or crumbly like some homemade cookies do
- Family and kid-approved – The classic peanut butter and chocolate combo is universally loved, making these cookies a guaranteed hit
- Customizable – Easy to adapt with different mix-ins, chocolate varieties, or dietary modifications to suit your preferences
- Great for gifting – These cookies travel well and look beautiful packaged in tins or cellophane bags
- Freezer-friendly – Both the dough and baked cookies freeze exceptionally well for make-ahead convenience
- No chilling required – Unlike many cookie recipes, you can mix and bake these immediately without waiting for dough to chill
- Makes a generous batch – One recipe yields about 2-3 dozen cookies, perfect for feeding a crowd or stocking your cookie jar
Ingredient Notes
Understanding your ingredients is the key to baking success, so let’s break down what makes these cookies so delicious and how you can customize them to your preferences.
All-Purpose Flour – Provides structure to the cookies. You can substitute with a 1:1 gluten-free flour blend if needed, though the texture may be slightly different. Avoid cake flour, which will make cookies too delicate.
Baking Soda – This leavening agent helps the cookies rise and spread just enough while contributing to their soft, tender texture. Make sure yours is fresh (less than 6 months old) for best results.
Salt – Enhances all the flavors and balances the sweetness. Don’t skip it! If using salted peanut butter, you can reduce the added salt slightly.
Unsalted Butter – Adds richness and flavor while contributing to the soft, tender texture. Must be softened to room temperature for proper creaming. In a pinch, you can use salted butter and reduce the added salt.
Creamy Peanut Butter – The star ingredient! Use a conventional brand like Jif, Skippy, or Peter Pan—not natural peanut butter, which has too much oil separation and will make cookies greasy and flat. The peanut butter should be smooth and easily spoonable.
Granulated Sugar – Provides sweetness and helps with spreading and browning. Creates a slightly crispy edge when combined with brown sugar.
Brown Sugar – Adds moisture, chewiness, and a deeper caramel-like flavor thanks to its molasses content. Light or dark brown sugar both work; dark will give a more pronounced molasses flavor.
Eggs – Bind everything together and add moisture and richness. Use large eggs at room temperature for best incorporation. For egg-free version, try flax eggs (though texture will differ).
Vanilla Extract – Enhances and rounds out all the other flavors. Always use pure vanilla extract, never imitation, for best flavor.
Semi-Sweet Chocolate Chips – Provide pockets of melty chocolate goodness throughout. You can substitute with milk chocolate chips, dark chocolate chunks, mini chips, or even peanut butter chips for extra peanut butter flavor.
Equipment Needed
Having the right tools makes baking these cookies a breeze. Here’s what you’ll need:
- Large mixing bowl – For combining dry ingredients
- Electric mixer (stand or hand) – Makes creaming butter and sugars effortless, though you can do it by hand with a sturdy wooden spoon and some arm strength
- Measuring cups and spoons – Accurate measurements are crucial in baking
- Rubber spatula or wooden spoon – For scraping down bowl sides and folding in chocolate chips
- Cookie scoop or tablespoon – A 2-tablespoon cookie scoop ensures uniform size and even baking
- Baking sheets (2-3) – Preferably light-colored aluminum for even baking
- Parchment paper or silicone baking mats – Prevents sticking and makes cleanup easy
- Wire cooling rack – Allows air circulation for proper cooling
- Whisk – For combining dry ingredients

Soft Peanut Butter Chocolate Chip Cookies Recipe
- Total Time: 25 minutes
- Yield: 30 cookies 1x
- Diet: Vegetarian
Description
These incredibly soft and chewy Peanut Butter Chocolate Chip Cookies combine rich, creamy peanut butter with an abundance of melty chocolate chips. With a texture that stays soft for days and a flavor combination that’s universally loved, these cookies are perfect for any occasion from casual snacking to special celebrations.
Ingredients
- 2 ½ cups all-purpose flour
- 1 teaspoon baking soda
- ½ teaspoon salt
- 1 cup unsalted butter, softened to room temperature
- 1 cup creamy peanut butter (not natural/separated)
- 1 cup granulated sugar
- 1 cup packed light brown sugar
- 2 large eggs, room temperature
- 2 teaspoons vanilla extract
- 2 cups semi-sweet chocolate chips
Instructions
- Preheat and prep: Preheat your oven to 350°F (175°C). Line two large baking sheets with parchment paper or silicone baking mats and set aside.
- Combine dry ingredients: In a medium bowl, whisk together the flour, baking soda, and salt until well combined. Set aside.
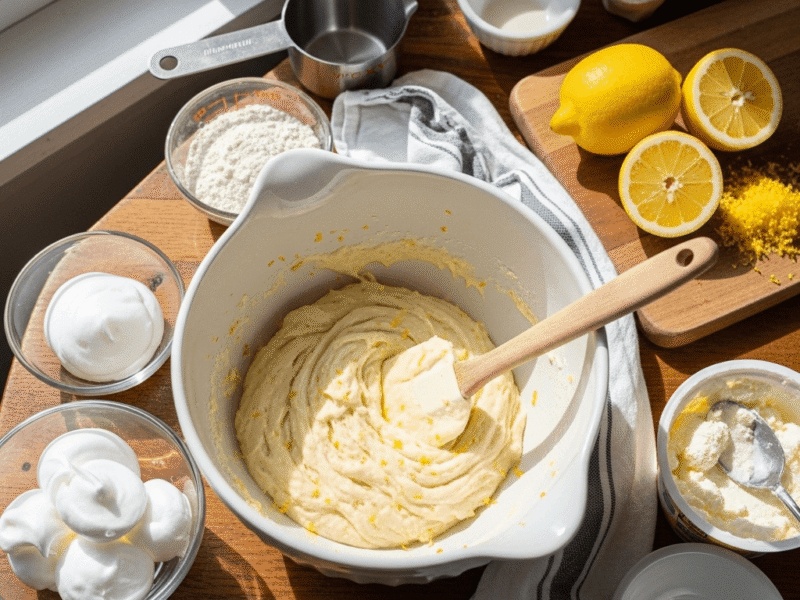
- Cream butter and sugars: In a large mixing bowl using an electric mixer, beat the softened butter, peanut butter, granulated sugar, and brown sugar together on medium speed for 2-3 minutes until light and fluffy. The mixture should look pale and creamy.
- Add eggs and vanilla: Beat in the eggs one at a time, mixing well after each addition. Add the vanilla extract and beat until fully incorporated, scraping down the sides of the bowl as needed.
- Mix in dry ingredients: With the mixer on low speed, gradually add the flour mixture to the wet ingredients, mixing just until no white streaks of flour remain. Be careful not to overmix, as this can make cookies tough.
- Fold in chocolate chips: Using a rubber spatula, gently fold in the chocolate chips until evenly distributed throughout the dough.
- Scoop and space: Using a 2-tablespoon cookie scoop or spoon, drop rounded portions of dough onto the prepared baking sheets, spacing them about 2 inches apart to allow for spreading.
- Bake: Bake for 9-11 minutes, until the edges are just set and lightly golden but the centers still look slightly underdone. They will continue cooking as they cool.
- Cool on pan: Let cookies cool on the baking sheet for 5 minutes before transferring to a wire rack. This resting time allows them to set properly without breaking apart.
- Finish cooling: Transfer to a wire cooling rack to cool completely, or enjoy them warm with a cold glass of milk!
Notes
- Don’t overbake! Cookies should look slightly underdone in the center when you remove them from the oven for the softest texture.
- Make sure butter and peanut butter are at room temperature for proper creaming.
- Use conventional peanut butter, not natural/separated varieties, for best results.
- Dough can be refrigerated for up to 3 days or frozen for up to 3 months.
- For thicker cookies, chill dough for 30 minutes before baking.
- Prep Time: 15 minutes
- Cook Time: 10 minutes
- Category: Dessert
- Method: Baking
- Cuisine: American
Nutrition
- Serving Size: 1 cookie
- Calories: 195
- Sugar: 16g
- Sodium: 125mg
- Fat: 10g
- Saturated Fat: 4.5g
- Unsaturated Fat: 5g
- Trans Fat: 0g
- Carbohydrates: 24g
- Fiber: 1g
- Protein: 3g
- Cholesterol: 25mg
Note: Nutrition information is an estimate and may vary based on specific ingredients used.
Tips & Variations
One of the best things about this cookie recipe is how adaptable it is to your personal preferences and dietary needs. Here are some delicious ways to customize these cookies:
Chocolate Variations: Swap the semi-sweet chocolate chips for milk chocolate, dark chocolate, white chocolate, or a combination. You can also use chocolate chunks for bigger pockets of chocolate, or mini chips for more even distribution.
Extra Peanut Butter: For serious peanut butter lovers, replace half the chocolate chips with peanut butter chips, or add ½ cup of chopped Reese’s Peanut Butter Cups to the dough.
Crunchy Texture: Add ½ cup of chopped peanuts or pecans for extra crunch and nutty flavor. You can also use crunchy peanut butter instead of creamy for added texture throughout.
Sea Salt Finish: Sprinkle a tiny pinch of flaky sea salt on top of each cookie immediately after removing from the oven for a gourmet sweet-and-salty flavor.
Make Them Giant: Use a ¼-cup scoop to create bakery-style giant cookies. Increase baking time by 2-3 minutes and space them at least 3 inches apart.
Gluten-Free Option: Substitute with a 1:1 gluten-free flour blend. The texture will be slightly more crumbly but still delicious.
Healthier Swaps: Use coconut sugar instead of white sugar, replace half the butter with coconut oil, or try whole wheat flour for half the all-purpose flour.
Holiday Versions: Add festive mix-ins like crushed candy canes for Christmas, M&M’s for Valentine’s Day or birthdays, or mini marshmallows and extra chocolate chips for s’mores-inspired cookies.
Pro Chef Tips
Want to take your cookies from good to absolutely incredible? Here are professional baking secrets that make all the difference:
Room temperature ingredients are crucial – Butter, eggs, and peanut butter should all be at room temperature (around 65-70°F) for proper emulsification and even texture. Cold ingredients won’t incorporate properly and can result in dense, uneven cookies.
Don’t skip the creaming step – Taking the full 2-3 minutes to properly cream your butter and sugars incorporates air into the dough, resulting in lighter, more tender cookies with better texture.
Measure flour correctly – Too much flour is the number one cause of dry, cakey cookies. Spoon flour into your measuring cup and level it off with a knife rather than scooping directly from the bag, which compacts the flour.
Underbake slightly – Cookies continue baking on the hot pan even after you remove them from the oven. Pull them out when they look slightly underdone in the center for the softest, chewiest texture.
Use a cookie scoop – This ensures all cookies are the same size, which means they’ll bake evenly and finish at the same time. It also makes portioning much faster and less messy.
Rotate your pans – If baking two sheets at once, rotate them halfway through (swap racks and turn 180 degrees) for even browning.
Let dough rest – If you have time, letting the dough rest for 30 minutes to an hour allows the flour to fully hydrate and results in better flavor and texture.
Common Mistakes to Avoid
Even experienced bakers can run into cookie troubles. Here are the most common pitfalls and how to avoid them:
Using natural peanut butter – Natural or separated peanut butter has too much oil and not enough stabilizers, which will make your cookies spread too thin and turn out greasy. Stick with conventional brands like Jif or Skippy.
Overmixing the dough – Once you add the flour, mix just until combined. Overmixing develops too much gluten, resulting in tough, cakey cookies instead of tender, chewy ones.
Not measuring accurately – Baking is a science! Too much flour will make cookies dry and crumbly, while too little will make them spread too thin and turn crispy. Use proper measuring techniques for best results.
Baking on a hot pan – Always let your baking sheet cool completely between batches, or use multiple pans. Putting dough on a hot pan causes immediate spreading and uneven baking.
Overcrowding the baking sheet – Cookies need at least 2 inches of space to spread properly. Overcrowding causes them to bake into each other and prevents even heat circulation.
Overbaking – This is the biggest mistake! Cookies should look slightly underdone when you remove them. They’ll continue cooking on the pan and firm up as they cool. Overbaked cookies turn dry and hard.
Skipping the cooling time on the pan – Moving cookies too quickly causes them to break apart. Let them set for 5 minutes on the baking sheet before transferring to a cooling rack.
Storage & Meal Prep
Proper storage keeps these cookies tasting fresh and soft for days, and they’re one of the easiest treats to prepare ahead of time.
Room Temperature Storage: Store completely cooled cookies in an airtight container at room temperature for up to 1 week. Layer cookies with parchment paper if stacking to prevent sticking. Adding a slice of bread to the container is an old baker’s trick that helps keep cookies soft—the cookies absorb moisture from the bread.
Refrigerator Storage: While not necessary, you can refrigerate cookies in an airtight container for up to 2 weeks. Bring to room temperature or warm briefly before serving for the best texture and flavor.
Reheating: To enjoy that fresh-from-the-oven experience, microwave individual cookies for 8-10 seconds or warm several cookies in a 300°F oven for 3-5 minutes. This softens them and makes the chocolate chips melty again.
Keeping Cookies Soft: The key to maintaining softness is preventing air exposure. Use containers with tight-fitting lids, and never store cookies while they’re still warm (this creates condensation and makes them soggy).
Make-Ahead & Freezer Notes
These cookies are excellent for advance preparation, making them perfect for busy schedules, holiday baking marathons, or just having treats on hand.
Freezing Cookie Dough: Scoop dough into balls and place on a parchment-lined baking sheet. Freeze until solid (about 2 hours), then transfer frozen dough balls to a freezer-safe bag or container. Freeze for up to 3 months. Bake directly from frozen, adding 1-2 extra minutes to the baking time. This method means you can have fresh cookies anytime with minimal effort.
Refrigerating Dough: Keep unbaked dough in an airtight container in the refrigerator for up to 3 days. Let sit at room temperature for 10-15 minutes before scooping and baking for easier handling.
Freezing Baked Cookies: Place completely cooled cookies in a single layer in freezer-safe containers or bags, separating layers with parchment paper. Freeze for up to 3 months. Thaw at room temperature for about 30 minutes, or warm in a 300°F oven for 5 minutes for that just-baked taste.
Best Reheating Method: For frozen cookies, let thaw at room temperature, then warm in a 300°F oven for 3-5 minutes to restore that soft, fresh-baked texture. The chocolate chips will get slightly melty again, making them taste like they just came out of the oven.
Serving Suggestions
While these cookies are absolutely delicious on their own, pairing them with complementary items can elevate your dessert experience.
Beverages: The classic pairing is ice-cold whole milk, but these cookies also pair beautifully with hot coffee, cappuccino, or espresso for adults. Hot chocolate makes them extra indulgent, while a cold glass of almond milk or oat milk offers a dairy-free option.
Ice Cream: Create an epic ice cream sandwich by placing a scoop of vanilla, chocolate, or peanut butter ice cream between two cookies. Let sit for a few minutes to soften slightly before eating.
Dessert Boards: Include these cookies on a dessert charcuterie board alongside fresh fruit (strawberries, raspberries, or apple slices), pretzels for salty contrast, brownie bites, and small candies.
After-School Snacks: Serve warm cookies with sliced apples, carrot sticks, and a small glass of milk for a balanced after-school treat that includes some nutrition along with the indulgence.
Party Platters: Stack cookies in a pyramid on a cake stand, dust with powdered sugar for a festive look, and surround with fresh flowers or seasonal decorations for an impressive party presentation.
Gift Packaging: Layer cookies in decorative tins or mason jars with ribbon, or wrap in cellophane bags tied with twine for beautiful homemade gifts.
FAQs Section
Can I use natural peanut butter for this recipe?
Unfortunately, natural peanut butter doesn’t work well in this recipe because it contains too much oil and lacks the stabilizers found in conventional peanut butter. This causes cookies to spread too much and become greasy. Stick with brands like Jif, Skippy, or Peter Pan for best results.
Why are my cookies flat and spreading too much?
Excessive spreading usually happens for one of these reasons: butter was too warm or melted, dough wasn’t mixed properly, baking soda is expired, or the baking sheet was too hot when you added the dough. Make sure butter is just softened (not melted), use fresh baking soda, and bake on cool pans.
How can I make my cookies thicker and puffier?
For thicker cookies, chill the dough for 30-60 minutes before baking, which slows spreading. You can also slightly underbake them (they’ll set as they cool) and make sure you’re not using too much butter or sugar. Adding an extra 2-3 tablespoons of flour can also help if your cookies consistently spread too thin.
Can I make these cookies without eggs?
Yes, though the texture will be slightly different. Try using two “flax eggs” (2 tablespoons ground flaxseed mixed with 6 tablespoons water, let sit 5 minutes) or commercial egg replacer following package directions. The cookies may be slightly more crumbly but still delicious.
Why did my cookies turn out dry and crumbly?
Dry cookies usually result from too much flour, overbaking, or not enough fat. Make sure you’re measuring flour correctly (spoon and level, don’t pack), remove cookies from the oven when centers still look slightly underbaked, and ensure you’re using the correct amount of butter and peanut butter.
Can I substitute almond butter or other nut butters?
Yes! Almond butter, cashew butter, or sunflower seed butter (for nut-free) can be substituted in equal amounts. The flavor will change, but the texture should be similar. Use the same type (non-natural, processed varieties) for best results.
How long will these cookies stay soft?
When stored properly in an airtight container at room temperature, these cookies will stay soft for 5-7 days. Adding a slice of bread to the container helps maintain moisture. They actually taste best on day 2-3 after the flavors have had time to meld.
Conclusion
There’s something truly special about pulling a tray of warm, soft peanut butter chocolate chip cookies from your oven. The intoxicating aroma that fills your kitchen, the melty chocolate chips, and that perfect soft-yet-structured texture create a homemade treat that simply can’t be replicated by store-bought cookies. These cookies represent the best of classic American baking—simple ingredients, straightforward techniques, and absolutely delicious results that bring smiles to everyone who tries them.
Whether you’re baking these cookies for a weekend family treat, packing them in lunch boxes, bringing them to a potluck, or gifting them to someone special, they’re guaranteed to be a hit. The combination of rich peanut butter and sweet chocolate is timeless, and the soft, chewy texture is what cookie dreams are made of.
Now it’s your turn to create some magic in your kitchen! I’d love to hear how your cookies turn out. Did you try any of the variations? What did your family think? Drop a comment below sharing your experience, and don’t forget to pin this recipe to your favorite Pinterest board so you can find it again and again. Take a photo of your beautiful cookies and share it on social media—tag me so I can see your delicious creations! Happy baking!