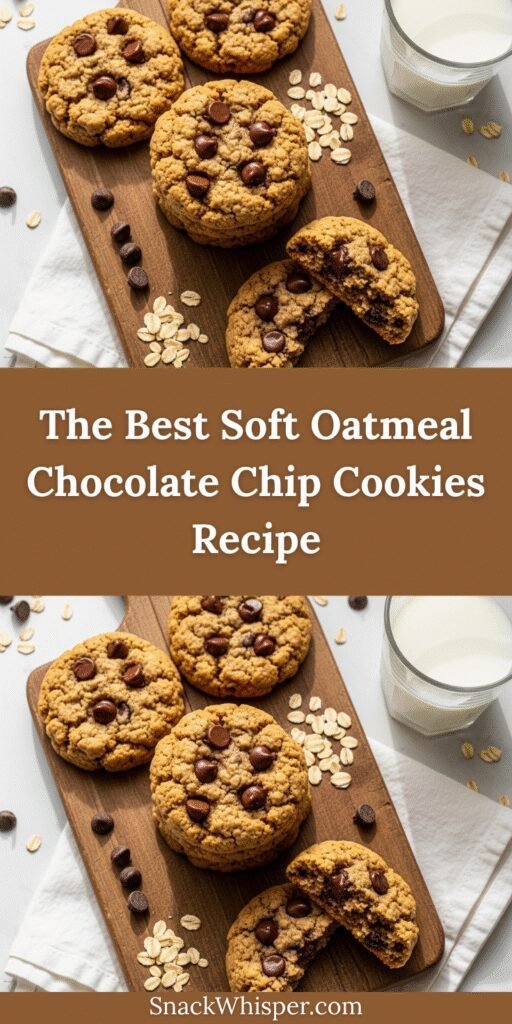
If you’re looking for the ultimate comfort cookie that combines wholesome oats with rich, melty chocolate chips, you’ve found it! These soft oatmeal chocolate chip cookies are the perfect blend of chewy texture, sweet chocolate, and hearty oats that create an irresistible treat everyone loves. Unlike traditional crunchy oatmeal cookies, this recipe produces bakery-style soft cookies that stay tender for days.
These cookies are perfect for any occasion—pack them in lunchboxes, serve them at birthday parties, bring them to potlucks, or simply enjoy them warm from the oven with a cold glass of milk. They’re a crowd-pleaser that appeals to both kids and adults, making them one of the most requested cookie recipes in American households. Whether you’re an experienced baker or just starting your baking journey, this foolproof recipe will become your go-to whenever a cookie craving hits.
History / Background
Oatmeal cookies have been a beloved staple in American baking since the late 1800s. The combination of oats and cookies became popular during a time when oats were considered a healthy, affordable pantry staple that could stretch ingredients and add nutritional value to baked goods. The first oatmeal cookie recipes appeared in American cookbooks around the 1890s, coinciding with the Quaker Oats Company’s efforts to promote oats beyond breakfast porridge.
The addition of chocolate chips to oatmeal cookies came later, after Ruth Graves Wakefield invented the chocolate chip cookie at the Toll House Inn in the 1930s. Bakers quickly realized that chocolate chips were the perfect complement to almost any cookie dough, and the oatmeal chocolate chip cookie was born from this delicious revelation. This combination married the wholesome, slightly nutty flavor of oats with the indulgent sweetness of chocolate, creating a cookie that felt both comforting and decadent.
During World War II, oatmeal cookies gained even more popularity because they were often included in care packages sent to soldiers overseas. The oats helped the cookies stay fresh longer, and they provided energy and a taste of home. Today, soft oatmeal chocolate chip cookies remain one of America’s favorite cookie varieties, with each family often having their own treasured recipe passed down through generations. This particular version focuses on achieving that coveted soft, chewy texture that makes these cookies absolutely irresistible.
Why You’ll Love This Recipe
These soft oatmeal chocolate chip cookies are about to become your new favorite baking project, and here’s why: they combine the best of both worlds—the wholesome goodness of oats with the pure indulgence of chocolate. The texture is absolutely perfect: soft and chewy in the center with slightly crisp edges that give way to a tender, almost cake-like interior. They’re substantial enough to feel satisfying but never heavy or dry.
Here’s what makes this recipe special:
- Incredibly Easy – Simple mixing method with no chilling required, perfect for beginner bakers
- Super Soft Texture – Stay tender for days without becoming hard or crumbly
- Family-Friendly – Kids love helping measure and mix, making this a perfect bonding activity
- Budget-Friendly – Uses basic pantry ingredients you probably already have on hand
- Customizable – Easy to adapt with different mix-ins, chocolate types, or dietary modifications
- Quick to Make – Ready to eat in under 30 minutes from start to finish
- Freezer-Friendly – Make ahead and freeze dough or baked cookies for later
- Crowd-Pleaser – Never met anyone who doesn’t love these cookies!
- Healthier Indulgence – Oats add fiber and nutrients while still tasting like a decadent treat
Ingredient Notes
Understanding your ingredients is key to baking success! Here’s what you’ll need and why each component matters:
All-Purpose Flour – Provides structure to the cookies. You can substitute with whole wheat flour for half the amount for a nuttier flavor, though cookies may be slightly denser.
Old-Fashioned Rolled Oats – These are essential for the classic chewy texture. Don’t use instant oats (too mushy) or steel-cut oats (too hard). Old-fashioned oats maintain their texture during baking while absorbing moisture perfectly.
Unsalted Butter – When softened to room temperature, butter creams beautifully with sugar to create a tender cookie. Unsalted allows you to control the salt level. Can substitute with salted butter and reduce added salt.
Brown Sugar – The molasses in brown sugar keeps cookies soft and adds a caramel-like flavor. Use light or dark brown sugar; dark creates a more intense flavor.
Granulated Sugar – Balances the brown sugar and helps cookies spread slightly while adding sweetness.
Eggs – Bind ingredients together and add moisture. Room temperature eggs incorporate more easily.
Vanilla Extract – Pure vanilla extract adds depth of flavor. Avoid imitation vanilla if possible.
Baking Soda – Creates lift and helps cookies spread. Essential for that perfect soft texture.
Salt – Enhances all the flavors and balances the sweetness.
Cinnamon – Optional but highly recommended! Adds warmth and complements both the oats and chocolate beautifully.
Semi-Sweet Chocolate Chips – Use quality chocolate chips for best results. Can substitute with dark chocolate, milk chocolate, or even white chocolate chips based on preference.
Equipment Needed
Gathering your tools before you start makes the baking process smooth and enjoyable:
- Large Mixing Bowl – For creaming butter and sugars
- Medium Mixing Bowl – For whisking together dry ingredients
- Electric Mixer (hand or stand) – Makes creaming butter easier, though you can mix by hand with a wooden spoon
- Measuring Cups and Spoons – Accurate measurements are crucial in baking
- Whisk – For combining dry ingredients
- Rubber Spatula – For scraping down bowl sides and folding in oats and chocolate chips
- Cookie Scoop (2-tablespoon size) – Ensures uniform cookie sizes for even baking
- Baking Sheets (2–3) – Preferably light-colored aluminum
- Parchment Paper or Silicone Baking Mats – Prevents sticking and makes cleanup easy
- Cooling Rack – Allows air circulation for proper cooling
- Kitchen Timer – Prevents overbaking (the #1 cookie killer!)

Creamy Garlic Parmesan Risotto Recipe
- Total Time: 27 minutes
- Yield: 24 cookies 1x
- Diet: Vegetarian
Description
These irresistibly soft oatmeal chocolate chip cookies combine wholesome rolled oats with melty chocolate chips in a perfectly chewy cookie that stays soft for days. Easy to make with simple pantry ingredients, they’re perfect for any occasion!
Ingredients
- 1 cup (2 sticks) unsalted butter, softened to room temperature
- 1 cup packed light brown sugar
- ½ cup granulated sugar
- 2 large eggs, room temperature
- 2 teaspoons pure vanilla extract
- 1½ cups all-purpose flour
- 1 teaspoon baking soda
- 1 teaspoon ground cinnamon
- ½ teaspoon salt
- 3 cups old-fashioned rolled oats
- 1½ cups semi-sweet chocolate chips
Instructions
- Preheat and Prepare: Preheat your oven to 350°F (175°C). Line two large baking sheets with parchment paper or silicone baking mats and set aside.
- Cream Butter and Sugars: In a large mixing bowl, using an electric mixer on medium speed, beat the softened butter, brown sugar, and granulated sugar together for 2-3 minutes until light and fluffy. The mixture should become pale and creamy in color.
- Add Wet Ingredients: Beat in the eggs one at a time, mixing well after each addition. Add the vanilla extract and mix until fully incorporated, scraping down the sides of the bowl as needed.
- Combine Dry Ingredients: In a separate medium bowl, whisk together the flour, baking soda, cinnamon, and salt until evenly distributed.
- Mix Dry into Wet: Add the dry ingredient mixture to the butter mixture and mix on low speed just until combined. Don’t overmix—stop as soon as you no longer see streaks of flour.
- Fold in Oats and Chocolate: Using a rubber spatula or wooden spoon, gently fold in the rolled oats and chocolate chips until evenly distributed throughout the dough.
- Portion the Dough: Using a 2-tablespoon cookie scoop or spoon, drop rounded portions of dough onto the prepared baking sheets, spacing them about 2 inches apart (they’ll spread during baking).
- Bake: Bake for 11-13 minutes, until the edges are set and lightly golden but the centers still look slightly underdone. They’ll seem soft, but don’t worry—they’ll firm up as they cool!
- Cool Properly: Let cookies cool on the baking sheet for 5 minutes before transferring to a wire cooling rack. This resting time allows them to set without overbaking.
- Enjoy: Serve warm or let cool completely. Store in an airtight container for up to 5 days.
Notes
- For Extra Soft Cookies: Slightly underbake by 1-2 minutes and let them finish setting on the hot pan.
- Butter Temperature: Room temperature butter should be soft enough to leave an indent when pressed but not melted or greasy.
- Don’t Skip the Parchment: This prevents over-browning on the bottom.
- Quick Oats Substitution: If you only have quick oats, reduce the amount to 2½ cups as they absorb more moisture.
- Make Them Thicker: Chill the dough for 30 minutes before baking to reduce spreading.
- Prep Time: 15 minutes
- Cook Time: 12 minutes
- Category: Dessert
- Method: Baking
- Cuisine: American
Nutrition
- Serving Size: 1 cookie
- Calories: 185
- Sugar: 14g
- Sodium: 95mg
- Fat: 9g
- Saturated Fat: 5g
- Unsaturated Fat: 3.5g
- Trans Fat: 0g
- Carbohydrates: 25g
- Fiber: 1.5g
- Protein: 2.5g
- Cholesterol: 30mg
Tips & Variations
The beauty of this recipe is how easily you can customize it to suit your preferences!
Chocolate Variations:
- Use a combination of dark, milk, and white chocolate chips for a “triple chocolate” version
- Add chocolate chunks instead of chips for bigger chocolate pockets
- Try butterscotch chips for a different flavor profile
Mix-In Options:
- Add ½ cup chopped walnuts or pecans for extra crunch and richness
- Stir in ½ cup dried cranberries or raisins for a fruity twist
- Include ½ cup shredded coconut for tropical flair
- Mix in ½ cup toffee bits for a cookie-meets-candy experience
Flavor Enhancements:
- Double the cinnamon for extra warmth
- Add ½ teaspoon nutmeg for a spiced cookie
- Include 1 tablespoon maple syrup with the wet ingredients for maple-oatmeal cookies
- Add the zest of one orange for a subtle citrus note
Dietary Modifications:
- Gluten-Free: Use certified gluten-free oats and a 1:1 gluten-free flour blend
- Vegan: Substitute butter with vegan butter and use flax eggs (2 tablespoons ground flaxseed + 6 tablespoons water, let sit 5 minutes)
- Reduced Sugar: Cut sugar by ¼ cup total (use ¾ cup brown sugar and ⅓ cup white sugar)
Pro Chef Tips
Want bakery-quality cookies at home? These professional techniques make all the difference:
Temperature Control is Everything: Room temperature ingredients (especially butter and eggs) mix more evenly and create better texture. Set them out 30-60 minutes before baking.
Don’t Overmix: Once you add the flour, mix just until combined. Overmixing develops gluten, which creates tough cookies instead of tender ones.
Use a Cookie Scoop: This ensures uniform sizing, which means all cookies bake at the same rate. No more burnt edges while centers are underdone!
Rotate Your Pans: If your oven has hot spots, rotate baking sheets halfway through baking for even browning.
The Underbake Secret: Professional bakers slightly underbake cookies and let them finish cooking on the hot pan. They should look slightly underdone when you remove them from the oven.
Quality Matters: Use real butter (not margarine) and quality chocolate chips. Your taste buds will notice the difference!
Test Your Baking Soda: If your baking soda is old, cookies won’t rise properly. To test: add ½ teaspoon to a small bowl with 1 tablespoon vinegar. If it fizzes vigorously, it’s still good.
Chill for Thickness: If you prefer thicker cookies, chill the dough for 30 minutes to an hour. This slows spreading during baking.
Common Mistakes to Avoid
Even experienced bakers make these errors—here’s how to avoid them:
Mistake #1: Using Melted or Too-Soft Butter
When butter is too warm or melted, cookies spread too much and become thin and crispy. Solution: Butter should be cool to touch but soft enough to leave an indent when pressed. If you’ve overwarmed it, pop it in the fridge for 10 minutes.
Mistake #2: Overbaking
Overbaked cookies are hard and dry. Remember: cookies continue baking on the hot pan after leaving the oven. Solution: Remove them when centers still look slightly underdone and edges are just set.
Mistake #3: Skipping the Resting Time on the Pan
Transferring cookies immediately to a cooling rack causes them to fall apart. Solution: Always let cookies rest on the baking sheet for 5 minutes to set before moving.
Mistake #4: Measuring Flour Incorrectly
Scooping flour directly from the bag packs it down, adding too much flour and creating dry cookies. Solution: Spoon flour into your measuring cup and level it off with a knife.
Mistake #5: Using Old Leavening Agents
Expired baking soda won’t create proper rise or texture. Solution: Replace baking soda and baking powder every 6 months for best results.
Storage & Meal Prep
Proper storage keeps these cookies tasting fresh-baked for days!
Room Temperature Storage:
Store cooled cookies in an airtight container at room temperature for up to 5 days. To keep them extra soft, add a slice of bread to the container—it maintains moisture without making cookies soggy.
Refrigerator Storage:
While not necessary for short-term storage, you can refrigerate cookies in an airtight container for up to 2 weeks. Let them come to room temperature before serving, or warm briefly in the microwave (10-15 seconds).
Reheating Tips:
- Microwave: 10-15 seconds for that fresh-baked warmth
- Oven: 300°F for 3-5 minutes wrapped in foil for a crispy edge
- Air Fryer: 300°F for 2-3 minutes for perfectly refreshed cookies
Shelf Life Tips:
Keep cookies away from direct sunlight and heat sources. If cookies do start to harden, the microwave trick works wonders to restore softness!
Make-Ahead & Freezer Notes
These cookies are incredibly freezer-friendly, making them perfect for meal prep or emergency cookie needs!
Freezing Cookie Dough:
This is my favorite method! Scoop dough into portions, freeze on a baking sheet until solid (about 1 hour), then transfer to a freezer-safe bag or container. Freeze for up to 3 months. Bake from frozen, adding 2-3 minutes to baking time. No thawing needed!
Freezing Baked Cookies:
Let cookies cool completely, then layer between parchment paper in an airtight container or freezer bag. Freeze for up to 3 months. Thaw at room temperature for 15-20 minutes or microwave for 20-30 seconds.
Make-Ahead Dough:
Prepare dough up to 24 hours in advance and store covered in the refrigerator. Cold dough actually bakes into thicker cookies! Let it sit at room temperature for 10 minutes before scooping if it’s too firm.
Best Reheating Method for Frozen Cookies:
Thaw frozen cookies at room temperature for 15 minutes, then warm in a 300°F oven for 5 minutes for that just-baked taste and texture. This method beats all others!
Serving Suggestions
These cookies are versatile and delicious in so many ways!
Classic Pairings:
- Cold glass of whole milk, almond milk, or oat milk
- Hot coffee or espresso (they’re perfect for dunking!)
- Hot chocolate with marshmallows
- Vanilla ice cream sandwiches (place a scoop between two cookies)
- Fresh fruit like strawberries or apple slices for balance
Dessert Board Ideas:
- Create a cookie platter with these alongside other favorites
- Serve with fresh whipped cream and berries
- Pair with vanilla yogurt and granola for breakfast (yes, breakfast!)
Party Serving:
- Stack cookies on a tiered cake stand for visual appeal
- Wrap individual cookies in cellophane with ribbon for party favors
- Serve warm with scoops of vanilla ice cream for a crowd
After School Snack:
- Pair with cheese sticks and apple slices for a balanced snack
- Serve with a smoothie for extra nutrition
- Pack in lunchboxes with a thermos of milk
FAQs Section
Q: Why are my cookies turning out flat and spreading too much?
A: This usually happens when butter is too warm or melted. Make sure butter is properly softened (cool but soft) not warm. Also, check that your baking soda is fresh and active. For thicker cookies, try chilling the dough for 30 minutes before baking.
Q: Can I use quick oats instead of old-fashioned oats?
A: Yes, but reduce the amount to 2½ cups as quick oats absorb more moisture. Your cookies will have a slightly different texture—a bit denser and less chewy, but still delicious! Avoid instant oatmeal packets as they’re too fine.
Q: How do I keep my cookies soft for days?
A: Store in an airtight container with a slice of bread. The bread releases moisture that the cookies absorb, keeping them soft. Replace the bread every 2 days. Also, slightly underbaking helps maintain softness!
Q: Can I make these cookies without eggs?
A: Absolutely! Use flax eggs (1 tablespoon ground flaxseed + 3 tablespoons water per egg, let sit 5 minutes) or applesauce (¼ cup per egg). Flax eggs work better for texture.
Q: My cookies are spreading too much on one side. What’s wrong?
A: This happens when your baking sheet isn’t level in the oven or has hot spots. Rotate your pan 180 degrees halfway through baking. Also ensure your oven racks are level.
Q: Can I substitute margarine for butter?
A: While possible, I don’t recommend it. Butter provides superior flavor and texture. If you must substitute, use stick margarine (not spread) at a 1:1 ratio, but expect slightly different results.
Q: How do I know when the cookies are perfectly done?
A: Remove them when edges are set and lightly golden, but centers still look slightly underdone and soft. They’ll continue baking on the hot pan. If centers look fully baked in the oven, they’re already overbaked!
Conclusion
There you have it—the ultimate guide to making perfectly soft oatmeal chocolate chip cookies that’ll have everyone asking for your secret recipe! These cookies truly are the complete package: easy enough for beginner bakers, delicious enough to impress guests, and wholesome enough to feel good about enjoying them (even if you have two… or three).
The combination of hearty oats, melty chocolate chips, and that signature soft-chewy texture makes these cookies impossible to resist. Whether you’re baking them for a special occasion, meal prepping for the week ahead, or simply satisfying a cookie craving, this recipe delivers bakery-quality results every single time.
I’d love to hear how your cookies turn out! Drop a comment below with your baking experience, any variations you tried, or creative ways you served them. And if you loved this recipe as much as I do, please share it with your fellow cookie lovers and save it to your Pinterest boards—your future self will thank you the next time a cookie craving hits!
Happy baking, and here’s to many batches of warm, soft, chocolate-chip-studded deliciousness! 🍪