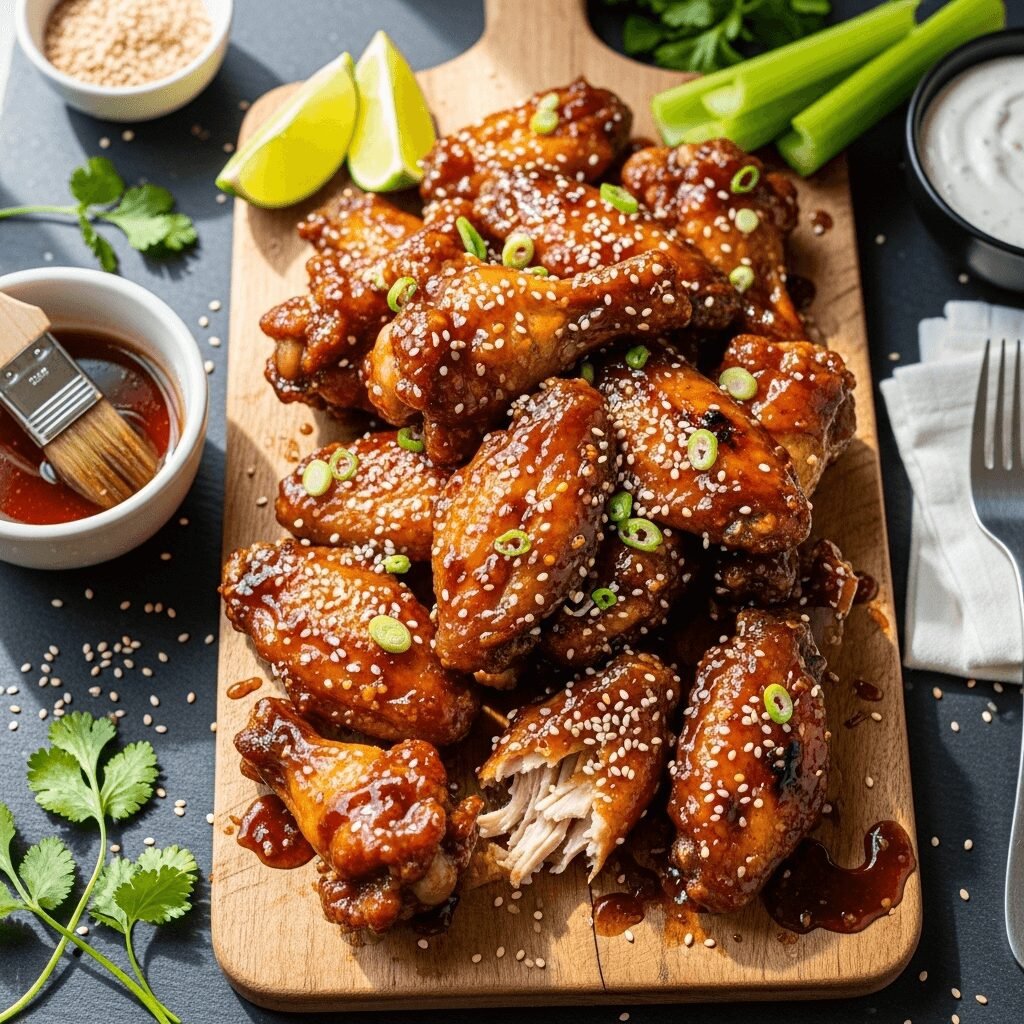
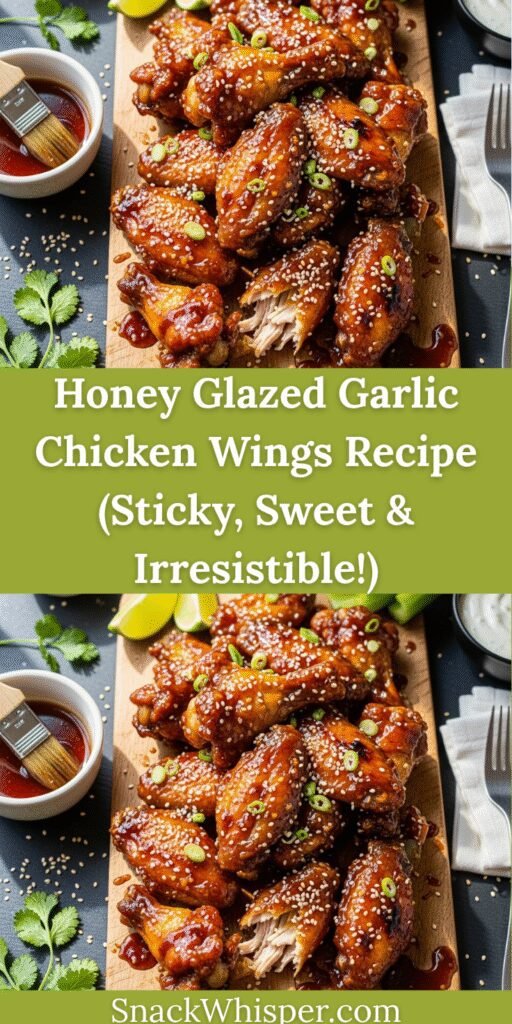
Get ready to discover the ultimate crowd-pleaser—these Honey Glazed Garlic Chicken Wings are sticky, sweet, savory, and absolutely addictive! Imagine perfectly crispy chicken wings coated in a luscious glaze that combines sweet honey, aromatic garlic, savory soy sauce, and a hint of heat, creating that irresistible finger-licking goodness that has everyone reaching for just one more wing (and then another, and another!). These aren’t your average buffalo wings; they’re a perfect balance of flavors that appeals to kids and adults alike, making them the star of any gathering from game day parties to family dinners.
What makes these honey garlic wings so incredibly crave-worthy is the perfect combination of textures and flavors. The wings are baked (or fried if you prefer) until golden and crispy, then tossed in a glossy honey garlic glaze that caramelizes slightly, creating sticky, sweet edges with savory depth. Fresh garlic provides aromatic punch, honey adds natural sweetness with beautiful caramelization, soy sauce brings umami richness, and a touch of ginger adds warmth and complexity. The result is wings that are crispy on the outside, juicy on the inside, and coated in a sauce so good you’ll want to lick your fingers—and the plate!
This recipe is perfect for game day parties when you need finger food that disappears fast, casual entertaining when you want something impressive but easy, family dinners when you’re craving comfort food with a twist, meal prep for easy weeknight dinners or lunches, or any time you need an appetizer that guarantees compliments. They’re also wonderfully versatile—adjust the sweetness, add more heat, make them in the oven or air fryer, or even grill them for smoky flavor. Whether you’re feeding hungry football fans, picky kids, or dinner party guests, these easy honey garlic chicken wings deliver crispy, sticky, sweet perfection every single time.
History & Background: Sweet Meets Savory in Wing Paradise
Chicken wings have a fascinating journey from being considered a throwaway part to becoming one of America’s most beloved foods. The modern chicken wing as we know it—as a standalone appetizer or meal—was popularized in Buffalo, New York, in 1964 when Teressa Bellissimo at the Anchor Bar created Buffalo wings by deep-frying and coating them in hot sauce and butter. This innovation transformed wings from being used primarily in stock or discarded into a cultural phenomenon.
However, the honey garlic flavor profile has different origins, drawing from Asian-inspired cooking that has long combined sweet and savory elements. In Chinese cuisine, the balance of sweet, salty, sour, and spicy is fundamental, with dishes often featuring honey or sugar balanced with soy sauce and aromatics like garlic and ginger. Korean cuisine also embraces this sweet-savory combination, particularly in dishes like yangnyeom chicken (Korean fried chicken with sweet and spicy glaze).
The specific combination of honey and garlic in American chicken wings likely emerged during the 1980s-90s fusion food movement when restaurants and home cooks began experimenting with Asian-inspired flavors adapted to American tastes and ingredients. Wings were the perfect canvas for this experimentation—their popularity was established thanks to Buffalo wings, and their finger-food format made them ideal for bold, sticky sauces.
Honey garlic wings became particularly popular in chain restaurants and sports bars as an alternative to traditional buffalo-style wings, appealing to those who wanted flavor without excessive heat. The sweetness of honey made them particularly kid-friendly, while the garlic provided enough savory complexity to satisfy adult palates. This made them perfect for families and mixed groups where spicy buffalo wings might not appeal to everyone.
Today, honey garlic chicken wings have become a staple on restaurant menus from sports bars to Asian fusion establishments, and they’re one of the most popular homemade wing flavors. They’ve become a Pinterest and food blog favorite because they deliver restaurant-quality flavor using simple pantry ingredients, require no exotic groceries or advanced techniques, and create that perfect combination of sweet and savory that’s universally appealing. They represent modern American comfort food—taking inspiration from multiple culinary traditions to create something familiar, achievable, and absolutely delicious.
Why You’ll Love These Honey Glazed Garlic Chicken Wings
These wings deliver restaurant-quality flavor that will have everyone convinced you have secret culinary skills, all while being surprisingly simple to prepare. The sticky, glossy glaze creates that addictive sweet-savory-garlicky combination that keeps people coming back for more, and the crispy texture with juicy interior makes every bite satisfying.
Here’s why these easy chicken wings will become your go-to recipe:
- Crowd-Pleasing Perfection: Everyone loves these—kids, adults, and even picky eaters can’t resist
- Sticky-Sweet Addictive: That glossy honey garlic glaze is finger-licking good in the best way
- Crispy & Juicy: Perfect texture—crispy skin outside, tender juicy meat inside
- Simple Ingredients: Uses pantry staples you probably already have on hand
- Multiple Cooking Methods: Make them baked, fried, air fried, or even grilled
- Party MVP: Always the first thing to disappear at any gathering
- Budget-Friendly: Chicken wings are affordable and feed a crowd economically
- Kid-Approved: Sweet honey flavor appeals to children without being too spicy
- Meal Prep Champion: Make ahead and reheat beautifully for easy weeknight dinners
- Customizable Heat: Adjust spiciness from mild to wild based on your preferences
- No Deep Frying Required: Baking method is healthier and less messy than traditional frying
- Gluten-Free Option: Easy to adapt for gluten-free diets with simple swaps
Ingredient Notes: Building That Perfect Glaze
Understanding your ingredients helps you achieve restaurant-quality results and make smart substitutions. Here’s what goes into these delicious honey glazed garlic chicken wings and why each component matters:
Chicken Wings: Use whole wings or pre-cut drumettes and flats (wingettes)—whichever you prefer or find on sale. Look for wings that are relatively uniform in size for even cooking. Fresh or properly thawed frozen wings both work. Pat them completely dry before cooking for maximum crispiness.
Honey: Provides natural sweetness and creates that gorgeous sticky glaze. Use real honey—the type (clover, wildflower, orange blossom) doesn’t matter much. Honey also helps with caramelization under high heat. Maple syrup can substitute but will change the flavor profile.
Garlic: Fresh minced garlic is essential for proper aromatic punch—this recipe is garlic-forward! Use at least 6-8 cloves. Don’t use garlic powder in the glaze (though it’s fine for dry seasoning)—fresh garlic provides the pungent, sweet complexity that makes these wings special.
Soy Sauce: Adds savory umami depth and saltiness that balances the honey’s sweetness. Low-sodium soy sauce is recommended so you can control salt levels. Tamari works for gluten-free; coconut aminos for soy-free (but will be sweeter).
Butter: Adds richness, helps the glaze cling to wings, and creates that glossy sheen. Unsalted butter lets you control salt. For dairy-free, use ghee or coconut oil (though flavor differs).
Rice Vinegar: Provides acidity that balances sweetness and cuts through richness. It also helps tenderize the chicken slightly. Apple cider vinegar or white wine vinegar can substitute.
Fresh Ginger: Grated fresh ginger adds warmth, complexity, and that subtle spiciness that elevates the glaze. Ground ginger can work (use 1/4 the amount) but fresh is significantly better.
Sesame Oil: Just a drizzle adds incredible nutty, toasted flavor that screams “Asian-inspired.” It’s optional but highly recommended. Don’t cook with it—add at the end for flavor.
Red Pepper Flakes: Optional for those who like a kick! Adjust to your heat preference or omit entirely for kids.
Baking Powder: Secret ingredient for crispy baked wings! It raises the pH of the skin, helping it brown and crisp better. Make sure it’s aluminum-free for best results.
Seasonings: Salt, black pepper, garlic powder, and onion powder for the dry rub create a flavorful base before glazing.
Equipment Needed
You’ll need these basic kitchen tools to create these delicious honey glazed garlic chicken wings:
- Large baking sheet (rimmed, for catching drips)
- Wire cooling rack (optional but highly recommended for crispy baked wings)
- Parchment paper or aluminum foil (for easy cleanup)
- Large mixing bowl (for tossing wings with glaze)
- Small saucepan (for making the honey garlic glaze)
- Whisk (for mixing glaze ingredients)
- Measuring cups and spoons
- Paper towels (for drying wings—very important!)
- Tongs (for flipping wings and tossing with sauce)
- Sharp knife and cutting board (for mincing garlic, grating ginger)
- Microplane or grater (for fresh ginger)
- Serving platter

Honey Glazed Garlic Chicken Wings Recipe
- Total Time: 1 hour
- Yield: 4-6 servings (about 20-24 wings) 1x
- Diet: Gluten Free
Description
These Honey Glazed Garlic Chicken Wings are crispy, sticky, sweet, and absolutely irresistible! Baked until golden and crispy, then tossed in a luscious honey garlic glaze. Perfect for game day, parties, or family dinners!
Ingredients
For the Wings:
- 3 lbs chicken wings (whole or pre-cut into drumettes and flats)
- 1 tablespoon baking powder (aluminum-free)
- 1 teaspoon salt
- ½ teaspoon black pepper
- ½ teaspoon garlic powder
- ½ teaspoon onion powder
For the Honey Garlic Glaze:
- ½ cup honey
- 6 cloves garlic, minced
- ¼ cup soy sauce (low-sodium recommended)
- 3 tablespoons butter
- 2 tablespoons rice vinegar
- 1 tablespoon fresh ginger, grated
- 1 teaspoon sesame oil (optional but recommended)
- ½ teaspoon red pepper flakes (optional, adjust to taste)
For Garnish:
- Sesame seeds
- Sliced green onions
- Fresh cilantro (optional)
Instructions
- Prep the Wings: If using whole wings, cut them at the joints into drumettes and flats (discard or save wing tips for stock). Pat wings completely dry with paper towels—this is crucial for crispy skin! Place dried wings in a large bowl.
- Season the Wings: In a small bowl, mix baking powder, salt, black pepper, garlic powder, and onion powder. Sprinkle this mixture over the wings and toss until evenly coated. The baking powder helps create extra-crispy skin!
- Arrange for Baking: Preheat oven to 425°F (220°C). Line a large baking sheet with parchment paper or foil. Place a wire cooling rack on top (this allows air circulation for crispier wings). Arrange wings in a single layer on the rack, leaving space between each wing. Don’t overlap or they’ll steam instead of crisp.
- Bake: Bake for 40-45 minutes, flipping wings halfway through (around 20-22 minutes), until golden brown, crispy, and cooked through (internal temperature of 165°F). The wings should be visibly crispy and golden.
- Make the Glaze: While wings bake, prepare the glaze. In a small saucepan over medium heat, melt butter. Add minced garlic and grated ginger, sautéing for 1 minute until fragrant (don’t let garlic brown). Add honey, soy sauce, rice vinegar, and red pepper flakes if using. Bring to a simmer and cook for 3-4 minutes, stirring occasionally, until sauce thickens slightly and becomes glossy. Remove from heat and stir in sesame oil if using.
- Glaze the Wings: Transfer hot, crispy wings to a large clean bowl. Pour the honey garlic glaze over the wings. Toss thoroughly until every wing is evenly coated with the sticky glaze. The hot wings will help the glaze caramelize slightly.
- Optional Crisping: For extra caramelization, return glazed wings to the baking sheet and broil for 2-3 minutes, watching carefully to prevent burning. The glaze will bubble and caramelize beautifully.
- Serve: Transfer glazed wings to a serving platter. Garnish with sesame seeds, sliced green onions, and cilantro if desired. Serve immediately while hot and enjoy the sticky, sweet perfection!
Notes
- Dry Wings are Key: Moisture prevents crisping. Pat wings very dry before seasoning.
- Baking Powder Magic: Don’t skip this! It creates incredibly crispy skin without frying.
- Don’t Overcrowd: Wings need space to crisp properly. Use two baking sheets if necessary.
- Gluten-Free: Use tamari instead of soy sauce and ensure baking powder is gluten-free.
- Air Fryer Method: Cook at 400°F for 25-30 minutes, flipping halfway, then toss with glaze.
- Adjust Sweetness: Use less honey (1/3 cup) for less sweet wings, or more (2/3 cup) for extra sweet.
- Prep Time: 15 minutes
- Cook Time: 45 minutes
- Category: Appetizer/Main Course
- Method: Baking (with oven or air fryer options)
- Cuisine: Asian-American Fusion
Nutrition
- Serving Size: 4-5 wings
- Calories: 420
- Sugar: 20g
- Sodium: 680mg
- Fat: 24g
- Saturated Fat: 8g
- Unsaturated Fat: 14g
- Trans Fat: 0g
- Carbohydrates: 26g
- Fiber: 0g
- Protein: 28g
- Cholesterol: 135mg
Nutrition information is approximate and calculated based on standard ingredient measurements for 6 servings. Values will vary depending on specific brands and modifications made to the recipe.
Tips & Variations: Make Them Your Own
Cooking Method Variations:
- Air Fryer: Cook at 400°F for 25-30 minutes, shaking basket halfway through
- Deep Fried: Fry at 375°F for 10-12 minutes until golden and crispy
- Grilled: Grill over medium-high heat for 20-25 minutes, turning frequently
- Slow Cooker: Cook on low 3-4 hours, then broil to crisp before glazing
Flavor Variations:
- Extra Spicy: Add sriracha or double the red pepper flakes in glaze
- Orange Honey: Add orange juice and zest for citrus twist
- Bourbon Glaze: Replace 2 tablespoons honey with bourbon for depth
- Asian Five-Spice: Add Chinese five-spice powder to dry rub
- Teriyaki Style: Increase soy sauce and add mirin
Make Them Healthier:
- Bake without oil spray for lower fat
- Use coconut aminos instead of soy sauce for less sodium
- Reduce honey to 1/3 cup for lower sugar
- Remove skin before cooking (though less crispy)
Dietary Modifications:
- Gluten-Free: Use tamari and ensure all ingredients are certified gluten-free
- Dairy-Free: Replace butter with coconut oil or more sesame oil
- Keto-Friendly: Replace honey with sugar-free maple syrup or monk fruit sweetener
- Paleo: Use coconut aminos, omit soy sauce, use coconut sugar instead of honey
Different Proteins:
- Try this glaze on chicken thighs, drumsticks, or boneless breasts
- Works beautifully on salmon or shrimp
- Use on pork ribs for amazing results
- Even works on tofu or cauliflower for vegetarian option
Pro Chef Tips: Restaurant-Quality Wings at Home
- Dry, Dry, Dry Those Wings: This cannot be stressed enough! Moisture is the enemy of crispy skin. Pat wings with paper towels until they feel completely dry—even slightly tacky. You can even let them air-dry uncovered in the refrigerator for a few hours or overnight for the crispiest results. Dry wings = crispy perfection.
- Baking Powder is Your Secret Weapon: The baking powder (not baking soda!) raises the pH of the chicken skin, helping it brown faster and crisp better. Make sure you’re using aluminum-free baking powder to avoid any metallic taste. This technique is what gives you crispy baked wings without deep frying!
- Use a Wire Rack: Placing wings on a wire rack over a baking sheet allows hot air to circulate all around the wings, crisping them on all sides. Wings sitting directly on a pan steam on the bottom and won’t crisp properly. If you don’t have a rack, flip wings every 15 minutes for more even crisping.
- High Heat is Essential: The 425°F temperature is crucial for achieving crispy skin. Lower temperatures will cook the wings but won’t create that satisfying crunch. Don’t be tempted to lower the heat—trust the process!
- Don’t Glaze Until Done: Wait until wings are fully cooked and crispy before adding the glaze. If you glaze them too early and return to the oven, the sugar in the honey can burn. Glaze hot wings, then optionally broil briefly for caramelization.
- Let Glaze Thicken: Simmer the glaze for a few minutes until it coats the back of a spoon. It will continue to thicken as it cools, and when tossed with hot wings, it will caramelize and become beautifully sticky. Thin glaze slides off; properly thickened glaze clings perfectly.
- Toss While Hot: Glaze wings immediately when they come out of the oven. Hot wings help the glaze caramelize and stick better. The residual heat also helps develop that characteristic sticky coating that makes these wings so addictive.
- Fresh Garlic is Non-Negotiable: Since garlic is a star flavor here, fresh minced garlic is essential. Cook it just until fragrant (about 1 minute)—overcooked garlic turns bitter and ruins the glaze. Golden and aromatic = perfect. Brown or burned = start over.
Common Mistakes to Avoid
Not Drying the Wings Thoroughly: Wet or damp wings create steam in the oven instead of crisping, resulting in soggy, rubbery skin. The moisture also dilutes the seasoning and prevents proper browning. Always pat wings completely dry with paper towels, and consider air-drying in the fridge for even better results.
Overcrowding the Pan: When wings are too close together or overlapping, they steam rather than roast, preventing crispy skin. Hot air needs to circulate around each wing. Leave space between wings, and use two baking sheets if necessary. Proper spacing = crispy wings. Overcrowding = soggy disappointment.
Glazing Too Early: Adding honey glaze before wings are fully cooked and crispy causes the honey to burn (it has a low smoke point) and prevents the skin from crisping. Always fully cook and crisp the wings first, then glaze. If you want extra caramelization, broil glazed wings for just 2-3 minutes.
Burning the Garlic: Garlic burns easily and turns bitter in seconds, ruining the entire glaze with acrid flavor. Always cook garlic over medium (not high) heat for only 1 minute until fragrant and golden, stirring constantly. Burned garlic = throw out the glaze and start over.
Using Too Low Oven Temperature: Baking wings at 350°F or lower cooks them through but doesn’t create crispy skin—you end up with rubbery, pale wings. The high heat of 425°F is necessary for browning and crisping. Trust the temperature—it’s been tested for optimal results!
Storage & Meal Prep: Keeping Them Delicious
Refrigerator Storage: Store leftover honey glazed garlic chicken wings in an airtight container in the refrigerator for up to 3-4 days. The glaze may absorb into the wings and the skin will soften with storage, but they’ll still taste delicious! Note that reheated wings won’t be quite as crispy as fresh, but flavor remains excellent.
Reheating Instructions:
- Oven Method (Best for Crispiness): Preheat oven to 375°F. Place wings on a baking sheet (preferably on a wire rack) and heat for 10-15 minutes until warmed through and skin crisps up again. This method best restores texture.
- Air Fryer Method: Reheat at 350°F for 5-7 minutes, shaking basket halfway through. This quickly re-crisps the wings beautifully.
- Microwave Method: Quick but won’t restore crispiness. Microwave on high in 30-second intervals until hot. Wings will be soft but tasty.
- Stovetop Method: Heat in a skillet over medium heat for 5-7 minutes, turning occasionally, until hot and slightly crispy.
Meal Prep Tips: These wings are excellent for meal prep:
- Cook wings fully and glaze them
- Portion into individual containers (4-5 wings each)
- Store for up to 4 days
- Reheat as needed for quick lunches or dinners
- Pair with pre-prepped veggies and rice for complete meals
Make-Ahead & Freezer Notes
Make-Ahead Options:
Option 1 – Prep Uncooked Wings (Best for Freshness):
- Season wings with dry rub up to 24 hours ahead
- Store covered in refrigerator
- Bake and glaze when ready to serve
- This gives you the freshest, crispiest results
Option 2 – Make Glaze Ahead:
- Prepare honey garlic glaze up to 3 days ahead
- Store in airtight container in refrigerator
- Reheat gently before tossing with freshly cooked wings
- This saves time on busy days
Option 3 – Fully Cook Ahead:
- Bake wings completely and glaze them
- Store in refrigerator for up to 2 days
- Reheat using oven or air fryer method before serving
- Skin won’t be quite as crispy but still delicious
Freezing Instructions:
To Freeze Cooked Wings:
- Cool completely after cooking (don’t glaze yet)
- Freeze in single layer on baking sheet until solid
- Transfer to freezer bags, removing as much air as possible
- Freeze for up to 3 months
- When ready to serve: thaw overnight in fridge, reheat until crispy, then glaze fresh
To Freeze Raw Seasoned Wings:
- Season wings with dry rub
- Freeze in portions in freezer bags for up to 3 months
- Cook from frozen (add 5-10 minutes to baking time) or thaw first
- Glaze after cooking
My Recommendation: For best texture and flavor, make wings fresh when possible. If meal prepping, cook wings and refrigerate for up to 2 days rather than freezing. The texture is significantly better when refrigerated than frozen and reheated.
Serving Suggestions: Complete Your Wing Experience
These sticky, sweet honey glazed garlic chicken wings pair beautifully with classic sides and refreshing accompaniments that balance the richness:
Classic Sides:
- French fries or sweet potato fries
- Coleslaw (cools and crunches perfectly against sweet wings)
- Celery and carrot sticks with ranch or blue cheese dressing
- Mac and cheese
- Corn on the cob
- Potato salad or pasta salad
Lighter Sides:
- Asian cucumber salad
- Mixed green salad with sesame ginger dressing
- Edamame
- Steamed or roasted broccoli
- Asian slaw
- Fresh fruit platter
Dipping Sauces (Optional):
- Ranch dressing (classic pairing)
- Blue cheese dressing
- Extra honey garlic sauce for dipping
- Sriracha mayo
- Sweet chili sauce
Rice and Grain Bowls:
- Serve over white or brown rice as a main dish
- Make rice bowls with wings, veggies, and drizzled sauce
- Pair with fried rice for complete meal
- Add to grain bowls with quinoa and vegetables
Beverages:
- Beer (light lagers, wheat beers, or IPAs)
- Iced tea or lemonade
- Soda or sparkling water
- For adults: white wine or sake
Perfect Occasions:
- Game day parties and Super Bowl gatherings
- Casual dinner parties
- Family dinners
- Tailgating
- Birthday parties
- Movie nights
- Potlucks and BBQs
Complete Menu Ideas:
- Game Day: Wings + fries + coleslaw + beer
- Family Dinner: Wings + rice + steamed veggies + salad
- Party Spread: Wings + various dips + veggie sticks + chips
- Asian-Inspired Meal: Wings + fried rice + cucumber salad + edamame
Frequently Asked Questions
Can I use frozen chicken wings? Yes! Frozen wings work perfectly. Thaw them completely in the refrigerator overnight, then pat them VERY dry with paper towels before seasoning. Frozen wings often retain more moisture, so the drying step is even more crucial. Make sure they’re fully thawed or they won’t cook evenly.
Do I need to use baking powder? While not absolutely required, baking powder is highly recommended! It’s the secret to crispy baked wings without deep frying. The baking powder raises the pH of the skin, helping it brown and crisp beautifully. Make sure you use baking powder (not baking soda) and choose aluminum-free to avoid any metallic taste.
Can I make these wings in an air fryer? Absolutely! Air fryers are fantastic for wings. Cook seasoned wings at 400°F for 25-30 minutes, shaking the basket every 10 minutes for even cooking. Wings should be golden and crispy. Then toss with the honey garlic glaze just like the oven method. Air fryer wings are incredibly crispy!
How do I know when the wings are done? Wings are done when they reach an internal temperature of 165°F, are golden brown all over, and the skin is visibly crispy. The meat should pull away from the bone easily. If you don’t have a meat thermometer, cut into the thickest part—the meat should be opaque white, not pink, and juices should run clear.
Can I make these ahead for a party? Yes! For a party, your best option is to fully cook and glaze the wings up to 2 hours ahead. Keep them warm in a 200°F oven on a wire rack. For longer advance prep (up to 2 days), cook and refrigerate wings, then reheat in a 375°F oven for 10-15 minutes and re-glaze lightly before serving.
Why are my wings not crispy? Soggy wings usually result from: 1) Not drying them thoroughly before seasoning, 2) Overcrowding the pan so they steam instead of roast, 3) Baking at too low a temperature, or 4) Not using a wire rack. Make sure wings are bone-dry, well-spaced, cooked at 425°F, and ideally on a wire rack for air circulation.
Can I adjust the sweetness level? Definitely! For less sweet wings, reduce honey to 1/3 cup. For sweeter wings, increase to 2/3 cup. You can also adjust the soy sauce—more soy sauce makes them more savory and less sweet. Taste the glaze before adding to wings and adjust to your preference!
Conclusion: Your New Party MVP
These Honey Glazed Garlic Chicken Wings are about to become your most-requested recipe—the dish that has everyone asking for the recipe and reaching for just one more wing! They prove that restaurant-quality, finger-licking-good food doesn’t require deep frying, complicated techniques, or exotic ingredients. Just good chicken wings, a simple honey garlic glaze, and proper technique create something absolutely irresistible that rivals any sports bar or restaurant.
What makes this recipe invaluable is how it delivers on every level: the wings are crispy and juicy, the glaze is perfectly balanced between sweet and savory, and the whole thing comes together with minimal effort and maximum flavor. Whether you’re feeding hungry game-day crowds, treating your family to something special, or impressing party guests, these sticky, sweet, garlicky wings deliver every single time.
Ready to make the best chicken wings ever? Try these Honey Glazed Garlic Chicken Wings today! Your friends and family will be begging you to make them again and again. Don’t forget to snap a photo of your beautiful batch and share it on Pinterest—I’d love to see your delicious creation! Drop a comment below with how you customized them or what you served alongside, and save this recipe so you always have it when a wing craving strikes. Happy cooking!

