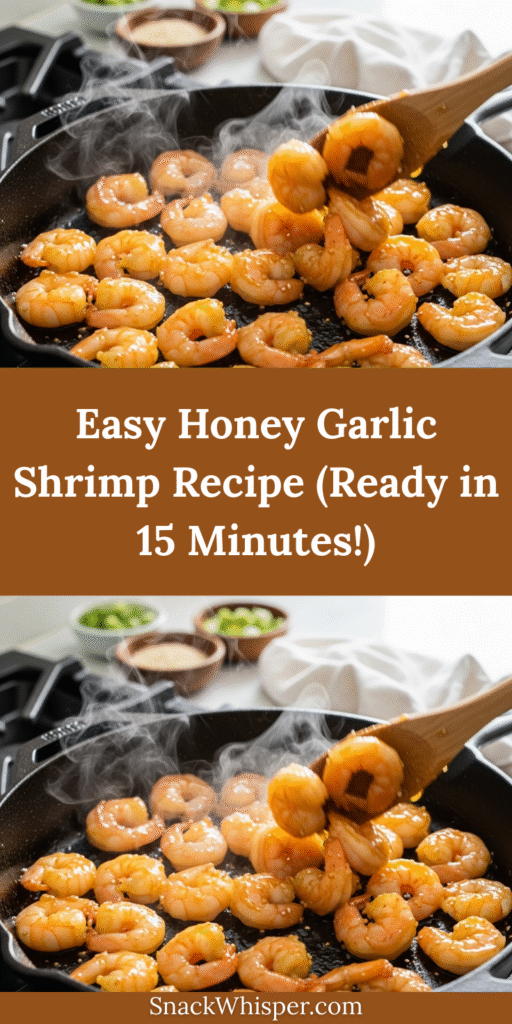
There’s something absolutely magical about the combination of sweet honey and savory garlic, especially when it coats tender, juicy shrimp in a glossy, restaurant-quality sauce. This Honey Garlic Shrimp recipe is a weeknight dinner hero that tastes like you spent hours in the kitchen, but actually comes together in just 15 minutes from start to finish.
Whether you’re a busy parent looking for a quick protein-packed meal, a college student trying to impress your roommates, or someone who simply craves delicious food without the fuss, this recipe checks all the boxes. The shrimp turn perfectly tender and slightly caramelized, while the sauce strikes that ideal balance between sticky-sweet and garlicky-savory with just a hint of tang. Serve it over steamed rice, toss it with noodles, or pile it on top of a fresh salad for a meal that feels special any night of the week.
This dish has become a Pinterest sensation for good reason. It’s visually stunning with its golden-brown shrimp glistening in that gorgeous amber sauce, it’s incredibly versatile, and most importantly, it delivers on flavor in a big way. Plus, with just a handful of pantry-friendly ingredients and minimal cleanup, you’ll find yourself making this recipe on repeat.
History / Background
While Honey Garlic Shrimp doesn’t belong to one specific cultural tradition, it represents a beautiful fusion of cooking techniques and flavor profiles from various Asian cuisines, particularly Chinese and Thai cooking traditions. The combination of honey (or other sweeteners) with garlic has been a cornerstone of Asian stir-fry cooking for centuries, creating that signature sweet-savory balance that’s become beloved worldwide.
In Chinese cuisine, honey has been used as a glaze for meats and seafood since ancient times, often combined with soy sauce and rice wine to create complex flavor layers. Garlic, meanwhile, has been a fundamental ingredient in Asian cooking for over 7,000 years, prized not just for flavor but also for its medicinal properties.
The Americanized version of honey garlic shrimp that we know today likely emerged during the mid-to-late 20th century as Asian restaurants became more prevalent across the United States. Home cooks began adapting restaurant-style stir-fries to their own kitchens, simplifying techniques while maintaining those irresistible flavor combinations.
What makes this particular dish so special is its accessibility. Unlike more complex Asian recipes that require specialty ingredients or advanced wok techniques, honey garlic shrimp uses ingredients you probably already have in your pantry and can be made in any regular skillet. It’s become a gateway recipe for many Americans exploring Asian-inspired cooking at home, proving that incredible flavor doesn’t require complicated methods or hard-to-find ingredients.
Today, you’ll find variations of this recipe across food blogs, Pinterest boards, and family dinner tables throughout North America. It’s evolved into a comfort food classic that bridges cultures and brings people together over a shared love of simple, delicious food.
Why You’ll Love This Recipe
This Honey Garlic Shrimp recipe is about to become your new favorite go-to dinner, and here’s why: imagine coming home after a long day, completely exhausted, and having a restaurant-quality meal on the table in less time than it takes to order takeout. That’s the magic of this recipe.
Here’s what makes this dish absolutely irresistible:
- Lightning Fast – From refrigerator to dinner plate in just 15 minutes, making it perfect for hectic weeknights
- Minimal Ingredients – Uses simple pantry staples you likely already have on hand
- One-Pan Wonder – Everything cooks in a single skillet, which means minimal cleanup and maximum convenience
- Budget-Friendly – Shrimp is surprisingly affordable, especially when purchased frozen, and a little goes a long way
- Crowd-Pleaser – Even picky eaters and kids love the sweet, mild flavors
- Naturally Gluten-Free – With simple substitutions, this fits seamlessly into gluten-free meal plans
- Impressive Presentation – Looks like something from a fancy restaurant but requires zero special skills
- Versatile Serving Options – Works over rice, noodles, vegetables, or even in tacos and salads
- Meal Prep Friendly – Makes excellent leftovers that reheat beautifully for easy lunches
- Perfect Protein – Shrimp is packed with protein and low in calories, making this a lighter dinner option that still satisfies
Whether you’re cooking for yourself, your family, or entertaining guests, this recipe delivers on every level. It’s the kind of dish that makes you look like a kitchen rockstar without breaking a sweat.
Ingredient Notes
Let’s break down what goes into this simple yet spectacular dish and why each ingredient matters:
Shrimp (1 ½ pounds, peeled and deveined) – The star of the show! Large or jumbo shrimp (26-30 count per pound) work best because they’re meaty and don’t overcook as quickly. You can use fresh or frozen shrimp, just make sure frozen shrimp are completely thawed and patted very dry. Look for shrimp that are already peeled and deveined to save time, though leaving the tails on is purely a presentation choice. Substitution: You can use scallops or even chicken breast cut into bite-sized pieces with similar results.
Honey (⅓ cup) – Provides the signature sweetness and helps create that beautiful glossy coating. Regular clover honey works perfectly, but feel free to experiment with different varieties like wildflower or orange blossom for subtle flavor variations. Substitution: Maple syrup or agave nectar work in a pinch, though the flavor will be slightly different.
Soy Sauce (3 tablespoons) – Adds savory depth, umami, and saltiness that balances the honey’s sweetness. Use regular or low-sodium soy sauce depending on your preference. Substitution: Tamari for gluten-free, coconut aminos for soy-free, or liquid aminos all work well.
Garlic (5-6 cloves, minced) – The aromatic backbone of this dish. Fresh garlic is essential here; don’t substitute with garlic powder as it won’t provide the same flavor impact or that amazing fragrance. The more garlic, the better in my opinion!
Fresh Ginger (1 tablespoon, grated) – Optional but highly recommended! Adds a warm, slightly spicy undertone that elevates the entire dish. Fresh ginger is best, but in a pinch, ½ teaspoon ground ginger can substitute.
Rice Vinegar (1 tablespoon) – Provides acidity to cut through the sweetness and add brightness. Substitution: Apple cider vinegar or fresh lemon juice work nicely.
Sesame Oil (1 teaspoon) – Just a touch adds nutty, toasted flavor that makes the dish taste more authentic. Don’t skip this if you have it!
Cornstarch (1 tablespoon) – Mixed with water to create a slurry, this thickens the sauce to that perfect glossy, clingy consistency. Substitution: Arrowroot powder works equally well.
Olive Oil or Vegetable Oil (2 tablespoons) – For cooking the shrimp. Any neutral cooking oil with a high smoke point works great.
Red Pepper Flakes (optional) – Just a pinch adds gentle heat without overwhelming the sweet flavors. Adjust to your spice preference!
Green Onions and Sesame Seeds (for garnish) – These finishing touches add color, texture, and visual appeal, plus a fresh onion bite that complements the rich sauce.
Equipment Needed
You don’t need a fancy kitchen to make this recipe! Here’s what you’ll use:
- Large Skillet or Wok – A 12-inch skillet or wok with high sides is ideal for tossing the shrimp and sauce together without spillage
- Mixing Bowls – One medium bowl for preparing the sauce, one small bowl for the cornstarch slurry
- Measuring Cups and Spoons – For accurate ingredient portions
- Garlic Press or Microplane – Makes mincing garlic and grating ginger quick and easy
- Whisk or Fork – For mixing the sauce ingredients
- Spatula or Wooden Spoon – For stirring and flipping the shrimp
- Paper Towels – Essential for patting shrimp completely dry before cooking
- Knife and Cutting Board – For chopping green onions and any prep work

Honey Garlic Shrimp Recipe
- Total Time: 15 minutes
- Yield: 4 servings 1x
- Diet: Gluten Free
Description
Quick and easy Honey Garlic Shrimp with a sticky, sweet-savory sauce that tastes like takeout but comes together in just 15 minutes! Perfectly tender shrimp coated in a glossy honey-garlic glaze that’s absolutely irresistible.
Ingredients
For the Shrimp:
- 1 ½ pounds large shrimp, peeled and deveined (26-30 count)
- 2 tablespoons olive oil or vegetable oil
- Salt and black pepper to taste
For the Honey Garlic Sauce:
- ⅓ cup honey
- 3 tablespoons soy sauce (or tamari for gluten-free)
- 5-6 cloves garlic, minced
- 1 tablespoon fresh ginger, grated (optional but recommended)
- 1 tablespoon rice vinegar
- 1 teaspoon sesame oil
- ¼ teaspoon red pepper flakes (optional)
- 1 tablespoon cornstarch
- 2 tablespoons water
For Garnish:
- 2 green onions, sliced
- 1 tablespoon sesame seeds
- Fresh cilantro (optional)
Instructions
- Prepare the Shrimp: Pat shrimp completely dry with paper towels. This is crucial for getting a nice sear. Season lightly with salt and pepper on both sides. Set aside.
- Make the Sauce: In a medium bowl, whisk together honey, soy sauce, minced garlic, grated ginger, rice vinegar, sesame oil, and red pepper flakes (if using). Set aside. In a small separate bowl, mix cornstarch with water to create a slurry. Set aside.
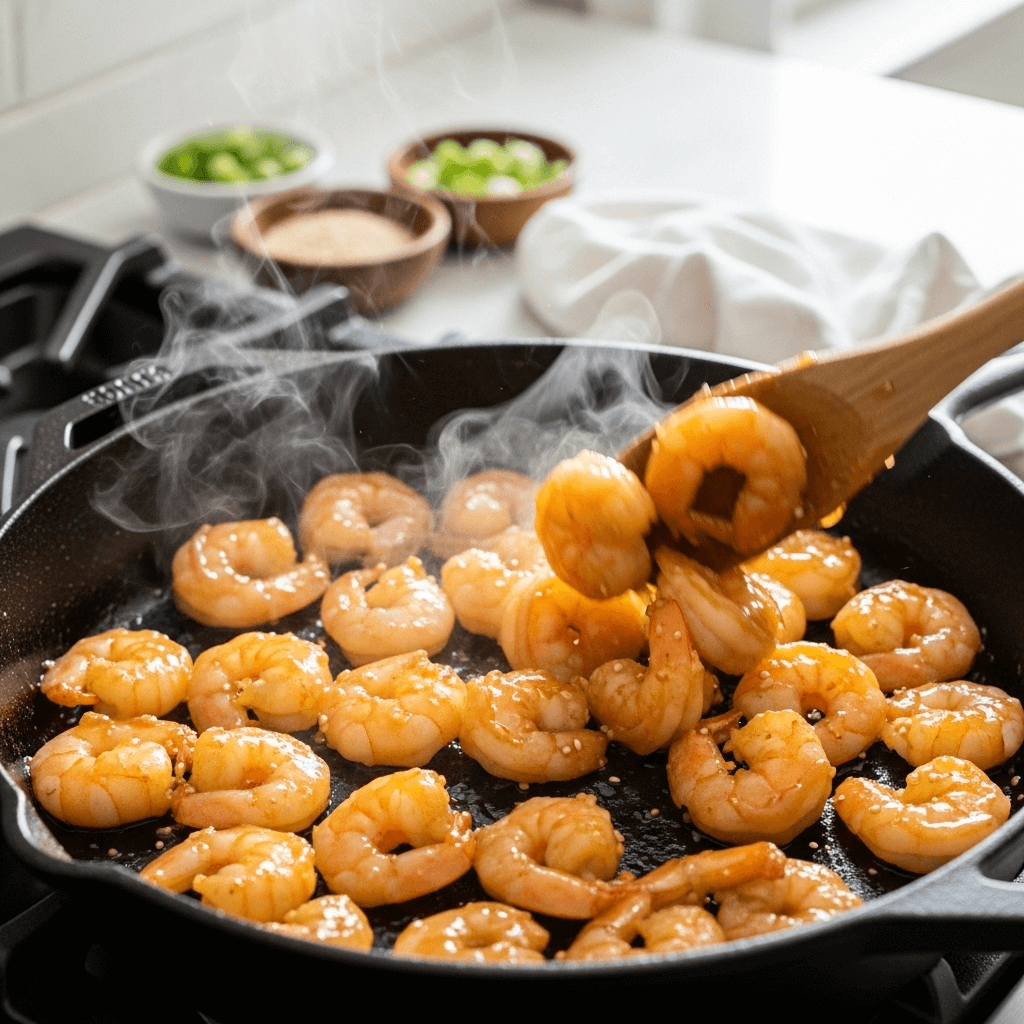
- Sear the Shrimp: Heat a large skillet or wok over medium-high heat. Add olive oil and swirl to coat the pan. Once the oil is shimmering hot (but not smoking), add the shrimp in a single layer. Don’t overcrowd the pan; work in batches if necessary. Cook for 1-2 minutes on the first side without moving them, until they develop a golden color on the bottom.
- Flip and Continue Cooking: Flip the shrimp and cook for another 1 minute on the other side. The shrimp should be pink and just cooked through. Remove shrimp from the skillet and set aside on a plate.
- Cook the Sauce: Reduce heat to medium. Pour the honey garlic sauce mixture into the same skillet. Let it bubble and simmer for about 1-2 minutes, stirring occasionally. The garlic should become fragrant but not burned.
- Thicken the Sauce: Give the cornstarch slurry a quick stir, then pour it into the simmering sauce while whisking constantly. Cook for 30-60 seconds until the sauce thickens noticeably and becomes glossy. It should coat the back of a spoon.
- Combine: Return the cooked shrimp to the skillet and toss everything together until the shrimp are completely coated in the glossy sauce. Cook for just 30 seconds to 1 minute to heat through and allow the flavors to meld.
- Serve: Remove from heat immediately. Transfer to a serving platter and garnish generously with sliced green onions, sesame seeds, and fresh cilantro if desired. Serve immediately over steamed rice, noodles, or vegetables.
Notes
- Shrimp Size Matters: Larger shrimp are easier to cook without overdoing them. If using smaller shrimp, reduce cooking time by 30 seconds to 1 minute.
- Don’t Overcook: Shrimp cook very quickly and become rubbery when overcooked. They’re done when they turn pink and form a C-shape. If they curl into tight O-shapes, they’ve gone too far.
- Sauce Thickness: If your sauce is too thick, add a tablespoon of water at a time to thin it out. If it’s too thin, simmer it a bit longer before adding the cornstarch slurry.
- Make it Spicier: Add more red pepper flakes, a drizzle of sriracha, or some freshly minced Thai chili peppers for extra heat.
- Gluten-Free Option: Use tamari or coconut aminos instead of regular soy sauce.
- Prep Time: 10 minutes
- Cook Time: 5 minutes
- Category: Dinner, Main Course
- Method: Stovetop
- Cuisine: Asian-Inspired
Nutrition
- Serving Size: About 6 ounces shrimp with sauce (¼ of recipe)
- Calories: 285
- Sugar: 18g
- Sodium: 890mg
- Fat: 9g
- Saturated Fat: 1.5g
- Unsaturated Fat: 7g
- Trans Fat: 0g
- Carbohydrates: 22g
- Fiber: 0.5g
- Protein: 28g
- Cholesterol: 285mg
Nutrition information is approximate and will vary based on specific ingredients used and portion sizes.
Tips & Variations
Spicy Honey Garlic Shrimp:
Add 1-2 teaspoons of sriracha or chili garlic sauce to the honey garlic sauce. You can also add sliced fresh jalapeños or Thai chilies when cooking the garlic for extra kick.
Citrus Twist:
Add the zest and juice of one orange or lime to the sauce for a bright, citrusy variation. The acidity pairs beautifully with the sweet honey.
Pineapple Honey Garlic Shrimp:
Toss in 1 cup of fresh pineapple chunks during the last minute of cooking for a tropical sweet-and-savory version.
Extra Vegetables:
Turn this into a complete one-pan meal by adding vegetables. Broccoli florets, snap peas, bell peppers, or asparagus all work wonderfully. Add them to the pan before the shrimp and cook until crisp-tender.
Bourbon Honey Garlic Shrimp:
Add 2 tablespoons of bourbon to the sauce for a sophisticated, slightly smoky depth of flavor. Let the alcohol cook off for about 30 seconds.
Coconut Variation:
Replace half the honey with coconut milk and add a squeeze of lime juice for a creamy, tropical version.
Low-Carb/Keto Option:
Swap the honey for a sugar-free sweetener like monk fruit sweetener or erythritol. The texture will be slightly different but still delicious.
Make it a Bowl:
Serve over cauliflower rice instead of regular rice for a lighter, lower-carb option that still soaks up all that delicious sauce.
Pro Chef Tips
Dry Your Shrimp Thoroughly:
This is the number one secret to getting a beautiful golden sear on your shrimp rather than steaming them. Use several layers of paper towels and really press down to absorb all moisture. Wet shrimp will steam in the pan and turn out rubbery rather than getting that gorgeous caramelized exterior.
Use High Heat and Don’t Move Them:
Resist the urge to stir or flip the shrimp too early. Let them sit undisturbed for that first 1-2 minutes to develop a proper sear. This creates flavor through the Maillard reaction and prevents them from becoming mushy.
Prep Everything Before You Start:
This is a fast-cooking dish, so having all your ingredients measured, mixed, and ready to go (mise en place, as chefs say) is essential. Once you start cooking, things move quickly and you won’t have time to mince garlic or measure honey.
Don’t Burn the Garlic:
Garlic burns quickly and becomes bitter. If you’re adding raw garlic to the sauce in the pan, make sure your heat isn’t too high. Medium heat is perfect. The garlic should become fragrant and lightly golden, never dark brown.
Control the Sauce Consistency:
The cornstarch slurry is your friend, but use it wisely. Add it gradually while the sauce is simmering and watch carefully. The sauce will continue to thicken slightly as it cools, so aim for slightly thinner than your desired final consistency.
Room Temperature Shrimp Cook More Evenly:
If using frozen shrimp, let them sit at room temperature for about 10-15 minutes after thawing and drying. This ensures they cook evenly throughout rather than being cold in the center.
Finish with Fresh Elements:
Those garnishes aren’t just for looks. The fresh green onions add a sharp, fresh bite that cuts through the richness of the sauce. The sesame seeds add a nutty crunch. Don’t skip these finishing touches.
Common Mistakes to Avoid
Overcooking the Shrimp:
This is the most common error. Shrimp cook incredibly fast, usually in just 2-3 minutes total. They’re done when they turn pink and opaque and curl into a gentle C-shape. Overcooked shrimp become tough, rubbery, and chewy. When in doubt, pull them off the heat a bit early; they’ll continue cooking from residual heat.
Overcrowding the Pan:
If you pile too many shrimp into the skillet at once, they’ll steam rather than sear, releasing moisture and preventing that beautiful caramelized exterior. Leave space between each shrimp, and cook in batches if necessary. Yes, it takes a few extra minutes, but the texture difference is worth it.
Using Pre-Minced Garlic from a Jar:
Fresh garlic is essential for this recipe. Pre-minced garlic has a completely different flavor profile, often tasting sharp, metallic, or even slightly sour. Fresh garlic provides that aromatic, sweet-when-cooked quality that makes this dish special. Take the two minutes to mince fresh cloves.
Not Adjusting for Low-Sodium Soy Sauce:
If using low-sodium soy sauce, you may need to add a pinch more salt to the dish. Taste the sauce before adding the shrimp and adjust seasoning. Regular soy sauce is quite salty, so low-sodium versions can make the final dish taste flat if you don’t compensate.
Letting the Sauce Burn:
Because this sauce contains honey, it can burn quickly if left unattended over high heat. Keep the heat at medium when making the sauce, stir regularly, and don’t walk away. Burned honey tastes bitter and will ruin the entire dish.
Adding the Cornstarch Slurry to Cold Sauce:
Cornstarch needs heat to activate and thicken properly. Always add your cornstarch slurry to simmering sauce, not cold sauce. And whisk constantly while adding to prevent lumps from forming.
Storage & Meal Prep
Refrigerator Storage:
Store leftover Honey Garlic Shrimp in an airtight container in the refrigerator for up to 3 days. The shrimp will remain safe to eat, though the texture is always best when freshly cooked. Keep the shrimp and sauce together to prevent the shrimp from drying out.
Reheating Instructions:
The key to reheating shrimp without turning them rubbery is using gentle heat. Here are your best options:
- Stovetop (Best Method): Add leftovers to a skillet over medium-low heat with a tablespoon or two of water or chicken broth. Cover and heat gently for 2-3 minutes, stirring occasionally, just until warmed through. Don’t overheat.
- Microwave: Place in a microwave-safe dish, cover with a damp paper towel, and microwave on 50% power in 30-second intervals, stirring between each interval, until just warmed through.
Avoid reheating multiple times, as this will make the shrimp increasingly tough.
Meal Prep Tips:
This dish is best when served fresh, but you can prep components ahead:
- Prep the sauce up to 2 days in advance and store it in the refrigerator
- Clean, devein, and dry the shrimp up to 1 day ahead, storing them in the refrigerator in a covered container lined with paper towels
- Chop all your garnishes and store them separately
- Cook your rice or prepare your serving sides ahead of time
When ready to eat, the actual cooking takes just 5 minutes, making this perfect for fast weeknight meals even with advance prep.
Make-Ahead & Freezer Notes
Can This Be Made Ahead?
While the dish is best served immediately after cooking, you can prep most components in advance as mentioned above. However, I don’t recommend fully cooking the shrimp ahead of time if you can avoid it, as reheated shrimp never quite match the texture of freshly cooked.
Freezing Cooked Honey Garlic Shrimp:
Technically, you can freeze the cooked dish, but I generally don’t recommend it. Shrimp can become mushy and rubbery when frozen after cooking, and the sauce texture may separate. If you must freeze it, here’s how:
- Let the dish cool completely
- Transfer to a freezer-safe airtight container or heavy-duty freezer bag
- Remove as much air as possible
- Label with the date
- Freeze for up to 2 months
- Thaw overnight in the refrigerator
- Reheat gently on the stovetop with a splash of water or broth
Better Freezer Strategy:
Instead of freezing the cooked dish, consider freezing the uncooked shrimp with the marinade:
- Place cleaned, deveined raw shrimp in a freezer bag
- Add the honey garlic sauce (without the cornstarch slurry)
- Remove air, seal, and lay flat in the freezer
- Freeze for up to 3 months
- When ready to cook, thaw overnight in the refrigerator
- Cook according to the recipe instructions, adding the cornstarch slurry to thicken the sauce
This method gives you a semi-homemade meal that tastes freshly made because the shrimp are cooked fresh rather than reheated.
Serving Suggestions
This versatile dish pairs beautifully with so many sides and accompaniments. Here are some of my favorite ways to serve Honey Garlic Shrimp:
Classic Pairings:
- Steamed jasmine rice or basmati rice (the fluffy rice soaks up all that delicious sauce)
- Cauliflower rice for a low-carb option
- Lo mein noodles or rice noodles tossed with a bit of sesame oil
- Fried rice (the shrimp can be served on top or mixed in)
- Quinoa for a protein-packed, nutritious base
Vegetable Sides:
- Steamed or roasted broccoli with garlic
- Sautéed bok choy or baby bok choy
- Stir-fried snap peas and bell peppers
- Roasted asparagus with lemon
- Simple cucumber salad with rice vinegar dressing
- Asian-style coleslaw with sesame-ginger dressing
Make it a Bowl: Create a shrimp bowl with rice, steamed vegetables, edamame, shredded carrots, cucumber slices, and a drizzle of extra sauce. Top with sesame seeds, green onions, and maybe some crispy wonton strips for texture.
Appetizer Style: Serve the shrimp on small plates with toothpicks as an appetizer or party food. Provide extra sauce on the side for dipping.
Taco Night: Use the honey garlic shrimp as a filling for Asian-fusion tacos. Serve in warm tortillas with shredded cabbage, cilantro, lime wedges, and a drizzle of sriracha mayo.
Lettuce Wraps: Spoon the shrimp and sauce into butter lettuce leaves for a light, low-carb meal. Add shredded carrots, cucumber, and fresh herbs.
Beverage Pairings:
- Crisp white wine like Sauvignon Blanc or Pinot Grigio
- Light beer or Asian lager
- Sparkling water with lime
- Iced green tea with honey
- Ginger ale or ginger beer for a non-alcoholic option
FAQs Section
Can I use frozen shrimp for this recipe?
Absolutely! Frozen shrimp work perfectly for this recipe and are often more affordable than fresh. Just make sure to thaw them completely before cooking. The best method is to place them in a colander under cold running water for about 5-10 minutes until fully thawed. Then pat them completely dry with paper towels before seasoning and cooking. Never cook shrimp from frozen for this recipe, as they’ll release too much water and won’t sear properly.
Should I leave the tails on or remove them?
This is entirely a personal preference! Leaving the tails on makes for a prettier presentation and gives diners something to hold onto when eating with their hands. However, tails can be annoying when you’re trying to eat the shrimp mixed with rice or noodles. For casual family dinners, I usually remove the tails for easier eating. For dinner parties or when I want a more elegant presentation, I leave them on.
My sauce is too thin/too thick. How do I fix it?
If your sauce is too thin, you have two options: simmer it longer to reduce and concentrate it naturally, or add a bit more cornstarch slurry (mix ½ teaspoon cornstarch with 1 tablespoon water and add gradually while whisking). If your sauce is too thick, simply thin it out by whisking in water or chicken broth one tablespoon at a time until you reach your desired consistency. Remember, the sauce will thicken as it cools, so err on the side of slightly thinner.
Can I make this recipe with chicken instead of shrimp?
Yes! Cut boneless, skinless chicken breast or thighs into bite-sized pieces. Season and cook them in the hot oil for about 5-7 minutes until golden brown and cooked through (internal temperature of 165°F). Remove from the pan, make the sauce, thicken it, then return the chicken to coat. Chicken will take longer to cook than shrimp, so adjust your timing accordingly.
Is this recipe spicy?
As written, this recipe is very mild with just a subtle sweetness and savory garlic flavor. The optional red pepper flakes add only a gentle warmth, not significant heat. This makes it perfect for kids and those who don’t enjoy spicy food. If you love heat, definitely add more red pepper flakes, sriracha, chili garlic sauce, or fresh sliced chilies to suit your taste.
What’s the best type of honey to use?
Regular clover honey works perfectly and is what I use most often. It has a mild, sweet flavor that doesn’t overpower the dish. However, you can experiment with other varieties like wildflower honey, orange blossom honey, or even buckwheat honey for different flavor nuances. Avoid honey that’s crystallized, as it won’t incorporate smoothly into the sauce.
Can I double this recipe?
Yes, but with one important caveat: don’t try to cook all the shrimp at once in a single pan. Even if you have a very large skillet, overcrowding will cause the shrimp to steam rather than sear. Double all the ingredients, but cook the shrimp in batches, keeping the first batch warm while you cook the second. Then combine everything with the sauce at the end. The sauce can definitely be doubled and made all at once.
Conclusion
There you have it – your new favorite weeknight dinner that’s guaranteed to become a regular rotation in your meal planning! This Honey Garlic Shrimp recipe proves that you don’t need hours in the kitchen or a pantry full of exotic ingredients to create something truly special. With just 15 minutes and a handful of simple ingredients, you can serve up a restaurant-quality meal that’ll have everyone asking for seconds.
The beauty of this recipe lies in its versatility and reliability. Whether you’re a nervous beginner following the instructions carefully or a confident home cook who wants to experiment with variations, this dish delivers every single time. It’s become a beloved staple on Pinterest for good reason – it photographs beautifully, tastes even better, and makes home cooking feel effortless and rewarding.
I hope you love this Honey Garlic Shrimp as much as my family does! It’s brought joy to countless weeknight dinners at our table, and I’m confident it’ll do the same for yours. Don’t forget to serve it with plenty of rice or noodles to soak up every last drop of that incredible sauce.
If you make this recipe, I’d absolutely love to hear about it! Leave a comment below sharing your experience, any fun variations you tried, or just to let me know how it turned out. And if you snap a photo, please tag me on Pinterest and Instagram – I love seeing your creations! Your feedback helps me continue creating recipes that make your life easier and your dinners more delicious.
Happy cooking, and here’s to many delicious shrimp dinners in your future!

