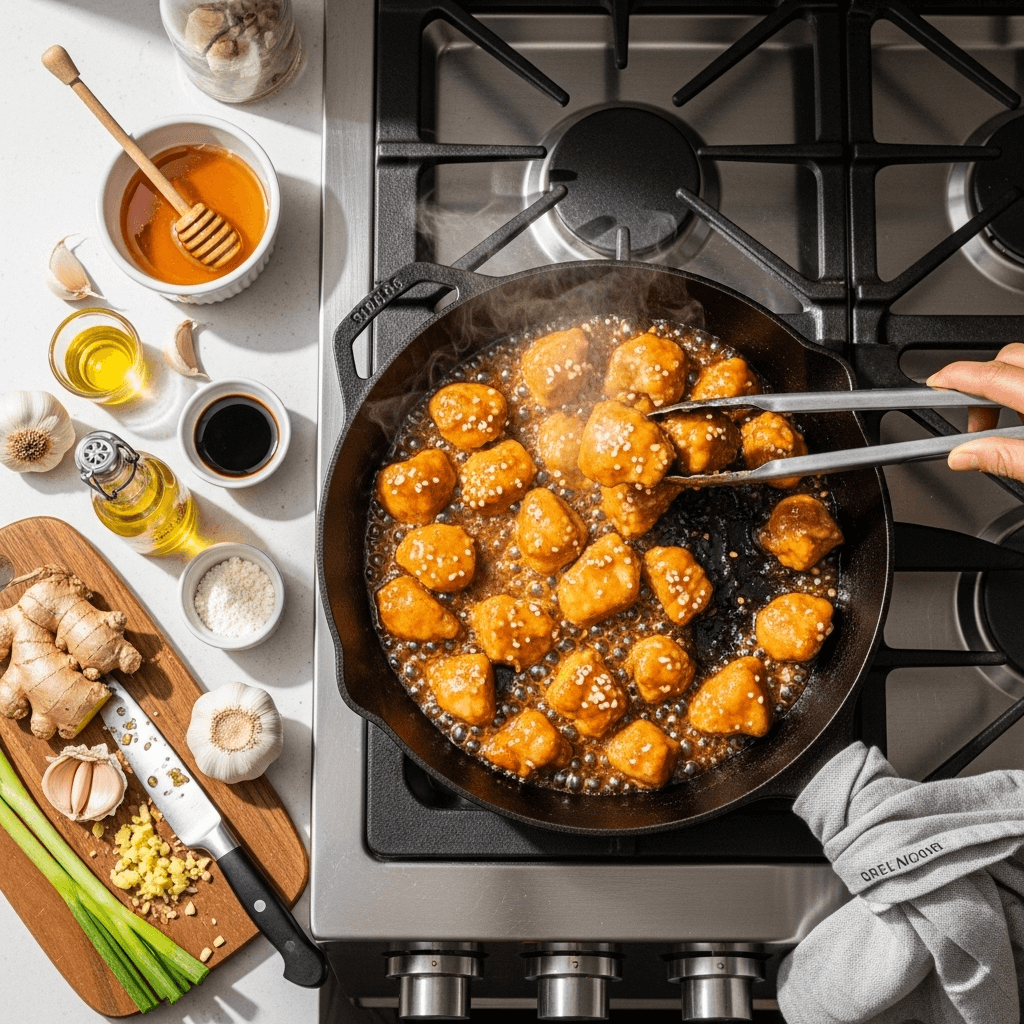
If you’re looking for a chicken recipe that delivers restaurant-quality flavor with minimal effort, this Honey Garlic Chicken is about to become your new weeknight hero. This dish features tender, juicy chicken coated in a glossy, sticky-sweet sauce that perfectly balances honey’s natural sweetness with savory garlic and a hint of tang. It’s the kind of meal that makes everyone at the table go quiet for a moment as they savor that first bite, then immediately ask when you’re making it again.
What makes this Honey Garlic Chicken truly special is how that gorgeous sauce transforms simple chicken into something extraordinary. We’re talking about perfectly seared chicken with a golden-brown exterior, bathed in a sauce that’s sweet but not cloying, garlicky but not overwhelming, and just sticky enough to coat every piece beautifully. The combination creates layers of flavor that taste complex and sophisticated, yet the recipe comes together in just 30 minutes using ingredients you probably already have in your pantry.
This recipe is incredibly versatile and works beautifully for so many occasions. It’s perfect for busy weeknights when you need something quick but special, ideal for meal prep since it reheats wonderfully, impressive enough to serve to guests for dinner parties, and kid-friendly enough that even picky eaters will clean their plates. Whether you’re cooking for your family, entertaining friends, or just treating yourself to a delicious homemade meal, this Honey Garlic Chicken consistently delivers satisfaction with every bite. Serve it over rice to soak up that amazing sauce, with steamed vegetables for a complete meal, or alongside noodles for an Asian-inspired dinner.
The Rich History Behind Honey Garlic Sauce
The combination of honey and garlic as a flavor pairing has roots that stretch across multiple cultures and centuries. While this specific preparation is a modern creation, the concept of balancing sweet and savory flavors is ancient, appearing in Chinese, Middle Eastern, and European cuisines throughout history.
In Chinese cooking, the practice of combining sweet elements like honey or sugar with savory ingredients dates back thousands of years. Sweet and sour dishes, which balance sugar, vinegar, and soy sauce, have been staples of Cantonese cuisine since at least the Tang Dynasty. The philosophy behind these flavor combinations is rooted in traditional Chinese medicine and cooking principles, which emphasize balance and harmony—the concept of yin (cooling, sweet) and yang (warming, savory) working together.
Garlic has been used as both food and medicine for over 5,000 years, with origins in Central Asia. Ancient civilizations from Egypt to Greece valued garlic not just for its flavor but for its perceived health benefits. Honey, similarly, has been treasured since ancient times—depicted in Egyptian tomb paintings and mentioned in ancient texts from cultures worldwide as both a sweetener and a medicinal substance.
The modern honey garlic chicken as we know it today is likely a North American creation, influenced by Chinese-American restaurant cuisine that became popular in the mid-to-late 20th century. As Chinese immigrants adapted their traditional recipes to American tastes and available ingredients, dishes featuring sweet, sticky sauces became incredibly popular. The honey garlic combination specifically gained traction in the 1980s and 1990s as home cooks began experimenting with Asian-inspired flavors.
This dish represents that beautiful fusion of traditional flavor principles with contemporary convenience cooking. It takes the timeless pairing of honey and garlic—ingredients that have been used together in various forms for centuries—and presents them in a format that’s perfect for modern home kitchens: quick, reliable, and absolutely delicious. Today, Honey Garlic Chicken has become a beloved staple in home cooking, proving that simple ingredient combinations, when done right, create magic.
Why You’ll Love This Honey Garlic Chicken
This recipe is an absolute winner that checks every box for what makes a great meal. Once you taste that perfect balance of sweet honey, aromatic garlic, and tender chicken, you’ll understand why this dish has become such a beloved favorite in homes across the country. The glossy sauce alone is worth the price of admission—it’s the kind of sauce you’ll want to drizzle over everything on your plate.
Here’s why this Honey Garlic Chicken will become your go-to recipe:
- Ready in 30 Minutes: From start to finish, you’ll have dinner on the table in half an hour—perfect for busy weeknights
- Simple Pantry Ingredients: Uses everyday ingredients you likely already have, making it perfect for last-minute meals
- Kid-Approved: The sweet-savory flavor profile appeals to all ages, making it a guaranteed family favorite
- Restaurant-Quality at Home: Tastes like takeout but costs a fraction and is healthier too
- One-Pan Wonder: Everything cooks in a single skillet, minimizing cleanup time
- Meal Prep Friendly: Makes excellent leftovers that taste just as good (or better!) the next day
- Versatile Serving Options: Works over rice, noodles, quinoa, or with any vegetable side you prefer
- Budget-Friendly: Uses affordable chicken and pantry staples to create an impressive meal
- Naturally Gluten-Free: Easy to make gluten-free with a simple soy sauce substitution
- Crowd-Pleaser: Perfect for entertaining—everyone loves this dish without exception
- Customizable Heat: Easy to adjust the flavor profile with added spice or keep it mild for sensitive palates
Ingredient Notes: What You’ll Need and Why
Understanding your ingredients helps you make smart substitutions and achieve the best results. Let’s break down what makes this dish so delicious.
Chicken: Boneless, skinless chicken breasts or thighs both work beautifully here. Breasts are leaner and cook quickly, while thighs are more flavorful and forgiving if slightly overcooked. I recommend cutting them into bite-sized pieces (about 1-inch cubes) for faster cooking and maximum sauce coverage. You’ll need about 1½-2 pounds to serve 4 people.
Honey: The star sweetener! Use good-quality honey for the best flavor. Different honey varieties (clover, wildflower, orange blossom) will create subtle flavor variations. You’ll need about ⅓ cup. The honey provides sweetness while creating that signature sticky, glossy sauce texture.
Garlic: Fresh garlic is essential for authentic flavor. You’ll need 5-6 large cloves, minced. This might seem like a lot, but cooking mellows garlic’s bite while concentrating its aromatic qualities. Don’t substitute with garlic powder—the fresh stuff makes all the difference.
Soy Sauce: Adds savory, umami depth and saltiness that balances the honey’s sweetness. Use regular or low-sodium soy sauce—your choice depending on salt preference. You’ll need about ¼ cup. For gluten-free, use tamari or coconut aminos.
Rice Vinegar: Provides acidity that brightens the sauce and prevents it from being too sweet. Apple cider vinegar or white vinegar can substitute in a pinch, but rice vinegar has a milder, slightly sweet flavor that works best. You’ll need 2 tablespoons.
Sesame Oil: Just 1 tablespoon adds incredible nutty, toasted flavor that gives the dish an authentic Asian-inspired taste. This is optional but highly recommended.
Ginger: Fresh ginger (about 1 tablespoon minced) adds warmth and complexity. Ground ginger can substitute (use 1 teaspoon) but fresh is far superior.
Cornstarch: Creates a silky, thick sauce that clings to the chicken. You’ll need 1-2 tablespoons mixed with water to create a slurry. This thickening step is crucial for that restaurant-quality glossy finish.
Cooking Oil: For searing the chicken. Use vegetable oil, canola oil, or avocado oil—something with a high smoke point. You’ll need 2-3 tablespoons.
Optional Additions: Red pepper flakes for heat, green onions for garnish, sesame seeds for texture and visual appeal.
Equipment Needed
Having the right tools makes this recipe come together smoothly. Here’s what you’ll need:
- Large skillet or wok (12-inch is ideal, non-stick or well-seasoned cast iron)
- Sharp knife and cutting board for prepping chicken, garlic, and ginger
- Mixing bowls (small and medium sizes)
- Measuring cups and spoons
- Whisk or fork for mixing the sauce
- Wooden spoon or spatula for stirring
- Tongs for flipping chicken pieces
- Small bowl for cornstarch slurry
- Microplane or garlic press for mincing garlic and ginger (optional but helpful)
- Paper towels for patting chicken dry

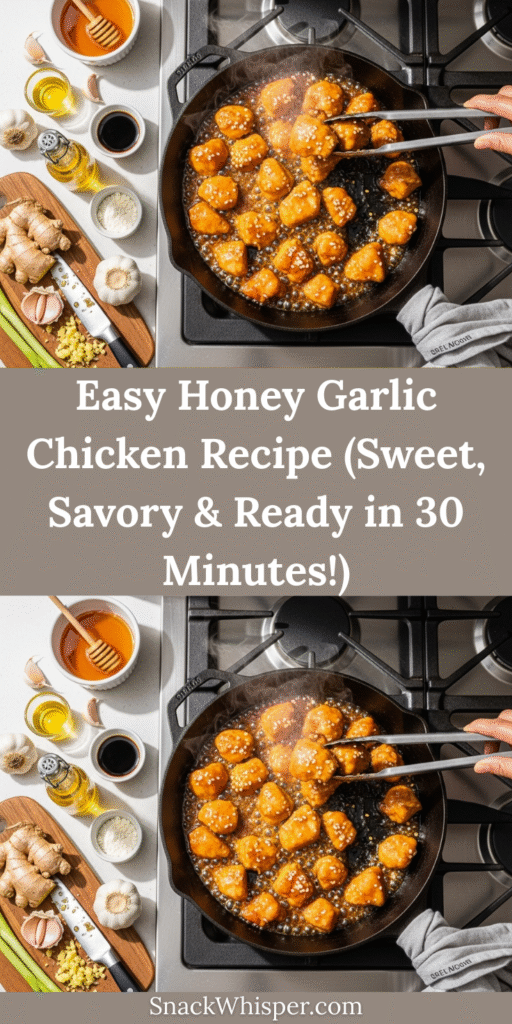
Honey Garlic Chicken Recipe
- Total Time: 30 minutes
- Yield: 4 servings 1x
- Diet: Gluten Free
Description
This Easy Honey Garlic Chicken features tender chicken pieces coated in a sweet, savory, and sticky honey garlic sauce. Ready in just 30 minutes, it’s perfect for weeknight dinners and tastes even better than takeout!
Ingredients
For the Chicken:
- 1½-2 pounds boneless, skinless chicken breasts or thighs, cut into 1-inch pieces
- ½ teaspoon salt
- ¼ teaspoon black pepper
- 2 tablespoons cornstarch (for coating chicken)
- 2-3 tablespoons vegetable oil (for cooking)
For the Honey Garlic Sauce:
- ⅓ cup honey
- ¼ cup soy sauce (or tamari for gluten-free)
- 6 cloves garlic, minced
- 1 tablespoon fresh ginger, minced (or 1 teaspoon ground ginger)
- 2 tablespoons rice vinegar
- 1 tablespoon sesame oil
- ¼ teaspoon red pepper flakes (optional, for heat)
- ¼ cup water
For the Cornstarch Slurry:
- 1 tablespoon cornstarch
- 2 tablespoons water
For Garnish:
- 2 green onions, sliced
- 1 tablespoon sesame seeds
- Fresh cilantro or parsley (optional)
Instructions
- Prepare the Chicken: Pat chicken pieces completely dry with paper towels—this is crucial for good browning. Season with salt and pepper, then toss with 2 tablespoons cornstarch until evenly coated. The cornstarch creates a light coating that helps the sauce adhere beautifully.
- Mix the Sauce: In a medium bowl, whisk together honey, soy sauce, minced garlic, minced ginger, rice vinegar, sesame oil, red pepper flakes (if using), and ¼ cup water. Set aside. The sauce should be well combined and fairly thin at this point—it will thicken later.
- Prepare Cornstarch Slurry: In a small bowl, mix 1 tablespoon cornstarch with 2 tablespoons water until smooth. Set aside—you’ll add this later to thicken the sauce.
- Heat the Pan: Place a large skillet or wok over medium-high heat. Add 2 tablespoons of vegetable oil and heat until shimmering and just beginning to smoke. The pan should be quite hot for proper searing.
- Sear the Chicken: Add chicken pieces in a single layer, making sure not to overcrowd the pan (work in batches if necessary). Sear without moving for 3-4 minutes until golden brown on the bottom. Flip and cook another 3-4 minutes until golden brown on the other side and cooked through (internal temperature should reach 165°F). Remove chicken to a plate.
- Sauté Aromatics (Optional Extra Step): If there’s excess oil in the pan, pour most of it out, leaving about 1 tablespoon. Add a bit of the minced garlic and ginger from your sauce mixture and sauté for 30 seconds until fragrant. This extra step intensifies the garlic flavor but isn’t necessary if you want to keep things simple.
- Add the Sauce: Pour the honey garlic sauce mixture into the skillet. Bring to a simmer over medium heat, stirring and scraping up any browned bits from the bottom of the pan. Those browned bits (fond) add incredible flavor.
- Thicken the Sauce: Once simmering, give the cornstarch slurry a quick stir and slowly pour it into the sauce while whisking constantly. Continue cooking and stirring for 1-2 minutes until the sauce thickens noticeably and becomes glossy. It should coat the back of a spoon.
- Combine Chicken and Sauce: Return the cooked chicken and any accumulated juices to the skillet. Toss to coat evenly with the thick, glossy sauce. Cook for 1-2 minutes more, stirring constantly, until the chicken is heated through and completely coated with sauce.
- Garnish and Serve: Remove from heat. Transfer to a serving dish and garnish with sliced green onions, sesame seeds, and fresh herbs if using. Serve immediately over rice, noodles, or your favorite side dish.
Notes
- Don’t Skip Drying the Chicken: Moisture prevents browning. Always pat chicken completely dry before cooking.
- Control the Heat: If your sauce gets too thick, thin it with a tablespoon of water at a time. If too thin, simmer longer or add more cornstarch slurry.
- Honey Quality Matters: Better honey = better flavor. Use real honey, not honey-flavored syrup.
- Adjust Sweetness: If the sauce is too sweet for your taste, add more rice vinegar or a squeeze of fresh lemon juice.
- For Crispier Chicken: After coating with cornstarch, let chicken sit for 5 minutes before cooking. This helps the coating adhere better.
- Low-Sodium Option: Use low-sodium soy sauce and reduce the amount to ⅛ cup, adjusting to taste.
- Prep Time: 10 minutes
- Cook Time: 20 minutes
- Category: Dinner, Main Course
- Method: Stovetop, Pan-Seared
- Cuisine: Asian-Inspired, Chinese-American
Nutrition
- Serving Size: About 6 oz chicken with sauce (based on 4 servings)
- Calories: 358
- Sugar: 18g
- Sodium: 892mg
- Fat: 11g
- Saturated Fat: 2g
- Unsaturated Fat: 8g
- Trans Fat: 0g
- Carbohydrates: 28g
- Fiber: 0g
- Protein: 36g
- Cholesterol: 109mg
Nutrition information is calculated automatically and should be used as an estimate only. Values vary based on specific ingredients and portion sizes.
Tips & Variations to Make It Your Own
One of the best features of this recipe is how easily you can customize it. Here are some delicious variations:
Spicy Honey Garlic Chicken: Increase red pepper flakes to 1 teaspoon, add sriracha to the sauce, or toss in sliced fresh chili peppers for serious heat.
Honey Garlic Chicken with Vegetables: Add broccoli florets, snap peas, bell peppers, or green beans during the last few minutes of cooking for a complete one-pan meal.
Crispy Honey Garlic Chicken: For extra-crispy chicken, coat pieces in beaten egg before the cornstarch, or use panko breadcrumbs instead of plain cornstarch.
Slow Cooker Version: Place raw chicken in slow cooker, pour sauce over (skip thickening initially), cook on low 4-5 hours. Thicken sauce with cornstarch slurry during last 30 minutes on high.
Baked Honey Garlic Chicken: Arrange coated chicken on a baking sheet, bake at 400°F for 20 minutes, then brush with sauce and broil 2-3 minutes until caramelized.
Orange Honey Garlic: Add ¼ cup fresh orange juice and 1 teaspoon orange zest to the sauce for a citrusy variation.
Lighter Version: Use chicken breast, reduce oil to 1 tablespoon, and use cooking spray for a lower-fat option.
Asian-Style Rice Bowl: Serve over rice with edamame, pickled vegetables, and a soft-boiled egg for a complete rice bowl experience.
Pro Chef Tips for Restaurant-Quality Results
Want to elevate this dish from delicious to extraordinary? Here are professional techniques:
Velveting the Chicken: Marinate chicken pieces in a mixture of 1 egg white, 1 tablespoon cornstarch, and 1 tablespoon soy sauce for 30 minutes before cooking. This Chinese restaurant technique creates incredibly tender chicken.
Double Fry Technique: For maximum crispiness, fry chicken once at medium heat (cook through), remove and let rest, then fry again at high heat for 1-2 minutes just before adding sauce.
Caramelize the Honey: Before adding all sauce ingredients, cook just the honey in the pan for 1-2 minutes until it darkens slightly. This creates deeper, more complex flavors.
Toast Your Sesame Oil: If using sesame oil, add it at the very end (not during cooking) to preserve its delicate, nutty flavor and aroma.
Fresh vs. Dried Aromatics: While the recipe calls for fresh garlic and ginger, reserving a bit of raw minced garlic to add at the very end creates a more complex, layered garlic flavor.
Proper Pan Temperature: Your pan should be hot enough that a drop of water sizzles and evaporates immediately. This high heat creates the best sear.
Rest Between Steps: Let seared chicken rest for 5 minutes before adding sauce. This allows juices to redistribute, ensuring moist chicken.
Glaze Multiple Times: For extra glossy, sticky chicken, remove from sauce, reduce sauce further, then toss chicken again. Repeat 2-3 times for maximum coating.
Finish with Acid: A squeeze of fresh lemon or lime juice right before serving brightens all the flavors and prevents the dish from tasting too sweet or heavy.
Common Mistakes to Avoid
Even straightforward recipes can go wrong. Here’s what to watch out for:
Not Drying the Chicken: Wet chicken won’t brown properly and will steam instead of sear, resulting in a gray, unappetizing appearance and no caramelized flavor. Always pat completely dry.
Overcrowding the Pan: Too much chicken in the pan at once lowers the temperature, causing steaming rather than searing. Cook in batches if necessary, keeping the first batch warm while finishing the rest.
Burning the Garlic: Garlic burns quickly and becomes bitter. If adding raw garlic directly to the pan (rather than in the sauce), watch it carefully and add liquid immediately if it starts to brown too much.
Adding Cornstarch Slurry to Boiling Sauce: If the sauce is at a hard boil, the cornstarch can clump. Reduce to a gentle simmer before adding the slurry, and whisk constantly.
Overcooking the Chicken: Chicken breasts especially can become dry if overcooked. Use a meat thermometer and remove from heat at exactly 165°F—carryover cooking will bring it to safe temperature during resting.
Sauce Too Thin or Too Thick: Adjust consistency as needed. Too thin? Simmer longer or add more cornstarch slurry. Too thick? Thin with water, broth, or additional soy sauce one tablespoon at a time.
Storage & Meal Prep
This Honey Garlic Chicken stores beautifully, making it perfect for meal prep and leftovers.
Refrigerator Storage: Store cooled chicken and sauce together in an airtight container in the refrigerator for up to 4 days. The flavors actually deepen and improve after a day, making leftovers particularly delicious.
Reheating Instructions: Reheat gently in a skillet over medium heat with a splash of water or chicken broth to prevent the sauce from becoming too thick, about 4-5 minutes until warmed through. Microwave works too—heat on 70% power in 1-minute intervals, stirring between, until hot.
Meal Prep Strategy: This is perfect for meal prep! Cook a double batch on Sunday and portion into containers with rice and steamed vegetables for ready-made lunches all week.
Sauce Separation: The sauce may thicken and the honey may separate slightly when refrigerated. Simply stir well while reheating and add a splash of water to restore the proper consistency.
Keep It Moist: When meal prepping, store chicken and sauce with rice or vegetables, which helps retain moisture. If storing chicken alone, add a tablespoon of sauce or water to each container to prevent drying.
Make-Ahead & Freezer Notes
This recipe is incredibly freezer-friendly and make-ahead-friendly, perfect for busy schedules.
Make-Ahead Sauce: Mix the sauce up to 3 days ahead and refrigerate. When ready to cook, just prep and cook the chicken, then add the pre-mixed sauce.
Marinating Ahead: Season and coat chicken with cornstarch up to 24 hours ahead. Keep refrigerated until ready to cook.
Freezing Cooked Chicken: Cool completely and freeze chicken with sauce in airtight containers or freezer bags for up to 3 months. Freeze flat for easy stacking and quicker thawing.
Freezing Raw Marinated Chicken: Toss raw chicken with the sauce in a freezer bag, remove air, and freeze flat for up to 2 months. Thaw in refrigerator overnight, then cook as directed, finishing with cornstarch slurry to thicken.
Best Thawing Method: Transfer from freezer to refrigerator 24 hours before you plan to eat. Never thaw at room temperature.
Reheating from Frozen: For best results, thaw first. If cooking from frozen, increase cooking time significantly and ensure internal temperature reaches 165°F.
Sauce Texture After Freezing: The sauce may separate slightly after freezing. Stir vigorously while reheating to re-emulsify.
Serving Suggestions: Complete Your Meal
This Honey Garlic Chicken pairs beautifully with many sides. Here are the best accompaniments:
Rice Options: Serve over white rice, brown rice, jasmine rice, basmati rice, or cauliflower rice for a low-carb option. The rice soaks up that incredible sauce perfectly.
Noodles: Serve over lo mein noodles, rice noodles, soba noodles, or even spaghetti for a fusion twist.
Vegetables: Pair with steamed broccoli, roasted Brussels sprouts, stir-fried bok choy, sautéed snap peas, or steamed green beans.
Salads: A fresh cucumber salad, Asian slaw, or simple lettuce salad with sesame ginger dressing provides refreshing contrast to the sweet, sticky chicken.
Complete Meal Ideas: Serve over rice with steamed broccoli and edamame, create a rice bowl with pickled vegetables and soft-boiled egg, or pair with lo mein and stir-fried vegetables for a full Asian-inspired feast.
Appetizers: Start with egg rolls, spring rolls, or wonton soup for a complete Asian-inspired dinner experience.
Beverages: Pair with iced green tea, jasmine tea, light beer, or a crisp white wine like Riesling or Gewürztraminer that complements the sweet-savory flavors.
Frequently Asked Questions
Can I use chicken thighs instead of breasts?
Absolutely! Chicken thighs are actually more flavorful and stay juicier than breasts. They take slightly longer to cook (about 2-3 extra minutes), but they’re more forgiving if you accidentally overcook them. I’d actually recommend thighs as my first choice!
Can I make this without honey?
You can substitute with maple syrup, agave nectar, or brown sugar, though the flavor will be slightly different. Use the same amount. Each sweetener has a different flavor profile, so expect variations in taste.
How do I make this gluten-free?
Simply use tamari (gluten-free soy sauce) or coconut aminos instead of regular soy sauce, and make sure your cornstarch is certified gluten-free. Everything else is naturally gluten-free.
Why is my sauce not thickening?
Make sure your cornstarch slurry is well-mixed before adding (the cornstarch settles). The sauce needs to simmer for 1-2 minutes after adding the slurry to activate the thickening. If it’s still thin, make another small batch of slurry (1 teaspoon cornstarch + 2 teaspoons water) and add it.
Can I use frozen chicken?
Yes, but thaw it completely first. Frozen chicken releases too much water when cooked, preventing proper browning and diluting your sauce. Thaw in the refrigerator overnight for best results.
How do I know when the chicken is fully cooked?
Chicken is safely cooked when it reaches an internal temperature of 165°F. Use an instant-read thermometer for accuracy. Visually, the chicken should be opaque throughout with no pink color, and juices should run clear.
Can I make this in an air fryer?
Yes! Coat chicken pieces, spray with oil, and air fry at 400°F for 12-15 minutes, shaking halfway through. Meanwhile, make the sauce on the stovetop, then toss the cooked chicken in the sauce before serving.
Conclusion: Your New Favorite Weeknight Dinner
There you have it—the ultimate Honey Garlic Chicken that’s about to transform your weeknight dinners and become your most-requested recipe! This dish perfectly balances sweet honey with savory garlic, creating a sauce so delicious you’ll want to eat it with a spoon. The magic happens when tender, perfectly cooked chicken meets that glossy, sticky sauce that coats every piece in pure deliciousness.
What I love most about this recipe is how it manages to taste incredibly special while being remarkably simple to make. In just 30 minutes, using ingredients you probably already have, you can create a meal that rivals anything from your favorite takeout restaurant—but it’s healthier, more affordable, and made with love in your own kitchen. Whether you’re serving it over rice for a comforting dinner, packing it for meal prep lunches, or impressing guests with your cooking skills, it consistently delivers satisfaction and flavor.
I truly hope this Honey Garlic Chicken becomes a cherished staple in your recipe rotation, just as it has in mine. If you make this recipe, I’d absolutely love to hear about your experience! Leave a comment below sharing how it turned out, any creative variations you tried, or what you served alongside it. Did you add vegetables? Make it spicy? Serve it over noodles or rice? Your feedback and tips help our cooking community grow, and I genuinely enjoy reading your stories!

