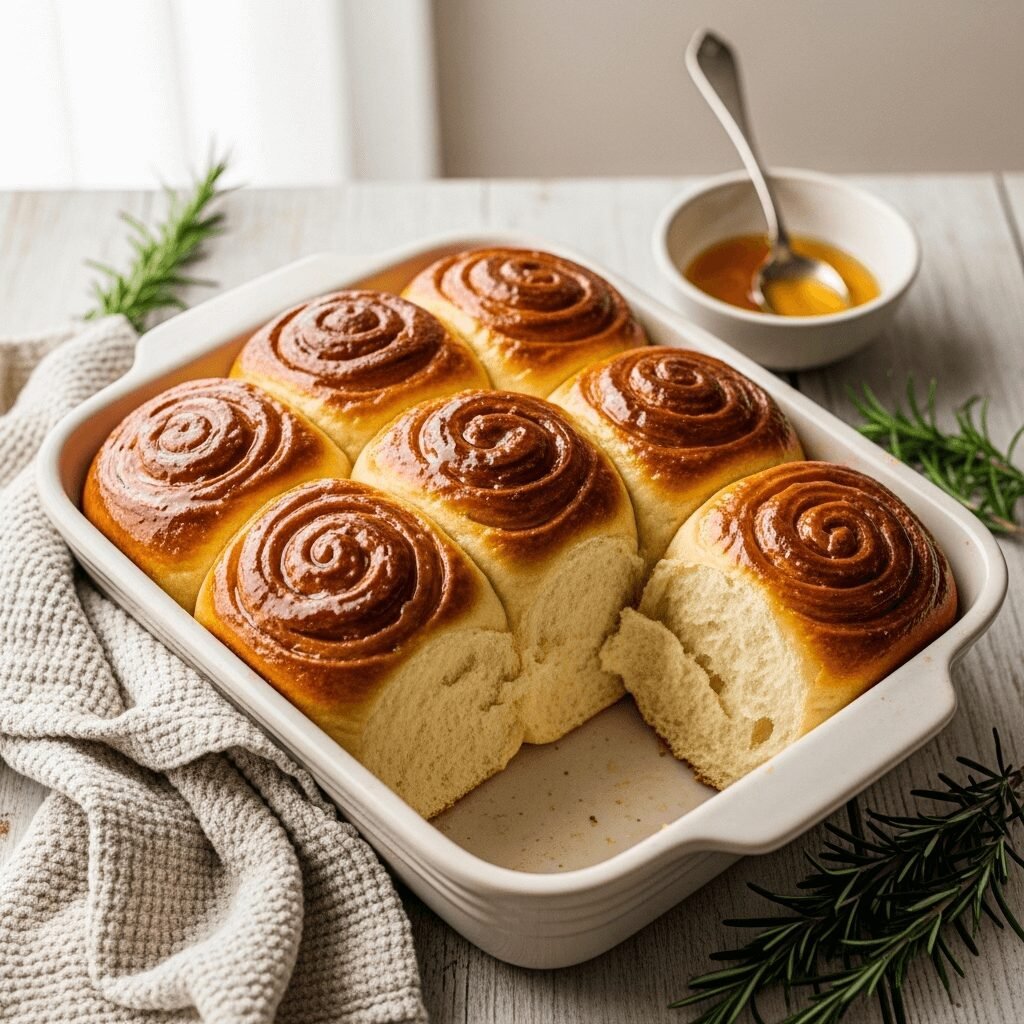
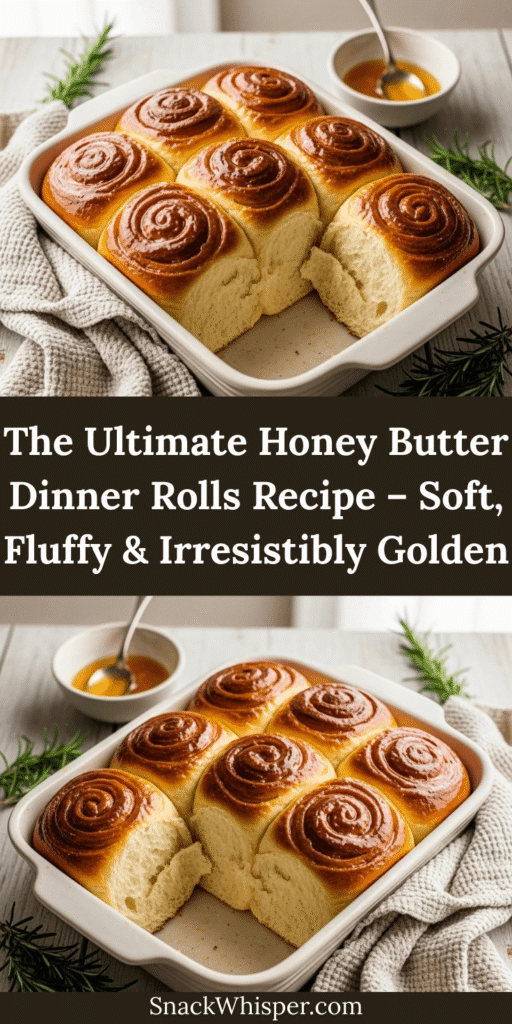
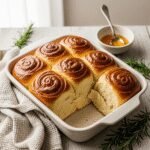
There’s something absolutely magical about pulling a pan of warm, golden dinner rolls from the oven, their tops glistening with melted honey butter. These Honey Butter Dinner Rolls are the definition of comfort food – soft, pillowy, slightly sweet, and absolutely irresistible. Whether you’re planning a holiday feast, Sunday dinner, or just craving homemade bread that fills your kitchen with the most incredible aroma, these rolls deliver every single time.
What makes these rolls truly special is their tender, fluffy texture combined with that gorgeous honey butter glaze that caramelizes slightly on top. They’re perfect for sopping up gravy, serving alongside soup, or honestly, just eating straight from the pan (no judgment here!). This recipe yields rolls that stay soft for days and taste like they came straight from a bakery, but they’re surprisingly simple to make at home. Even if you’re new to bread baking, you’ll find this recipe approachable and forgiving – the kind that builds your confidence and makes you feel like a baking superstar.
History / Background
Dinner rolls have been a staple of American dining tables for generations, with roots tracing back to European bread-making traditions brought over by immigrants. The concept of soft, enriched rolls (made with butter, milk, and eggs) became particularly popular in the American South during the 19th century, where hospitality and generous home cooking were deeply valued cultural traditions.
Honey butter itself is a Southern classic that’s been enjoyed for over a century, originally served at restaurants and special occasions as a way to elevate simple bread into something memorable. The combination of honey and butter creates a sweet, creamy spread that’s become synonymous with Texas Roadhouse and other beloved American eateries, but home cooks have been making their own versions for generations.
These Honey Butter Dinner Rolls combine the best of both worlds – the traditional yeasted dinner roll recipe that grandmothers perfected over decades, with that restaurant-style honey butter finish that makes them extra special. During the mid-20th century, as stand mixers became common household appliances, homemade rolls became more accessible to everyday cooks, and recipes like this one became treasured family traditions passed down through generations. Today, they’re experiencing a resurgence as more people discover the joy of baking bread from scratch, especially as a way to bring warmth and comfort to family gatherings.
Why You’ll Love This Recipe
These Honey Butter Dinner Rolls are about to become your new favorite bread recipe, and here’s why: they strike that perfect balance between impressive and achievable. The dough comes together easily, and while there’s some waiting time for rising, the actual hands-on work is minimal. The result? Bakery-quality rolls that will have everyone asking for your secret.
Here’s what makes this recipe absolutely wonderful:
- Incredibly soft and fluffy texture – Thanks to the perfect ratio of butter, milk, and eggs, these rolls stay tender for days
- Restaurant-quality honey butter glaze – That signature sweet, buttery finish makes these rolls truly unforgettable
- Perfect for any occasion – From Thanksgiving dinner to Tuesday night tacos, these rolls elevate every meal
- Budget-friendly – Made with simple pantry staples that don’t break the bank
- Make-ahead friendly – You can prepare the dough in advance and bake fresh when needed
- Freezer-friendly – Double the batch and freeze for quick homemade rolls anytime
- Kid-approved – The slight sweetness makes these a hit with even picky eaters
- Impressive presentation – Golden, glossy tops that look like they came from a professional bakery
- Versatile recipe – Easy to customize with herbs, garlic, or other flavors
- Rewarding baking experience – There’s something deeply satisfying about making bread from scratch
Ingredient Notes
Let’s talk about what goes into these heavenly rolls and why each ingredient matters:
All-Purpose Flour – The foundation of your rolls. All-purpose flour provides the perfect protein content for soft, tender rolls without being too dense. You can substitute bread flour for a slightly chewier texture, but all-purpose is ideal for that melt-in-your-mouth quality. Make sure to measure correctly – spoon flour into your measuring cup and level it off rather than scooping directly from the bag.
Active Dry Yeast – This is what makes your rolls rise and develop that beautiful light texture. Make sure your yeast is fresh (check the expiration date!) and proof it in warm liquid to ensure it’s active. You can substitute instant yeast in equal amounts, but active dry gives the most reliable results.
Whole Milk – Adds richness, tenderness, and helps create that soft crumb. The fat in whole milk makes a noticeable difference in texture. You can use 2% milk in a pinch, but avoid skim milk as it won’t provide the same tender results.
Granulated Sugar – Feeds the yeast and adds a subtle sweetness that balances the honey butter. It also helps the rolls brown beautifully in the oven.
Unsalted Butter – Used both in the dough and for the honey butter topping. Unsalted gives you better control over the salt content. Make sure it’s softened to room temperature for easy mixing into the dough.
Eggs – Provide structure, richness, and that gorgeous golden color. Room temperature eggs incorporate more easily into the dough.
Salt – Essential for flavor development. Don’t skip it or reduce it – salt also strengthens the gluten structure.
Honey – The star of the honey butter topping! Use pure honey for the best flavor. The honey adds sweetness and creates that beautiful glossy finish that makes these rolls so irresistible.
Equipment Needed
Having the right tools makes this recipe even easier:
- Stand mixer with dough hook (or large mixing bowl for hand kneading)
- 9×13-inch baking pan or two 9-inch round pans
- Measuring cups and spoons
- Kitchen scale (optional but helpful for precision)
- Instant-read thermometer (for checking liquid temperature)
- Clean kitchen towel or plastic wrap (for covering dough while rising)
- Small saucepan (for warming milk mixture)
- Pastry brush (for applying honey butter)
- Small bowl (for mixing honey butter)
- Bench scraper or sharp knife (for dividing dough)
Honey Butter Dinner Rolls Recipe
- Total Time: 2 hours 8 minutes
- Yield: 15 rolls 1x
- Diet: Vegetarian
Description
These Honey Butter Dinner Rolls are soft, fluffy, and brushed with a sweet honey butter glaze that makes them absolutely irresistible. Perfect for holidays, family dinners, or any time you want bakery-quality rolls at home!
Ingredients
For the Rolls:
- 4 cups (500g) all-purpose flour, plus more for dusting
- 2¼ teaspoons (1 packet) active dry yeast
- 1 cup whole milk, warmed to 110°F
- ¼ cup granulated sugar
- ¼ cup unsalted butter, melted and slightly cooled
- 2 large eggs, room temperature
- 1½ teaspoons salt
For the Honey Butter:
- 4 tablespoons unsalted butter, melted
- 3 tablespoons honey
- Pinch of salt
Instructions
- Activate the yeast: In the bowl of your stand mixer, combine warm milk, sugar, and yeast. Stir gently and let sit for 5-7 minutes until foamy and bubbly. This proves your yeast is alive and active.
- Mix the dough: Add melted butter, eggs, and salt to the yeast mixture. Attach the dough hook and mix on low speed. Gradually add flour, one cup at a time, mixing until a soft dough forms. The dough should pull away from the sides of the bowl but still be slightly tacky.
- Knead the dough: Increase mixer speed to medium and knead for 6-8 minutes until the dough is smooth, elastic, and passes the windowpane test (when stretched thin, it doesn’t tear easily). If kneading by hand, turn dough onto a floured surface and knead for 8-10 minutes.
- First rise: Place dough in a greased bowl, turning once to coat all sides. Cover with a clean kitchen towel or plastic wrap. Let rise in a warm, draft-free spot for 45-60 minutes until doubled in size.
- Shape the rolls: Punch down the dough to release air bubbles. Turn onto a lightly floured surface and divide into 15 equal pieces (about 2.5 ounces each). Shape each piece into a smooth ball by pulling the edges underneath and rolling between your palms.
- Arrange and second rise: Place rolls in a greased 9×13-inch baking pan, spacing them about ½-inch apart. Cover and let rise for 30-45 minutes until puffy and touching each other.
- Bake: Preheat oven to 375°F. Bake rolls for 16-18 minutes until golden brown on top and cooked through. They should sound hollow when tapped.
- Apply honey butter: While rolls bake, whisk together melted butter, honey, and salt. As soon as rolls come out of the oven, generously brush the honey butter over the tops. The heat will help it soak in and create that gorgeous glossy finish.
- Serve: Let rolls cool for 5-10 minutes before pulling apart. Serve warm and watch them disappear!
Notes
- Make sure your milk is between 105-110°F – too hot will kill the yeast, too cold won’t activate it properly.
- Don’t add too much flour – the dough should be soft and slightly sticky for the fluffiest rolls.
- For even-sized rolls, use a kitchen scale to divide the dough into equal portions.
- The honey butter should be applied while rolls are still hot for best absorption.
- Rolls are best enjoyed warm but stay soft for 2-3 days when stored properly.
- Prep Time: 20 minutes
- Cook Time: 18 minutes
- Category: Bread, Side Dish
- Method: Baking
- Cuisine: American
Nutrition
- Serving Size: 1 roll
- Calories: 195
- Sugar: 8g
- Sodium: 245mg
- Fat: 7g
- Saturated Fat: 4g
- Unsaturated Fat: 2.5g
- Trans Fat: 0g
- Carbohydrates: 29g
- Fiber: 1g
- Protein: 5g
- Cholesterol: 40mg
Tips & Variations
Make them savory: Skip the honey butter and brush with garlic butter instead (melted butter mixed with minced garlic, parsley, and parmesan).
Add herbs: Knead in 2 tablespoons of fresh chopped rosemary, thyme, or chives for an herbaceous twist.
Cinnamon sugar rolls: After baking, brush with melted butter and dust with cinnamon sugar for a dessert-like treat.
Whole wheat version: Substitute up to half the all-purpose flour with whole wheat flour for a heartier roll (you may need to add a bit more liquid).
Orange honey butter: Add ½ teaspoon orange zest to your honey butter for a citrus twist that’s perfect for brunch.
Stuffed rolls: Place a small cube of cheddar or mozzarella in the center of each roll before the second rise for a cheesy surprise.
Mini rolls: Divide dough into 24 pieces instead of 15 for slider-sized rolls (reduce baking time to 12-14 minutes).
Brown butter honey glaze: Brown your butter before mixing with honey for an extra layer of nutty, caramelized flavor.
Pro Chef Tips
Temperature matters: Keep your rising dough at around 75-80°F for optimal yeast activity. If your kitchen is cold, place the covered bowl in your oven with just the oven light on (don’t turn the oven on!).
The windowpane test: After kneading, stretch a small piece of dough between your fingers. If it stretches thin enough to see light through without tearing, your gluten is properly developed.
Steam for softer crust: Place a small pan of hot water on the bottom oven rack while baking for extra moisture, which creates an even softer crust.
Brush twice: Apply honey butter immediately when rolls come out of the oven, then brush again 5 minutes later for maximum flavor and shine.
Shape with purpose: When forming balls, create tension on the surface by pulling the dough edges underneath. This creates a smooth, tight top that rises beautifully and evenly.
Use weight, not volume: Weighing your flour ensures consistency every time. 4 cups of flour can vary by 20-30 grams depending on how it’s measured, which affects dough hydration.
Don’t skip the salt: Salt slows yeast activity slightly, which develops better flavor. Add it after the flour has been incorporated to prevent direct contact with yeast initially.
Common Mistakes to Avoid
Using liquid that’s too hot or too cold: Water/milk above 120°F kills yeast; below 100°F won’t activate it properly. Always use an instant-read thermometer to check – 110°F is ideal.
Adding too much flour: This is the #1 reason for dense, dry rolls. Add flour gradually and stop when dough is soft and slightly tacky, not stiff. It should stick to your finger slightly when touched but not leave dough behind.
Not kneading long enough: Under-kneaded dough won’t develop proper gluten structure, resulting in rolls that don’t rise well and have a dense texture. Knead for the full time specified.
Skipping the rising time: Rushing the rise produces rolls that are dense and lack flavor. Yeast needs time to work its magic – let the dough fully double before proceeding.
Overbaking: Rolls continue cooking slightly after leaving the oven. Remove them when just golden brown – they should register 190°F internally. Overbaked rolls are dry and tough.
Not spacing properly: Rolls need a little room in the pan to expand during the second rise and initial baking. They’ll grow together, which is perfect, but starting too close prevents proper rising.
Forgetting to cover dough: Exposed dough develops a dry skin that prevents proper rising and creates a tough crust. Always cover with a damp towel or plastic wrap.
Storage & Meal Prep
Room Temperature Storage: Store completely cooled rolls in an airtight container or resealable plastic bag at room temperature for up to 3 days. Place a paper towel in the container to absorb excess moisture and keep rolls from getting soggy.
Refrigerator Storage: Not recommended for these rolls as refrigeration actually speeds up staling in bread. Room temperature or freezer storage are your best options.
Reheating: Wrap rolls in aluminum foil and warm in a 350°F oven for 8-10 minutes. For a softer finish, brush with melted butter before wrapping. You can also microwave individual rolls for 12-15 seconds wrapped in a damp paper towel.
Keeping them soft: If rolls start to firm up after a day, place them in a container with a slice of bread. The rolls will absorb moisture from the bread, staying softer longer (change the bread slice daily).
Best serving practice: These rolls are absolutely incredible served warm. If making ahead for dinner, time your baking so they come out of the oven about 15-20 minutes before serving.
Make-Ahead & Freezer Notes
Make-Ahead Option 1 – Refrigerate overnight: After shaping rolls and placing them in the pan, cover tightly with plastic wrap and refrigerate overnight (up to 16 hours). The next day, remove from refrigerator and let sit at room temperature for 30-45 minutes until puffy, then bake as directed.
Make-Ahead Option 2 – Freeze unbaked: Shape rolls and place in pan. Freeze uncovered until solid (about 2 hours), then wrap tightly with plastic wrap and aluminum foil. Freeze for up to 2 months. To bake: thaw overnight in refrigerator, let come to room temperature and rise for 45-60 minutes, then bake as normal.
Make-Ahead Option 3 – Freeze baked rolls: Bake rolls completely and let cool without applying honey butter. Wrap tightly and freeze for up to 3 months. To serve: thaw at room temperature, warm in 350°F oven for 10 minutes, then brush with fresh honey butter.
Best method: For maximum freshness and that just-baked taste, the overnight refrigerator method (Option 1) is ideal. You get freshly baked rolls with minimal morning effort.
Pro tip: If freezing unbaked rolls, use disposable aluminum pans so you don’t tie up your baking dishes. You can bake directly from the freezer pan.
Serving Suggestions
These Honey Butter Dinner Rolls are incredibly versatile and pair beautifully with so many dishes:
Perfect for holiday dinners: Serve alongside roast turkey, glazed ham, prime rib, or honey-baked chicken. They’re essential for Thanksgiving, Christmas, and Easter feasts.
Soup and stew companion: These rolls are ideal for soaking up every drop of beef stew, chicken noodle soup, creamy tomato soup, or chili. There’s nothing better than tearing off a piece of warm, buttery roll to dip.
Barbecue and comfort food: Pair with pulled pork, brisket, fried chicken, meatloaf, or pot roast. The slight sweetness complements smoky, savory flavors beautifully.
Breakfast and brunch: Serve with scrambled eggs, bacon, sausage gravy, or use them to make breakfast sandwiches. They’re also wonderful alongside quiche or frittata.
Make sandwiches: Slice these rolls horizontally for amazing sliders – perfect for pulled pork, turkey club, or roast beef sandwiches.
Complete the meal with: Caesar salad, roasted vegetables, mashed potatoes, green bean casserole, mac and cheese, or coleslaw.
Beverage pairings: Sweet tea, lemonade, hot apple cider, or a nice glass of white wine for dinner parties.
FAQs Section
Q: Can I use instant yeast instead of active dry yeast?
A: Yes! Use the same amount of instant yeast, but you can skip the proofing step and add it directly to the dry ingredients. The rising times will be slightly shorter, so watch your dough rather than relying solely on the clock.
Q: Why didn’t my rolls rise?
A: The most common reasons are: dead or expired yeast, liquid that was too hot (killed the yeast) or too cold (didn’t activate it), insufficient rising time, or a too-cold environment. Always proof your yeast first to ensure it’s alive, and create a warm rising environment around 75-80°F.
Q: Can I make these rolls without a stand mixer?
A: Absolutely! Mix ingredients in a large bowl with a wooden spoon until combined, then turn out onto a floured surface and knead by hand for 8-10 minutes. It requires more arm work, but the results are just as delicious.
Q: My dough is too sticky – what should I do?
A: Add flour one tablespoon at a time, kneading briefly after each addition. However, remember that slightly sticky dough makes softer rolls, so don’t add too much. The dough should be tacky to the touch but not leaving dough residue on your hands.
Q: Can I make these dairy-free?
A: Yes! Substitute the milk with unsweetened almond milk or oat milk (warmed), and use dairy-free butter substitutes. The texture will be slightly different but still delicious. Make sure your dairy-free butter is suitable for baking.
Q: How do I know when my rolls are fully baked?
A: Rolls should be golden brown on top and sound hollow when tapped. For precision, use an instant-read thermometer – the internal temperature should reach 190°F. If the tops are browning too quickly but aren’t done inside, tent with foil and continue baking.
Q: Can I double this recipe?
A: Yes! This recipe doubles beautifully. You may need to divide the dough between two bowls for rising if your bowl isn’t large enough. You can also split between two 9×13-inch pans or fill a large roasting pan.
Q: Why are my rolls dense instead of fluffy?
A: Common causes include: not kneading long enough (gluten wasn’t developed), adding too much flour, not allowing sufficient rising time, or using old yeast. Make sure to knead until the dough passes the windowpane test and rises until truly doubled in size.
Conclusion
There you have it – the ultimate recipe for bakery-quality Honey Butter Dinner Rolls that will make you look like a kitchen rockstar! These soft, fluffy, golden rolls with their gorgeous honey butter glaze are proof that some of life’s greatest pleasures are also the simplest. Whether you’re preparing a special holiday meal, bringing comfort to a Sunday dinner, or just treating your family to something homemade and wonderful, these rolls deliver every single time.
The beauty of this recipe is that it’s both impressive and achievable. Yes, there’s some rising time involved, but the actual hands-on work is minimal and deeply rewarding. There’s something almost meditative about kneading dough, watching it rise, and smelling that incredible aroma as your rolls bake to golden perfection.
I’d love to hear how these rolls turn out for you! Did you try any of the variations? What did you serve them with? Drop a comment below and let me know. And if you loved this recipe as much as I do, please consider saving it to your Pinterest boards – your followers will thank you! Don’t forget to rate the recipe and share photos of your beautiful homemade rolls. Happy baking, friends! 🍯✨