
Imagine biting into perfectly golden chicken with a crunchy, flavorful crust loaded with garlic and Parmesan cheese, revealing tender, juicy meat underneath. That’s exactly what you get with this Garlic Parmesan Crusted Chicken recipe! This dish transforms ordinary chicken breasts into something extraordinary with a crispy coating that’s bursting with savory, cheesy, garlicky goodness.
This recipe has become a dinner table favorite for good reason. It delivers restaurant-quality results with minimal effort and uses ingredients you likely already have in your pantry. The combination of Parmesan cheese, breadcrumbs, and aromatic garlic creates an irresistible crust that stays crispy even after baking. Whether you’re cooking for picky eaters, hosting a dinner party, or just want to elevate your weeknight chicken game, this recipe is your answer. It’s fancy enough for company but easy enough for a Tuesday night when you’re juggling homework help and laundry. Serve it with roasted vegetables, a fresh salad, or creamy mashed potatoes for a complete meal that everyone will request again and again.
History / Background
While the exact origins of Garlic Parmesan Crusted Chicken are difficult to pinpoint, this dish represents a beautiful marriage of Italian-inspired flavors with American home cooking convenience. Parmesan cheese, or Parmigiano-Reggiano as it’s known in Italy, has been produced in the Parma region of Italy for over 900 years. This aged, nutty cheese has become a cornerstone of Italian cuisine and has been enthusiastically adopted by American cooks who appreciate its ability to add depth and umami to virtually any dish.
The technique of breading and baking chicken became increasingly popular in American kitchens during the mid-20th century as home cooks sought ways to create flavorful, satisfying meals that were healthier alternatives to fried chicken. Baking allowed families to enjoy that coveted crispy exterior without the mess and excess oil of deep frying. The addition of Parmesan cheese to breadcrumb coatings was a natural evolution—Italian-American communities had long used Parmesan in their cooking, and creative home cooks discovered that mixing it with breadcrumbs created an incredibly flavorful and crispy crust.
Garlic, one of the oldest cultivated crops in human history, has been valued for both its culinary and medicinal properties for thousands of years. In Italian-American cooking, garlic is practically essential, forming the aromatic foundation of countless dishes. When combined with Parmesan in this crusted chicken recipe, garlic provides that irresistible savory punch that makes the dish so memorable.
This recipe represents modern American home cooking at its best—taking inspiration from traditional Italian ingredients and techniques, then adapting them for busy families who want delicious, wholesome meals without spending hours in the kitchen. It’s comfort food that feels special, which is exactly what makes it perfect for both everyday dinners and occasions when you want to impress.
Why You’ll Love This Recipe
This Garlic Parmesan Crusted Chicken is about to become your new secret weapon for impressing family and friends. The crunchy, golden crust delivers incredible texture and flavor, while the inside stays remarkably moist and tender—it’s the best of both worlds!
Here’s why this recipe is a total winner:
- Unbelievably crispy crust – The combination of Parmesan and breadcrumbs creates a golden, crunchy coating that doesn’t get soggy
- Packed with flavor – Garlic, Parmesan, and Italian herbs infuse every bite with savory deliciousness
- Healthier than fried – Baked instead of fried, so you get that satisfying crunch with less oil and calories
- Kid-approved – Even picky eaters love the cheesy, crispy coating and mild garlic flavor
- Budget-friendly – Uses affordable chicken breasts and pantry staples to create an impressive meal
- Meal prep champion – Makes excellent leftovers and can be prepared in advance for busy weeks
- Versatile protein – Works as a main course, sliced over salads, in sandwiches, or even as appetizers
- Foolproof method – Simple steps guarantee success even for beginner cooks
- Ready in 35 minutes – From prep to plate in just over half an hour
- Naturally low-carb friendly – Use almond flour instead of breadcrumbs for a keto version
- Company-worthy – Looks and tastes like you spent hours in the kitchen
Ingredient Notes
Let’s break down what makes this recipe so delicious and talk about each ingredient:
Chicken Breasts: Boneless, skinless chicken breasts are the classic choice here. Look for breasts that are relatively uniform in thickness (about 1 to 1.5 inches) for even cooking. If your breasts are very thick, you can pound them to an even thickness or butterfly them. Chicken tenderloins also work beautifully with this recipe and cook even faster. For a more flavorful option, you can use bone-in, skin-on chicken breasts, though you’ll need to adjust the cooking time.
Parmesan Cheese: Freshly grated Parmesan is absolutely essential here—please don’t use the pre-grated stuff in the green can! Fresh Parmesan has superior flavor, melts better, and creates a much crispier crust. A good-quality Parmigiano-Reggiano or Grana Padano will give you the best results. You can substitute Pecorino Romano for a sharper, saltier flavor, or use half Parmesan and half Asiago for a more complex cheese blend.
Breadcrumbs: Panko breadcrumbs are my top choice because they’re larger and flakier than regular breadcrumbs, creating an extra-crispy texture. However, regular Italian-seasoned breadcrumbs work well too. For a gluten-free version, use gluten-free breadcrumbs or crushed gluten-free crackers. Almond flour or crushed pork rinds make excellent low-carb alternatives.
Garlic: Fresh minced garlic is where the magic happens. You’ll need about 4-5 cloves of fresh garlic, minced finely. Garlic powder works in a pinch (use about 2 teaspoons), but fresh garlic provides that vibrant, aromatic quality that makes this dish special. You can also use roasted garlic for a sweeter, mellower flavor.
Mayonnaise: This is the secret weapon that helps the breading stick while also keeping the chicken incredibly moist. The mayo creates a barrier that seals in moisture during baking. You can substitute with Greek yogurt or sour cream for a tangier flavor, or use Dijon mustard mixed with a bit of olive oil.
Italian Seasoning: A blend of dried herbs like oregano, basil, thyme, and rosemary adds authentic Italian flavor. If you don’t have Italian seasoning, make your own by combining equal parts of these dried herbs. Fresh herbs can be used too—just triple the amount.
Butter: Melted butter adds richness and helps the crust brown beautifully. It also contributes to that golden color we’re after. You can use olive oil as a substitute, though the flavor will be slightly different.
Lemon: Fresh lemon juice brightens all the flavors and cuts through the richness of the cheese. Lemon zest can also be added to the breading mixture for extra citrus punch.
Equipment Needed
You won’t need any special equipment for this recipe—just these kitchen basics:
- 9×13-inch baking dish or rimmed baking sheet
- Parchment paper or aluminum foil (for easy cleanup)
- Three shallow bowls or plates for the breading station
- Whisk for mixing
- Meat thermometer (highly recommended for perfect doneness)
- Measuring cups and spoons
- Microplane or fine grater for the Parmesan cheese
- Chef’s knife for mincing garlic
- Cutting board
- Tongs or fork for handling chicken
- Pastry brush (optional, for brushing with melted butter)
- Meat mallet (optional, for pounding chicken to even thickness)

Garlic Parmesan Crusted Chicken Recipe
- Total Time: 40 minutes
- Yield: 4 servings 1x
- Diet: Low Fat
Description
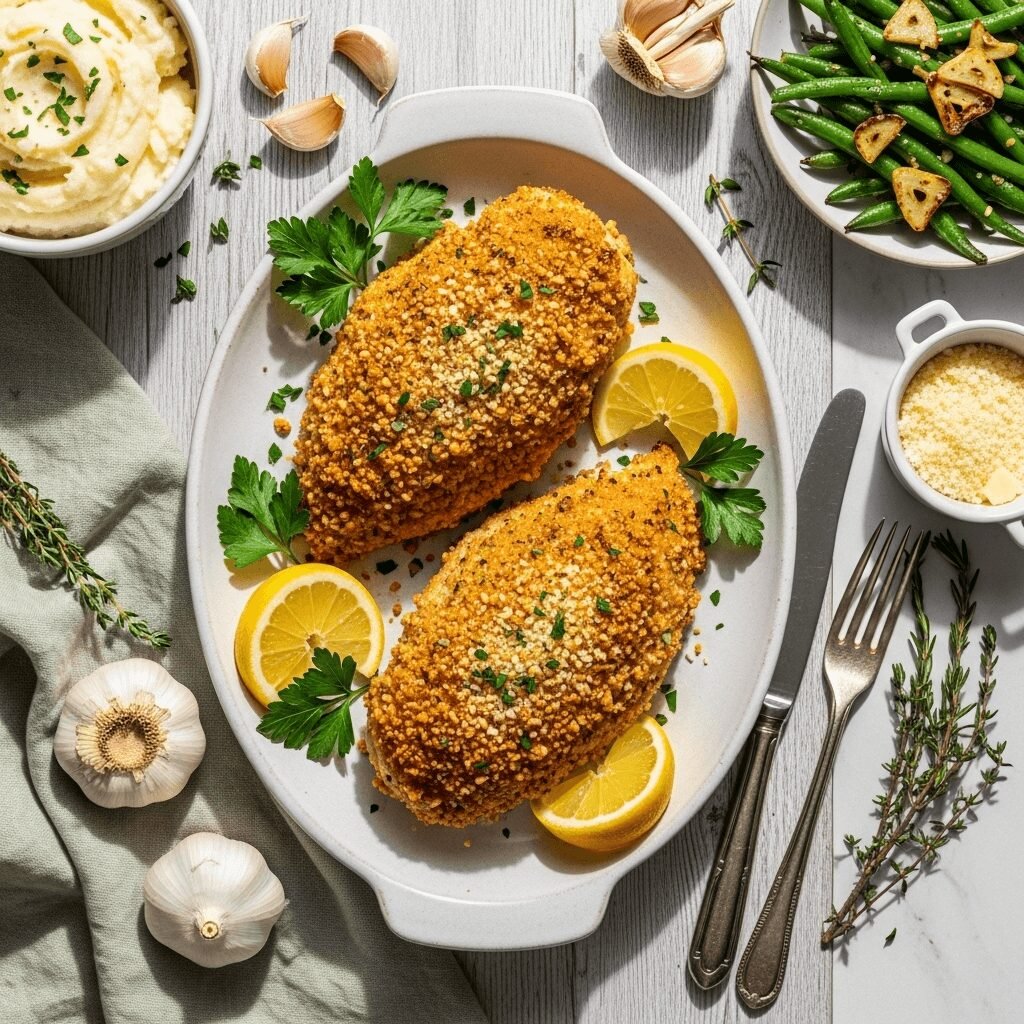
Juicy chicken breasts coated in a crispy, golden crust of Parmesan cheese, breadcrumbs, and garlic. This baked chicken is healthier than fried but delivers all the crunch and flavor you crave. Perfect for weeknight dinners or special occasions.
Ingredients
For the Chicken:
- 4 boneless, skinless chicken breasts (about 6-8 ounces each)
- Salt and black pepper, to taste
- 1 teaspoon paprika
For the Coating:
- ½ cup mayonnaise
- 1 tablespoon fresh lemon juice
- 4 cloves garlic, minced
- 1 cup freshly grated Parmesan cheese
- 1 cup panko breadcrumbs
- 2 tablespoons melted butter
- 1 tablespoon Italian seasoning
- ½ teaspoon garlic powder
- ½ teaspoon onion powder
- ¼ teaspoon cayenne pepper (optional)
- 2 tablespoons fresh parsley, chopped (plus more for garnish)
- Lemon wedges, for serving
Instructions
- Preheat and prep: Preheat your oven to 400°F (200°C). Line a baking sheet with parchment paper or lightly grease a 9×13-inch baking dish with cooking spray or olive oil.
- Prepare the chicken: Pat the chicken breasts completely dry with paper towels—this is crucial for the coating to stick properly. If your chicken breasts are very thick (more than 1.5 inches), place them between two pieces of plastic wrap and gently pound them to an even thickness with a meat mallet. Season both sides of each chicken breast with salt, pepper, and paprika.
- Make the mayo mixture: In a shallow bowl, whisk together the mayonnaise, lemon juice, and half of the minced garlic (about 2 cloves) until smooth and well combined.
- Create the breading mixture: In another shallow bowl, combine the Parmesan cheese, panko breadcrumbs, melted butter, Italian seasoning, garlic powder, onion powder, remaining minced garlic, cayenne pepper (if using), and fresh parsley. Mix thoroughly until everything is evenly distributed and the mixture is slightly moistened by the butter.
- Bread the chicken: Working with one chicken breast at a time, use a brush or your hands to coat both sides generously with the mayo mixture. Then press the chicken firmly into the breadcrumb mixture, making sure to coat all sides completely. Press the coating onto the chicken so it adheres well. Place the breaded chicken on your prepared baking sheet, leaving space between each piece.
- Bake: Place the baking sheet in the preheated oven and bake for 22-28 minutes, depending on the thickness of your chicken. The chicken is done when it reaches an internal temperature of 165°F (74°C) when measured with a meat thermometer in the thickest part. The coating should be golden brown and crispy.
- Rest and serve: Remove from the oven and let the chicken rest for 5 minutes before serving. This allows the juices to redistribute throughout the meat. Garnish with additional fresh parsley and serve with lemon wedges for squeezing over the top.
Notes
- Even thickness matters: If your chicken breasts vary significantly in thickness, consider butterflying the thicker ones or pounding them to ensure even cooking.
- Don’t skip the mayo: The mayonnaise keeps the chicken incredibly moist and helps the breading stick. Don’t worry—you won’t taste it in the final dish!
- Extra crispy hack: For an even crispier crust, broil the chicken for the last 1-2 minutes of cooking time, watching carefully to prevent burning.
- Check the temperature: Invest in a good meat thermometer. Chicken is perfectly cooked at 165°F and will be juicy and safe to eat.
- Make extra coating: If you love extra-thick crusts, consider making 1.5 times the breading mixture.
- Prep Time: 15 minutes
- Cook Time: 25 minutes
- Category: Dinner
- Method: Baking
- Cuisine: Italian-American
Nutrition
- Serving Size: 1 chicken breast with coating
- Calories: 485
- Sugar: 2g
- Sodium: 720mg
- Fat: 26g
- Saturated Fat: 9g
- Unsaturated Fat: 15g
- Trans Fat: 0g
- Carbohydrates: 18g
- Fiber: 1g
- Protein: 44g
- Cholesterol: 145mg
Nutrition information is approximate and calculated based on standard ingredient measurements. Values will vary based on specific brands and ingredient substitutions used.
Tips & Variations
This versatile recipe adapts beautifully to different tastes and dietary needs. Here are some delicious ways to customize it:
Spicy Garlic Parmesan: Add 1 teaspoon of red pepper flakes to the breading mixture, or mix some hot sauce into the mayo coating. You can also use spicy Italian sausage seasoning instead of regular Italian herbs.
Herb-Crusted Version: Add 2 tablespoons of fresh chopped herbs like basil, thyme, or rosemary to the breadcrumb mixture for a more herbaceous flavor profile.
Lemon Parmesan Chicken: Add 1 tablespoon of lemon zest to the breading mixture for bright, citrusy notes that pair beautifully with the garlic and cheese.
Keto/Low-Carb: Replace the breadcrumbs with almond flour or crushed pork rinds. The texture will be slightly different but still delicious and crispy.
Gluten-Free: Use your favorite gluten-free breadcrumbs or crushed gluten-free crackers in place of the panko.
Ranch Parmesan: Mix 2 tablespoons of dry ranch seasoning into the breading for a ranch-flavored twist that kids especially love.
Double Cheese: Add ½ cup of shredded mozzarella to the Parmesan mixture for extra cheesy goodness that melts beautifully.
Protein Swap: This coating works wonderfully on pork chops, fish fillets, or even thick slices of eggplant for a vegetarian option.
Pro Chef Tips
Want to take your Garlic Parmesan Crusted Chicken from delicious to absolutely exceptional? Here are some professional techniques:
Dry brine for juiciness: Salt the chicken breasts and refrigerate them uncovered for 2-4 hours (or overnight) before cooking. This dry brining technique seasons the meat deeply and helps it retain moisture during cooking.
Room temperature chicken: Let your chicken sit at room temperature for 20-30 minutes before cooking. Cold chicken from the fridge cooks unevenly—the outside can overcook before the inside reaches a safe temperature.
Create a proper breading station: Set up your three bowls in order—mayo mixture, breading, and an empty plate for the coated chicken. Use one hand for wet ingredients and the other for dry to avoid “club hands” (when breading coats your fingers).
Press firmly: Really press that breading into the chicken. The more it adheres before baking, the less likely it is to fall off. Don’t be shy—give it a good press on all sides.
Use a wire rack: For even crispier results, place a wire rack on your baking sheet and put the breaded chicken on the rack. This allows air to circulate all around the chicken, crisping the bottom as well as the top.
Finish with extra Parmesan: About 5 minutes before the chicken is done, sprinkle a bit more Parmesan on top. It will melt and create an extra layer of cheesy goodness.
Let it rest: Always let chicken rest for 5 minutes after cooking. Cutting into it immediately causes all those delicious juices to run out onto the plate instead of staying in the meat.
Save those crispy bits: Any breadcrumb mixture that falls off during baking is pure gold—toast it in a dry skillet and use it as a topping for salads, pasta, or vegetables.
Common Mistakes to Avoid
Even straightforward recipes can go wrong. Here’s what to watch out for:
Using wet chicken: Moisture is the enemy of a crispy crust. If you don’t thoroughly dry your chicken with paper towels, the coating won’t stick properly and won’t crisp up during baking. Take an extra minute to really pat those chicken breasts dry.
Pre-grated Parmesan from a can: Those shelf-stable containers of powdery Parmesan don’t melt well and lack the flavor intensity of freshly grated cheese. Always grate your own from a block of real Parmesan for the best results.
Overcooking the chicken: Chicken breasts can go from perfectly juicy to dry and tough very quickly. Always use a meat thermometer and remove the chicken from the oven when it reaches 165°F. Remember, it will continue cooking slightly as it rests.
Overcrowding the pan: Leave space between each chicken breast on the baking sheet. Crowding causes steam to build up, which makes the coating soggy instead of crispy.
Not pressing the coating enough: The breading needs to really adhere to the chicken. If you just lightly dust it on, it will fall off during baking. Press it firmly onto the chicken with your hands.
Skipping the mayo layer: Some people try to skip the mayo thinking they can just use egg or nothing at all. The mayo serves a crucial purpose—it keeps the chicken moist and acts as a superior “glue” for the breading. Don’t skip it!
Storage & Meal Prep
Refrigerator Storage: Store leftover Garlic Parmesan Crusted Chicken in an airtight container in the refrigerator for up to 4 days. To maintain the crispiness of the crust, store the chicken pieces in a single layer if possible, or place parchment paper between layers.
Reheating for Crispiness: The key to reheating is restoring that crispy crust. The best method is to reheat in the oven at 350°F for 10-15 minutes, or until heated through. Place the chicken on a wire rack set over a baking sheet for even crisping. You can also use an air fryer at 350°F for 5-7 minutes for incredibly crispy results. Avoid the microwave if you want to maintain any crispiness—it will make the coating soggy.
Meal Prep Magic: This chicken is perfect for weekly meal prep! Cook a batch on Sunday and use it throughout the week. Slice it over salads, make chicken sandwiches, dice it for wraps, or serve it alongside different sides each night. The flavors actually improve after a day in the fridge as the seasonings have time to meld.
Cold Chicken is Delicious Too: Don’t overlook the fact that this chicken is also excellent served cold, making it perfect for packed lunches or picnics.
Make-Ahead & Freezer Notes
Make-Ahead Options: You can prepare the chicken through step 5 (fully breaded but not baked) up to 24 hours in advance. Place the breaded chicken pieces on a baking sheet, cover tightly with plastic wrap, and refrigerate. When you’re ready to cook, simply remove from the fridge, let sit for 15 minutes, and bake as directed. You may need to add 2-3 minutes to the cooking time since the chicken will be cold.
Freezing Unbaked Chicken: The breaded chicken freezes beautifully! After breading, place the chicken pieces on a baking sheet lined with parchment paper and freeze until solid (about 2 hours). Then transfer to a freezer bag or container, separating layers with parchment paper. They’ll keep for up to 3 months. To cook from frozen, add 10-15 minutes to the baking time and check the internal temperature to ensure it reaches 165°F.
Freezing Cooked Chicken: You can also freeze already-cooked chicken for up to 2-3 months. Let it cool completely, then freeze in an airtight container or freezer bag. The texture will be slightly less crispy when reheated, but it will still be delicious.
Best Thawing and Reheating Method: Thaw frozen cooked chicken overnight in the refrigerator. Reheat in a 350°F oven for 15-20 minutes until heated through and the crust crisps back up. For unbaked frozen chicken, you can bake directly from frozen—just add extra time and monitor the internal temperature.
Serving Suggestions
Garlic Parmesan Crusted Chicken is wonderfully versatile and pairs beautifully with countless sides. Here are my favorite ways to serve it:
Classic Sides: Serve alongside creamy mashed potatoes or garlic mashed cauliflower, roasted vegetables (especially Brussels sprouts, green beans, or asparagus), and a simple green salad with Italian dressing.
Italian-Inspired Meal: Pair with pasta tossed in olive oil and garlic, a Caprese salad with fresh mozzarella and tomatoes, and crusty garlic bread for a full Italian feast.
Healthy Bowl: Slice the chicken and serve over quinoa or brown rice with roasted broccoli, cherry tomatoes, and a drizzle of balsamic glaze for a nutritious bowl meal.
Sandwich/Wrap Style: Slice the chicken and serve in a ciabatta roll with marinara sauce and melted mozzarella for a Parmesan chicken sandwich. Or wrap sliced chicken in a tortilla with lettuce, tomatoes, and Caesar dressing.
Low-Carb Plate: Serve over zucchini noodles or cauliflower rice with sautéed spinach and roasted cherry tomatoes for a delicious keto-friendly dinner.
Salad Topper: Slice the chicken and place it over a bed of mixed greens with cherry tomatoes, red onion, olives, and a zesty vinaigrette for a hearty, protein-packed salad.
Complete Dinner Ideas: Pair with Caesar salad and roasted baby potatoes, or serve with creamy polenta and sautéed mushrooms. For a summer meal, try it with grilled vegetables and corn on the cob.
Wine Pairing: A crisp white wine like Pinot Grigio or Sauvignon Blanc complements the garlic and Parmesan flavors beautifully.
FAQs Section
Can I use chicken thighs instead of breasts?
Absolutely! Boneless, skinless chicken thighs work wonderfully with this recipe. They’re actually more forgiving than breasts because they have more fat, which keeps them moist. The cooking time will be similar—just make sure they reach an internal temperature of 165°F. Bone-in, skin-on thighs also work, but you’ll need to increase the cooking time to about 35-40 minutes.
How do I keep the breading from falling off?
The key is to thoroughly dry the chicken first, then make sure the mayo layer is generous and the breading is pressed firmly onto the chicken. Don’t move or flip the chicken once it’s in the oven—let it bake undisturbed. Also, letting the breaded chicken rest in the fridge for 15-30 minutes before baking helps the coating adhere better.
Can I make this in an air fryer?
Yes! Air fryers make incredibly crispy Garlic Parmesan Chicken. Preheat your air fryer to 380°F, lightly spray the basket with oil, and cook the breaded chicken for 12-15 minutes, flipping halfway through. Check that the internal temperature reaches 165°F. You may need to work in batches depending on your air fryer size.
What can I substitute for mayonnaise?
Greek yogurt, sour cream, or a mixture of Dijon mustard and olive oil all work well as mayo substitutes. Each will provide a slightly different flavor, but they’ll all help the breading stick and keep the chicken moist. Some people also use beaten eggs, though the chicken won’t be quite as moist.
How do I know when the chicken is done?
The only reliable way to know is by using a meat thermometer. Insert it into the thickest part of the chicken—it should read 165°F. Visual cues include: the chicken should be white throughout (no pink), the juices should run clear, and the crust should be golden brown.
Can I use store-bought Italian dressing instead of mayo?
While Italian dressing can work as a marinade before breading, it doesn’t adhere the breading as well as mayo does. If you want to use it, I’d suggest marinating the chicken in Italian dressing for 30 minutes, then patting it dry and using a thin layer of mayo or egg before applying the breadcrumb mixture.
Why is my crust not crispy?
Several things can cause a soggy crust: wet chicken before breading, not enough butter in the breading mixture, overcrowding the baking pan, or baking at too low a temperature. Make sure you’re following all the steps, especially drying the chicken thoroughly and baking at the full 400°F.
Conclusion
And there you have it—everything you need to create the most delicious, crispy, golden Garlic Parmesan Crusted Chicken right in your own kitchen! This recipe truly is a game-changer for busy families who want restaurant-quality meals without the hassle or expense. The combination of that crunchy, cheesy crust with the tender, juicy chicken inside is simply irresistible, and the best part is how simple it is to make.
Whether you’re a seasoned home cook or just starting your culinary journey, this recipe is designed to set you up for success. The straightforward method, common ingredients, and foolproof technique mean you’ll get perfect results every single time. Plus, it’s versatile enough to adapt to your family’s preferences and dietary needs, making it a recipe you’ll come back to again and again.
I love how this dish manages to be both comforting and impressive at the same time. It’s perfect for those nights when you need dinner on the table fast, but it’s also special enough to serve when you have guests. The garlic and Parmesan combination is classic for a reason—it’s a flavor profile that almost everyone loves, from picky kids to discerning adults.
Ready to make the crispiest, most flavorful chicken of your life? Head to your kitchen and give this recipe a try tonight! I promise you won’t be disappointed. When you do make it, I’d absolutely love to hear how it turned out for you. Leave a comment below sharing your experience, any variations you tried, or what you served it with. And please don’t forget to save this recipe to your Pinterest boards—you’ll definitely want to make it again and again!
Here’s to delicious dinners that make everyone happy. Enjoy every crispy, garlicky, cheesy bite!

