
If you think broccoli is boring, this Garlic Herb Roasted Broccoli recipe is about to completely change your mind! Roasting transforms humble broccoli florets into crispy, caramelized, flavor-packed bites that even veggie skeptics can’t resist. Tossed with fragrant garlic, aromatic herbs, and a squeeze of fresh lemon, this side dish is so delicious it might just steal the show from your main course.
This recipe is perfect for busy weeknights when you need a healthy side dish in under 30 minutes, holiday dinners where you want something elegant yet simple, meal prep sessions for the week ahead, or any time you want to add more vegetables to your family’s diet without any complaints. The high heat of roasting brings out broccoli’s natural sweetness while creating those irresistible crispy edges that make every bite addictively crunchy.
What makes this recipe truly special is how it elevates a simple vegetable into something restaurant-worthy with just a handful of ingredients. The garlic becomes mellow and slightly sweet as it roasts, the herbs infuse every floret with aromatic flavor, and that final squeeze of lemon adds brightness that ties everything together. Plus, it’s naturally vegan, gluten-free, paleo, keto-friendly, and Whole30 compliant—making it perfect for just about any dietary preference. Whether you’re serving it alongside roasted chicken, grilled steak, baked salmon, or as part of a vegetarian feast, this garlic herb roasted broccoli is guaranteed to become your go-to veggie side dish!
History / Background
While roasted vegetables have been a staple of cooking since humans first discovered fire, the modern American obsession with roasted broccoli is a relatively recent phenomenon that reflects our evolving relationship with healthy eating and vegetable preparation.
Broccoli itself has ancient roots, descended from wild cabbage and cultivated by the Romans over 2,000 years ago. The name “broccoli” comes from the Italian word “broccolo,” meaning “the flowering crest of a cabbage,” derived from “brocco” meaning “small nail” or “sprout.” Italian immigrants brought broccoli to the United States in the early 1900s, but it didn’t gain widespread popularity until the 1920s when commercial cultivation began in California.
For decades, broccoli in America was primarily boiled or steamed—methods that often resulted in mushy, sulfurous vegetables that many children (and adults!) learned to dread. The turning point came in the late 1990s and early 2000s when high-heat roasting techniques became popular in home kitchens, largely influenced by restaurant cooking methods and celebrity chefs who championed the technique.
Roasting broccoli at high temperatures triggers the Maillard reaction—a chemical process that creates complex flavors and appealing browning. This technique caramelizes the natural sugars in the vegetable while creating crispy, almost chip-like edges that contrast beautifully with the tender interior. The addition of garlic and herbs draws from Mediterranean cooking traditions, particularly Italian cuisine where garlic, olive oil, and fresh herbs form the foundation of countless dishes.
The garlic herb roasted broccoli we know today represents a perfect marriage of Italian flavoring traditions, French roasting techniques, and the American desire for healthy, flavorful food that’s quick and easy to prepare. It gained massive popularity through food blogs and Pinterest in the 2010s, becoming a cornerstone of clean eating, paleo, and keto diets. Today, it’s a beloved side dish that proves healthy eating doesn’t mean sacrificing flavor—in fact, when done right, it means enhancing it!
Why You’ll Love This Recipe
This Garlic Herb Roasted Broccoli isn’t just another vegetable side dish—it’s a game-changer that will make you actually crave your greens. It’s the kind of recipe that converts broccoli skeptics and delights vegetable lovers alike, all while being incredibly simple to prepare.
Here’s why this recipe will become your favorite way to cook broccoli:
- Super Quick – Ready in just 25 minutes from start to finish with only 5 minutes of hands-on prep time
- Incredibly Healthy – Packed with vitamins C and K, fiber, and antioxidants while being naturally low-carb and nutrient-dense
- Amazingly Crispy – The high-heat roasting creates irresistible caramelized edges and crispy florets you’ll want to snack on
- Burst with Flavor – Garlic, herbs, and lemon transform bland broccoli into something genuinely crave-worthy
- Universally Diet-Friendly – Naturally vegan, vegetarian, gluten-free, dairy-free, paleo, keto, Whole30, and suitable for almost any eating plan
- Budget-Friendly – Uses affordable, everyday ingredients that won’t break the bank
- Foolproof Method – Nearly impossible to mess up; even kitchen beginners will nail this recipe
- Kid-Approved – The crispy texture and savory flavors make it appealing even to picky eaters
- Minimal Cleanup – Just one sheet pan and a mixing bowl—that’s it!
- Versatile Pairing – Complements virtually any main dish from casual weeknight dinners to elegant holiday meals
- Meal Prep Champion – Stays delicious for days and reheats beautifully for easy weekly meal planning
- Restaurant-Quality at Home – Tastes like something you’d order at an upscale restaurant but costs pennies per serving
Ingredient Notes
The beauty of this recipe lies in its simplicity. Let’s break down each ingredient and why it matters:
Fresh Broccoli – The star of the show! Look for firm, bright green heads with tightly closed florets and no yellowing. Fresh broccoli has a slightly sweet, earthy flavor that intensifies when roasted. You can use broccoli crowns (just the florets) or whole heads (florets plus stems). Don’t throw away the stems—they’re delicious when peeled and roasted!
Olive Oil – Essential for achieving that crispy, caramelized exterior. Extra virgin olive oil adds the best flavor, but regular olive oil or avocado oil work too. The oil helps conduct heat, promotes browning, and carries the garlic and herb flavors throughout the dish. Don’t skimp here—you need enough to coat everything well.
Fresh Garlic – Game-changer alert! Fresh minced garlic becomes mellow, sweet, and slightly nutty when roasted. Use 3-5 cloves depending on your garlic love level. Avoid pre-minced garlic in jars for this recipe—fresh makes a noticeable difference. If garlic browns too quickly, it can become bitter, so we’ll add it partway through cooking.
Fresh Herbs – I recommend a combination of fresh thyme, rosemary, and parsley. Thyme adds earthy, slightly minty notes; rosemary brings pine-like aromatics; and parsley provides fresh, peppery brightness. Fresh herbs are preferred, but dried herbs work in a pinch (use ⅓ the amount since dried herbs are more concentrated).
Lemon – A squeeze of fresh lemon juice at the end brightens all the flavors and cuts through the richness of the olive oil. The acidity balances the sweetness from caramelization. Lemon zest adds even more citrus punch if you want extra zing!
Salt & Black Pepper – Essential for bringing out broccoli’s natural flavors. Sea salt or kosher salt works best. Freshly ground black pepper adds a subtle heat and complexity that pre-ground pepper can’t match.
Optional Additions:
- Red Pepper Flakes – Add a pinch for subtle heat
- Parmesan Cheese – Grated over the top after roasting for extra umami (makes it non-vegan)
- Balsamic Vinegar – A drizzle adds tangy sweetness
- Nutritional Yeast – For a cheesy flavor that’s vegan-friendly
Equipment Needed
You’ll need just a few basic kitchen tools for this recipe:
- Large Rimmed Baking Sheet (18×13 inches recommended) – Essential for roasting. A rimmed edge prevents rolling and makes tossing easier. Light-colored pans work best as dark pans can cause over-browning.
- Parchment Paper or Aluminum Foil (optional) – Makes cleanup even easier, though not necessary. I prefer parchment as it promotes better browning than foil.
- Large Mixing Bowl – For tossing broccoli with oil, garlic, and seasonings.
- Sharp Chef’s Knife – For cutting broccoli into florets and mincing garlic.
- Cutting Board – Preferably a large one with plenty of workspace.
- Garlic Press or Microplane (optional) – Makes mincing garlic super quick and easy.
- Measuring Spoons – For accurate oil and seasoning amounts.
- Tongs or Spatula – For tossing the broccoli halfway through roasting.
- Zester or Grater (optional) – If you want to add lemon zest for extra flavor.

Garlic Herb Roasted Broccoli Recipe
- Total Time: 25 minutes
- Yield: 4 servings 1x
- Diet: Gluten Free
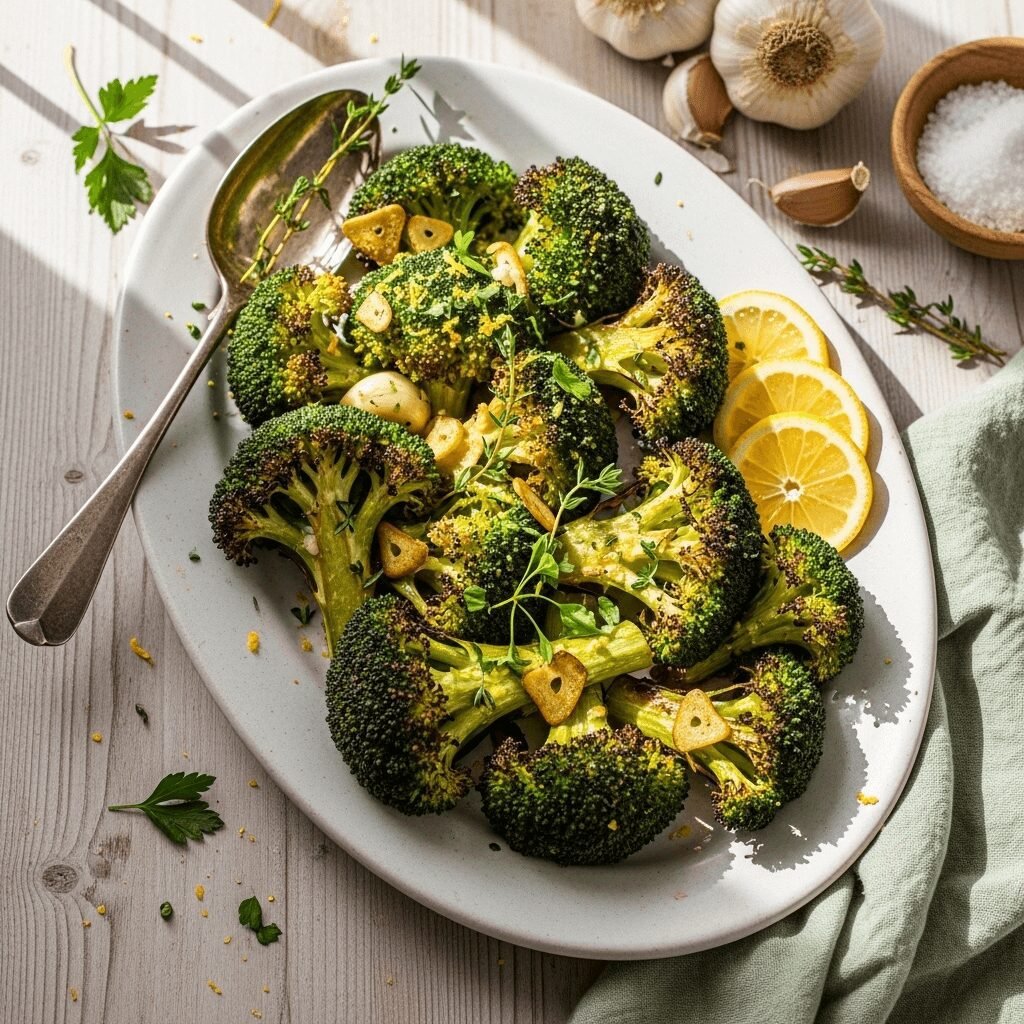
Description
Perfectly roasted broccoli florets with crispy caramelized edges, tossed with aromatic garlic, fresh herbs, and finished with a bright squeeze of lemon. This healthy, flavorful side dish comes together in just 25 minutes and pairs beautifully with any main course!
Ingredients
- 1½ pounds fresh broccoli (about 2 large heads)
- 3 tablespoons extra virgin olive oil
- 4-5 cloves garlic, minced
- 1 teaspoon fresh thyme leaves (or ½ teaspoon dried thyme)
- 1 teaspoon fresh rosemary, finely chopped (or ½ teaspoon dried rosemary)
- ¾ teaspoon sea salt (or to taste)
- ½ teaspoon freshly ground black pepper
- ¼ teaspoon red pepper flakes (optional, for heat)
- 1 lemon (for zest and juice)
- 2 tablespoons fresh parsley, chopped (for garnish)
- Optional: 2 tablespoons grated Parmesan cheese (omit for vegan)
Instructions
Step 1: Preheat the Oven
Preheat your oven to 425°F (220°C). This high temperature is crucial for achieving those crispy, caramelized edges. Position the oven rack in the center position for even heat distribution.
Step 2: Prepare the Broccoli
Wash the broccoli thoroughly and pat completely dry with paper towels or a clean kitchen towel—excess moisture prevents proper browning. Cut the broccoli into evenly-sized florets, approximately 1½ to 2 inches in size. If your broccoli came with stems, peel the tough outer layer and cut the tender interior into ½-inch thick rounds or sticks. Try to keep pieces similar in size so they cook evenly.
Step 3: Season the Broccoli
Place the broccoli florets in a large mixing bowl. Drizzle with olive oil, then add the minced garlic, thyme, rosemary, salt, black pepper, and red pepper flakes if using. Toss everything together thoroughly with your hands or tongs, ensuring every piece is well-coated with oil and seasonings. Really massage the seasonings into the florets for maximum flavor.
Step 4: Arrange on Baking Sheet
Spread the seasoned broccoli in a single layer on your baking sheet. This is important—don’t overcrowd! The florets should have space between them with minimal touching. Overcrowding creates steam instead of roasting, resulting in soft, not crispy broccoli. Use two pans if necessary.
Step 5: Roast
Place the baking sheet in the preheated oven and roast for 10 minutes undisturbed. After 10 minutes, remove the pan and use tongs or a spatula to flip and toss the broccoli. This ensures even browning on all sides. Return to the oven and roast for an additional 8-12 minutes, until the florets are tender with deeply caramelized, crispy brown edges. The stems should be easily pierced with a fork.
Step 6: Finish and Serve
Remove from the oven. While still hot, zest half the lemon directly over the broccoli (if using), then squeeze fresh lemon juice over everything. Toss gently to distribute. Taste and adjust seasoning with more salt or pepper if needed. Transfer to a serving dish, garnish with fresh chopped parsley, and sprinkle with Parmesan cheese if desired. Serve immediately for the crispiest texture!
Notes
- Size matters: Cut florets uniformly so they cook at the same rate. Smaller pieces get crispier but can burn more easily.
- Don’t skip the flip: Tossing halfway through ensures even browning and prevents burning on one side.
- Crispier results: For extra-crispy broccoli, increase oven temperature to 450°F and watch closely to prevent burning.
- Garlic sensitive? Add garlic during the last 5-7 minutes of roasting instead of at the beginning to prevent burning and bitterness.
- Make it cheesy: Add Parmesan, nutritional yeast, or a sprinkle of feta cheese after roasting.
- Batch cooking: Recipe easily doubles or triples—just use multiple sheet pans and rotate them halfway through cooking.
- Convection setting: If using a convection oven, reduce temperature to 400°F and check 2-3 minutes earlier.
- Prep Time: 5 minutes
- Cook Time: 20 minutes
- Category: Side Dish
- Method: Roasting
- Cuisine: American, Mediterranean-Inspired
Nutrition
- Serving Size: About 1 cup (¼ of recipe)
- Calories: 125
- Sugar: 2g
- Sodium: 380mg
- Fat: 10g
- Saturated Fat: 1.5g
- Unsaturated Fat: 8g
- Trans Fat: 0g
- Carbohydrates: 8g
- Fiber: 3g
- Protein: 3g
- Cholesterol: 0mg
Nutritional values are approximate and may vary based on specific ingredients and portion sizes. Parmesan cheese adds approximately 22 calories and 2g protein per serving.
Tips & Variations
Flavor Variations:
- Asian-Inspired: Replace herbs with sesame oil, soy sauce, ginger, and finish with sesame seeds
- Spicy Kick: Add more red pepper flakes, a drizzle of sriracha, or toss with harissa after roasting
- Italian Style: Add Italian seasoning, finish with balsamic glaze and fresh basil
- Mediterranean: Toss with za’atar spice blend and finish with tahini drizzle
- Smoky Version: Add smoked paprika and a touch of cumin
- Cheesy Garlic: Toss with freshly grated Parmesan, Romano, or Pecorino cheese while still hot
Texture Variations:
- Extra Crispy: Roast at 450°F for shorter time, watching carefully
- Charred Style: Use the broiler for the last 2-3 minutes for extra char
- Tender-Crisp: Reduce roasting time by 3-4 minutes for less browning
Add-Ins:
- Nuts: Toss with toasted pine nuts, slivered almonds, or chopped walnuts
- Dried Fruit: Add golden raisins or dried cranberries for sweet contrast
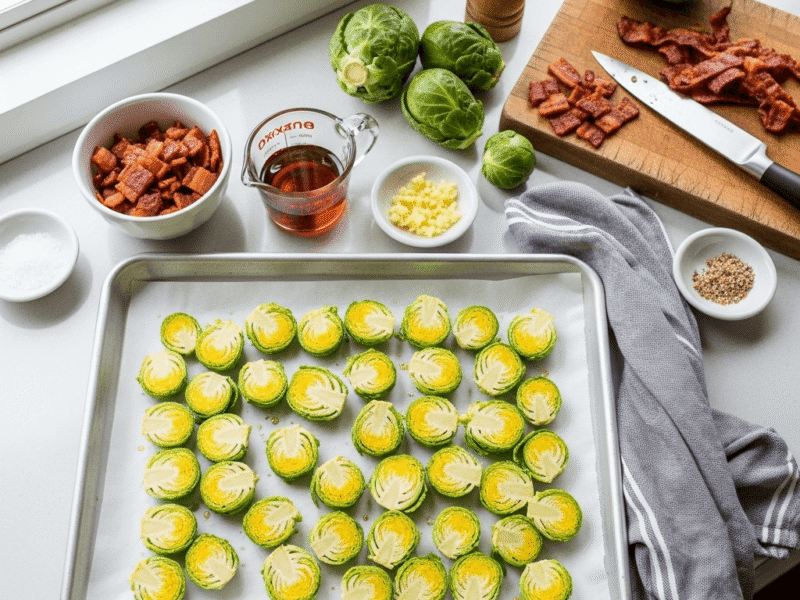
- Bacon: Crispy bacon bits add smoky, savory richness (no longer vegetarian)
- Vegetables: Roast alongside cauliflower, Brussels sprouts, or sliced red onions
- Chickpeas: Add drained, dried chickpeas for extra protein and crunch
Dietary Modifications:
- Low-Sodium: Reduce salt to ¼ teaspoon and rely on herbs and lemon for flavor
- Oil-Free: Use vegetable broth to coat instead of oil (won’t be as crispy)
- AIP-Compliant: Omit black pepper and red pepper flakes
- Nut-Free: Already nut-free! Just avoid the nut add-in suggestions above
Pro Chef Tips
1. Dry is Essential: The biggest secret to crispy roasted broccoli is starting with completely dry florets. After washing, spread them on a towel and let them air-dry for 10-15 minutes, or thoroughly pat dry with paper towels. Any moisture creates steam, which leads to soggy, not crispy results.
2. High Heat is Your Friend: Don’t be tempted to lower the oven temperature. The high heat of 425-450°F is what creates that delicious caramelization and crispy texture. Lower temperatures will steam the broccoli rather than roast it.
3. Single Layer, No Exceptions: Overcrowding is the enemy of crispiness. Broccoli pieces should be in a single layer with space between them. When pieces touch, they steam each other instead of developing crispy edges. Use two pans if you need to!
4. Don’t Trim Too Much Stem: The stems are incredibly delicious when roasted! Peel away the tough outer layer with a vegetable peeler, then slice the tender interior into coins or sticks. They’ll become sweet and tender with slightly crispy edges.
5. Timing the Garlic: Fresh garlic can burn at high temperatures, turning bitter. For the best flavor without bitterness, either add the garlic during the last 5-7 minutes of roasting, or toss it with enough oil to protect it from direct heat.
6. Let It Brown: Resist the urge to stir too often. Those dark brown, almost charred edges? That’s flavor! Don’t worry if some pieces look very dark—that caramelization is exactly what you want. It’s not burnt unless it’s black and bitter.
7. Season in Stages: Salt the broccoli before roasting to help draw out moisture and concentrate flavors. Then taste and adjust seasoning after roasting when you add the lemon juice. The lemon’s acidity can dull the salt, so you may need a tiny pinch more.
8. Finish with Acid: Always finish with something bright and acidic—lemon juice, lime juice, or a splash of vinegar. This cuts through the richness and makes all the other flavors pop, transforming good roasted broccoli into great roasted broccoli.
Common Mistakes to Avoid
1. Not Drying the Broccoli Properly: Wet broccoli creates steam in the oven, resulting in soggy, limp florets instead of crispy ones. Always thoroughly pat dry with towels after washing, or better yet, let them air-dry for 10-15 minutes before roasting.
2. Cutting Uneven Pieces: When florets are different sizes, the small ones burn while large ones stay undercooked. Take the extra minute to cut everything into similar-sized pieces (about 1½-2 inches). Your broccoli will cook evenly and you won’t have to pick out burnt bits.
3. Overcrowding the Pan: This is the most common mistake! When broccoli pieces are piled on top of each other or touching too much, they steam rather than roast. You’ll end up with soft, pale vegetables instead of crispy, caramelized ones. Always use a large enough pan or multiple pans to keep florets in a single layer with breathing room.
4. Using an Oven That’s Not Hot Enough: If your oven temperature is too low, the broccoli will dry out before it browns. Make sure your oven is fully preheated to 425°F before adding the broccoli. An oven thermometer can help verify your actual oven temperature matches the setting.
5. Not Tossing Halfway Through: Flipping the broccoli ensures all sides get exposure to direct heat and develop those delicious brown, crispy edges. If you skip this step, one side stays pale while the other potentially burns.
6. Adding Lemon Too Early: If you add lemon juice before roasting, the acidity and moisture prevent proper browning. Always add citrus elements (juice and zest) after roasting when the broccoli comes out of the oven.
7. Storing While Hot: Placing hot, freshly roasted broccoli directly in a sealed container traps steam, making everything soggy. Always let it cool to room temperature first, and store uncovered or loosely covered so excess moisture can escape.
Storage & Meal Prep
Refrigerator Storage:
Store leftover roasted broccoli in an airtight container in the refrigerator for up to 4 days. For best results, let it cool completely before storing to prevent condensation that makes it soggy. The broccoli will lose some crispiness but maintains great flavor and is still delicious cold or reheated.
Reheating Instructions:
For best results, reheat in a 400°F oven for 5-7 minutes to restore some crispiness. You can also use an air fryer at 375°F for 3-4 minutes for excellent results. Microwave reheating (1-2 minutes) works in a pinch but won’t restore the crispy texture—the broccoli will be softer but still tasty.
Meal Prep Tips:
This recipe is fantastic for weekly meal prep! Roast a large batch on Sunday and portion into individual containers. The roasted broccoli works beautifully in grain bowls, salad bowls, alongside meal-prepped proteins, or as a quick side dish throughout the week. Add a fresh squeeze of lemon before serving to brighten the flavors.
Serving Cold:
Leftover roasted broccoli is delicious served cold! Chop it up and add it to salads, grain bowls, or pasta salads. The caramelized flavors taste amazing at room temperature or chilled, making it a versatile meal prep component.
Best Practices:
For optimal texture retention, store broccoli loosely covered for the first day, allowing some moisture to escape. Don’t add the lemon juice until just before serving if you’re meal prepping—this helps maintain better texture and keeps flavors fresher.
Make-Ahead & Freezer Notes
Make-Ahead Preparation:
You can cut the broccoli into florets up to 2 days in advance. Store them in an airtight container or zip-top bag with a paper towel to absorb moisture. Mix the garlic, herbs, and seasonings together and store separately. When ready to cook, simply toss everything together with oil and roast as directed.
Par-Roasting Method:
For truly ahead-of-time preparation, you can par-roast the broccoli (roast for only 10 minutes until barely tender but not browned). Let it cool completely, refrigerate up to 2 days, then finish roasting at 425°F for 8-10 minutes just before serving. This ensures maximum crispiness when you’re ready to eat.
Freezing Raw Broccoli:
Raw broccoli florets can be frozen for up to 3 months. Spread cut florets on a baking sheet, freeze until solid (about 2 hours), then transfer to freezer bags. You can roast from frozen—just add 5-7 minutes to the cooking time and expect slightly less crispiness than fresh.
Freezing Roasted Broccoli:
While possible, freezing fully roasted broccoli isn’t ideal as it loses its crispy texture completely. If you do freeze it, let it cool completely, store in freezer-safe containers for up to 2 months, and plan to use it in soups, casseroles, frittatas, or other dishes where texture is less critical.
Best Reheating from Frozen:
If reheating frozen roasted broccoli, use the oven method—spread on a baking sheet and reheat at 400°F for 10-12 minutes, stirring halfway through. This will restore some texture, though it won’t be as crispy as freshly roasted.
Serving Suggestions
This versatile roasted broccoli pairs beautifully with virtually any main course! Here are some delicious serving ideas:
Protein Pairings:
- Roasted or Grilled Chicken – Lemon herb chicken, honey garlic chicken thighs, or simple baked chicken breasts
- Steak – Ribeye, sirloin, or filet mignon for an elegant steakhouse-style dinner
- Fish & Seafood – Baked salmon, pan-seared halibut, garlic butter shrimp, or grilled swordfish
- Pork – Pork chops, pork tenderloin, or pulled pork
- Lamb – Herb-crusted lamb chops or roasted leg of lamb
- Plant-Based Proteins – Baked tofu, tempeh, or seasoned chickpeas
Complete Meal Ideas:
- Grain Bowls – Serve over quinoa, brown rice, or farro with your choice of protein and a tahini drizzle
- Mediterranean Plate – Alongside hummus, tzatziki, grilled chicken, and warm pita bread
- Italian Dinner – With baked ziti, chicken parmesan, or Italian sausages and garlic bread
- Steakhouse Dinner – Next to grilled steak with loaded baked potatoes and Caesar salad
- Sheet Pan Dinner – Roast alongside chicken thighs and baby potatoes for a complete one-pan meal
Other Side Dishes:
- Starches – Garlic mashed potatoes, roasted sweet potatoes, wild rice pilaf, or creamy polenta
- Salads – Caesar salad, mixed green salad with balsamic vinaigrette, or arugula salad
- More Vegetables – Roasted carrots, green beans, or Brussels sprouts for a veggie-forward meal
- Breads – Garlic bread, dinner rolls, or crusty sourdough
Creative Uses:
- Chop and add to omelets or frittatas
- Toss with pasta, olive oil, and Parmesan for a quick vegetarian meal
- Add to pizza as a topping
- Blend into soup for added nutrition and flavor
- Mix into grain salads or pasta salads
- Serve as a healthy snack with ranch dressing or hummus for dipping
FAQs Section
Q: Can I use frozen broccoli instead of fresh?
A: Yes, but fresh produces better results. If using frozen, don’t thaw it first—roast straight from frozen, adding 5-7 extra minutes to the cooking time. Pat away any excess ice crystals with paper towels before tossing with oil. Note that frozen broccoli won’t get quite as crispy as fresh because it contains more moisture.
Q: Why is my roasted broccoli soggy instead of crispy?
A: Soggy broccoli usually results from one of three issues: (1) the broccoli wasn’t dried properly after washing, (2) the oven temperature was too low, or (3) the pan was overcrowded causing the florets to steam each other. Make sure to thoroughly dry the broccoli, use high heat (425°F), and spread florets in a single layer with space between them.
Q: Can I make this recipe in an air fryer?
A: Absolutely! Air fryers work fantastically for roasted broccoli. Preheat your air fryer to 375°F, arrange broccoli in a single layer (work in batches if needed), and cook for 10-12 minutes, shaking the basket halfway through. The results are incredibly crispy! Air frying actually works even better than oven roasting for achieving maximum crispiness.
Q: How do I prevent the garlic from burning?
A: Fresh garlic burns easily at high temperatures. To prevent this, either: (1) add garlic during the last 5-7 minutes of roasting instead of at the beginning, (2) use garlic powder instead of fresh minced garlic, or (3) make sure the garlic is thoroughly coated in olive oil which protects it from direct heat. Small bits of golden-brown garlic are fine and flavorful—you’re just avoiding black, bitter pieces.
Q: What other vegetables can I roast using this method?
A: This garlic herb roasting method works beautifully with many vegetables! Try cauliflower, Brussels sprouts, green beans, asparagus, carrots, bell peppers, zucchini, or mushrooms. Adjust cooking times based on the vegetable—denser vegetables like carrots need longer (25-30 minutes) while tender vegetables like asparagus need less (12-15 minutes).
Q: Is roasted broccoli healthy?
A: Yes, very healthy! Broccoli is naturally low in calories and carbs while being high in fiber, vitamins C and K, folate, and potassium. Roasting actually helps your body absorb more of broccoli’s beneficial nutrients. The olive oil adds healthy fats that help absorb fat-soluble vitamins. This cooking method is far healthier than steaming in butter or using heavy cream-based preparations.
Q: Can I roast broccoli without oil?
A: You can, though the results will be different. Without oil, the broccoli won’t get as crispy and caramelized. For oil-free roasting, spray the baking sheet with cooking spray or use parchment paper, and toss broccoli with a bit of vegetable broth, lemon juice, and seasonings. Roast at 425°F for 15-20 minutes, tossing halfway through. It won’t be as crispy but will still taste good.
Q: How do I know when the broccoli is done?
A: Perfectly roasted broccoli should have tender stems that pierce easily with a fork and florets with dark brown, caramelized, crispy edges. Some pieces should look almost charred—that’s the flavorful caramelization you want! The total cooking time is usually 18-22 minutes at 425°F, but exact timing varies based on floret size and oven accuracy. When in doubt, taste a piece!
Conclusion
And there you have it—the ultimate guide to making Garlic Herb Roasted Broccoli that’s so delicious, you might find yourself making it several times a week! This simple recipe proves that healthy eating doesn’t have to be boring or bland. With just a few basic ingredients and minimal effort, you can transform ordinary broccoli into an extraordinary side dish that the whole family will genuinely enjoy.
The beauty of this recipe is its versatility and foolproof nature. Whether you’re a seasoned home cook or just starting your culinary journey, you’ll nail this recipe every single time. Those crispy, caramelized edges with the perfect garlic-herb seasoning and bright lemon finish create a flavor experience that rivals any restaurant side dish—all for just pennies per serving!
I hope this recipe helps you fall in love with vegetables all over again (or maybe for the first time!). It’s been a staple in my kitchen for years, and I still get excited every time I pull that sheet pan out of the oven and see those perfectly golden, crispy florets. The aroma alone is worth making this recipe!