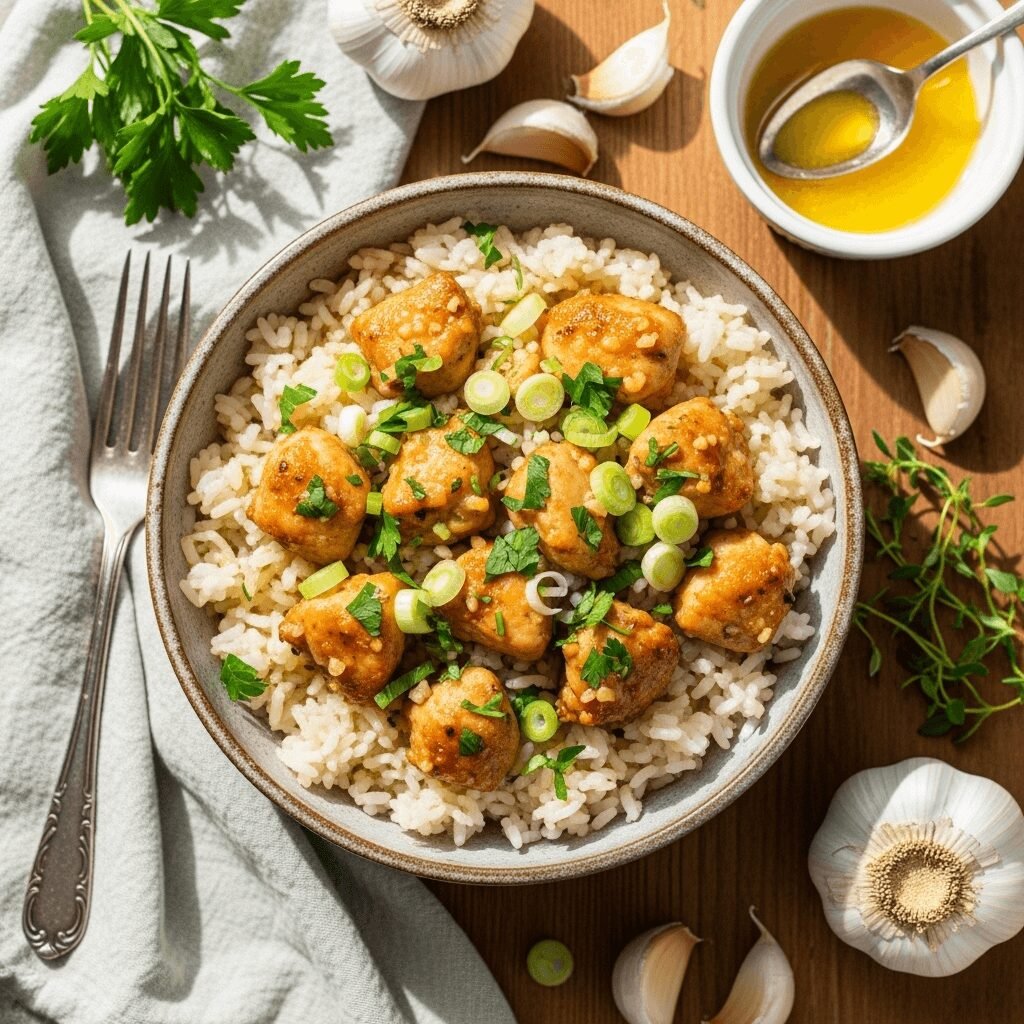
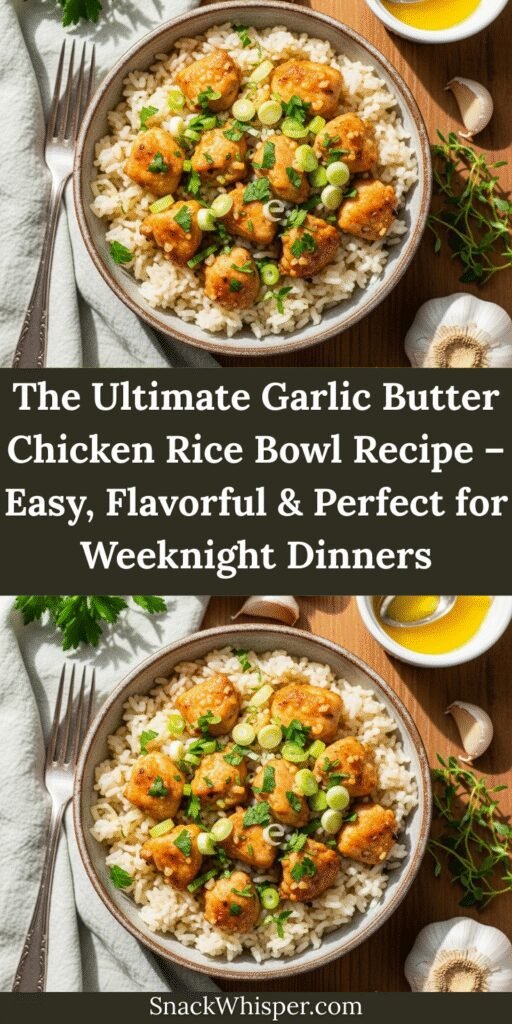
If you’re looking for a hearty, satisfying meal that comes together in one pan with minimal cleanup, this Garlic Butter Chicken Rice Bowl is about to become your new weeknight hero. Imagine tender, juicy chicken pieces swimming in a rich, garlicky butter sauce, nestled on a bed of perfectly cooked, fluffy rice that soaks up all those incredible flavors. This isn’t just another chicken and rice recipe – it’s a complete meal in a bowl that delivers restaurant-quality taste right in your own kitchen.
This dish is incredibly versatile and works beautifully for busy weeknight dinners when you need something quick but impressive, casual weekend lunches with the family, or even meal prep Sundays when you want to set yourself up for success during the week. The beauty of this recipe lies in its simplicity – you don’t need fancy ingredients or complicated techniques, just good quality chicken, aromatic garlic, butter, and rice. The result? A comforting bowl of deliciousness that satisfies everyone at the table, from picky eaters to adventurous foodies.
What makes this recipe particularly appealing is how it transforms simple pantry staples into something truly special. The garlic butter sauce creates this luscious coating on the chicken that’s absolutely irresistible, while the rice acts like a flavor sponge, capturing every drop of that golden, aromatic goodness. It’s comfort food at its finest, without being heavy or overly complicated.
History / Background
The concept of combining chicken, rice, and butter in a single dish has roots that stretch across multiple culinary traditions around the world. While this specific Garlic Butter Chicken Rice Bowl is a modern American creation, it draws inspiration from several classic preparations that have been beloved for generations.
Rice bowls themselves have a long and rich history, particularly in Asian cuisines where donburi (Japanese rice bowls) and bibimbap (Korean mixed rice bowls) have been staples for centuries. The idea of serving protein over rice in a bowl format makes practical sense – it’s economical, filling, and allows flavors to meld together beautifully. Meanwhile, the European tradition of cooking chicken in butter, particularly in French cuisine with dishes like poulet au beurre, has influenced Western cooking for hundreds of years.
The American version of chicken and rice dishes became particularly popular in the South, where variations like chicken bog and chicken perloo have been comfort food classics since the 19th century. These dishes were born out of necessity and resourcefulness, using affordable ingredients that were readily available to create nourishing, flavor-packed meals that could feed large families.
Our Garlic Butter Chicken Rice Bowl is a contemporary fusion of these traditions, simplified and streamlined for today’s busy home cooks who want maximum flavor with minimum fuss. The emphasis on garlic is distinctly modern – while garlic has been used in cooking for thousands of years, the American love affair with bold garlic flavor in everyday cooking really took off in the latter half of the 20th century as home cooks became more adventurous with their seasoning.
What makes this recipe special is how it honors the wisdom of these traditional preparations while adapting them for contemporary kitchens. It keeps the soul-warming comfort of classic chicken and rice dishes while incorporating the bold, punchy flavors that modern palates crave. It’s a recipe that feels both familiar and exciting, nostalgic and new all at once.
Why You’ll Love This Recipe
This Garlic Butter Chicken Rice Bowl is the kind of recipe that checks every box for what busy home cooks are looking for in their weeknight dinner rotation. It’s the perfect balance of simple and impressive, quick and satisfying, budget-friendly and absolutely delicious.
Here’s why this recipe will become a family favorite:
- Quick and Easy – From start to finish, you’ll have dinner on the table in about 35-40 minutes, with most of that time being hands-off cooking while everything simmers together beautifully
- One-Pan Wonder – Less dishes to wash means more time to relax after dinner, and everything cooks in the same skillet or pot for maximum convenience
- Budget-Friendly – Uses affordable ingredients you probably already have in your pantry and refrigerator, making it perfect for stretching your grocery budget without sacrificing flavor
- Family-Approved – The mild, buttery garlic flavor appeals to both kids and adults, making it a safe bet for pleasing even the pickiest eaters at your table
- Incredibly Flavorful – The combination of butter, garlic, and chicken creates a rich, savory sauce that elevates simple rice into something extraordinary
- Customizable – Easy to adapt based on what you have on hand or dietary preferences, from adding vegetables to adjusting the garlic intensity
- Perfect for Meal Prep – Makes excellent leftovers that reheat beautifully, so you can cook once and enjoy multiple times throughout the week
- Crowd-Pleaser – Whether you’re feeding your immediate family or hosting friends, this dish always gets rave reviews and recipe requests
- Comfort Food Without the Guilt – Satisfying and hearty without being overly heavy, it hits that sweet spot of being filling but not leaving you feeling weighed down
The magic of this recipe is in its simplicity. You don’t need to be an experienced cook to pull this off successfully, yet the end result tastes like you spent hours in the kitchen. It’s the kind of recipe that builds your confidence as a home cook because it’s nearly impossible to mess up, yet delivers consistently delicious results every single time.
Ingredient Notes
Let me walk you through the ingredients for this recipe so you understand what each one brings to the table and how you can customize it based on what you have available.
Chicken: I recommend using boneless, skinless chicken thighs for the best flavor and texture. Thighs stay incredibly moist and tender during cooking and have more flavor than breasts. However, if you prefer chicken breasts, they work perfectly fine – just be careful not to overcook them as they can dry out more easily. Cut the chicken into bite-sized pieces, about 1-inch cubes, for even cooking. You can also use chicken tenderloins cut into chunks.
Butter: Use real, unsalted butter for the best flavor. The butter creates that rich, luxurious sauce that coats everything. Unsalted allows you to control the sodium level in your dish. If you only have salted butter, just reduce any additional salt in the recipe. Some people ask about using olive oil instead, and while you can, you’ll lose that characteristic buttery richness that makes this dish so special.
Garlic: Fresh garlic is absolutely essential here – don’t substitute garlic powder or pre-minced garlic from a jar. The fresh, pungent flavor of freshly minced garlic is what gives this dish its signature taste. You’ll need about 6-8 cloves, depending on how much you love garlic. Pro tip: mince it finely so it distributes evenly throughout the dish.
Rice: Long-grain white rice works beautifully because it stays fluffy and separate. Jasmine or basmati rice are excellent choices that add a subtle aromatic quality. You can use brown rice for a healthier option, but you’ll need to adjust the cooking time and liquid ratio. Avoid instant rice as it becomes mushy.
Chicken Broth: Using chicken broth instead of water adds an extra layer of flavor to the rice. Low-sodium broth is best so you can control the salt level. In a pinch, water with a bouillon cube works, or even just water if that’s all you have – the dish will still be delicious thanks to all the other flavors.
Seasonings: Simple seasonings work best here. Salt, black pepper, and a bit of paprika for color and subtle sweetness. Italian seasoning or dried thyme adds a nice herbaceous note. If you want a little heat, a pinch of red pepper flakes or cayenne pepper does wonders.
Optional Add-ins: While not traditional, you can add vegetables like peas, carrots, broccoli, or spinach to make this a complete one-bowl meal. Fresh parsley or green onions for garnish add a pop of color and freshness.
Equipment Needed
You don’t need a fancy kitchen setup to make this recipe successfully. Here’s what you’ll need:
- Large Skillet or Deep Sauté Pan with Lid (12-inch works perfectly) – This is your main cooking vessel where everything comes together
- Sharp Knife and Cutting Board – For prepping the chicken and mincing garlic
- Measuring Cups and Spoons – For accurate ingredient measurements
- Wooden Spoon or Silicone Spatula – For stirring and scraping up the flavorful bits from the bottom of the pan
- Garlic Press (optional) – Makes mincing garlic even easier, though a knife works just fine
- Kitchen Timer – To keep track of cooking times and ensure perfectly cooked rice
- Serving Bowls – For presenting your beautiful creation
- Tongs or Serving Spoon – For plating
If you don’t have a large skillet with a lid, you can use a Dutch oven or even a deep pot. The key is having something with enough surface area to brown the chicken properly and deep enough to hold the rice and liquid.
Print
Garlic Butter Chicken Rice Bowl Recipe
- Total Time: 40 minutes
- Yield: 4 servings 1x
- Diet: Gluten Free
Description
This Garlic Butter Chicken Rice Bowl is a one-pan wonder that combines tender, juicy chicken pieces with fluffy rice, all coated in a rich, aromatic garlic butter sauce. Perfect for busy weeknights when you want something comforting, satisfying, and incredibly delicious without spending hours in the kitchen.
Ingredients
- 1½ pounds boneless, skinless chicken thighs, cut into 1-inch pieces
- 4 tablespoons unsalted butter, divided
- 6-8 cloves garlic, minced
- 1½ cups long-grain white rice, rinsed
- 3 cups low-sodium chicken broth
- 1 teaspoon salt (adjust to taste)
- ½ teaspoon black pepper
- ½ teaspoon paprika
- ½ teaspoon dried thyme or Italian seasoning
- ¼ teaspoon red pepper flakes (optional, for heat)
- 2 tablespoons fresh parsley, chopped (for garnish)
- 2 green onions, sliced (for garnish)
Instructions
- Prepare the chicken: Pat the chicken pieces dry with paper towels and season generously with salt, pepper, and paprika. This helps the chicken brown beautifully and ensures it’s seasoned throughout.
- Brown the chicken: Heat 2 tablespoons of butter in a large skillet or sauté pan over medium-high heat. Once the butter is melted and foaming, add the chicken pieces in a single layer. Cook for 3-4 minutes per side until golden brown. The chicken doesn’t need to be cooked through at this point – it will finish cooking with the rice. Remove the chicken to a plate and set aside.
- Make the garlic butter base: In the same skillet, reduce heat to medium and add the remaining 2 tablespoons of butter. Once melted, add the minced garlic and cook for about 1 minute, stirring constantly, until fragrant and just beginning to turn golden. Be careful not to burn the garlic as it can turn bitter.
- Toast the rice: Add the rinsed rice to the skillet with the garlic butter and stir to coat every grain. Toast for 2-3 minutes, stirring frequently. This step adds a lovely nutty flavor to the rice and helps prevent it from becoming mushy.
- Add liquid and seasonings: Pour in the chicken broth and add the thyme (or Italian seasoning) and red pepper flakes if using. Stir to combine and scrape up any browned bits from the bottom of the pan – that’s pure flavor.
- Combine and simmer: Nestle the browned chicken pieces back into the rice mixture, along with any accumulated juices from the plate. Bring everything to a boil, then reduce heat to low, cover with a tight-fitting lid, and simmer for 20-25 minutes without lifting the lid.
- Rest and fluff: After 20-25 minutes, turn off the heat and let the rice bowl sit, covered, for 5 minutes. This resting period allows the rice to finish cooking in the residual heat and absorb any remaining moisture.
- Finish and serve: Remove the lid, fluff the rice gently with a fork, and stir everything together so the chicken and rice are evenly distributed. Taste and adjust seasoning if needed. Garnish with fresh chopped parsley and sliced green onions.
- Serve immediately: Divide among bowls and serve hot, enjoying the incredible garlic butter aroma and perfectly tender chicken.
Notes
- Rice consistency: If your rice seems too dry after cooking, add a splash more broth or water and let it sit covered for a few more minutes. If it’s too wet, uncover and let it cook on low heat for a few more minutes until excess liquid evaporates.
- Chicken variations: Chicken breasts work fine but watch them carefully as they can dry out. If using breasts, consider cutting them thinner so they cook evenly.
- Make it creamier: For an extra indulgent version, stir in 2-3 tablespoons of cream cheese or heavy cream at the end for a creamy garlic butter sauce.
- Add vegetables: Frozen peas, corn, diced carrots, or chopped spinach can be stirred in during the last 5 minutes of cooking for added nutrition.
- Spice it up: Double the red pepper flakes or add a splash of hot sauce if you like heat.
- Prep Time: 10 minutes
- Cook Time: 30 minutes
- Category: Dinner
- Method: Stovetop
- Cuisine: American
Nutrition
- Serving Size: 1 bowl (about 2 cups)
- Calories: 485
- Sugar: 1g
- Sodium: 720mg
- Fat: 18g
- Saturated Fat: 9g
- Unsaturated Fat: 7g
- Trans Fat: 0g
- Carbohydrates: 48g
- Fiber: 1g
- Protein: 32g
- Cholesterol: 135mg
Note: Nutrition information is approximate and based on standard ingredient measurements. Actual values may vary depending on specific brands and modifications used.
Tips & Variations
This recipe is wonderfully adaptable to suit different tastes, dietary needs, and whatever you happen to have in your pantry. Here are some creative ways to customize your Garlic Butter Chicken Rice Bowl:
Make it vegetarian: Swap the chicken for chickpeas, cubed firm tofu, or meaty mushrooms. Use vegetable broth instead of chicken broth. The garlic butter sauce is so flavorful that you won’t miss the meat.
Add more vegetables: Turn this into a complete one-bowl meal by adding broccoli florets, bell peppers, snap peas, carrots, or zucchini. Add heartier vegetables like carrots during the simmering phase, and tender vegetables like spinach or peas during the last 5 minutes.
Make it spicier: Incorporate diced jalapeños with the garlic, increase the red pepper flakes, drizzle with sriracha, or stir in some hot sauce at the end. For a smoky kick, add a teaspoon of smoked paprika.
Creamy version: Stir in cream cheese, heavy cream, or coconut cream during the last few minutes for a luscious, creamy garlic butter sauce that coats everything beautifully.
Mediterranean twist: Use olive oil instead of some butter, add sun-dried tomatoes, artichoke hearts, kalamata olives, and finish with crumbled feta cheese and fresh dill.
Asian-inspired: Add ginger with the garlic, use sesame oil for part of the butter, add soy sauce, and garnish with sesame seeds and sliced scallions.
Lemon garlic version: Add the zest and juice of one lemon at the end for a bright, fresh flavor that cuts through the richness of the butter.
Cheesy upgrade: Stir in shredded parmesan, mozzarella, or cheddar during the last few minutes of cooking for an extra indulgent, cheesy rice bowl.
Pro Chef Tips
These professional techniques will take your Garlic Butter Chicken Rice Bowl from good to absolutely restaurant-quality:
Pat the chicken completely dry: This is crucial for getting that beautiful golden-brown sear on the chicken. Excess moisture creates steam, which prevents proper browning. Use paper towels to thoroughly dry each piece before seasoning.
Don’t crowd the pan: If your skillet isn’t large enough to fit all the chicken in a single layer with space between pieces, work in batches. Overcrowding causes the chicken to steam rather than sear, and you’ll miss out on those delicious browned bits.
Use the fond: Those browned bits stuck to the bottom of the pan after cooking the chicken (called fond) are packed with flavor. When you add the broth, make sure to scrape them up with your wooden spoon. This deglazing process incorporates all that caramelized goodness into your rice.
Rinse your rice: This removes excess starch that can make your rice gummy and sticky. Rinse under cold water until the water runs clear, then drain well before adding to the pan.
Toast the rice: Taking a few minutes to toast the rice in the garlic butter before adding liquid is a game-changer. It adds a subtle nutty flavor and helps each grain cook up separate and fluffy rather than mushy.
Resist lifting the lid: Once you’ve covered the pan and reduced the heat, don’t peek. Lifting the lid releases steam and heat, which disrupts the cooking process and can result in unevenly cooked rice.
Let it rest: That 5-minute rest after cooking is essential. It allows the rice to finish absorbing moisture evenly and makes it easier to fluff without breaking the grains.
Fresh garlic, freshly minced: Pre-minced garlic from a jar just doesn’t have the same punch as fresh garlic you mince yourself right before cooking. The flavor difference is significant and worth the extra minute of prep time.
Common Mistakes to Avoid
Even simple recipes can go wrong if you’re not careful. Here are the most common pitfalls and how to avoid them:
Using too much or too little liquid: The rice-to-liquid ratio is crucial. Too much liquid makes mushy rice, too little leaves it undercooked and crunchy. Stick to the 1:2 ratio (1½ cups rice to 3 cups liquid) for best results. Different rice varieties may need slight adjustments, so check the package instructions.
Cooking on too high heat: Once you’ve added the liquid and chicken back to the pan, you want a gentle simmer, not a rolling boil. High heat will cause the liquid to evaporate too quickly, leaving you with burnt rice on the bottom and undercooked rice on top. Low and slow wins the race here.
Burning the garlic: Garlic goes from perfectly golden to burnt and bitter in seconds. Always add garlic to a pan that’s at medium (not high) heat, and stir constantly. If your garlic burns, it’s better to start over than to continue with bitter-tasting garlic in your dish.
Not seasoning the chicken: Seasoning only the rice or the sauce isn’t enough. The chicken itself needs to be well-seasoned with salt and pepper before cooking so every component of the dish is flavorful.
Opening the lid while rice cooks: I know it’s tempting to check on things, but resist the urge. Every time you lift the lid, you release steam and lower the temperature, which interferes with the cooking process and can result in unevenly cooked rice.
Skipping the resting time: Those final 5 minutes off the heat are when the magic happens. The rice finishes absorbing moisture and firms up, making it fluffy rather than sticky when you fluff it with a fork.
Using the wrong type of rice: Instant or quick-cooking rice will turn to mush with this method. Short-grain rice will be too sticky. Stick with long-grain white rice for the best texture.
Storage & Meal Prep
This Garlic Butter Chicken Rice Bowl is fantastic for meal prep and stores beautifully, making it perfect for busy weeks when you want homemade meals without daily cooking.
Refrigerator storage: Let the rice bowl cool to room temperature (within 2 hours of cooking), then transfer to airtight containers. Properly stored, it will keep in the refrigerator for 3-4 days. I like to portion it into individual containers for easy grab-and-go lunches.
Reheating instructions: The key to reheating rice without drying it out is adding a little moisture. For microwave reheating, add a tablespoon of water or broth to each portion, cover with a damp paper towel, and microwave on high for 2-3 minutes, stirring halfway through. For stovetop reheating, add a splash of broth to a skillet, add the rice bowl, cover, and heat over medium-low heat for 5-7 minutes, stirring occasionally.
Keeping it fresh: Rice dishes can dry out in the refrigerator, so add a tablespoon or two of butter or broth before reheating to refresh the moisture and bring back that fresh-cooked flavor.
Portion control: Divide leftovers into individual portions before storing. This makes it easier to grab single servings and prevents you from having to reheat the entire batch multiple times, which can degrade quality.
Best practices: Always use clean utensils when serving from the storage container to prevent bacterial contamination. Label containers with the date so you know when to use them by.
Make-Ahead & Freezer Notes
If you want to get ahead of the game or make a double batch for future meals, here’s what you need to know:
Partial make-ahead: You can prep all your ingredients in advance – cube the chicken, mince the garlic, measure out the rice and spices – and store everything separately in the refrigerator for up to 24 hours before cooking. This makes the actual cooking process super quick on busy evenings.
Freezing cooked rice bowls: Yes, this freezes beautifully! Let the dish cool completely, then portion into freezer-safe containers or heavy-duty freezer bags. Press out as much air as possible to prevent freezer burn. Label with the date and contents. It will keep in the freezer for up to 3 months.
Freezing tips: I don’t recommend freezing in one large batch because it’s harder to thaw evenly. Instead, freeze in individual or family-sized portions so you can thaw only what you need. Flat freezer bags stack nicely and thaw more quickly than containers.
Thawing: The best method is to transfer frozen rice bowls to the refrigerator the night before you plan to eat them and let them thaw slowly overnight. If you’re in a hurry, you can use the microwave defrost function, but be sure to break up the rice as it thaws for even heating.
Reheating from frozen: You can reheat directly from frozen if needed. Add extra moisture (a few tablespoons of broth or water), cover tightly, and microwave on 50% power for 5-7 minutes, stirring every 2 minutes, until heated through. Or reheat covered in a 350°F oven for about 30-40 minutes.
Quality considerations: While the rice freezes well, it may be slightly less fluffy after freezing and reheating compared to fresh. Adding a little extra butter or broth when reheating helps restore moisture and texture.
Serving Suggestions
This Garlic Butter Chicken Rice Bowl is satisfying enough to stand alone as a complete meal, but here are some delicious sides and accompaniments that pair beautifully:
Fresh salads: A crisp green salad with a tangy vinaigrette provides a refreshing contrast to the rich, buttery rice. Try a simple arugula salad with lemon dressing, or a classic Caesar salad for something more substantial.
Roasted vegetables: Roasted broccoli, Brussels sprouts, asparagus, or green beans add nutrition and texture. The slight char from roasting complements the creamy garlic butter flavors.
Bread options: Warm, crusty bread for soaking up the garlic butter sauce, garlic bread for extra garlic lovers, or soft dinner rolls are all wonderful choices. Naan or pita bread work great for a Mediterranean twist.
Light sides: Steamed or sautéed green beans, roasted cherry tomatoes, cucumber salad, or coleslaw add freshness and crunch without competing with the main dish.
Beverages: This pairs beautifully with a crisp white wine like Sauvignon Blanc or Pinot Grigio. For non-alcoholic options, iced tea, lemonade, or sparkling water with lemon are refreshing choices.
Make it a feast: For a special dinner, start with a light soup like minestrone or tomato basil, serve the chicken rice bowl as the main, and finish with a simple dessert like fruit sorbet or chocolate mousse.
Lunch box idea: Pack the rice bowl with cherry tomatoes, cucumber slices, and some crackers on the side for a satisfying lunch that travels well.
FAQs Section
Can I use brown rice instead of white rice?
Yes, you can use brown rice, but you’ll need to adjust the cooking time and liquid. Brown rice typically requires about 45-50 minutes of cooking time and a bit more liquid (use 3½ cups broth instead of 3 cups). The texture will be chewier and nuttier, which some people prefer for the added nutrition and fiber.
Can I make this in an Instant Pot or rice cooker?
Absolutely! For an Instant Pot, brown the chicken using the sauté function, then add the garlic, rice, and broth. Seal the lid and cook on high pressure for 8 minutes, followed by a 10-minute natural release. For a rice cooker, brown the chicken in a separate pan, then transfer everything to the rice cooker and cook on the white rice setting.
What if I don’t have chicken broth?
Water works in a pinch, though you’ll lose some depth of flavor. To compensate, add a chicken bouillon cube, or use a combination of water and a tablespoon of soy sauce for umami. You could also use vegetable broth if that’s what you have on hand.
Can I add cheese to this recipe?
Yes! Parmesan cheese stirred in at the end adds a wonderful salty, nutty flavor. Shredded mozzarella or cheddar can be stirred in during the last few minutes for a cheesy, creamy version. Just be sure to add it off the heat so it melts gently without becoming stringy.
How do I know when the rice is done?
The rice is done when all the liquid has been absorbed and the grains are tender but not mushy. If you gently press a grain between your fingers, it should be soft all the way through with no hard center. If there’s still liquid but the rice is tender, remove the lid and cook for a few more minutes to evaporate excess moisture.
Can I use frozen chicken?
It’s best to use thawed chicken for even cooking and proper browning. If you’re in a pinch, you can use frozen chicken, but it will release more water as it cooks, which may affect the final texture. Increase the cooking time by 5-10 minutes to ensure it’s fully cooked through.
Is this recipe gluten-free?
Yes, this recipe is naturally gluten-free as long as you use gluten-free chicken broth. Check your broth label to be certain, as some brands add ingredients that contain gluten. All other ingredients – chicken, rice, butter, garlic, and basic seasonings – are naturally gluten-free.
Conclusion
There you have it – the ultimate Garlic Butter Chicken Rice Bowl that’s destined to become a regular in your dinner rotation! This recipe proves that you don’t need complicated techniques or expensive ingredients to create something truly delicious and satisfying. The combination of tender chicken, fluffy rice, and that incredible garlic butter sauce is pure comfort food magic that brings everyone to the table with smiles.
What I love most about this recipe is how it adapts to your life. Busy weeknight? It’s quick and easy. Meal prep Sunday? It stores and reheats beautifully. Picky eaters at home? The mild, crowd-pleasing flavors work for everyone. Want to get creative? The variations are endless. It’s the kind of recipe that gives you confidence in the kitchen and rewards you with consistently delicious results every single time.
I hope you enjoy making this Garlic Butter Chicken Rice Bowl as much as my family and I do. There’s something so satisfying about serving a homemade meal that’s both nourishing and incredibly flavorful, knowing you pulled it together without stress or fuss. The aroma of garlic and butter filling your kitchen, the satisfaction of that first bite, and the happy faces around your table – that’s what cooking at home is all about.
Now it’s your turn! I’d absolutely love to hear how your Garlic Butter Chicken Rice Bowl turns out. Did you try any of the variations? Did your family devour it? Leave a comment below sharing your experience, and don’t forget to rate the recipe! If you loved it (and I think you will), please share it on Pinterest and save it to your favorite dinner boards so you can come back to it again and again. Happy cooking, friends!

