
If you’re craving a restaurant-quality meal that’s ready faster than takeout delivery, this Easy Teriyaki Chicken Rice Bowl is about to become your new weeknight hero! Picture this: tender, juicy chicken pieces coated in a glossy, sweet-and-savory teriyaki glaze, nestled over a bed of fluffy steamed rice, and topped with crisp vegetables and toasted sesame seeds. It’s the kind of meal that makes everyone at the table happy—kids love the sweet sauce, adults appreciate the balanced flavors, and the cook (that’s you!) loves how ridiculously simple it is to pull together.
This dish is perfect for busy weeknights when you need dinner on the table fast, but it’s also impressive enough to serve when you have company. Whether you’re meal prepping for the week ahead, looking for a family-friendly dinner that doesn’t require convincing anyone to eat their veggies, or just want something more exciting than the same old chicken routine, this teriyaki chicken rice bowl delivers on every front. Plus, it’s endlessly customizable—swap the protein, change up the vegetables, or adjust the sweetness level to match your family’s taste preferences. The best part? You probably already have most of the ingredients in your pantry right now.
History / Background
Teriyaki has a fascinating culinary journey that bridges two cultures beautifully. The word “teriyaki” comes from two Japanese words: “teri,” meaning luster or shine, and “yaki,” meaning grilled or broiled. This cooking technique originated in Japan during the 17th century, where fish was traditionally marinated in a sweet soy-based sauce and then grilled until it developed that signature glossy finish.
However, the teriyaki chicken we know and love today—especially in rice bowl form—is actually a Japanese-American creation that gained popularity in the United States during the 1960s and 1970s. When Japanese immigrants brought their culinary traditions to Hawaii and the West Coast, they adapted their recipes to suit American tastes and available ingredients. Chicken replaced the traditional fish (like yellowtail or salmon), and the sauce became sweeter and thicker to appeal to Western palates.
The rice bowl format itself draws inspiration from “donburi,” a traditional Japanese dish where various toppings are served over rice in a bowl. Combining the Americanized teriyaki sauce with the donburi concept created the perfect fusion dish—one that’s now a staple at Japanese restaurants across America, food courts nationwide, and increasingly, in home kitchens everywhere.
What makes this dish particularly special is how it represents culinary evolution at its finest. It honors its Japanese roots while embracing American convenience and taste preferences, creating something that feels both authentic and accessible. Today, teriyaki chicken rice bowls have become comfort food for millions of Americans, proving that the best recipes are often those that bring cultures together on a single plate.
Why You’ll Love This Recipe
This teriyaki chicken rice bowl isn’t just another chicken recipe—it’s a complete game-changer for home cooks who want maximum flavor with minimum fuss. The homemade teriyaki sauce is so much better than store-bought versions, with a perfect balance of sweet, salty, and umami that coats every piece of chicken in glossy perfection. Unlike complicated Asian-inspired recipes that require specialty equipment or hard-to-find ingredients, this one uses pantry staples and comes together in one pan, which means less time cooking and even less time cleaning up afterward.
Here’s why this recipe will become a regular in your dinner rotation:
- Super Quick & Easy – From start to finish, you’re looking at about 30 minutes, making it faster than ordering delivery and infinitely more satisfying
- Budget-Friendly – Uses affordable chicken thighs or breasts and simple ingredients that won’t break the bank
- Crowd-Pleasing – Even picky eaters love this sweet and savory combination; it’s kid-approved without being boring for adults
- Customizable – Easily adapt it for different dietary needs, spice levels, or whatever vegetables you have on hand
- Meal Prep Champion – Makes excellent leftovers and can be portioned out for healthy work lunches all week long
- Healthier Than Takeout – Control the sugar, sodium, and oil content while still getting that restaurant-style taste you crave
- One-Pan Wonder – Minimal cleanup means more time enjoying your meal and less time scrubbing dishes
- Impressive Yet Effortless – Looks and tastes like you spent hours in the kitchen, but your secret is safe with us
Whether you’re cooking for one, feeding a family, or meal prepping for the week, this recipe scales beautifully and delivers consistent, delicious results every single time.
Ingredient Notes
Understanding your ingredients is the secret to recipe success! Here’s what you need and why each component matters:
Chicken (Boneless, Skinless Thighs or Breasts): Chicken thighs are preferred by many home cooks because they stay juicier and more tender during cooking, plus they’re more forgiving if you accidentally overcook them slightly. Breasts work perfectly too—they’re leaner and cook a bit faster. Cut into bite-sized pieces for even cooking and maximum sauce coverage. Substitution: Try thinly sliced pork, firm tofu, or even shrimp for variety.
Soy Sauce: This is your primary source of saltiness and umami depth. Use low-sodium soy sauce if you’re watching your salt intake, or go with regular for maximum flavor punch. Substitution: Tamari for gluten-free, coconut aminos for soy-free (though it’ll be slightly sweeter).
Brown Sugar or Honey: Provides the characteristic sweetness and helps create that beautiful caramelized glaze. Brown sugar gives a deeper, molasses-like flavor, while honey adds floral notes. Substitution: Maple syrup, coconut sugar, or even a sugar substitute if you’re watching carbs.
Rice Vinegar: Adds brightness and tanginess that balances the sweetness perfectly. It’s milder than white vinegar, which is essential for that authentic Asian-inspired flavor. Substitution: Apple cider vinegar in a pinch, but use less as it’s stronger.
Fresh Garlic & Ginger: These aromatics are non-negotiable for authentic flavor! Fresh is vastly superior to powdered versions here. Garlic adds pungency, while ginger brings warmth and a slight spicy kick. Substitution: In a real emergency, use 1/2 teaspoon of garlic powder and ground ginger, but fresh is truly best.
Cornstarch: The secret to that thick, glossy sauce that clings to every piece of chicken. It’s mixed with water to create a slurry that thickens the sauce without making it gloopy. Substitution: Arrowroot powder works similarly.
Sesame Oil: Just a drizzle adds incredible nutty depth and that restaurant-quality aroma. A little goes a long way! Substitution: If you don’t have it, skip it rather than substituting, as alternatives won’t provide the same flavor.
White or Jasmine Rice: The foundation of your bowl! Jasmine rice is slightly fragrant and sticky, which is ideal, but any white rice works. Brown rice is a heartier, healthier option. Substitution: Cauliflower rice for low-carb, quinoa for protein boost.
Vegetables: Broccoli, snap peas, carrots, and edamame are classic choices. They add color, nutrition, and textural contrast. Use fresh or frozen based on convenience. Substitution: Bell peppers, zucchini, mushrooms, bok choy—whatever you love!
Equipment Needed
You don’t need a fancy kitchen to make this recipe—just these basic tools that most home cooks already have:
- Large Skillet or Wok – For cooking the chicken and making the sauce; a 12-inch skillet with high sides works perfectly
- Medium Saucepan with Lid – For cooking your rice to fluffy perfection
- Sharp Chef’s Knife – To cut chicken into uniform pieces and prep vegetables
- Cutting Board – Preferably separate ones for raw meat and vegetables
- Measuring Cups and Spoons – For accurate ingredient proportions
- Small Bowl – To mix your cornstarch slurry
- Whisk or Fork – For mixing ingredients smoothly
- Wooden Spoon or Silicone Spatula – For stirring the chicken and sauce without scratching your pan
- Grater or Microplane (optional but helpful) – For fresh ginger
- Rice Cooker (optional) – Makes rice preparation completely hands-off if you have one

Easy Teriyaki Chicken Rice Bowl Recipe
- Total Time: 30 minutes
- Yield: 4 servings 1x
- Diet: Gluten Free
Description
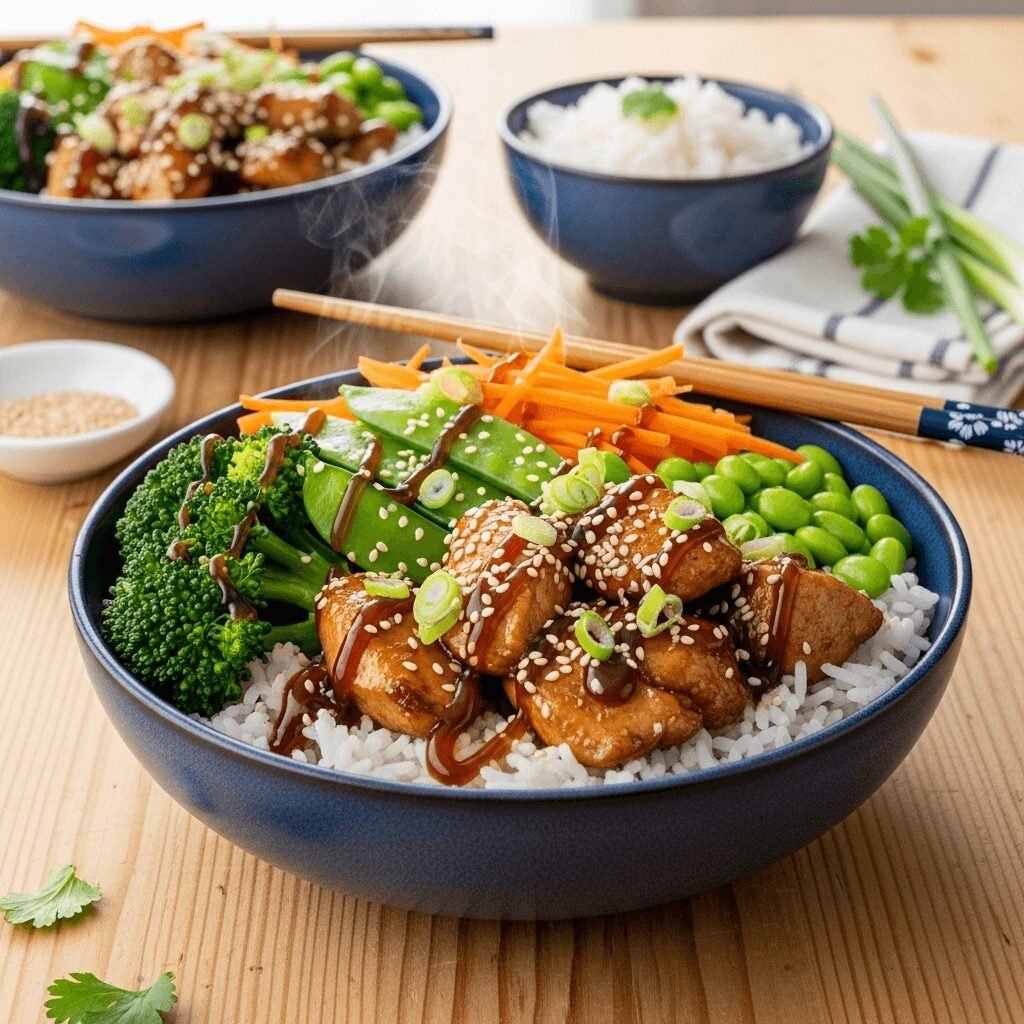
This Easy Teriyaki Chicken Rice Bowl features tender chicken pieces coated in a homemade sweet and savory teriyaki sauce, served over fluffy rice with crisp vegetables. Ready in just 30 minutes, it’s the perfect weeknight dinner that tastes like takeout but is healthier and more budget-friendly!
Ingredients
For the Teriyaki Sauce:
- 1/3 cup low-sodium soy sauce
- 1/4 cup water
- 3 tablespoons brown sugar (or honey)
- 2 tablespoons rice vinegar
- 1 tablespoon sesame oil
- 3 cloves garlic, minced
- 1 tablespoon fresh ginger, grated
- 2 tablespoons cornstarch mixed with 2 tablespoons cold water (slurry)
For the Chicken & Bowl:
- 1.5 pounds boneless, skinless chicken thighs or breasts, cut into bite-sized pieces
- 2 tablespoons vegetable oil, divided
- 3 cups cooked white or jasmine rice (about 1 cup uncooked)
- 2 cups broccoli florets
- 1 cup snap peas
- 1 cup shredded carrots
- 2 green onions, sliced
- 2 tablespoons sesame seeds, toasted
- Salt and pepper to taste
Instructions
- Cook the Rice: Prepare your rice according to package directions. If using a rice cooker, start this first so it’s ready when you need it. Keep warm until serving.
- Prep the Chicken: Pat chicken pieces dry with paper towels and season lightly with salt and pepper. Dry chicken browns better and creates a nice texture.
- Make the Teriyaki Sauce: In a small bowl, whisk together soy sauce, 1/4 cup water, brown sugar, rice vinegar, sesame oil, minced garlic, and grated ginger. Set aside. In a separate small bowl, mix cornstarch with 2 tablespoons cold water to create a slurry—set this aside too.
- Cook the Chicken: Heat 1 tablespoon of vegetable oil in a large skillet or wok over medium-high heat. Once hot and shimmering, add the chicken pieces in a single layer (work in batches if necessary to avoid crowding). Cook for 4-5 minutes without stirring to get a nice golden-brown sear, then flip and cook another 3-4 minutes until cooked through (internal temperature should reach 165°F). Remove chicken from pan and set aside.
- Stir-Fry the Vegetables: In the same skillet, add the remaining tablespoon of oil. Add broccoli florets and cook for 2-3 minutes, stirring frequently. Add snap peas and carrots, continuing to cook for another 2-3 minutes until vegetables are tender-crisp and bright in color. Remove vegetables and set aside with the chicken.
- Create the Sauce: Reduce heat to medium. Pour the teriyaki sauce mixture into the skillet, scraping up any browned bits from the bottom of the pan (that’s flavor!). Bring to a gentle simmer. Give your cornstarch slurry a quick stir (it settles), then slowly pour it into the simmering sauce while whisking constantly. Continue cooking for 1-2 minutes, stirring frequently, until the sauce thickens to a glossy, syrupy consistency that coats the back of a spoon.
- Combine Everything: Return the cooked chicken and vegetables to the skillet with the sauce. Toss everything together gently but thoroughly, ensuring each piece is coated in that beautiful teriyaki glaze. Cook for another minute to heat everything through and allow the flavors to meld.
- Assemble Your Bowls: Divide the cooked rice among four bowls. Top each generously with the teriyaki chicken and vegetable mixture, making sure to drizzle plenty of that gorgeous sauce over everything. Garnish with sliced green onions and toasted sesame seeds.
- Serve Immediately: Enjoy while hot! Pass around extra soy sauce or sriracha for anyone who wants to customize their bowl.
- Chicken Temperature: Always use a meat thermometer to ensure chicken reaches 165°F internal temperature for food safety.
- Sauce Thickness: If your sauce is too thick, add a tablespoon of water at a time to thin it. If too thin, mix a little more cornstarch with cold water and add it to the simmering sauce.
- Vegetable Options: Feel free to use whatever vegetables you have—bell peppers, mushrooms, zucchini, baby corn, and water chestnuts all work beautifully.
- Make it Spicy: Add 1-2 teaspoons of sriracha or red pepper flakes to the sauce for a kick.
- Gluten-Free: Simply substitute tamari for the soy sauce.
Notes
- Chicken Temperature: Always use a meat thermometer to ensure chicken reaches 165°F internal temperature for food safety.
- Sauce Thickness: If your sauce is too thick, add a tablespoon of water at a time to thin it. If too thin, mix a little more cornstarch with cold water and add it to the simmering sauce.
- Vegetable Options: Feel free to use whatever vegetables you have—bell peppers, mushrooms, zucchini, baby corn, and water chestnuts all work beautifully.
- Make it Spicy: Add 1-2 teaspoons of sriracha or red pepper flakes to the sauce for a kick.
- Gluten-Free: Simply substitute tamari for the soy sauce.
- Prep Time: 10 minutes
- Cook Time: 20 minutes
- Category: Dinner
- Method: Stovetop
- Cuisine: Japanese-American
Nutrition
- Serving Size: 1 bowl (1/4 of recipe)
- Calories: 485
- Sugar: 12g
- Sodium: 720mg
- Fat: 14g
- Saturated Fat: 2.5g
- Unsaturated Fat: 10.5g
- Trans Fat: 0g
- Carbohydrates: 52g
- Fiber: 3g
- Protein: 38g
- Cholesterol: 125mg
Note: Nutrition information is estimated based on ingredients used and may vary based on specific brands and modifications.
Tips & Variations
Protein Swaps:
- Tofu Teriyaki Bowl: Use extra-firm tofu, pressed and cubed. Pan-fry until golden before coating with sauce.
- Salmon or Shrimp: Reduce cooking time accordingly—shrimp takes just 2-3 minutes per side, salmon about 4 minutes per side.
- Ground Turkey or Beef: Brown the meat, drain excess fat, then add the sauce.
Vegetable Variations:
- Winter Version: Use roasted Brussels sprouts, butternut squash cubes, and kale.
- Summer Version: Try zucchini, yellow squash, bell peppers, and fresh corn.
- Frozen Vegetables: Absolutely fine! Use a stir-fry blend for ultimate convenience.
Dietary Modifications:
- Low-Carb/Keto: Serve over cauliflower rice instead of regular rice and reduce the brown sugar to 1 tablespoon or use a sugar substitute.
- Paleo: Use coconut aminos instead of soy sauce, honey instead of brown sugar, and serve over cauliflower rice.
- Vegan: Replace chicken with crispy tofu or tempeh and ensure your sugar is vegan-certified.
Flavor Boosts:
- Add a splash of pineapple juice to the sauce for a Hawaiian-inspired twist
- Stir in a tablespoon of creamy peanut butter for a Thai-fusion flavor
- Top with pickled ginger, edamame, or a soft-boiled egg
- Drizzle with spicy mayo (mix mayo with sriracha) for restaurant-style presentation
Heat Level Adjustments:
- Mild: Keep it as-is or reduce the ginger slightly
- Medium: Add 1 teaspoon of sriracha to the sauce
- Spicy: Include red pepper flakes, fresh sliced jalapeños, or double the sriracha
Pro Chef Tips
Tip #1 – The Perfect Chicken Texture: The secret to restaurant-quality chicken is high heat and patience. Let the chicken sit undisturbed for the first few minutes to develop a golden-brown crust. This caramelization adds incredible depth of flavor and prevents the meat from becoming rubbery. Don’t overcrowd your pan—cook in batches if needed. Overcrowding creates steam instead of a sear.
Tip #2 – Sauce Consistency Mastery: Your teriyaki sauce should be glossy and thick enough to coat the chicken but not gloopy. The cornstarch slurry is your control mechanism. Always mix it right before adding (cornstarch settles quickly) and add it slowly while the sauce simmers gently—not at a rolling boil, which can make it clumpy. If your sauce breaks or becomes too thick, a tablespoon of water and gentle whisking will bring it back to life.
Tip #3 – Rice Perfection: For the fluffiest rice, rinse it under cold water 2-3 times before cooking to remove excess starch. This prevents gummy, sticky rice (unless you’re using sushi rice, which should be sticky). Let cooked rice rest, covered, for 5 minutes after the heat is off before fluffing with a fork. This finishing step allows moisture to redistribute evenly.
Tip #4 – Layering Flavors: Toast your sesame seeds in a dry pan for 2-3 minutes before using them as garnish. This small step releases their oils and intensifies their nutty flavor dramatically. Similarly, when cooking garlic and ginger, don’t let them burn—they should be fragrant and softened, not browned, which would make them bitter.
Tip #5 – The Deglaze Technique: When you add your sauce to the pan where you cooked the chicken, use a wooden spoon to scrape up all those brown bits (fond) stuck to the bottom. This is concentrated flavor gold! Those caramelized bits dissolve into your sauce, adding incredible depth you simply can’t replicate any other way.
Common Mistakes to Avoid
Mistake #1 – Using Too Much Cornstarch: Adding too much cornstarch or adding it when the sauce is boiling too vigorously creates a gluey, overly thick sauce that’s unappetizing. Always mix cornstarch with cold water first (never add it dry), and add it to gently simmering sauce while stirring constantly. If you do over-thicken, thin it out with water or chicken broth.
Mistake #2 – Overcooking the Vegetables: Nobody wants mushy, gray broccoli! Vegetables should be tender-crisp and vibrant in color. Cook them over high heat for a short time, and don’t be afraid to remove them while they still have a slight bite. They’ll continue cooking slightly from residual heat, and the texture contrast with the tender chicken is part of what makes this dish so satisfying.
Mistake #3 – Not Seasoning the Chicken: While the teriyaki sauce is flavorful, seasoning your raw chicken with salt and pepper before cooking makes a huge difference in the final taste. This base seasoning enhances the meat itself, not just the coating. Don’t skip this simple step!
Mistake #4 – Cold Ingredients in a Cold Pan: Starting with room-temperature chicken (let it sit out for 10 minutes after cutting) and a properly preheated pan ensures even cooking and proper browning. Adding cold chicken to a cold pan causes the meat to steam and stick rather than sear beautifully.
Mistake #5 – Drowning Everything in Sauce: More isn’t always better! You want each component to shine—the chicken should be well-coated but not swimming, the vegetables should be lightly glazed, and the rice should have sauce on top but remain fluffy underneath. Reserve some sauce on the side for those who want extra, rather than making everything soggy from the start.
Storage & Meal Prep
Refrigerator Storage:
Store leftover teriyaki chicken rice bowls in airtight containers in the refrigerator for up to 4 days. For best results, store the rice separately from the chicken and vegetables if possible, as this prevents the rice from absorbing too much sauce and becoming mushy. If you’ve already combined everything, that’s totally fine—it’ll just be more sauce-integrated when reheated.
Reheating Instructions:
The microwave is your friend here! Place your bowl in the microwave, add a tablespoon of water or chicken broth to restore moisture, cover with a damp paper towel, and heat in 1-minute intervals, stirring between, until heated through (usually 2-3 minutes total). Alternatively, reheat in a skillet over medium heat with a splash of water, stirring occasionally until hot.
Meal Prep Strategy:
This recipe is absolutely perfect for meal prepping! Cook everything on Sunday, then portion into 4 individual meal prep containers. Pack the rice on the bottom, top with chicken and vegetables, and store the extra sauce in small containers or squeeze bottles on the side. When it’s time to eat, just heat and enjoy. The flavors actually deepen and meld beautifully over the first day or two!
Shelf Life Notes:
Cooked rice typically keeps for 4-5 days when properly refrigerated, while cooked chicken stays safe for 3-4 days. Always reheat to an internal temperature of 165°F to ensure food safety. If anything smells off or looks questionable, err on the side of caution and discard it.
Make-Ahead & Freezer Notes
Can You Make This Ahead?
Absolutely! You can prep several components in advance to make dinner time even easier:
- The Sauce: Make the teriyaki sauce (without the cornstarch slurry) up to 5 days ahead and store it in the refrigerator. Add the cornstarch when you’re ready to cook.
- Marinated Chicken: Cut your chicken and marinate it in half the teriyaki sauce for up to 24 hours before cooking for extra flavor.
- Chopped Vegetables: Prep all your vegetables 2-3 days in advance and store them in containers in the fridge.
- Cooked Rice: Make rice up to 4 days ahead. Actually, day-old rice works great for this recipe!
Freezer Instructions:
Yes, this freezes beautifully! Cool completely, then portion into freezer-safe containers or heavy-duty freezer bags. Lay bags flat for space-efficient storage. Label with the date and contents. Properly stored, teriyaki chicken bowls will maintain good quality in the freezer for up to 3 months.
How to Freeze:
- Best Method: Freeze the chicken with sauce and vegetables together, but freeze rice separately in its own container. Rice texture can become slightly different when frozen with sauce.
- Alternative Method: Freeze complete bowls if you want ultimate convenience, accepting that the rice texture might be slightly softer upon reheating.
Thawing & Reheating from Frozen:
For best results, transfer frozen portions to the refrigerator to thaw overnight. Reheat in the microwave with a splash of water, or in a skillet over medium heat until piping hot throughout. You can also reheat directly from frozen—just add 2-3 minutes to the reheating time and stir halfway through to ensure even heating.
Serving Suggestions
This teriyaki chicken rice bowl is a complete meal on its own, but here are some delicious ways to round out your dinner or add variety:
Perfect Side Dishes:
- Miso Soup: A warm, savory bowl of miso soup with tofu and seaweed makes an authentic Japanese-style accompaniment
- Asian Cucumber Salad: Thinly sliced cucumbers dressed in rice vinegar, sesame oil, and a touch of sugar provide a cool, refreshing contrast
- Edamame: Steamed edamame sprinkled with sea salt is the perfect appetizer or side
- Seaweed Salad: Adds color, nutrition, and an authentic touch
- Potstickers or Gyoza: Store-bought or homemade dumplings pan-fried until crispy
Beverages to Pair:
- Hot Green Tea: Traditional and perfect for cleansing your palate between bites
- Iced Matcha Latte: For a modern, Instagram-worthy pairing
- Sparkling Water with Citrus: Keeps things light and refreshing
- Japanese Beer (Sapporo or Asahi): For the adults at the table
- Ramune (Japanese Soda): Kids love this fun, bubbly option
Additional Toppings Bar:
Set up a DIY topping station for a fun, customizable meal experience:
- Crispy fried onions or shallots
- Pickled ginger
- Sriracha or chili crisp oil
- Kimchi for a Korean fusion twist
- Sliced avocado
- Soft-boiled or jammy eggs
- Furikake (Japanese rice seasoning)
- Crispy seaweed strips
- Extra sesame seeds and green onions
Make It a Full Asian-Inspired Feast:
Serve alongside other favorites like spring rolls, crab rangoon, or a simple stir-fried bok choy to create a spread that feels like a special occasion dinner without the restaurant price tag!
FAQs Section
Q: Can I use chicken breast instead of chicken thighs?
A: Absolutely! Chicken breasts work perfectly in this recipe. They’re leaner than thighs, so they’ll have a slightly different texture—a bit firmer and less juicy—but still delicious. Just be extra careful not to overcook them, as breasts can dry out more quickly. Cut them into uniform bite-sized pieces and watch your cooking time closely. Internal temperature should reach 165°F, which usually takes 6-8 minutes total in a hot pan.
Q: Is this recipe gluten-free?
A: It can be! The only ingredient containing gluten is the soy sauce. Simply substitute tamari (which is a gluten-free soy sauce) or coconut aminos for the regular soy sauce, and you’re good to go. Everything else in the recipe is naturally gluten-free. Just double-check your specific brands to be absolutely sure.
Q: My sauce came out too thin/thick. How do I fix it?
A: No problem—sauce consistency is easily adjustable! If it’s too thin, mix another teaspoon of cornstarch with a tablespoon of cold water, stir it into the simmering sauce, and cook for another minute until it thickens to your liking. If it’s too thick, simply whisk in water or chicken broth, one tablespoon at a time, until you reach your desired consistency. The beauty of a cornstarch-thickened sauce is how forgiving it is!
Q: Can I make this in a slow cooker or Instant Pot?
A: Yes, with modifications! For a slow cooker, place chicken pieces in the pot, pour the teriyaki sauce (without the cornstarch) over top, and cook on low for 3-4 hours or high for 2 hours. In the last 30 minutes, stir in the cornstarch slurry to thicken. Add vegetables in the last hour. For an Instant Pot, use the sauté function to brown the chicken, add sauce and vegetables, pressure cook on high for 5 minutes with quick release, then use the sauté function again to add the cornstarch slurry and thicken the sauce.
Q: What’s the best rice to use for this recipe?
A: Jasmine rice is ideal because of its slightly sticky texture and subtle fragrance, but any long-grain white rice works beautifully. Short-grain rice (like sushi rice) is more sticky and clumps together nicely for eating with chopsticks. Brown rice is a healthier option with more fiber, though it takes longer to cook. For a low-carb option, cauliflower rice works well but will have a completely different texture—lighter and less filling.
Q: How do I prevent my chicken from being rubbery or dry?
A: The key is high heat and not overcooking! Pat your chicken dry before cooking, season it well, and make sure your pan is hot before adding the meat. Cook it quickly over medium-high heat—you’re looking for an internal temperature of 165°F, which happens pretty fast with bite-sized pieces. Using chicken thighs instead of breasts also helps, as they’re more forgiving and stay juicier. Finally, once the chicken is cooked, remove it from the pan and let it rest while you make the sauce and cook vegetables, then return it just to coat and heat through.
Q: Can I add pineapple to make it Hawaiian-style?
A: Definitely! Fresh or canned pineapple chunks (drained if canned) make a delicious sweet and tangy addition. Add them when you’re cooking the vegetables—they’ll caramelize slightly and add wonderful flavor. You can also add a few tablespoons of pineapple juice to the teriyaki sauce for extra tropical vibes. This variation is especially popular with kids!
Q: How spicy is this recipe? Can I make it spicier?
A: As written, this recipe is very mild with no heat—just sweet and savory. To add spice, stir 1-2 teaspoons of sriracha sauce into the teriyaki sauce, add red pepper flakes while cooking, include sliced fresh jalapeños or Thai chilies with the vegetables, or serve with chili crisp oil on the side for people to add to taste. Start conservatively—you can always add more heat, but you can’t take it away!
Conclusion
There you have it—your new go-to recipe for Easy Teriyaki Chicken Rice Bowls that’ll have everyone asking for seconds! This dish truly has it all: incredible flavor, simple preparation, healthy ingredients, and that satisfying takeout vibe without the takeout price tag or mystery ingredients. Whether you’re a busy parent looking for a reliable weeknight dinner, a meal prep enthusiast planning your week ahead, or simply someone who loves good food without the fuss, this recipe delivers every single time.
The beauty of this dish lies in its versatility. Make it exactly as written for classic teriyaki perfection, or use it as a canvas for your own creativity with different proteins, vegetables, and spice levels. Batch cook it on Sunday for easy lunches all week, or whip it up fresh on a busy Tuesday evening when you need dinner on the table fast. Either way, you’re treating yourself and your loved ones to a home-cooked meal that nourishes both body and soul.
I’d absolutely love to hear how this recipe turns out for you! Did you make any fun modifications? What vegetables did you use? Was your family as obsessed as mine? Drop a comment below and let me know! And if you loved this recipe, please consider pinning it to your favorite Pinterest boards—whether that’s “Easy Dinner Recipes,” “Meal Prep Ideas,” or “Asian-Inspired Dishes.” Your save helps other home cooks discover this delicious meal, and I’m so grateful for your support!
Now stop reading and start cooking—your perfect teriyaki chicken rice bowl awaits! 🍚✨

