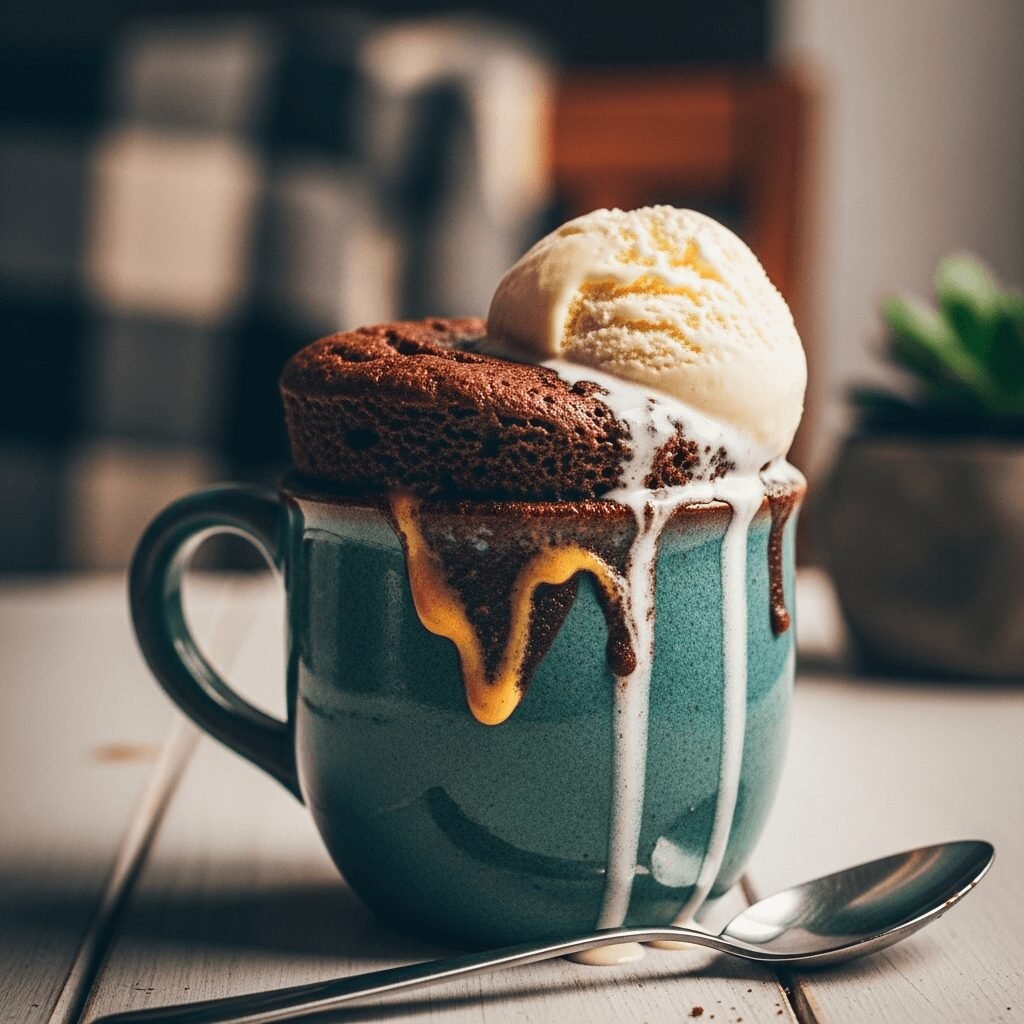

Craving something sweet but don’t want to heat up your entire kitchen or wait an hour for dessert? This chocolate peanut butter mug cake is about to become your new favorite late-night treat! Imagine the rich, fudgy texture of brownies combined with the creamy, nutty goodness of peanut butter—all made in a single mug and ready in just two minutes.
This single-serve dessert is perfect for those moments when you need something indulgent right now. Whether you’re studying late, binge-watching your favorite show, need a quick after-dinner sweet treat, or simply want portion control without baking an entire cake, this chocolate peanut butter mug cake delivers big flavor in a tiny package. It’s warm, gooey, and incredibly satisfying—basically a hug in a mug!
The best part? You probably already have all the ingredients in your pantry. No mixer, no oven, just a mug, a microwave, and about five minutes from start to finish. It’s the ultimate solution for unexpected dessert cravings or when you want to treat yourself without the commitment of a full batch of baked goods.
History / Background
The mug cake phenomenon took the internet by storm in the early 2010s, revolutionizing the way we think about single-serve desserts. Before mug cakes, satisfying a sudden sweet tooth meant either baking an entire cake (and dealing with leftovers) or heading to the store. The genius of the mug cake lies in its simplicity and speed—it democratized dessert-making for college students, busy professionals, and anyone living in small spaces without full kitchens.
The chocolate and peanut butter combination, however, has a much longer history in American cuisine. This beloved pairing gained mainstream popularity in 1928 when H.B. Reese created the Reese’s Peanut Butter Cup. Since then, chocolate and peanut butter have been inseparable in the American dessert landscape—from Buckeye candies in Ohio to peanut butter brownies across the country.
The chocolate peanut butter mug cake is essentially a modern mashup of these two iconic elements: the convenience-driven innovation of mug cakes meets the timeless American flavor combination. Food bloggers and home cooks began experimenting with adding peanut butter to basic chocolate mug cake recipes in the mid-2010s, and the results were spectacular. The peanut butter adds moisture, richness, and protein while creating pockets of melty goodness throughout the cake.
Today, mug cakes have evolved from a quirky internet trend to a legitimate dessert category with endless variations. The chocolate peanut butter version stands out as one of the most popular because it delivers restaurant-quality flavor with zero culinary skills required. It’s become a staple recipe for teenagers learning to cook, adults living solo, and anyone who believes life’s too short to share dessert!
Why You’ll Love This Recipe
This chocolate peanut butter mug cake is the definition of instant gratification, and once you try it, you’ll understand why it’s earned a permanent spot in dessert lovers’ hearts. It’s not just about speed—though two minutes is pretty impressive—it’s about getting bakery-quality flavor with minimal effort and cleanup.
Here’s why this recipe is absolutely brilliant:
- Lightning-fast – From craving to eating in under 5 minutes total, including prep and cooking time
- Single serving perfection – Built-in portion control means you can indulge without temptation sitting in your kitchen for days
- No special equipment needed – If you own a mug and a microwave, you’re already equipped to make this
- Beginner-friendly – Absolutely no baking experience required; if you can stir, you can make this cake
- Minimal cleanup – Mix and cook in the same mug, meaning just one dish to wash (or you can even eat straight from it!)
- Budget-conscious – Uses pantry staples that cost pennies per serving
- Customizable – Easily adapt to dietary needs or flavor preferences with simple swaps
- Kid-approved – Safe enough for older kids to make themselves under supervision
- Late-night craving savior – No need to fire up the oven when that 10 PM chocolate urge hits
- Impressive despite simplicity – Serve it topped with ice cream, and guests will think you fussed
The texture is what really sets this recipe apart—it’s soft and tender like cake but dense and fudgy like a brownie, with ribbons of melted peanut butter throughout. Every bite delivers that perfect chocolate-peanut butter ratio that makes this flavor combination so addictive.
Ingredient Notes
The beauty of this chocolate peanut butter mug cake lies in its simplicity. Each ingredient plays a specific role in creating that perfect texture and flavor, and understanding them helps you troubleshoot and customize.
All-Purpose Flour – Provides structure to your cake. You can substitute with whole wheat flour for a heartier texture, or use a gluten-free flour blend if needed. Almond flour works too but creates a denser, more brownie-like result.
Granulated Sugar – Sweetens the cake and helps create moisture. You can reduce it slightly if you prefer less sweetness, or swap for brown sugar for a deeper, caramel-like flavor. Coconut sugar works beautifully as a refined sugar-free alternative.
Unsweetened Cocoa Powder – The star of the chocolate flavor! Make sure it’s unsweetened cocoa powder, not hot cocoa mix (which contains sugar and milk powder). Dutch-processed cocoa gives a smoother, less acidic flavor, while natural cocoa is more intense.
Baking Powder – The leavening agent that makes your cake rise and become fluffy rather than dense. Make sure yours is fresh (test it by dropping a pinch in hot water—it should fizz vigorously).
Salt – Don’t skip this! Even a tiny pinch enhances all the flavors and balances the sweetness. It makes the chocolate taste more chocolatey and prevents the cake from tasting flat.
Milk – Adds moisture and helps bind ingredients. Any milk works—dairy, almond, oat, soy, or coconut milk all produce great results. Room temperature milk incorporates more easily than cold.
Vegetable Oil – Creates a tender, moist crumb and prevents the cake from becoming rubbery. You can substitute melted coconut oil or melted butter for a richer flavor.
Vanilla Extract – Rounds out the flavors and adds depth. Pure vanilla is best, but imitation works in a pinch.
Peanut Butter – Use creamy peanut butter for the best texture and melting quality. Natural peanut butter works but may be slightly grainier. For peanut allergies, almond butter, cashew butter, or sunflower seed butter are excellent substitutions.
Equipment Needed
One of the greatest things about this recipe is how little equipment you need. Here’s your simple toolkit:
- Microwave-safe mug (12-16 oz capacity) – Make sure it’s genuinely microwave-safe! Ceramic or tempered glass mugs work best. Avoid mugs with metallic trim or decorations.
- Small bowl (optional) – For mixing if you prefer not to mix directly in the mug
- Fork or small whisk – For stirring and eliminating lumps
- Measuring spoons – For accurate measurements (this matters more in baking!)
- Tablespoon or small spoon – For adding the peanut butter dollop
- Microwave – The cooking vessel for this magical creation
- Oven mitts or towel – The mug gets hot! Protect your hands when removing it
That’s literally it. No stand mixer, no baking pans, no cooling racks. Just the basics you probably already have within arm’s reach in your kitchen.
Print
Chocolate Peanut Butter Mug Cake Recipe
- Total Time: 4 minutes 30 seconds
- Yield: 1 serving 1x
- Diet: Vegetarian
Description
This decadent chocolate peanut butter mug cake is a warm, fudgy, single-serve dessert ready in just 90 seconds! Rich chocolate cake studded with melty peanut butter swirls makes for the perfect quick treat when you need something sweet right now.
Ingredients
- 4 tablespoons all-purpose flour
- 3 tablespoons granulated sugar
- 2 tablespoons unsweetened cocoa powder
- 1/4 teaspoon baking powder
- Pinch of salt
- 3 tablespoons milk (any kind)
- 2 tablespoons vegetable oil
- 1/4 teaspoon vanilla extract
- 1 tablespoon creamy peanut butter
Instructions
- Select your mug – Choose a microwave-safe mug with at least 12 ounces capacity to allow room for the cake to rise while cooking.
- Combine dry ingredients – Add the flour, sugar, cocoa powder, baking powder, and salt directly to your mug. Use a fork to whisk everything together thoroughly, breaking up any clumps of cocoa powder. Make sure there are no pockets of flour or cocoa hiding at the bottom.
- Add wet ingredients – Pour in the milk, vegetable oil, and vanilla extract. Stir vigorously with your fork for about 30 seconds until the batter is completely smooth with no lumps. Scrape the sides and bottom of the mug to ensure everything is incorporated. The batter should be thick but pourable.
- Add peanut butter swirl – Drop the tablespoon of peanut butter right in the center of the batter. Use a toothpick or the tip of your fork to gently swirl it through the chocolate batter in a figure-eight pattern. Don’t over-mix—you want distinct ribbons of peanut butter, not a fully blended batter.
- Microwave – Place the mug in the center of your microwave. Cook on high power for 70-90 seconds. Start checking at 70 seconds—the cake is done when the top looks mostly set with perhaps a few slightly moist spots. It will continue cooking from residual heat after you remove it. The exact time depends on your microwave’s wattage (lower wattage may need closer to 90 seconds; higher wattage may only need 60 seconds).
- Cool slightly – Carefully remove the mug using oven mitts or a towel—it will be hot! Let it cool for 1-2 minutes before eating. The cake will firm up slightly as it cools but should remain fudgy in the center.
- Serve and enjoy – Eat straight from the mug or turn it out onto a plate. Top with ice cream, whipped cream, chocolate chips, or extra peanut butter if desired. Best enjoyed warm!
Notes
- Microwave wattage matters – All microwaves cook differently. Start with less time and add more in 10-second increments if needed. Overcooking makes the cake rubbery.
- Don’t overfill – The batter should fill no more than halfway up your mug to allow for rising.
- Natural peanut butter note – If using natural peanut butter, stir the oil back in well before measuring, as separated oil can affect texture.
- Measuring accuracy – For best results, level off your flour and cocoa powder measurements rather than heaping them.
- Altitude adjustment – If you’re at high altitude, you may need to reduce baking powder slightly or increase liquid by a teaspoon.
- Prep Time: 3 minutes
- Cook Time: 90 seconds
- Category: Dessert
- Method: Microwave
- Cuisine: American
Nutrition
- Serving Size: 1 mug cake
- Calories: 485
- Sugar: 38g
- Sodium: 195mg
- Fat: 24g
- Saturated Fat: 3.5g
- Unsaturated Fat: 19g
- Trans Fat: 0g
- Carbohydrates: 62g
- Fiber: 4g
- Protein: 9g
- Cholesterol: 2mg
Note: Nutrition information is approximate and will vary based on specific brands and ingredients used.
Tips & Variations
The basic chocolate peanut butter mug cake is amazing on its own, but here are some fun ways to customize it to your taste preferences or dietary needs:
Flavor Variations:
- Double Chocolate: Add 1 tablespoon chocolate chips to the batter before microwaving
- Nutella swirl: Replace peanut butter with Nutella for a chocolate-hazelnut version
- Almond joy: Use almond butter instead of peanut butter and add shredded coconut
- Mocha: Replace 1 tablespoon of milk with strong brewed coffee or add 1/2 teaspoon instant espresso powder
- Mexican chocolate: Add a pinch of cinnamon and a tiny pinch of cayenne pepper
- Mint chocolate: Add 1/8 teaspoon peppermint extract and use mint chocolate chips
Dietary Modifications:
- Gluten-free: Use a 1-to-1 gluten-free flour blend
- Vegan: Use plant-based milk and replace the egg with 1 tablespoon aquafaba (if adding an egg) or simply use the eggless version
- Sugar-free: Substitute with a 1-to-1 sugar replacement like monk fruit sweetener
- Protein boost: Add 1 tablespoon chocolate protein powder and reduce flour by 1 tablespoon
- Lower fat: Use applesauce in place of oil (texture will be slightly different but still delicious)
Topping Ideas:
- Vanilla ice cream or frozen yogurt
- Whipped cream or coconut whipped cream
- Extra drizzle of peanut butter or chocolate sauce
- Sliced bananas (chocolate-peanut butter-banana is heavenly!)
- Crushed peanuts or peanut butter chips
- Fresh berries for a fruity contrast
- Caramel sauce for extra decadence
Pro Chef Tips
Want to take your mug cake from good to bakery-level amazing? Here are professional tricks that make all the difference:
Temperature is everything – Let your mug stand for 1-2 minutes after microwaving. The residual heat continues cooking the center while the edges set. Eating it immediately may give you a raw center, but waiting those two minutes creates perfect texture throughout.
The swirl technique matters – When adding peanut butter, drop it in the center and use just one or two gentle swirls. Over-mixing fully incorporates the peanut butter and you lose those amazing molten pockets. Think marbled, not blended.
Calibrate your microwave – Every microwave has hot spots and varying power levels. The first time you make this, start with 60 seconds, then add 10-second intervals. Note your perfect time and use it consistently. My 1100-watt microwave needs exactly 75 seconds, but my mom’s 800-watt needs a full 90.
Sift for superior texture – If you want an extra-fluffy cake, sift your cocoa powder and flour before measuring. Cocoa tends to clump, and sifting incorporates air for a lighter crumb.
Use room temperature ingredients – Cold milk straight from the fridge can create a less uniform batter. Let your milk sit out for 10 minutes, or microwave it for 10 seconds to take the chill off.
The toothpick test works here too – If you’re unsure about doneness, insert a toothpick into the center. It should come out with a few moist crumbs clinging to it, not wet batter. Remember, slightly underdone is better than overdone!
Grease your mug for easy removal – If you plan to plate your cake rather than eat from the mug, lightly spray the inside with cooking spray or butter it first. The cake will slide right out.
Embrace the imperfections – Mug cakes have rustic charm! Don’t expect it to look like a professionally decorated cake. The crater top and uneven surface are part of the appeal.
Common Mistakes to Avoid
Even simple recipes have pitfalls. Here’s how to sidestep the most common mug cake mistakes:
Overcooking the cake – This is the number one problem! An overcooked mug cake becomes rubbery, dense, and dry. Remember that it continues cooking after you remove it from the microwave. When the top looks mostly set with maybe one or two slightly wet spots, it’s done. It’s better to slightly undercook and add 10 more seconds than to overcook from the start.
Using the wrong size mug – Too small and your batter will overflow all over your microwave (messy!). Too large and the cake spreads out too thin and overcooks. Sweet spot is 12-16 ounces. If your mug seems borderline small, place it on a microwave-safe plate to catch any overflow.
Not mixing thoroughly – Lumps of flour or pockets of cocoa powder ruin the texture. Mix vigorously for a full 30 seconds, scraping the bottom and sides. The batter should be completely smooth before cooking.
Skipping the salt – Some people omit the pinch of salt thinking it’s unnecessary. Wrong! Salt is a flavor enhancer that makes chocolate taste more chocolatey and prevents the cake from tasting flat and one-dimensional.
Using expired leavening – Old baking powder won’t give you the rise you need. Test yours by dropping a pinch in hot water—if it doesn’t fizz immediately and vigorously, buy a fresh container. Baking powder loses potency after about 6 months once opened.
Measuring incorrectly – Baking is chemistry, even in a mug! Heaping tablespoons of flour or cocoa can throw off the ratios. Use proper measuring spoons and level them off with a knife for accuracy.
Forgetting to stir in the peanut butter properly – Just plopping peanut butter on top without swirling means you’ll get all the peanut butter in one bite and none in others. Give it a gentle swirl for even distribution.
Storage & Meal Prep
While this chocolate peanut butter mug cake is absolutely best enjoyed fresh and warm right after cooking, real life happens and you might need to save it for later.
Short-term storage: If you have leftovers (though honestly, who has leftover mug cake?), let it cool completely, then cover the mug with plastic wrap or transfer the cake to an airtight container. Store at room temperature for up to 1 day or refrigerate for up to 2 days. The texture will become firmer and more brownie-like as it sits.
Reheating: Place the mug in the microwave and heat for 15-20 seconds until warm throughout. It won’t be quite as magical as fresh, but it’s still pretty delicious! You can also eat it cold if you’re into that dense, fudgy brownie texture.
Dry ingredient prep: Here’s a brilliant time-saver—mix up several batches of the dry ingredients in advance! Combine flour, sugar, cocoa powder, baking powder, and salt in small containers or zip-top bags labeled with the wet ingredients and cooking instructions. When a craving hits, just dump a dry mix into a mug, add the wet ingredients, and microwave. Game changer for busy weeknights!
Mixed batter storage: I don’t recommend mixing the full batter in advance, as the baking powder activates when it meets liquid and loses its leavening power over time. Your cake won’t rise properly if the batter sits.
Leftover ingredients: Keep your cocoa powder in an airtight container in a cool, dark place to prevent clumping. Store opened jars of peanut butter upside down in the fridge to prevent oil separation.
Make-Ahead & Freezer Notes
The beauty of a mug cake is its immediacy—you make it when you want it. However, there are some smart prep strategies for maximum convenience:
Dry mix jars: Create your own “mug cake mix” by combining the dry ingredients (flour, sugar, cocoa powder, baking powder, salt) in a small jar or container. Label it with instructions for the wet ingredients and cooking time. This keeps for months in your pantry and makes the recipe even faster—you’re basically making your own boxed mix! Scale up and make 5-10 portions at once for ultimate convenience.
Can you freeze mug cake? Technically yes, but honestly, why would you? It takes 5 minutes to make fresh! That said, if you made one and didn’t finish it, you can freeze the baked cake wrapped tightly in plastic wrap for up to 1 month. Thaw at room temperature or microwave for 20-30 seconds. The texture will be denser and less fluffy than fresh.
Freezing batter: Not recommended. The baking powder activates when mixed with liquid, so frozen-then-thawed batter won’t rise properly. You’ll end up with a dense, heavy cake.
The best make-ahead strategy: Honestly, the dry mix prep mentioned above is your winner. Keep a jar in your pantry, and you’re always just 3 minutes away from warm chocolate peanut butter cake. It’s the perfect balance between convenience and fresh-baked quality.
Planning for guests: If you’re serving mug cakes at a gathering or party, prep individual portions of dry mix in small paper cups or ramekins labeled with each person’s name. Set out bowls of wet ingredients, and let everyone mix and microwave their own. It’s interactive, fun, and ensures everyone gets a hot, fresh cake!
Serving Suggestions
A chocolate peanut butter mug cake is pretty spectacular on its own, but here are some ideas for turning it into a complete dessert experience:
Classic pairings:
- A scoop of vanilla ice cream melting over the warm cake creates an amazing hot-and-cold contrast
- Freshly whipped cream with a dusting of cocoa powder for elegant simplicity
- Cold glass of milk—the traditional chocolate cake companion
Elevated presentations:
- Turn the cake out onto a dessert plate, top with ice cream, drizzle with chocolate sauce, and add a mint sprig for restaurant vibes
- Serve alongside fresh strawberries or raspberries—the fruity tartness cuts through the richness beautifully
- Add a dollop of vanilla Greek yogurt for a breakfast-dessert hybrid
Coffee shop style:
- Pair with a cappuccino or latte for an afternoon pick-me-up
- Serve with hot chocolate topped with marshmallows for ultimate chocolate indulgence
- Enjoy with a shot of espresso poured over the top (affogato style!) for adult sophistication
Make it a sundae:
- Top with vanilla or peanut butter ice cream, hot fudge, whipped cream, and chopped peanuts
- Add banana slices, caramel sauce, and a cherry for a peanut butter split situation
- Try salted caramel ice cream with pretzels for a sweet-salty extravaganza
Breakfast twist:
- Enjoy with your morning coffee as a special weekend treat
- Top with sliced bananas and a drizzle of honey for a more breakfast-appropriate presentation
- Add a spoonful of Greek yogurt and granola for protein
The best part about serving suggestions is that this cake is completely customizable to your mood, dietary preferences, and what you have on hand!
FAQs Section
Can I make this without a microwave? Absolutely! You can bake this in a conventional oven. Preheat your oven to 350°F (175°C), prepare the batter in an oven-safe ramekin or small baking dish, and bake for 12-15 minutes until the center is mostly set. The texture will be slightly different—more cake-like and less steamy—but still delicious.
Why did my mug cake overflow in the microwave? This usually happens for two reasons: your mug was too small (you need at least 12 ounces capacity), or your microwave runs hot and the cake rose too quickly. Try using a larger mug or reducing cooking time by 10 seconds. Placing the mug on a microwave-safe plate catches any potential overflow.
Can I double this recipe to make two mug cakes? It’s better to make two separate mugs rather than doubling in one large container. The cooking time changes when you increase volume, making it tricky to get even cooking. Just mix up two mugs separately—it only takes an extra minute!
My cake came out rubbery and tough. What happened? You overcooked it! This is the most common mug cake problem. Microwave ovens vary in power, so reduce your cooking time by 10-15 seconds next time. Remember, the cake continues cooking from residual heat even after you remove it, so slightly undercooked is better than overdone.
Can I use natural peanut butter instead of regular? Yes, but make sure to stir it really well first so the oil is fully incorporated. Natural peanut butter can be a bit grainier and may not swirl quite as smoothly, but it definitely works. Just avoid completely separated peanut butter where there’s a layer of oil on top.
Is this recipe safe for kids to make themselves? For older kids (10+) with basic kitchen skills, yes! The main safety concern is the hot mug coming out of the microwave. Make sure they use oven mitts or a towel and understand that both the mug and the cake inside will be very hot. Adult supervision is recommended, especially for younger children.
Can I add chocolate chips to this recipe? Definitely! Stir 1-2 tablespoons of chocolate chips into the batter before microwaving for extra chocolatey goodness. Mini chocolate chips work especially well since they distribute more evenly throughout the small cake.
Conclusion
There’s something magical about making a warm, decadent dessert in less time than it takes to brew a cup of coffee. This chocolate peanut butter mug cake proves that you don’t need hours in the kitchen, fancy equipment, or complicated techniques to create something truly special. It’s just you, a few simple ingredients, and two minutes standing between you and chocolate-peanut butter bliss.
Whether you’re treating yourself after a long day, satisfying a sudden midnight craving, or impressing someone with your “baking skills” (they don’t need to know how easy this was!), this little cake delivers big on flavor and satisfaction. The combination of rich chocolate and creamy peanut butter never gets old, and the warm, gooey texture is like a hug for your taste buds.
The best part? Once you master this basic recipe, the world of mug cake possibilities opens up. Experiment with different nut butters, add-ins, and toppings to make it uniquely yours. Save those dry ingredients in a jar for next time, and you’ll always be minutes away from homemade dessert.
So grab your favorite mug, raid your pantry, and get ready to fall in love with the easiest chocolate peanut butter dessert you’ll ever make. Trust me—once you discover how simple this is, you’ll wonder why you ever bothered with boxed cake mixes or store-bought desserts. This is your new secret weapon for instant dessert gratification!
Ready to make this delicious chocolate peanut butter mug cake? Give it a try tonight and let me know how it turns out in the comments below! Don’t forget to save this recipe to Pinterest so you can find it whenever that chocolate craving hits. Happy baking (or should I say, happy microwaving)! 🍫🥜✨