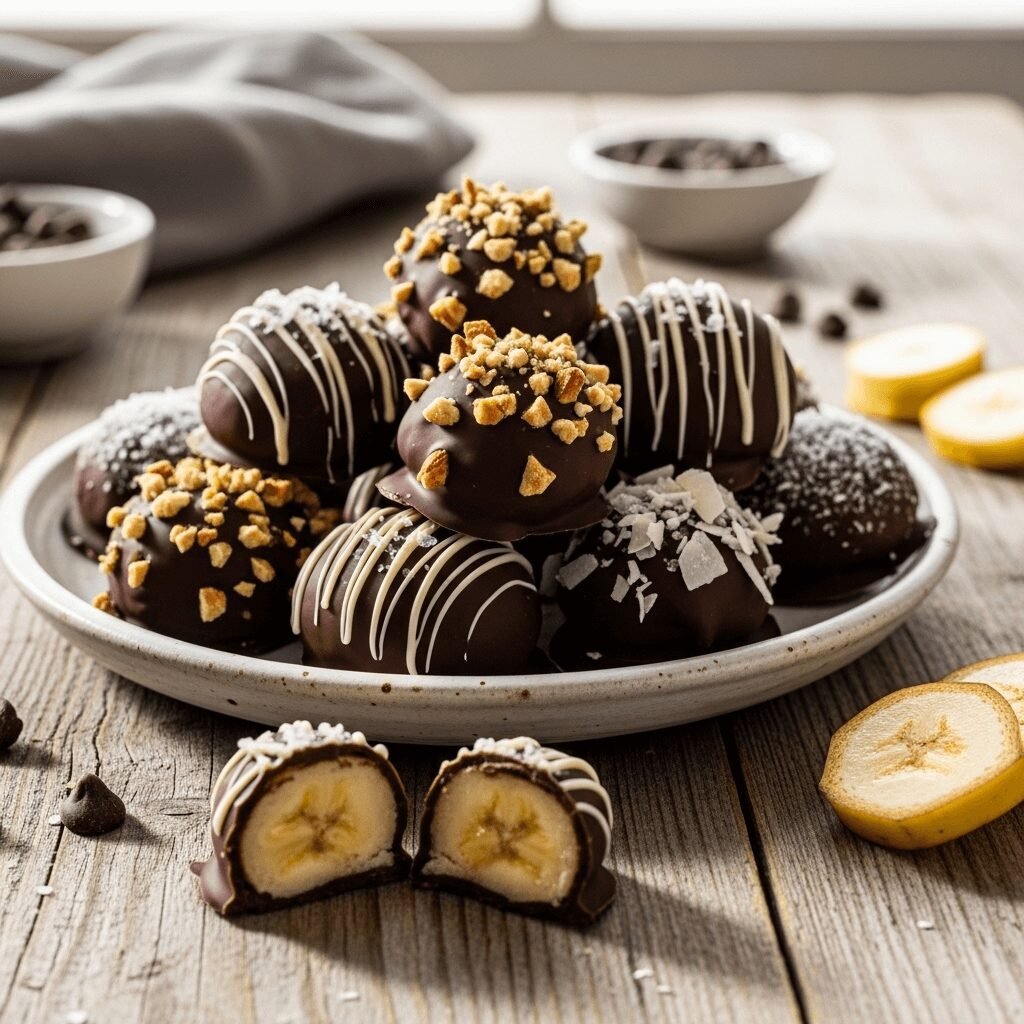
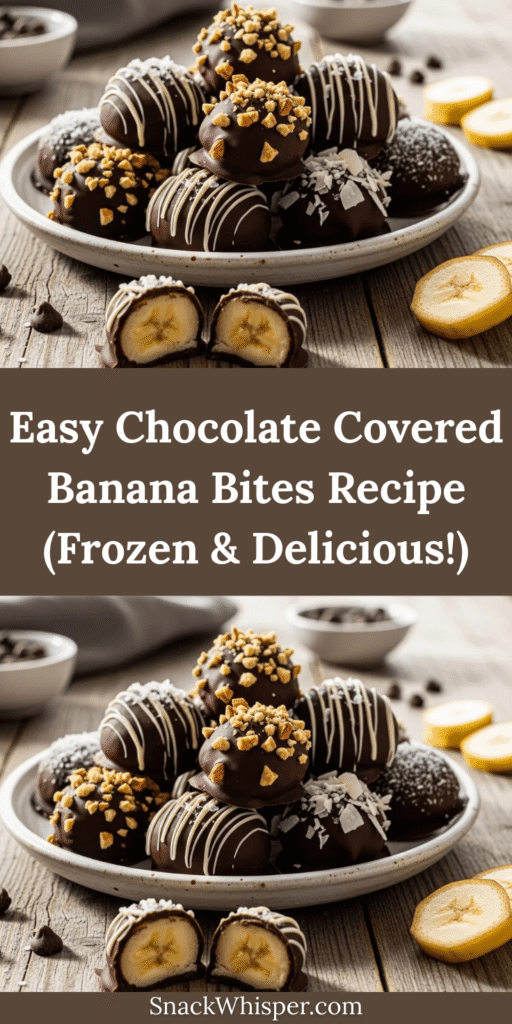
If you’re looking for a healthier dessert that tastes absolutely indulgent, these Chocolate Covered Banana Bites are about to become your new obsession! This simple frozen treat combines the natural sweetness of ripe bananas with rich, smooth chocolate coating, creating the perfect bite-sized snack that satisfies your sweet tooth without the guilt.
These adorable little bites are incredibly versatile—serve them at kids’ birthday parties, pack them for school lunches, enjoy them as a post-workout snack, or bring them out for game night with friends. They’re also fantastic for baby showers, summer barbecues, and holiday cookie platters. The best part? They take less than 15 minutes of active prep time, and most of that is just slicing bananas and melting chocolate!
What makes this recipe truly special is how it transforms two simple ingredients into something that feels like a gourmet treat. The creamy banana provides natural sweetness and a smooth texture, while the chocolate shell adds that satisfying snap when you bite into it. Plus, you can customize these bites with endless topping options—think crushed nuts, colorful sprinkles, shredded coconut, or a drizzle of white chocolate.
History / Background
While chocolate-covered bananas have been enjoyed for decades, the exact origin of this delightful combination is a bit of a delicious mystery. The concept likely emerged in the mid-20th century when frozen chocolate-dipped bananas became popular treats at beachside boardwalks and amusement parks across America, particularly in California. Street vendors would insert wooden sticks into whole bananas, dip them in chocolate, and freeze them for a refreshing summertime dessert.
The bite-sized version we’re making today is a modern adaptation that gained tremendous popularity in the 2010s with the rise of healthy eating blogs and Pinterest recipe boards. Home cooks discovered that slicing bananas into rounds before coating them in chocolate created the perfect portion-controlled treat that was easier to eat, store, and share than traditional frozen chocolate bananas on sticks.
This recipe also aligns beautifully with the growing movement toward “nice cream” and naturally sweetened frozen treats. As people became more conscious about refined sugars and artificial ingredients, banana-based desserts surged in popularity because bananas provide natural sweetness, creamy texture, and beneficial nutrients like potassium, vitamin B6, and fiber.
Today, chocolate covered banana bites have become a staple in meal prep communities, fitness enthusiast circles, and family-friendly food blogs. They represent the perfect intersection of health-conscious eating and dessert satisfaction—proof that you don’t have to sacrifice flavor to make better choices.
Why You’ll Love This Recipe
These Chocolate Covered Banana Bites check every box for the perfect easy dessert. They’re naturally gluten-free, can be made dairy-free or vegan with simple substitutions, and they’re refined sugar-free if you use dark chocolate. But beyond the health benefits, they’re just plain delicious—that combination of frozen creamy banana and crispy chocolate shell is absolutely irresistible!
Here’s why this recipe will become a regular in your kitchen:
- Super Quick & Easy – Only 10 minutes of prep time with just 2 main ingredients
- Naturally Sweet – No added sugar needed thanks to ripe bananas
- Kid-Approved – Children absolutely love helping make these and eating them even more
- Budget-Friendly – Bananas are one of the most affordable fruits year-round
- Portion-Controlled – Each bite is perfectly sized to satisfy without overindulging
- Customizable – Endless topping options mean you’ll never get bored
- Make-Ahead Friendly – Perfect for meal prep and last-minute entertaining
- Healthier Alternative – A much better choice than ice cream or candy bars
- Allergy-Friendly – Easy to adapt for various dietary restrictions
- No Baking Required – Your kitchen stays cool, perfect for summer
Ingredient Notes
The beauty of this recipe lies in its simplicity, but choosing the right ingredients makes all the difference in the final result.
Bananas: Use ripe but firm bananas with yellow peels that have just a few brown spots. Overly ripe bananas will be too soft and mushy when frozen, while underripe green bananas won’t have enough natural sweetness. Medium to large bananas work best because they’re easier to slice into uniform rounds. You’ll need about 3-4 bananas for a standard batch.
Chocolate: Semi-sweet or dark chocolate chips are ideal because they melt smoothly and create a nice shell when frozen. Dark chocolate (60-70% cacao) provides health benefits like antioxidants and pairs beautifully with the banana’s sweetness. Milk chocolate works too if you prefer sweeter bites, and white chocolate creates a gorgeous contrast. For dairy-free or vegan options, choose dairy-free chocolate chips or chunks—brands like Enjoy Life, Lily’s (sugar-free option), or Hu Kitchen work wonderfully.
Coconut Oil: Adding 1-2 teaspoons of coconut oil to your melted chocolate helps create a thinner, more fluid consistency that’s easier to dip and creates a glosser finish. It also helps the chocolate harden more quickly in the freezer. If you don’t have coconut oil, you can substitute with vegetable oil or simply skip it—the recipe will still work.
Optional Toppings: This is where you can get creative! Crushed peanuts or almonds add crunch and protein, shredded coconut brings tropical vibes, sea salt flakes create a sophisticated sweet-salty combination, mini chocolate chips double down on chocolate flavor, crushed pretzels add salty crunch, and rainbow sprinkles make them party-ready. The toppings need to be added immediately after dipping while the chocolate is still wet.
Equipment Needed
You don’t need any special kitchen gadgets for this recipe—just basic tools you probably already have:
- Sharp Knife – For slicing bananas into even rounds
- Cutting Board – A clean, stable surface for prep work
- Baking Sheet or Large Plate – Must fit in your freezer
- Parchment Paper or Silicone Baking Mat – Prevents sticking and makes cleanup easy
- Microwave-Safe Bowl or Double Boiler – For melting chocolate
- Fork or Dipping Tool – To lower banana slices into chocolate and lift them out
- Small Bowls – For organizing different toppings
- Airtight Container or Freezer Bags – For storing finished bites

Chocolate Covered Banana Bites Recipe
- Total Time: 2 hours 10 minutes
- Yield: About 30-40 bites (depending on banana size) 1x
- Diet: Vegetarian
Description
These easy Chocolate Covered Banana Bites are the perfect healthy frozen treat! Made with just bananas and chocolate, they’re naturally sweet, incredibly delicious, and ready in under 15 minutes of prep time. Customize with your favorite toppings for endless variety!
Ingredients
- 3-4 medium ripe bananas
- 1½ cups (about 9 oz) semi-sweet or dark chocolate chips
- 1-2 teaspoons coconut oil (optional, for smoother chocolate)
- Optional toppings: crushed nuts, shredded coconut, sea salt flakes, sprinkles, mini chocolate chips, crushed pretzels
Instructions
- Prepare Your Workspace: Line a large baking sheet with parchment paper or a silicone baking mat. Make sure your baking sheet will fit flat in your freezer. Clear some freezer space ahead of time.
- Slice the Bananas: Peel your bananas and slice them into rounds about ½-inch thick. Try to keep them as uniform as possible so they freeze and look consistent. Arrange the banana slices on your prepared baking sheet in a single layer, making sure they’re not touching each other.
- First Freeze: Place the baking sheet in the freezer for 30-45 minutes. This initial freeze prevents the bananas from sliding off your fork when dipping and helps the chocolate set faster. The bananas should be firm but not rock-hard.
- Melt the Chocolate: About 5 minutes before your bananas are done freezing, melt your chocolate. Microwave Method: Place chocolate chips and coconut oil in a microwave-safe bowl. Microwave in 30-second intervals, stirring between each, until completely smooth (usually 1-2 minutes total). Double Boiler Method: Place chocolate and coconut oil in a heatproof bowl over simmering water, stirring until melted and smooth.
- Dip the Bananas: Remove banana slices from the freezer. Working quickly, use a fork to dip each frozen banana slice into the melted chocolate, coating it completely. Tap the fork gently on the edge of the bowl to remove excess chocolate. Place the coated banana back on the parchment-lined baking sheet.
- Add Toppings: If using toppings, sprinkle them onto each chocolate-covered banana immediately after dipping, while the chocolate is still wet. Work in small batches so the chocolate doesn’t harden before you add toppings.
- Final Freeze: Once all banana bites are dipped and topped, return the baking sheet to the freezer for at least 1-2 hours, or until the chocolate is completely set and the bananas are frozen solid.
- Store and Enjoy: Transfer the frozen banana bites to an airtight container or freezer-safe bag with parchment paper between layers to prevent sticking. Enjoy straight from the freezer!
Notes
- Banana Ripeness Matters: Use bananas that are ripe but still slightly firm. Overripe bananas become mushy when frozen.
- Chocolate Temperature: If your chocolate gets too thick while dipping, reheat it for 10-15 seconds to restore smooth consistency.
- Quick-Set Tip: Use chocolate that contains cocoa butter (check ingredients) for the best snap and texture when frozen.
- Prevent Sliding: The first freeze is crucial—it keeps bananas from sliding off your fork during dipping.
- Storage Life: These keep well in the freezer for up to 2 months when stored properly in an airtight container.
- Prep Time: 10 minutes
- Cook Time: 0 minutes
- Category: Dessert, Snack
- Method: No-Bake, Freezing
- Cuisine: American
Nutrition
- Serving Size: 2 bites
- Calories: 95
- Sugar: 11g
- Sodium: 2mg
- Fat: 4g
- Saturated Fat: 2.5g
- Unsaturated Fat: 1.5g
- Trans Fat: 0g
- Carbohydrates: 16g
- Fiber: 2g
- Protein: 1g
- Cholesterol: 0mg
Nutritional information is approximate and will vary based on specific brands and toppings used.
Tips & Variations
Peanut Butter Chocolate Banana Bites: Spread a thin layer of peanut butter between two banana slices before dipping in chocolate for an extra indulgent treat that tastes like a frozen peanut butter cup!
White Chocolate Version: Use white chocolate chips instead of dark or milk chocolate for a sweeter, creamier coating. You can even do half the batch in dark chocolate and half in white chocolate.
Almond Bark Drizzle: After the chocolate coating sets, melt some almond bark or white chocolate and drizzle it over the top using a fork or piping bag for an elegant, professional look.
Nutella Variation: Mix 2 tablespoons of Nutella into your melted chocolate for a hazelnut chocolate flavor that’s absolutely divine.
Cinnamon Spice: Add ¼ teaspoon of cinnamon to your melted chocolate for a warm, cozy flavor that’s perfect for fall and winter.
Coconut Lover’s Version: Roll your chocolate-dipped bananas in toasted shredded coconut for a tropical twist that adds texture and flavor.
Candy Bar Style: Top with chopped peanut butter cups, crushed Oreos, or caramel bits before freezing for candy bar-inspired bites.
Healthy Dark Chocolate: Use 85% dark chocolate for a more sophisticated, less sweet version that’s packed with antioxidants.
Pro Chef Tips
Flash Freeze Strategy: Professional pastry chefs always freeze fresh fruit before dipping in chocolate. This prevents the chocolate from melting on contact and creates a cleaner, more professional-looking coating with fewer drips.
Temper Your Chocolate (Optional): For the ultimate snap and glossy finish, properly temper your chocolate by melting it to 115°F, cooling it to 84°F, then reheating to 88°F. This creates stable crystals that give you that perfect professional chocolate shell.
Use High-Quality Chocolate: The better your chocolate quality, the better your final result. Look for chocolate with cocoa butter as the first fat ingredient rather than vegetable oils.
Two-Dip Method: For an extra-thick chocolate coating, do a thin first dip, freeze for 10 minutes, then dip again. This creates a sturdier bite with more chocolate flavor.
Room Temperature Chocolate: Before melting, let your chocolate chips sit at room temperature for 30 minutes. This prevents temperature shock and helps them melt more evenly.
Prevent Condensation: When removing banana bites from the freezer, let them sit for just 1-2 minutes before eating. This prevents condensation from forming on the chocolate surface, which can make it look dull or streaky.
Uniform Slicing: Use a ruler or measuring tape to mark your banana at ½-inch intervals before cutting. Uniform pieces not only look more professional but also freeze and thaw at the same rate.
Common Mistakes to Avoid
Using Overripe Bananas: Bananas that are too ripe will be mushy and watery when frozen, making them difficult to handle and less pleasant to eat. Choose bananas that are yellow with just a few brown spots—ripe enough for sweetness but firm enough for structure.
Skipping the First Freeze: This is the most common mistake! If you dip room-temperature or refrigerated banana slices directly in chocolate, they’ll slip off your fork, melt the chocolate on contact, and create a sticky mess. Always freeze the banana slices first.
Chocolate Too Hot: If your chocolate is too hot when dipping, it will melt your frozen banana slices and create an uneven coating. Let melted chocolate cool slightly (but remain liquid) before dipping—it should be warm to the touch, not hot.
Not Tapping Off Excess Chocolate: After dipping each banana slice, gently tap your fork on the edge of the bowl to remove excess chocolate. Too much chocolate creates thick, uneven coats and makes the bites harder to eat.
Storing Improperly: Don’t just toss all the frozen bites into a container without parchment paper between layers—they’ll stick together and the chocolate will crack when you try to separate them. Layer with parchment or wax paper for easy access.
Storage & Meal Prep
These Chocolate Covered Banana Bites are meal prep superstars! They actually get better after sitting in the freezer for a day because the flavors meld together beautifully.
Short-Term Storage (Up to 1 Week): Keep them in an airtight container in the freezer with parchment paper between layers. This is perfect if you’re making them for the current week’s snacks.
Long-Term Storage (Up to 2 Months): For longer storage, use a high-quality freezer bag or vacuum-sealed container to prevent freezer burn. Press out as much air as possible before sealing. The banana bites will maintain their quality and taste for up to 2 months, though the bananas may darken slightly over time (this doesn’t affect flavor, just appearance).
Individual Portioning: If you’re meal prepping for the week, divide bites into individual portions in small containers or snack bags. This makes it easy to grab a serving without thawing the entire batch.
Serving from Frozen: These are meant to be eaten frozen! Remove from the freezer and let sit for 1-2 minutes to take the edge off the extreme cold, then enjoy. They should still be firm and frozen—if they start to get soft, the banana becomes mushy and less pleasant.
Reheating: Don’t reheat these! They’re specifically designed as a frozen treat. If they’ve thawed accidentally, you can refreeze them once, but the texture won’t be quite as good as the first freeze.
Make-Ahead & Freezer Notes
This is one of those wonderful recipes that’s actually meant to be made ahead—in fact, you must make it ahead since freezing is part of the process!
Timeline for Make-Ahead:
- 3 Months Before: You can make these up to 3 months ahead if properly stored in airtight, freezer-safe containers, though quality is best within the first 2 months.
- 1 Week Before: Perfect timing for party prep. Make them a week ahead and they’ll be at peak quality for your event.
- 1-2 Days Before: Ideal if you’re making them for personal snacking or lunchboxes.
Freezer Best Practices: The key to maintaining quality is preventing freezer burn and temperature fluctuations. Store your banana bites in the back of the freezer where temperature stays most consistent, not in the door. Use containers specifically rated for freezer storage, and always label with the date you made them.
If you’re making a large batch, consider dividing them into smaller containers so you’re not opening and closing the same container repeatedly, which introduces warm air and moisture.
Party Planning Tip: If you’re serving these at a party, transfer the number you’ll need to a serving platter about 5 minutes before guests arrive. They should still be mostly frozen but just slightly softened for the perfect eating temperature.
Thaw Time: These don’t need thawing! They’re ready to eat straight from the freezer. However, if you prefer a slightly softer texture, let them sit at room temperature for 3-5 minutes before enjoying.
Serving Suggestions
Chocolate Covered Banana Bites are incredibly versatile and can be served in so many creative ways beyond just eating them straight from the freezer!
Dessert Board Centerpiece: Arrange these on a platter alongside fresh berries, chocolate truffles, cookies, and other bite-sized treats for a stunning dessert charcuterie board that guests can graze on throughout the evening.
Ice Cream Sundae Topper: Chop these into smaller pieces and use them as a topping for vanilla ice cream or frozen yogurt. The combination of cold ice cream and frozen chocolate banana creates an amazing texture and flavor experience.
Smoothie Add-In: Toss 2-3 frozen banana bites into your morning smoothie for natural sweetness and chocolate flavor. They blend beautifully and eliminate the need for added sugar.
Lunch Box Treat: Pack 2-3 bites in a small container with an ice pack for a special lunchbox dessert that will stay frozen until lunchtime. Kids absolutely love finding these in their lunches!
Coffee or Hot Chocolate Companion: Serve these alongside a hot cup of coffee or hot chocolate for a delightful temperature contrast. The cold chocolate banana pairs wonderfully with warm beverages.
Yogurt Parfait Layer: Layer these chopped banana bites in Greek yogurt parfaits with granola and fresh fruit for a breakfast or snack that tastes like dessert but provides protein and nutrients.
Party Platter Arrangement: For parties, arrange them on a tiered stand with toothpicks inserted for easy grabbing. Set out a variety of toppings so guests can appreciate the different flavors.
Accompaniment Ideas: Pair with fresh strawberries, a glass of cold milk, a scoop of vanilla ice cream, hot herbal tea, or even a glass of dessert wine for adult gatherings.
FAQs Section
Can I use frozen bananas instead of fresh? It’s best to use fresh bananas that you then freeze as part of the recipe. Pre-frozen bananas tend to be too icy and watery, and they won’t slice cleanly into those perfect round shapes. If you do use frozen bananas, thaw them slightly first, but expect a softer, less attractive final result.
What if my chocolate is too thick to dip properly? Add more coconut oil, one teaspoon at a time, and stir until you reach a thinner, more fluid consistency. If you don’t have coconut oil, regular vegetable oil or even a tiny bit of butter will work. You want the chocolate to coat the banana smoothly without being clumpy.
How long do these actually last in the freezer? When stored properly in an airtight container with parchment paper between layers, these will maintain good quality for up to 2 months. After that, they’re still safe to eat but may develop freezer burn or the bananas may darken. For best taste and texture, enjoy them within 4-6 weeks.
Can I make these with almond bark or candy melts instead of real chocolate? Absolutely! Almond bark and candy melts work wonderfully and are often easier to melt and work with than chocolate chips. They create a smooth, shiny coating and set up quickly. The flavor will be slightly different—sweeter and less complex than real chocolate—but they’re delicious and come in fun colors.
Why did my chocolate seize up or get grainy? Chocolate seizes when it comes into contact with water or steam. Make sure your bowl and utensils are completely dry before melting chocolate. If your chocolate does seize, you can sometimes rescue it by stirring in a bit of coconut oil or vegetable oil to smooth it out again.
Can kids help make these? Yes! This is a perfect recipe for kids to help with. They can help slice bananas (with supervision or a child-safe knife), arrange slices on the baking sheet, and especially enjoy adding toppings. Just have an adult handle the melting chocolate and the dipping process to avoid burns.
Do I need to peel bananas a special way to get perfect rounds? Not really! Just peel normally and slice crosswise with a sharp knife. For the most uniform slices, use a ruler to measure ½-inch intervals, but honestly, even irregular slices taste just as good. The key is using bananas that aren’t too curved—straighter bananas give you nicer, rounder slices.
Conclusion
There you have it—the easiest, most delicious Chocolate Covered Banana Bites you’ll ever make! This simple two-ingredient recipe proves that healthy treats don’t have to be complicated or time-consuming. Whether you’re making them for your family’s weekly snack rotation, preparing for a party, or just craving something sweet that won’t derail your health goals, these little bites deliver every single time.
The beauty of this recipe lies not just in its simplicity, but in its endless adaptability. Once you’ve mastered the basic technique, you can experiment with different chocolates, creative toppings, and fun presentations that make each batch feel brand new. Your kids will love them, your Pinterest followers will save them, and you’ll feel good knowing you’re serving a treat that actually has nutritional value.
So go ahead—grab some bananas and chocolate, and spend 10 minutes making magic in your kitchen. Your freezer (and your taste buds) will thank you! Once you’ve tried these, come back and let me know your favorite topping combination in the comments below. And don’t forget to save this recipe to your Pinterest boards so you can find it again and again!
Happy snacking, friends! 🍌🍫