
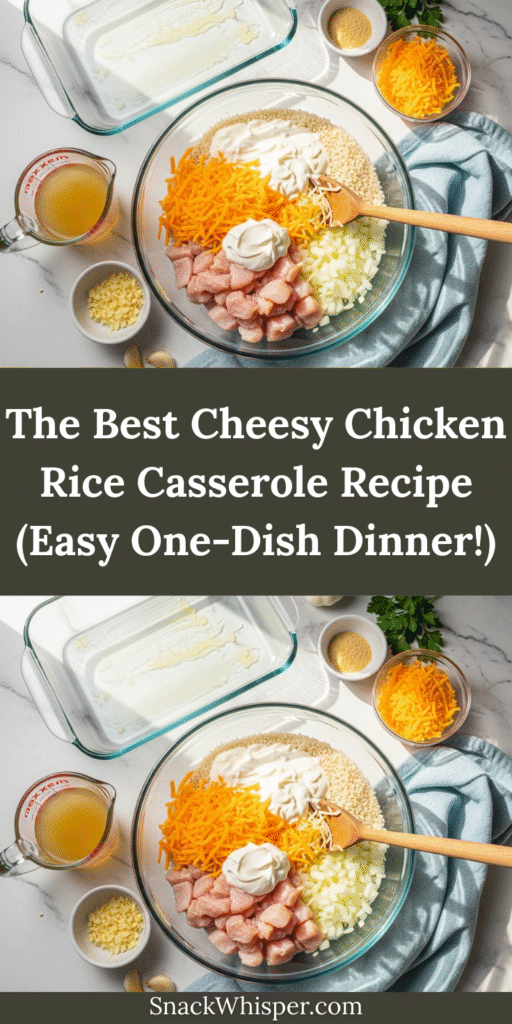
If you’re looking for the perfect weeknight dinner that combines tender chicken, fluffy rice, and loads of melted cheese in one glorious dish, this Cheesy Chicken Rice Casserole is exactly what you need. This recipe is pure comfort food magic—the kind of meal that brings everyone to the table with smiles on their faces and has them asking for the recipe before they’ve even finished their first serving.
What makes this casserole so special is how it takes simple, everyday ingredients and transforms them into something truly crave-worthy. We’re talking about juicy chicken, perfectly cooked rice that’s creamy but not mushy, a rich and flavorful sauce, and a blanket of golden, bubbly cheese on top that gets those irresistible crispy edges. It’s a complete meal in one dish, which means you get maximum flavor with minimal cleanup—a total win in my book!
This casserole is incredibly versatile and works for so many occasions. It’s perfect for busy weeknights when you need something quick and satisfying, ideal for meal prep Sundays, excellent for potlucks and church suppers, and comforting enough to bring to friends who need a warm meal. Whether you’re feeding picky kids, hungry teenagers, or adults who appreciate good home cooking, this dish delivers every single time. Plus, it makes amazing leftovers that actually taste better the next day once all those flavors have had time to meld together.
The Rich History Behind Chicken and Rice Casseroles
Chicken and rice casseroles have deep roots in American home cooking, particularly in Southern and Midwestern kitchens where one-dish meals became a cornerstone of family cooking. The concept of casseroles really took off in the United States during the 1950s and 1960s when working mothers needed efficient, economical meals that could feed the whole family without spending hours in the kitchen.
The beauty of casseroles lies in their practicality—they were designed to stretch ingredients, use up leftovers, and create something delicious from pantry staples. During post-war America, rice became increasingly popular as an affordable, filling base for family meals. Combined with chicken (which was more economical than red meat) and canned soups or simple white sauces, home cooks created satisfying meals that could feed a crowd on a budget.
The addition of cheese to chicken and rice casseroles elevated these practical dishes into something truly special. As processed cheese and shredded cheese became more widely available in American grocery stores during the mid-20th century, home cooks discovered that adding cheese made everything better—it created richness, added flavor, and gave casseroles that golden, bubbly top that made them irresistible.
This particular style of cheesy chicken rice casserole draws inspiration from classic American comfort food traditions while incorporating elements from various regional cooking styles. You’ll find similar dishes throughout the South, where creamy rice casseroles are beloved, and in the Midwest, where hearty, cheese-topped casseroles reign supreme. Today, this dish represents the best of American home cooking—simple, reliable, delicious, and perfect for bringing people together around the dinner table.
Why You’ll Love This Cheesy Chicken Rice Casserole
This recipe checks every single box when it comes to what makes a great family meal. It’s the kind of recipe you’ll make over and over again because it’s just that good and just that easy. The combination of tender chicken, creamy rice, and that incredible cheese topping creates layers of texture and flavor that satisfy on every level.
Here’s why this casserole will become your new go-to dinner:
- Ridiculously Simple: No complicated techniques or hard-to-find ingredients—just straightforward cooking that anyone can master
- True One-Dish Meal: Everything cooks together, creating incredible flavor while saving you from a sink full of dishes
- Kid-Approved: Even the pickiest eaters love this creamy, cheesy combination—it’s comfort food that appeals to all ages
- Budget-Friendly: Uses affordable ingredients like chicken, rice, and cheese to create a meal that feeds 6-8 people without breaking the bank
- Perfect for Meal Prep: Makes great leftovers and can be assembled ahead, making your week so much easier
- Customizable: Easy to adapt with different vegetables, proteins, or cheese combinations based on what you have on hand
- Freezer-Friendly: Doubles easily and freezes beautifully, so you can have a homemade meal ready whenever you need it
- Crowd-Pleaser: Perfect for potlucks, family gatherings, or feeding a group—everyone loves this dish
- Complete Nutrition: Provides protein, carbs, and vegetables (if you add them) all in one convenient casserole
Ingredient Notes: What You’ll Need and Why
Understanding your ingredients helps you make smart substitutions and achieve the best possible results. Let’s break down what goes into this amazing casserole.
Chicken: I recommend boneless, skinless chicken breasts or thighs for this recipe. Breasts give you lean, mild-flavored meat, while thighs are more flavorful and stay juicier. You’ll need about 2 pounds, which you can use raw (diced) or pre-cooked (shredded rotisserie chicken works perfectly). Using rotisserie chicken is a huge time-saver!
Long-Grain White Rice: Uncooked rice works best here because it absorbs all the delicious flavors as it cooks. Long-grain rice stays fluffy and separate rather than becoming sticky. You’ll need 1½ cups uncooked, which will expand to about 4½ cups cooked. Don’t substitute instant rice—it won’t work properly in this recipe.
Chicken Broth: This is crucial for both cooking the rice and creating a flavorful base. Use good-quality chicken broth, not just water, for maximum flavor. You’ll need about 3 cups. Low-sodium broth gives you better control over the salt level.
Cream of Chicken Soup: This creates that classic creamy texture and adds rich flavor. One 10.5-ounce can is standard. For a homemade version, you can make a simple roux with butter, flour, and milk, though the canned version is more convenient and gives that nostalgic flavor many of us love.
Sour Cream: Adds tanginess and extra creaminess to the sauce. You’ll need about 1 cup. Greek yogurt can be substituted if you prefer, though sour cream gives the best texture and flavor.
Cheddar Cheese: The star of the show! You’ll need about 3 cups of shredded cheddar cheese, divided. Use sharp or extra-sharp cheddar for the best flavor. Freshly shredded cheese melts better than pre-shredded, which contains anti-caking agents.
Butter: Adds richness and helps create the sauce base. You’ll need about 3 tablespoons. Don’t skip this—it makes a difference!
Onion and Garlic: Fresh onion and garlic provide aromatic flavor that makes the whole dish more complex and delicious. Use one medium onion (diced) and 3-4 cloves of garlic (minced).
Seasonings: Salt, black pepper, garlic powder, onion powder, and paprika create a well-rounded flavor profile. These simple seasonings make the chicken and rice taste amazing without overwhelming the dish.
Optional Vegetables: Frozen mixed vegetables, broccoli florets, or peas add nutrition and color. About 1-2 cups work perfectly if you want to include them.
Equipment Needed
Having the right tools makes this recipe come together smoothly. Here’s what you’ll need:
- 9×13-inch baking dish (glass, ceramic, or metal all work great)
- Large skillet or sauté pan for cooking chicken and vegetables
- Medium saucepan (if pre-cooking rice separately)
- Sharp knife and cutting board for prepping chicken, onions, and garlic
- Mixing bowls (medium and large sizes)
- Wooden spoon or spatula for stirring
- Measuring cups and spoons
- Box grater for shredding cheese (if not using pre-shredded)
- Aluminum foil for covering the casserole while baking
- Oven mitts for safe handling
Cheesy Chicken Rice Casserole Recipe
- Total Time: 1 hour 10 minutes
- Yield: 8 servings 1x
- Diet: Gluten Free
Description
This Cheesy Chicken Rice Casserole is the ultimate comfort food featuring tender chicken, fluffy rice, and loads of melted cheddar cheese baked to golden perfection. It’s an easy, budget-friendly one-dish meal that the whole family will love.
Ingredients
- 2 pounds boneless, skinless chicken breasts (or thighs), cut into bite-sized pieces
- 1½ cups long-grain white rice, uncooked
- 3 cups chicken broth
- 1 can (10.5 oz) cream of chicken soup
- 1 cup sour cream
- 3 cups sharp cheddar cheese, shredded and divided
- 3 tablespoons butter
- 1 medium yellow onion, diced
- 4 cloves garlic, minced
- 1 teaspoon salt
- ½ teaspoon black pepper
- 1 teaspoon garlic powder
- 1 teaspoon onion powder
- ½ teaspoon paprika
- ¼ teaspoon cayenne pepper (optional, for a hint of heat)
- 1 cup frozen mixed vegetables (optional)
- 2 tablespoons fresh parsley, chopped (for garnish)
Instructions
- Preheat Your Oven: Preheat oven to 375°F (190°C). Grease a 9×13-inch baking dish with butter or cooking spray and set aside.
- Prepare the Chicken: Pat the chicken pieces dry with paper towels and season with salt, pepper, garlic powder, onion powder, and paprika. This pre-seasoning ensures the chicken is flavorful throughout.
- Sauté the Aromatics: In a large skillet over medium heat, melt 2 tablespoons of butter. Add the diced onion and cook for 4-5 minutes until softened and translucent. Add the minced garlic and cook for another 30 seconds until fragrant. Transfer to a large mixing bowl.
- Cook the Chicken: In the same skillet, add the remaining tablespoon of butter and increase heat to medium-high. Add the seasoned chicken pieces in a single layer (work in batches if needed to avoid crowding). Cook for 3-4 minutes per side until golden brown and just cooked through. The chicken doesn’t need to be fully cooked as it will continue cooking in the oven. Transfer chicken to the bowl with the onions.
- Mix the Casserole Base: To the bowl with chicken and onions, add the uncooked rice, chicken broth, cream of chicken soup, sour cream, 2 cups of the shredded cheddar cheese, and any optional frozen vegetables. Stir everything together until well combined. Taste and adjust seasoning with additional salt and pepper if needed.
- Assemble the Casserole: Pour the entire mixture into your prepared baking dish, spreading it into an even layer. Use a spoon to make sure the rice is evenly distributed and submerged in the liquid—this ensures even cooking.
- Cover and Bake: Cover the baking dish tightly with aluminum foil. This is important because it traps steam and helps cook the rice properly. Bake covered for 45 minutes.
- Add the Cheese Topping: After 45 minutes, carefully remove the foil (watch out for hot steam!). The rice should be tender and most of the liquid absorbed. Sprinkle the remaining 1 cup of cheddar cheese evenly over the top.
- Bake Until Golden: Return the uncovered casserole to the oven and bake for an additional 10-15 minutes, until the cheese is melted, bubbly, and starting to turn golden brown in spots.
- Rest and Serve: Remove from the oven and let the casserole rest for 5-10 minutes before serving. This allows the sauce to thicken slightly and makes serving easier. Garnish with fresh chopped parsley and serve hot.
Notes
- Rice is Key: Make sure your rice is completely submerged in liquid before baking. If it looks dry, add an extra ½ cup of broth.
- Check Doneness: Rice cooking times can vary. If after 45 minutes the rice isn’t quite tender, re-cover and bake for another 10 minutes.
- Rotisserie Shortcut: Use 4 cups of shredded rotisserie chicken and skip steps 2 and 4 for an even faster version.
- Creamy Texture: Don’t skip the sour cream—it adds tanginess and keeps everything moist and creamy.
- Cheese Options: Mix cheddar with Monterey Jack, Colby, or even pepper jack for different flavor profiles.
- Prep Time: 15 minutes
- Cook Time: 55 minutes
- Category: Dinner, Main Course, Casserole
- Method: Baking
- Cuisine: American
Nutrition
- Serving Size: 1/8 of casserole (approximately 1.5 cups)
- Calories: 487
- Sugar: 3g
- Sodium: 892mg
- Fat: 22g
- Saturated Fat: 12g
- Unsaturated Fat: 8g
- Trans Fat: 0g
- Carbohydrates: 38g
- Fiber: 1g
- Protein: 35g
- Cholesterol: 118mg
Nutrition information is calculated automatically and should be used as an estimate only.
Tips & Variations to Make It Your Own
One of the best features of this casserole is how adaptable it is to your family’s preferences. Here are some delicious ways to customize it:
Vegetable Additions: Boost the nutrition by adding 2 cups of broccoli florets, diced bell peppers, sliced mushrooms, or frozen peas. Stir them into the mixture before baking.
Mexican-Inspired Version: Swap cheddar for pepper jack cheese, add a can of diced green chiles, use Mexican-style rice, and season with cumin and chili powder. Top with crushed tortilla chips for the last 10 minutes of baking.
Broccoli Cheddar Style: Add 2 cups of fresh or frozen broccoli florets for a classic broccoli-cheddar combination that sneaks in extra veggies.
Bacon Lovers: Crumble 6-8 slices of cooked bacon and sprinkle over the cheese topping for a smoky, savory addition.
Lighter Version: Use light sour cream, reduced-fat cheese, and cream of chicken soup to cut calories while keeping it delicious.
Wild Rice Variation: Replace half the white rice with wild rice for a nuttier flavor and more interesting texture (you may need an extra 10 minutes of covered baking time).
Spicy Kick: Add diced jalapeños, use pepper jack cheese, or stir in a tablespoon of hot sauce to the mixture for those who like heat.
Italian Style: Use Italian seasoning, add sun-dried tomatoes, use mozzarella and Parmesan instead of cheddar, and top with fresh basil.
Pro Chef Tips for Restaurant-Quality Results
Want to elevate this casserole from good to absolutely incredible? Here are professional techniques that make a real difference:
Toast Your Rice First: Before adding rice to the mixture, toast it in a dry skillet for 2-3 minutes until lightly golden and fragrant. This adds a nutty depth of flavor and helps the rice maintain better texture.
Layer Your Cheese: Instead of mixing all the cheese into the casserole, save more for the topping (use only 1 cup mixed in, reserve 2 cups for topping). This creates that impressive cheesy crust everyone loves.
Season in Stages: Season the chicken, then season the mixture before baking. Building flavor at each step creates more complex, well-rounded taste.
Use Room Temperature Dairy: Let your sour cream and soup come to room temperature before mixing. This helps everything blend smoothly and prevents temperature shock when baking.
Create a Crispy Top: For an extra-crispy cheese topping, mix ½ cup of panko breadcrumbs with 2 tablespoons melted butter and sprinkle over the cheese for the last 10 minutes of baking.
Add Fresh Herbs: Stir in fresh thyme or rosemary to the mixture before baking, and always finish with fresh parsley or chives for a pop of color and fresh flavor.
Proper Resting Time: Don’t skip letting it rest after baking. This 5-10 minutes allows the starches to settle and the sauce to thicken, preventing a soupy casserole when you serve it.
Common Mistakes to Avoid
Even straightforward recipes can go wrong without proper technique. Here’s what to watch out for:
Using Instant or Minute Rice: These pre-cooked rice products will turn to mush in this recipe. Always use regular long-grain white rice that needs 15-20 minutes of cooking time.
Not Enough Liquid: Rice needs liquid to cook properly. If your mixture looks dry before baking, add an extra ½ cup of broth. The rice should be completely covered with liquid.
Skipping the Foil Cover: Baking uncovered from the start will dry out the casserole and prevent the rice from cooking properly. Always bake covered for the first 45 minutes to trap moisture.
Overcrowding the Chicken: When browning chicken, don’t crowd the pan. Cook in batches if needed to ensure proper browning, which adds flavor to the entire dish.
Not Checking Rice Doneness: Oven temperatures vary, so check that your rice is tender before adding the cheese topping. If it needs more time, re-cover and continue baking.
Cutting Corners on Cheese Quality: Pre-shredded cheese contains cellulose (anti-caking agent) that prevents smooth melting. Shred your own cheese from a block for the best, creamiest results.
Storage & Meal Prep
This casserole is fantastic for meal prep and leftovers, making your busy week so much easier.
Refrigerator Storage: Store cooled leftovers in an airtight container in the refrigerator for up to 4 days. The flavors actually improve after a day, making this an excellent make-ahead option.
Reheating Instructions: Reheat individual portions in the microwave for 2-3 minutes, stirring halfway through and adding a splash of chicken broth if it seems dry. For larger portions, reheat covered at 350°F for 20-25 minutes until warmed through.
Portion Control: Divide leftovers into individual meal-prep containers for grab-and-go lunches throughout the week. Add a side salad or steamed vegetables to make it a complete meal.
Keep It Moist: When reheating, add a tablespoon of chicken broth or water to prevent drying out. Cover with a damp paper towel in the microwave or foil in the oven to retain moisture.
Make-Ahead & Freezer Notes
This is where this recipe really shines for busy families—it’s incredibly make-ahead and freezer-friendly.
Make-Ahead Assembly: Assemble the entire casserole (through step 6) up to 24 hours in advance. Cover tightly with plastic wrap and refrigerate. When ready to bake, let it sit at room temperature for 20-30 minutes, then bake as directed, adding 5-10 extra minutes to account for the cold start.
Freezing Unbaked: Assemble the casserole in a freezer-safe disposable aluminum pan or a dish you don’t mind freezing. Wrap tightly with plastic wrap, then aluminum foil. Label with the date and baking instructions. Freeze for up to 3 months.
Baking from Frozen: You can bake directly from frozen! Keep covered and bake at 375°F for 90 minutes, then uncover, add cheese topping, and bake 15 more minutes. Or thaw overnight in the refrigerator and bake as directed.
Freezing Baked Casserole: Cool completely, portion into individual servings or leave whole, wrap tightly in plastic wrap and foil, and freeze for up to 2 months. Thaw in refrigerator overnight before reheating.
Best Thawing Method: Transfer from freezer to refrigerator 24 hours before you plan to bake or reheat for most even results.
Serving Suggestions: Complete Your Meal
While this casserole is substantial enough to be a complete meal, these sides make it even better:
Fresh Salads: A crisp green salad with ranch or balsamic vinaigrette cuts through the richness beautifully. Try Caesar salad, house salad, or a simple mixed greens salad.
Garlic Bread: Crusty garlic bread or Texas toast is perfect for soaking up the creamy sauce. You can never go wrong with warm bread alongside casseroles!
Steamed or Roasted Vegetables: Green beans, asparagus, Brussels sprouts, or roasted carrots add color and nutrition to your plate.
Light Soups: Start with a light soup like tomato soup, vegetable soup, or a simple chicken noodle soup for a complete comfort food meal.
Biscuits or Rolls: Fluffy buttermilk biscuits or dinner rolls are always a hit alongside casseroles, especially with butter.
Coleslaw: A tangy coleslaw provides a nice crunchy, acidic contrast to the creamy casserole.
Cranberry Sauce: A small spoonful of cranberry sauce on the side adds a sweet-tart element that complements the savory cheese and chicken.
Frequently Asked Questions
Can I use brown rice instead of white rice?
Brown rice requires longer cooking time and more liquid than white rice. If you want to use brown rice, pre-cook it about halfway before adding to the casserole, or increase the baking time to 60-70 minutes covered and add an extra ½ cup of broth.
What if I don’t have cream of chicken soup?
You can make a quick substitute by whisking together 1 cup of milk, 3 tablespoons flour, and 2 tablespoons melted butter. Season with salt, pepper, and a pinch of poultry seasoning. Or use cream of mushroom soup as a substitute.
Can I make this with leftover cooked chicken?
Absolutely! This is a perfect use for leftover chicken or rotisserie chicken. Use 4 cups of shredded or diced cooked chicken and add it to the mixture in step 5, skipping the chicken cooking steps entirely.
Why is my casserole soupy?
This usually happens if there’s too much liquid or if the casserole wasn’t baked long enough. Let it rest for 10 minutes after baking to allow the sauce to thicken. If it’s still soupy, return it to the oven uncovered for another 10-15 minutes.
Can I make this in a slow cooker?
Yes! Combine all ingredients (except the cheese topping) in a greased slow cooker. Cook on low for 4-5 hours or high for 2-3 hours until rice is tender. Add cheese topping, cover, and cook 10 more minutes until melted.
How do I know when the rice is fully cooked?
After 45 minutes of covered baking, carefully lift the foil and taste a grain of rice from the center. It should be tender with no hard center. If still firm, re-cover and bake another 10 minutes.
Can I double this recipe?
Definitely! Use two 9×13-inch pans or one very large roasting pan. The baking time should remain approximately the same, though check doneness at 45 minutes to be sure.
Conclusion: Your New Family Favorite Awaits
There you have it—the ultimate Cheesy Chicken Rice Casserole that’s about to become your most-requested family dinner! This recipe perfectly balances simplicity with incredible flavor, delivering a restaurant-quality meal using straightforward ingredients and techniques that any home cook can master. The magic is in how everything comes together: tender, seasoned chicken, perfectly cooked rice, that creamy sauce, and of course, loads of melted cheese that create pure comfort food bliss.
What makes this casserole truly special is its versatility and reliability. Whether you’re feeding your family on a busy weeknight, bringing a dish to a potluck, prepping meals for the week ahead, or cooking for a crowd, this recipe consistently delivers satisfaction and smiles. The make-ahead and freezer-friendly nature means you can always have a delicious homemade meal ready when life gets hectic—and we all know how valuable that is!
I truly hope this Cheesy Chicken Rice Casserole becomes a beloved staple in your recipe rotation, just as it has in mine. If you make this recipe, I’d absolutely love to hear how it turned out! Leave a comment below sharing your experience, any creative variations you tried, or what your family thought. Did you add extra veggies? Try different cheeses? Make it ahead for meal prep? Your feedback and tips help other home cooks, and I love hearing your stories!

