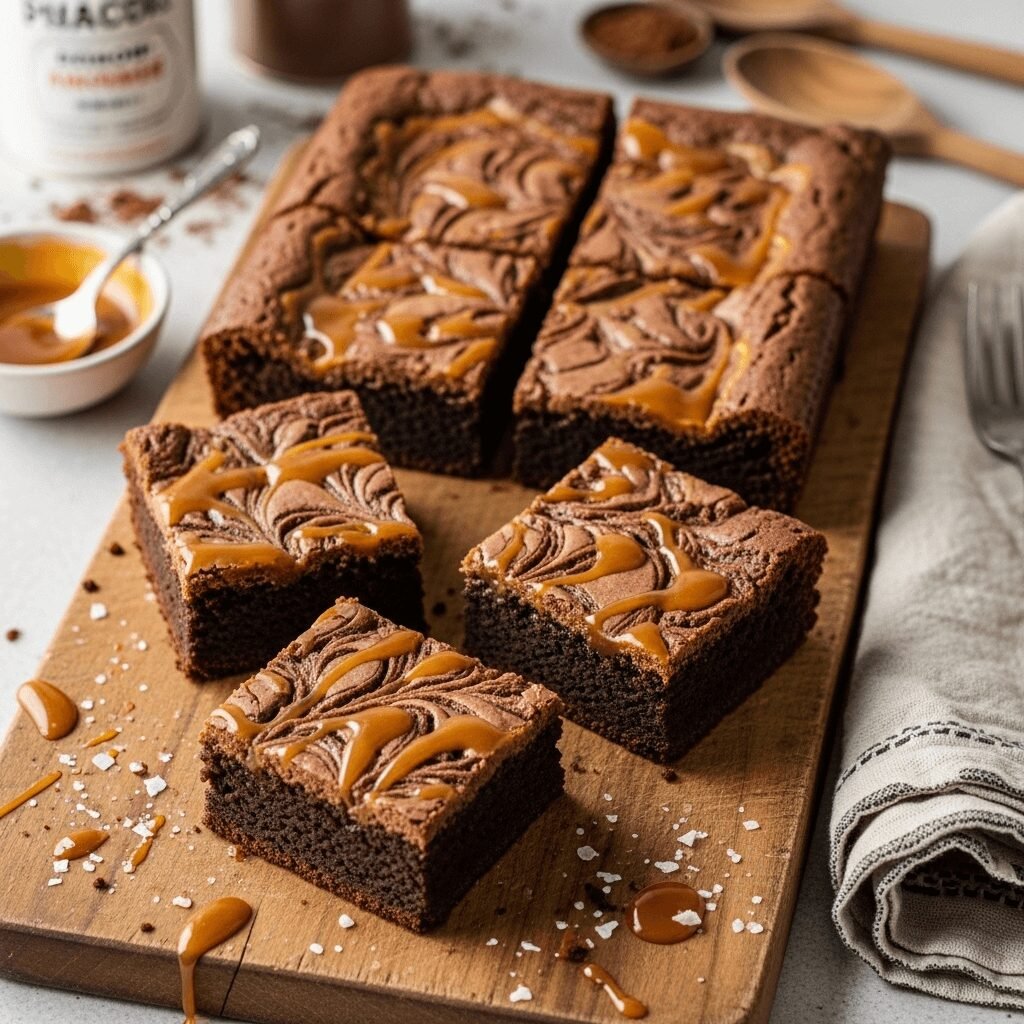
If you’ve ever dreamed of combining the rich, fudgy decadence of classic brownies with ribbons of buttery, golden caramel, then these Caramel Swirl Brownies are about to become your new obsession. This recipe delivers the perfect marriage of textures—dense, chocolatey brownie base meets luscious, gooey caramel swirls that create pockets of sweet, buttery goodness in every bite.
These brownies are perfect for practically any occasion. Bring them to potlucks and watch them disappear within minutes. Serve them at birthday parties, bake sales, or holiday gatherings. They’re also wonderful as an afternoon treat with coffee, or warmed slightly and topped with vanilla ice cream for an indulgent dessert that rivals anything you’d find at a fancy bakery. The best part? They look incredibly impressive but are surprisingly simple to make, even for beginner bakers.
What sets these apart from ordinary brownies is that gorgeous caramel swirl marbled throughout. When you cut into the pan, each square reveals beautiful golden ribbons against the dark chocolate background—it’s Instagram and Pinterest gold, my friends. The caramel adds a sophisticated sweetness that balances the deep cocoa flavor, creating a more complex taste experience than your standard brownie.
History / Background
Brownies have been an American baking staple since the late 19th century, with the first known published recipe appearing in the 1897 Sears, Roebuck Catalogue. The origin story is delightfully murky—some credit a chef at Chicago’s Palmer House Hotel who created them for the 1893 World’s Columbian Exposition, while others point to a happy accident in Bangor, Maine, where a cook forgot to add baking powder to a chocolate cake.
Regardless of their exact origins, brownies became a beloved fixture in American home kitchens throughout the 20th century. They represented accessible luxury—chocolate was special, but brownies were easier than layer cakes and required no fancy decorating skills. As American baking evolved, creative cooks began experimenting with mix-ins and toppings: nuts, cream cheese swirls, peanut butter, and eventually, caramel.
The caramel brownie variation likely emerged during the 1970s and 1980s when caramel candies and sauces became more widely available in grocery stores. Home bakers discovered that swirling caramel into brownie batter before baking created stunning visual appeal and added an irresistible gooey texture. This combination tapped into Americans’ love affair with salted caramel and sweet-salty flavor profiles that dominated dessert trends in the 2000s and 2010s.
Today, caramel brownies have secured their place in the pantheon of classic American desserts. They represent the evolution of home baking—taking something traditional and elevating it with simple but effective flavor combinations. These brownies bridge generations, appealing to kids who love gooey sweets and adults who appreciate sophisticated flavor balance.
Why You’ll Love This Recipe
This isn’t just another brownie recipe—it’s the brownie recipe you’ll return to again and again. The texture is absolutely perfect: fudgy and dense without being underbaked, with those gorgeous caramel pockets that stay soft and gooey even after cooling. The flavor balance is spot-on, with rich chocolate that isn’t overly sweet, complemented by buttery caramel notes that add depth and complexity.
Here’s why this recipe deserves a permanent spot in your baking rotation:
- Foolproof method: Even if you’re new to baking, the straightforward instructions ensure success every single time
- Minimal ingredients: You probably have most of what you need in your pantry right now—no specialty items required
- Make-ahead friendly: These actually taste better the next day, making them perfect for planned entertaining
- Crowd-pleaser guarantee: I’ve never met anyone who doesn’t love these—they appeal to all ages and taste preferences
- Impressive presentation: The marbled caramel swirl looks bakery-quality with minimal effort
- Budget-friendly: Costs just a few dollars to make an entire pan that serves 12-16 people
- Customizable: Easily adapt with nuts, sea salt, different chocolate, or even dulce de leche
- Quick prep: Active preparation takes just 15-20 minutes before the oven does the work
- Perfect texture: Achieves that ideal balance between fudgy and cakey that brownie lovers crave
Ingredient Notes
Understanding your ingredients helps you make better baking decisions and troubleshoot if needed. Here’s what you need to know about each component:
Unsalted Butter: Forms the rich, tender base of the brownies. Using unsalted allows you to control the salt level precisely. European-style butter with higher fat content will make them even more decadent. If you only have salted butter, reduce added salt by half.
Granulated Sugar: Provides sweetness and contributes to that shiny, crackly top that makes brownies so appealing. Don’t substitute with brown sugar entirely, as you’ll lose that signature brownie texture.
Brown Sugar: Adds moisture and a subtle molasses flavor that deepens the overall taste. Light or dark brown sugar both work—dark will give slightly more caramel notes.
Eggs: Bind everything together and provide structure. Use large eggs at room temperature for best results—they incorporate more smoothly into the batter.
Vanilla Extract: Amplifies the chocolate flavor. Use pure vanilla extract, not imitation, for the best taste.
All-Purpose Flour: Provides structure without making brownies cakey. Measure correctly by spooning into your measuring cup and leveling off—don’t pack it down.
Unsweetened Cocoa Powder: The chocolate powerhouse of this recipe. Dutch-process cocoa creates a darker color and milder flavor, while natural cocoa is more acidic and intense. Either works beautifully.
Salt: Essential for balancing sweetness and enhancing chocolate flavor. Don’t skip it!
Caramel Sauce: The star swirl ingredient. Use thick, quality caramel sauce—either homemade or a good jarred brand. Avoid ice cream topping style caramel, which is too thin.
Equipment Needed
Having the right tools makes baking easier and ensures better results:
- 9×9-inch or 8×8-inch square baking pan: Metal pans conduct heat better than glass for even baking
- Parchment paper or aluminum foil: For easy removal and clean edges
- Large mixing bowl: For combining wet and dry ingredients
- Medium saucepan: For melting butter and chocolate together
- Whisk: For mixing batter smoothly
- Rubber spatula: For scraping bowls and spreading batter
- Measuring cups and spoons: Accurate measurements are crucial in baking
- Butter knife or skewer: For creating caramel swirls
- Cooling rack: Allows air circulation for even cooling
- Sharp knife: For cutting clean brownie squares
Print

Caramel Swirl Brownies Recipe
- Total Time: 50-55 minutes (plus cooling)
- Yield: 16 brownies 1x
- Diet: Vegetarian
Description
Decadent fudgy brownies swirled with rich, buttery caramel sauce create the ultimate indulgent dessert. These Caramel Swirl Brownies feature a perfectly dense chocolate base with gorgeous ribbons of gooey caramel throughout—easy enough for beginners but impressive enough for special occasions.
Ingredients
ScaleFor the Brownies:
- ¾ cup (170g) unsalted butter
- 1¼ cups (250g) granulated sugar
- ⅓ cup (65g) packed light brown sugar
- 3 large eggs, at room temperature
- 2 teaspoons vanilla extract
- ¾ cup (95g) all-purpose flour
- ½ cup (50g) unsweetened cocoa powder
- ½ teaspoon salt
- ¾ cup (130g) semi-sweet chocolate chips (optional but recommended)
For the Caramel Swirl:
- ¾ cup (180ml) thick caramel sauce (store-bought or homemade)
- Flaky sea salt for topping (optional)
Instructions
- Prepare your pan: Preheat your oven to 350°F (175°C). Line a 9×9-inch baking pan with parchment paper, leaving an overhang on two sides for easy removal. Lightly grease the parchment with butter or cooking spray.
- Melt the butter and chocolate base: In a medium saucepan over low heat, melt the butter completely. Remove from heat and stir in both sugars until well combined and slightly glossy. The mixture will look grainy—that’s perfect.
- Add eggs and vanilla: Let the butter mixture cool for 3-4 minutes (so it doesn’t scramble the eggs). Add eggs one at a time, whisking vigorously after each addition until the batter becomes smooth and glossy. Stir in the vanilla extract.
- Incorporate dry ingredients: In a separate bowl, whisk together the flour, cocoa powder, and salt to remove any lumps. Add the dry mixture to the wet ingredients and fold gently with a spatula until just combined—don’t overmix. A few small streaks of flour are okay. Fold in chocolate chips if using.
- Create the base layer: Pour the brownie batter into your prepared pan and spread it evenly with a spatula. The batter will be thick and fudgy.
- Add caramel swirls: Warm your caramel sauce slightly in the microwave (10-15 seconds) so it’s pourable but still thick. Drop spoonfuls of caramel all over the brownie batter surface—about 6-8 dollops distributed evenly.
- Create the swirl pattern: Using a butter knife, toothpick, or skewer, gently swirl the caramel into the brownie batter using a figure-eight or zigzag motion. Don’t overdo it—you want distinct ribbons of caramel, not completely mixed in. Make about 8-10 swirls total.
- Bake to perfection: Place the pan in your preheated oven and bake for 30-35 minutes. The brownies are done when the edges look set and slightly pull away from the pan, and a toothpick inserted into the center (avoiding caramel) comes out with just a few moist crumbs attached. The caramel areas may look slightly underdone—that’s exactly what you want.
- Cool completely: Remove from the oven and immediately sprinkle with flaky sea salt if desired. Let the brownies cool in the pan on a wire rack for at least 1 hour—this step is crucial for the texture to set properly. For cleanest cuts, refrigerate for 30 minutes before slicing.
- Cut and serve: Using the parchment overhang, lift the entire brownie slab out of the pan. Place on a cutting board and use a sharp knife, wiping it clean between cuts, to slice into 16 squares.
Notes
- Caramel choice matters: Use thick caramel sauce, not thin ice cream topping. Brands like Trader Joe’s Fleur de Sel Caramel or Ghirardelli work beautifully. You can also make homemade caramel if you’re feeling ambitious.
- Don’t overbake: Brownies continue cooking as they cool. They should look slightly underdone in the center when you remove them from the oven.
- Storage extends shelf life: These brownies actually improve after a day as the flavors meld. Store in an airtight container at room temperature for up to 5 days, or refrigerate for up to 10 days.
- Clean cuts: For professional-looking squares, use a sharp knife and wipe it completely clean between each cut. Warm the knife under hot water and dry it for even cleaner slices.
- Prep Time: 20 minutes
- Cook Time: 30-35 minutes
- Category: Dessert
- Method: Baking
- Cuisine: American
Nutrition
- Serving Size: 1 brownie (1/16 of recipe)
- Calories: 285
- Sugar: 32g
- Sodium: 115mg
- Fat: 13g
- Saturated Fat: 8g
- Unsaturated Fat: 4g
- Trans Fat: 0g
- Carbohydrates: 41g
- Fiber: 2g
- Protein: 3g
- Cholesterol: 60mg
Note: Nutrition information is approximate and calculated based on standard ingredient measurements. Actual values may vary based on specific brands and ingredient substitutions used.
Tips & Variations
One of the beautiful things about this recipe is how easily it adapts to different tastes and dietary needs:
Chocolate Variations: Swap semi-sweet chocolate chips for dark chocolate (70% cacao) for a more sophisticated, less sweet brownie. White chocolate chips create a stunning visual contrast and add creamy sweetness. Milk chocolate chips make them more kid-friendly and sweeter overall.
Nut Additions: Fold in ½ cup of chopped pecans, walnuts, or toasted hazelnuts for added crunch and flavor. Pecans pair especially well with caramel. Toast nuts first in a dry skillet for 3-4 minutes to intensify their flavor.
Salted Caramel Version: Use salted caramel sauce instead of regular, and finish with extra flaky sea salt on top before baking. The sweet-salty combination is absolutely addictive.
Peanut Butter Swirl: Alternate caramel dollops with warmed peanut butter for a chocolate-peanut butter-caramel trifecta. Use ½ cup caramel and ¼ cup peanut butter.
Espresso Enhancement: Add 1 tablespoon of instant espresso powder to the dry ingredients. It won’t make them taste like coffee but will intensify the chocolate flavor significantly.
Gluten-Free Adaptation: Substitute a 1:1 gluten-free baking flour for the all-purpose flour. The texture will be slightly more delicate but still delicious.
Make Them Boozy: Add 2 tablespoons of bourbon, rum, or Irish cream to the batter for an adult twist on classic brownies.
Pro Chef Tips
These professional techniques will elevate your brownies from good to extraordinary:
Room temperature matters: Bring eggs to room temperature before using. Cold eggs don’t incorporate as smoothly and can cause the melted butter to seize. Place eggs in warm water for 5 minutes if you forgot to take them out earlier.
The sugar dissolve technique: When you stir sugar into melted butter, mix vigorously for 60-90 seconds. This dissolves some of the sugar crystals and creates that gorgeous shiny, crackly top that makes brownies so appealing.
Caramel temperature is key: If your caramel is too cold, it won’t swirl properly and will sink. If it’s too warm, it’ll blend completely into the batter. Aim for honey-like consistency—thick but pourable.
The toothpick test isn’t perfect: For fudgy brownies, you want moist crumbs on your toothpick, not a completely clean stick. Insert it about 1 inch from the edge rather than dead center for a better read, and avoid caramel pockets which will always look wet.
Layer your swirl: For extra dramatic swirls, reserve half the brownie batter, spread the first half in the pan, add most of the caramel, then dollop the remaining batter on top and add final caramel swirls. This creates caramel throughout the layers.
Aluminum foil for easy removal: If you don’t have parchment, use aluminum foil and butter it generously. Create handles by leaving overhang on opposite sides, making it easy to lift the entire batch out for perfect cutting.
The refrigerator secret: While not required, chilling brownies for 20-30 minutes before cutting gives you the cleanest, most professional-looking edges. They’ll warm back up to room temperature quickly.
Common Mistakes to Avoid
Learn from these common pitfalls so your brownies turn out perfect every time:
Overmixing the batter: Once you add flour, mix only until just combined. Overmixing develops gluten, which makes brownies tough and cakey instead of fudgy. A few small flour streaks are completely fine—they’ll disappear during baking.
Overbaking: This is the number one brownie killer. Brownies continue cooking as they cool, so slightly underdone in the oven means perfectly fudgy once cooled. If edges are pulling away and the center looks mostly set (even if slightly jiggly), they’re done. Better to underbake slightly than overbake.
Cutting too early: I know it’s tempting, but cutting into hot brownies creates a crumbly mess. The texture needs time to set as it cools. Wait at least an hour, preferably two, for the best results.
Using the wrong caramel: Thin, runny ice cream topping will either burn or completely absorb into the batter. You need thick caramel sauce that holds its shape when dropped from a spoon. If your caramel is too thin, simmer it in a saucepan for 2-3 minutes to thicken.
Incorrect oven temperature: An oven that’s too hot will give you crusty edges and raw centers. Too cool and you’ll get cakey brownies. Use an oven thermometer to verify your actual temperature matches the dial—most ovens run 15-25 degrees off.
Over-swirling the caramel: More isn’t better when creating swirls. If you mix too much, the caramel completely blends into the chocolate batter and you lose that beautiful marbled effect. Make 8-10 deliberate swirls and stop.
Forgetting to grease parchment: Even with parchment paper, lightly greasing it prevents any potential sticking and ensures easy removal. A quick spray of cooking spray or butter rub does the trick.
Storage & Meal Prep
Proper storage keeps these brownies fresh and delicious for days:
Room temperature storage: Place cooled brownies in an airtight container with parchment or wax paper between layers if stacking. They’ll stay fresh at room temperature for 4-5 days. The texture actually improves over the first 24-48 hours as flavors meld.
Refrigerator storage: For longer storage, refrigerate brownies in an airtight container for up to 10 days. The cold makes them extra fudgy and the caramel gets even chewier. Let them sit at room temperature for 15-20 minutes before serving for best texture, or enjoy them cold if you prefer an extra-dense, almost truffle-like consistency.
Preventing dryness: If your brownies seem to be drying out during storage, place a slice of bread in the container with them. The brownies will absorb moisture from the bread, staying soft while the bread gets stale instead.
Individual wrapping: Wrap individual brownies tightly in plastic wrap for lunchboxes or grab-and-go treats. This also makes portion control easier if you’re trying to make them last!
Reheating tips: While delicious at room temperature, warmed brownies are extra special. Microwave individual squares for 10-15 seconds to soften the caramel and create a fresh-from-the-oven experience. For larger portions, wrap in foil and warm in a 300°F oven for 8-10 minutes.
Make-Ahead & Freezer Notes
These brownies are incredibly freezer-friendly, making them perfect for planning ahead:
Advance preparation: You can make the entire recipe up to 2 days before serving. In fact, they taste even better after resting overnight as the flavors develop and the texture becomes more fudgy. Store covered at room temperature or in the refrigerator.
Freezing whole pan: Once completely cooled, wrap the entire uncut brownie slab tightly in plastic wrap, then again in aluminum foil. Freeze for up to 3 months. To serve, thaw overnight in the refrigerator still wrapped, then bring to room temperature before cutting.
Freezing individual portions: Cut brownies into squares, then freeze them individually on a baking sheet for 1 hour until solid. Transfer to a freezer-safe container or bag with parchment between layers. This allows you to remove just one or two at a time. They’ll keep for 3 months.
Best thawing method: Remove from freezer and let thaw at room temperature for 1-2 hours, or thaw overnight in the refrigerator. For a warm treat, microwave frozen brownies for 20-30 seconds, or thaw partially then warm in a 300°F oven for 5-7 minutes.
Freezing just the batter: Prepare the batter and spread in your lined pan, add caramel swirls, then wrap tightly and freeze unbaked for up to 1 month. When ready to bake, add 5-10 minutes to the baking time—no need to thaw first.
Quality after freezing: Frozen and thawed brownies maintain excellent texture and flavor. The caramel may become slightly more liquid after thawing, but that just makes them more gooey and delicious. I actually prefer freezing some to have on hand for unexpected guests or late-night cravings.
Serving Suggestions
While these brownies are absolutely perfect on their own, here are some ways to take them over the top:
Ice cream pairing: Serve warm brownies with a scoop of vanilla bean, salted caramel, or coffee ice cream. The temperature contrast of cold ice cream against warm brownie is heavenly. Drizzle with extra caramel sauce and you’ve got a restaurant-quality dessert.
Whipped cream topping: A dollop of freshly whipped cream (sweetened with a touch of vanilla) adds lightness that balances the rich, fudgy brownies. Fold in a tablespoon of bourbon or Kahlua for an adult version.
Coffee companion: These brownies pair beautifully with coffee—hot, iced, or as affogato. The bitter notes of coffee complement the sweet caramel perfectly. Try serving at brunch with a coffee bar.
Fresh fruit: Balance the richness with fresh raspberries, strawberries, or sliced bananas. The bright acidity of berries cuts through the chocolate and caramel wonderfully.
Brownie sundae bar: Set up a DIY dessert station with brownie squares and toppings: multiple ice cream flavors, hot fudge, caramel sauce, whipped cream, nuts, cherries, and sprinkles. Perfect for parties and gatherings.
Milkshake mix-in: Blend a brownie square into vanilla ice cream and milk for the ultimate chocolate-caramel milkshake. Add a shot of espresso for a mocha version.
Breakfast treat: Okay, this isn’t the healthiest suggestion, but a brownie square with your morning coffee on special occasions is absolutely allowed. Life’s too short not to enjoy dessert for breakfast sometimes!
FAQs Section
Can I use homemade caramel sauce instead of store-bought?
Absolutely! Homemade caramel actually works beautifully because you can control the thickness. Just make sure it’s cooled to room temperature and thick enough to hold its shape. If your homemade caramel is too thin, simmer it for a few extra minutes to reduce and thicken before using.Why did my caramel sink to the bottom instead of swirling?
This usually happens when the caramel is too thin or too warm, or when you swirled too vigorously. Use thick caramel sauce (honey-like consistency), warm it just slightly so it’s pourable, and swirl gently without mixing it completely into the batter. Also ensure you’re not pouring it in one spot—distribute dollops across the surface first.Can I make these in a different size pan?
Yes, but baking time will change. An 8×8 pan makes thicker brownies (bake 35-40 minutes), while a 9×13 pan makes thinner ones (bake 25-28 minutes). Check for doneness using the toothpick test—edges pulling away and moist crumbs (not wet batter) on the toothpick.How do I know when brownies are done if the caramel areas always look wet?
Test the chocolate portions, not the caramel swirls. Insert your toothpick into a chocolate area about 1 inch from the edge—you want moist crumbs, not wet batter. The edges should also be pulling away from the pan slightly. The caramel areas will always look underdone, which is perfect.Can I make these dairy-free or vegan?
For dairy-free, substitute the butter with coconut oil or vegan butter and use dairy-free chocolate chips. Use dairy-free caramel sauce (many store brands are accidentally vegan). For fully vegan brownies, replace the 3 eggs with flax eggs (3 tablespoons ground flaxseed mixed with 9 tablespoons water, let sit 5 minutes) or use ¾ cup applesauce. The texture will be slightly different but still delicious.Why do my brownies come out cakey instead of fudgy?
The most common cause is too much flour or overbaking. Make sure you’re measuring flour correctly—spoon it into the measuring cup and level off without packing. Also check your oven temperature with a thermometer, as ovens running hot will dry out brownies. Finally, try reducing baking time by 2-3 minutes.Can I double this recipe?
Yes! Double all ingredients and bake in a 9×13 pan for 35-40 minutes, or divide between two 9×9 pans for the same baking time as the original recipe. Just make sure all ingredients are thoroughly mixed when working with larger quantities.Conclusion
There’s something truly magical about pulling a pan of these Caramel Swirl Brownies from the oven. The way your kitchen fills with the aroma of chocolate and caramelizing sugar, the anticipation as they cool and set, and finally that first bite where fudgy chocolate meets buttery caramel—it’s pure baking joy.
Whether you’re baking for a special occasion, meal prepping treats for the week, or simply craving something decadent, this recipe delivers every single time. The beauty is that while they look and taste impressively gourmet, they’re actually beginner-friendly and use simple pantry ingredients. No fancy techniques, no complicated steps—just straightforward mixing and swirling that yields bakery-quality results.
I’d love to hear how your Caramel Swirl Brownies turn out! Did you add any creative variations? How did your family react when they tasted them? Drop a comment below sharing your experience, and don’t forget to rate the recipe. If you’re feeling generous, snap a photo and tag me on social media—I absolutely love seeing your beautiful brownie creations!
And please, please save this recipe to your Pinterest boards so you can find it easily next time that chocolate craving hits. Share it with your fellow baking enthusiasts who deserve to experience these incredible brownies too. Happy baking, friends!