
There’s something undeniably comforting about a warm plate of cheesy chicken and rice. This one-pan wonder brings together tender, juicy chicken pieces nestled in fluffy rice that’s been transformed into a creamy, cheesy masterpiece. It’s the kind of dish that makes weeknight dinners feel special without requiring hours in the kitchen or a culinary degree.
This cheesy chicken rice recipe is pure comfort food at its finest. Imagine perfectly seasoned chicken combined with rice that’s cooked to perfection in a rich, savory broth, then finished with melted cheese that creates those gorgeous, stretchy cheese pulls we all love. It’s a complete meal in one pan—protein, carbs, and plenty of flavor all working together in perfect harmony.
Whether you’re feeding hungry kids after soccer practice, hosting a casual dinner party, or simply craving something warm and satisfying on a chilly evening, this recipe delivers every single time. It’s become a staple in kitchens across America for good reason: it’s foolproof, budget-friendly, and incredibly delicious. The best part? You probably have most of the ingredients sitting in your pantry right now.
History / Background
While there’s no single origin story for cheesy chicken and rice, this dish represents the beautiful evolution of American home cooking—where practicality meets comfort. The combination of chicken and rice has been a global staple for centuries, appearing in various forms across cultures from Spanish arroz con pollo to Middle Eastern maqluba.
The American version we know and love today gained popularity in the 1950s and 60s, coinciding with the rise of convenience cooking and the introduction of processed cheese products. Home cooks discovered that combining these simple ingredients created a meal that was economical, filling, and appealing to the whole family. During this era, one-dish meals became increasingly popular as more women entered the workforce and needed recipes that were both time-efficient and satisfying.
The Southern United States, in particular, embraced this style of cooking, often adding cream of mushroom or cream of chicken soup to create extra creaminess. As cooking evolved and fresh ingredients became more accessible year-round, home cooks began creating from-scratch versions that elevated the dish beyond its casserole roots.
Today’s cheesy chicken rice represents a beautiful marriage of convenience and quality. We’ve taken the time-tested concept and refined it with fresh ingredients, better cheese choices, and cooking techniques that maximize flavor. It’s a testament to how classic comfort food can evolve while maintaining the heart and soul that made it beloved in the first place.
Why You’ll Love This Recipe
This cheesy chicken and rice recipe has earned its place in my regular dinner rotation, and once you make it, you’ll understand why it’s a family favorite that never gets old.
Here’s what makes this recipe absolutely irresistible:
- One-Pan Wonder – Everything cooks together in one skillet or baking dish, which means minimal cleanup and maximum flavor as all the ingredients meld together beautifully.
- Budget-Friendly – Using simple, affordable ingredients like chicken thighs or breasts, basic pantry rice, and cheese you likely already have makes this an economical choice that doesn’t sacrifice taste.
- Ready in 45 Minutes – From prep to plate, you’re looking at less than an hour, making it perfect for busy weeknights when you need dinner fast but don’t want to compromise on homemade goodness.
- Kid-Approved – The creamy, cheesy goodness appeals to even the pickiest eaters. There are no weird textures or strong flavors to turn up noses—just comforting, familiar ingredients.
- Customizable – Easily adapt it to your family’s preferences by switching up the cheese, adding vegetables, adjusting seasonings, or making it spicier with jalapeños.
- Freezer-Friendly – Make a double batch and freeze half for those nights when cooking from scratch feels impossible. Future you will be so grateful.
- Restaurant-Quality at Home – The combination of tender chicken, perfectly cooked rice, and gooey melted cheese creates a dish that tastes like you ordered it from your favorite comfort food restaurant.
Ingredient Notes
Understanding your ingredients helps you make smart substitutions and ensures success every time you make this recipe. Let’s break down what goes into this comforting dish.
Chicken: Boneless, skinless chicken breasts or thighs work beautifully here. Thighs are more forgiving and stay juicier, while breasts are leaner. You can also use rotisserie chicken for an even quicker version—just shred it and add it toward the end of cooking. For best results, cut the chicken into bite-sized pieces so they cook evenly and distribute throughout the rice.
Long-Grain White Rice: This is the foundation of the dish. Long-grain rice stays fluffy and doesn’t get mushy like short-grain varieties might. Jasmine or basmati rice work wonderfully if you want to add a subtle aromatic quality. Avoid instant rice, as it won’t absorb the flavors properly and can turn to mush. Brown rice requires different liquid ratios and longer cooking time, so adjust accordingly if using it.
Chicken Broth: This is where a ton of flavor comes from. Use good-quality chicken broth or stock—low-sodium gives you better control over seasoning. In a pinch, bouillon cubes work, but watch your salt levels. The rice will absorb all this liquid, so quality matters here.
Cheese: A combination of sharp cheddar and creamy mozzarella creates the perfect balance of flavor and melt-ability. The cheddar brings bold, tangy flavor while mozzarella gives you those Instagram-worthy cheese pulls. Monterey Jack, Colby, or even Gruyere work as substitutions. Always shred your own cheese from a block—pre-shredded contains anti-caking agents that prevent smooth melting.
Butter and Olive Oil: This duo creates the perfect cooking fat—butter adds richness and flavor while olive oil prevents burning. You can substitute all butter or all oil if needed.
Aromatics (Onion and Garlic): These build the flavor base. Fresh is always best, but in a pinch, you can use 1 teaspoon garlic powder and 2 tablespoons dried minced onion.
Seasonings: Paprika, Italian seasoning, salt, pepper, and a pinch of cayenne create a well-rounded flavor profile. Feel free to adjust based on your family’s preferences.
Heavy Cream or Milk: This optional addition makes the dish extra creamy and luxurious. Heavy cream is richer, while milk keeps it lighter. You can skip it entirely for a less rich version.
Equipment Needed
Having the right tools makes cooking so much easier and more enjoyable. Here’s what you’ll need for this recipe:
- Large Oven-Safe Skillet or Dutch Oven (12-inch or larger) – This is your workhorse. It needs to be big enough to hold everything and able to go from stovetop to oven if you’re using the baking method.
- Sharp Chef’s Knife – For cutting chicken into uniform pieces and chopping vegetables.
- Cutting Board – Preferably separate ones for raw chicken and vegetables to prevent cross-contamination.
- Measuring Cups and Spoons – Accurate measurements ensure consistent results, especially with the rice-to-liquid ratio.
- Wooden Spoon or Silicone Spatula – For stirring without scratching your cookware.
- Box Grater or Food Processor – If you’re shredding cheese from a block (which I highly recommend for better melting).
- Meat Thermometer – Optional but helpful to ensure chicken reaches 165°F for food safety.
- Aluminum Foil – For covering during cooking to trap steam and ensure the rice cooks evenly.
- Serving Spoon – For dishing up those generous portions.

Cheesy Chicken Rice Recipe
- Total Time: 45 minutes
- Yield: 6 servings 1x
- Diet: Gluten Free
Description
This creamy, cheesy chicken and rice recipe is comfort food at its finest. Tender chicken pieces and fluffy rice are cooked together in a rich, savory broth and topped with melted cheese for a complete one-pan meal that the whole family will love. Perfect for busy weeknights when you need something satisfying and delicious without spending hours in the kitchen.
Ingredients
- 1½ pounds boneless, skinless chicken breasts or thighs, cut into 1-inch pieces
- 1½ cups long-grain white rice (uncooked)
- 3 cups low-sodium chicken broth
- 1 medium yellow onion, finely diced
- 3 cloves garlic, minced
- 2 tablespoons butter
- 1 tablespoon olive oil
- 2 cups shredded sharp cheddar cheese, divided
- 1 cup shredded mozzarella cheese
- ½ cup heavy cream (optional, for extra creaminess)
- 1 teaspoon paprika
- 1 teaspoon Italian seasoning
- ½ teaspoon garlic powder
- ½ teaspoon onion powder
- ½ teaspoon salt (adjust to taste)
- ¼ teaspoon black pepper
- Pinch of cayenne pepper (optional)
- 2 tablespoons fresh parsley, chopped (for garnish)
Instructions
- Prepare the Chicken: Pat the chicken pieces dry with paper towels and season generously with salt, pepper, paprika, garlic powder, and onion powder. Set aside while you prep the other ingredients.
- Sauté the Aromatics: In a large oven-safe skillet or Dutch oven, heat butter and olive oil over medium-high heat. Once the butter is melted and foaming, add the diced onion and cook for 3-4 minutes until softened and translucent. Add the minced garlic and cook for another 30 seconds until fragrant.
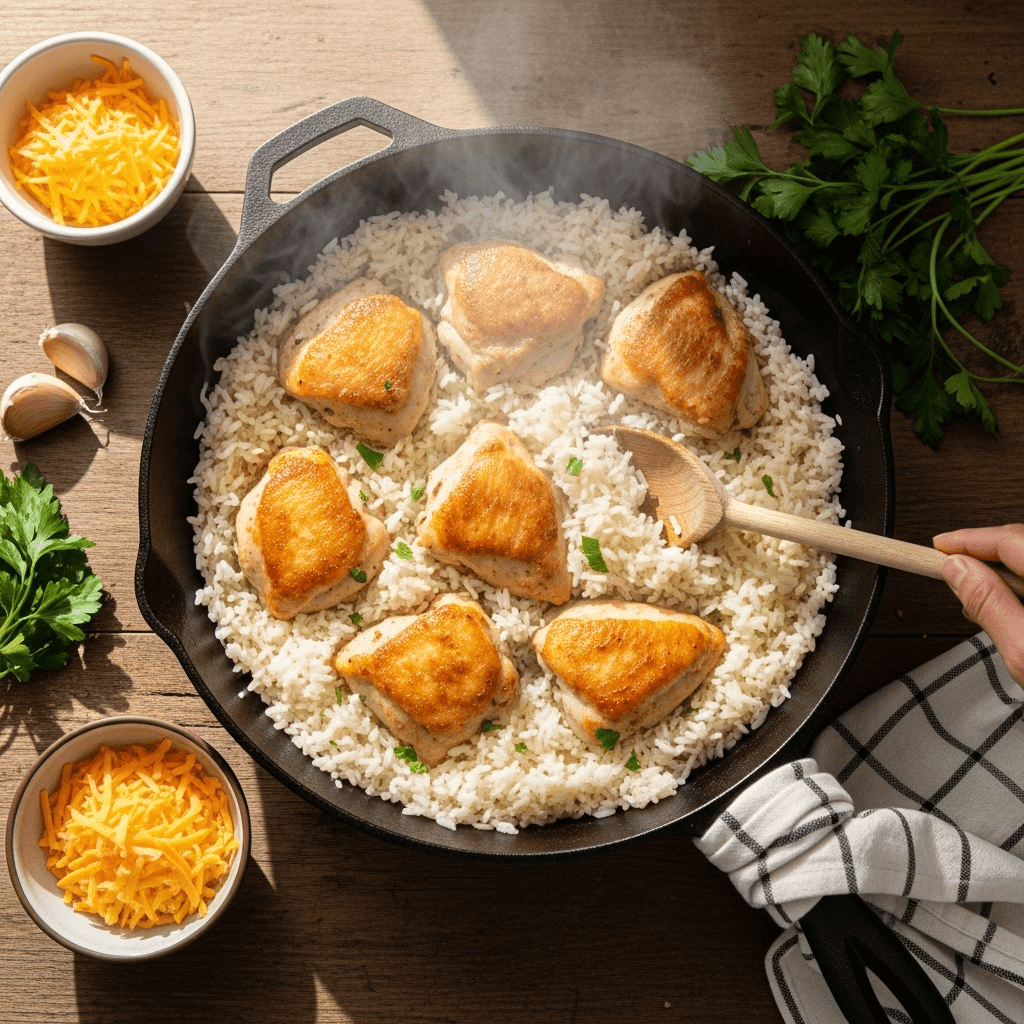
- Brown the Chicken: Add the seasoned chicken pieces to the pan in a single layer. Cook for 3-4 minutes without moving them to get a nice golden sear on one side. Flip and cook for another 2-3 minutes. The chicken doesn’t need to be fully cooked through at this point—it will finish cooking with the rice.
- Add the Rice: Sprinkle the uncooked rice over the chicken, stirring to coat the rice with the pan drippings. Let it toast for about 1 minute, stirring occasionally. This step adds extra flavor to the rice.
- Add Liquid and Seasonings: Pour in the chicken broth, Italian seasoning, and cayenne pepper (if using). Stir everything together, scraping up any browned bits from the bottom of the pan—that’s pure flavor! If using heavy cream, stir it in now.
- Simmer: Bring the mixture to a boil, then immediately reduce the heat to low. Cover the pan tightly with a lid or aluminum foil. Simmer for 18-20 minutes without lifting the lid (this traps the steam needed to cook the rice properly).
- Check for Doneness: After 20 minutes, check if the rice is tender and has absorbed most of the liquid. If it’s still a bit firm or there’s too much liquid, cover and cook for another 3-5 minutes.
- Add the Cheese: Remove the pan from heat. Sprinkle 1½ cups of cheddar cheese and all of the mozzarella evenly over the top. Cover again and let it sit for 3-4 minutes until the cheese melts beautifully.
- Final Touch: If you want an extra golden, bubbly top, place the uncovered skillet under the broiler for 2-3 minutes, watching carefully to prevent burning. Sprinkle the remaining ½ cup of cheddar on top and let it melt from the residual heat.
- Garnish and Serve: Remove from heat, garnish with fresh chopped parsley, and let it rest for 5 minutes before serving. This allows everything to set up slightly and makes serving easier.
Notes
- Rice Ratio: The standard ratio is 1 part rice to 2 parts liquid. If your rice seems undercooked after the initial cooking time, add ¼ cup more broth and continue cooking covered for a few more minutes.
- Chicken Size: Cut chicken into uniform pieces so everything cooks at the same rate. Smaller pieces cook faster and distribute better throughout the rice.
- Cheese Options: Mix and match cheeses based on what you have. Pepper Jack adds a spicy kick, while Gruyere makes it more sophisticated.
- Making it Lighter: Use milk instead of cream, reduce cheese to 2 cups total, or use part-skim mozzarella.
- Vegetable Additions: Frozen peas, diced bell peppers, broccoli florets, or spinach can be stirred in during the last 5 minutes of cooking for added nutrition.
- Prep Time: 10 minutes
- Cook Time: 30 minutes
- Category: Dinner
- Method: Stovetop
- Cuisine: American
Nutrition
- Serving Size: 1 cup (approximately 1/6 of recipe)
- Calories: 485
- Sugar: 2g
- Sodium: 685mg
- Fat: 22g
- Saturated Fat: 11g
- Unsaturated Fat: 9g
- Trans Fat: 0g
- Carbohydrates: 38g
- Fiber: 1g
- Protein: 34g
- Cholesterol: 105mg
Nutrition information is an estimate and will vary based on specific ingredients used and portion sizes.
Tips & Variations
Make this recipe your own with these creative twists and helpful tips:
Spicy Version: Add diced jalapeños, use pepper jack cheese, increase cayenne to ½ teaspoon, or stir in a few dashes of hot sauce.
Veggie-Packed: Fold in 2 cups of chopped broccoli, cauliflower, or spinach during the last 5 minutes of cooking. Frozen mixed vegetables work great too—just thaw and drain them first.
Mexican-Inspired: Replace Italian seasoning with taco seasoning, add black beans and corn, use Mexican cheese blend, and top with cilantro, lime juice, and sliced avocado.
Mushroom Lover’s: Sauté 8 ounces of sliced mushrooms with the onions and add ½ teaspoon of thyme. Swap half the cheddar for Gruyere for a more sophisticated flavor.
Low-Carb Option: Replace rice with cauliflower rice (add it during the last 8-10 minutes of cooking since it cooks much faster than regular rice).
Buffalo Style: Toss chicken with buffalo sauce before adding to the pan, use a combination of cheddar and blue cheese crumbles, and drizzle with ranch dressing before serving.
Lighter Version: Use chicken breast instead of thighs, skip the cream, reduce cheese to 1½ cups total, and use low-fat cheese varieties.
Pro Chef Tips
Elevate your cheesy chicken rice with these professional techniques that make a noticeable difference:
Toast Your Rice: That minute of toasting the rice in the pan drippings before adding liquid adds a nutty depth that makes the dish taste more complex and restaurant-quality.
Don’t Peek: Resist the urge to lift the lid while the rice cooks. Every time you do, you release steam that’s essential for properly cooking the rice. Trust the process!
Use Room Temperature Chicken: Take chicken out of the fridge 15-20 minutes before cooking. It browns better and cooks more evenly than cold chicken straight from the refrigerator.
Layer Your Cheese: Using two types of cheese isn’t just for flavor—cheddar provides sharp taste while mozzarella creates that stretchy, gooey texture. This combination is the secret to perfect cheese pulls.
The Resting Period Matters: Letting the dish sit for 5 minutes after cooking allows the starches to set, making it easier to serve and improving the overall texture. Everything firms up just enough to not be soupy.
Season in Stages: Season the chicken separately before cooking, then season the broth mixture. This creates layers of flavor rather than one-dimensional saltiness.
Fresh Herbs at the End: Adding fresh parsley (or cilantro, basil, or chives) right before serving adds brightness and a pop of color that makes the dish look and taste fresher.
Common Mistakes to Avoid
Learn from these common pitfalls so your cheesy chicken rice turns out perfect every time:
Mistake #1: Using Too Much or Too Little Liquid – The rice-to-liquid ratio is crucial. Too much liquid creates mushy, soupy rice. Too little and your rice will be crunchy and undercooked. Stick to the 1:2 ratio (1 cup rice to 2 cups liquid) for perfect results.
Mistake #2: Cooking on Too High Heat – Once you’ve added the broth, the heat should be low—just enough to maintain a gentle simmer. High heat will cause the liquid to evaporate too quickly, leaving you with burnt bottom and raw rice on top.
Mistake #3: Stirring the Rice While It Cooks – Unlike risotto, this rice should not be stirred once the liquid is added and the lid is on. Stirring releases too much starch and creates gummy, sticky rice instead of fluffy, separate grains.
Mistake #4: Using Pre-Shredded Cheese – Those convenient bags of shredded cheese contain cellulose (an anti-caking agent) that prevents smooth, creamy melting. Block cheese that you shred yourself melts beautifully and creates that dreamy, creamy texture.
Mistake #5: Not Cutting Chicken into Uniform Pieces – When pieces are different sizes, some will be overcooked and dry while others are undercooked. Aim for uniform 1-inch pieces for even cooking throughout.
Mistake #6: Skipping the Searing Step – Taking the time to properly brown the chicken creates fond (those flavorful browned bits) on the bottom of the pan that adds tremendous depth to the final dish. Don’t skip this step!
Storage & Meal Prep
Proper storage keeps your leftovers tasting fresh and delicious for days:
Refrigerator Storage: Transfer cooled leftovers to an airtight container and refrigerate for up to 4 days. The rice will firm up in the fridge, which is completely normal.
Reheating from Refrigerator: Add a splash of chicken broth or water (about 2-3 tablespoons per serving) to prevent drying out. Microwave individual portions for 2-3 minutes, stirring halfway through, until heated through. Alternatively, reheat in a covered skillet over medium-low heat, stirring occasionally and adding liquid as needed.
Oven Reheating: For larger portions, place in an oven-safe dish, add a few tablespoons of broth, cover with foil, and bake at 350°F for 20-25 minutes until heated through.
Texture Tip: The rice may absorb more liquid as it sits, making leftovers a bit drier than freshly made. Adding that splash of liquid when reheating brings back the creamy texture.
Food Safety: Always reheat to 165°F internal temperature. Don’t leave this dish at room temperature for more than 2 hours (1 hour if it’s above 90°F).
Make-Ahead & Freezer Notes
This recipe is excellent for meal prep, making your busy weeknights so much easier:
Freezing Instructions: Cool the dish completely, then portion into freezer-safe containers, leaving about ½ inch of space at the top for expansion. Freeze for up to 3 months. Label with the date and reheating instructions.
Freezing Tip: For best texture, slightly undercook the rice by 2-3 minutes before freezing. It will finish cooking during reheating and won’t become mushy.
Thawing: Transfer frozen portions to the refrigerator 24 hours before you plan to eat them for safe, even thawing.
Reheating from Frozen: You can reheat from frozen, but it takes longer. Microwave on 50% power for 5 minutes, stir, then continue heating at full power in 2-minute intervals until hot throughout. Add extra liquid as needed since frozen rice can be drier.
Make-Ahead Assembly: Prep all ingredients ahead—cut chicken, dice onions, measure spices, and shred cheese. Store separately in the fridge for up to 24 hours. When ready to cook, proceed with the recipe as directed.
Best Results: While this dish freezes reasonably well, it’s best enjoyed fresh or refrigerated rather than frozen. The cheese texture can become slightly grainy after freezing, though the flavor remains delicious.
Serving Suggestions
Complete your meal with these delicious pairings that complement the rich, cheesy flavors:
Fresh Salads: A crisp Caesar salad, simple mixed greens with balsamic vinaigrette, or a tangy coleslaw provides refreshing contrast to the creamy richness of the chicken and rice.
Roasted Vegetables: Roasted broccoli, green beans almondine, garlic butter asparagus, or honey-roasted carrots add color, nutrition, and textural variety to your plate.
Breads: Warm garlic bread, buttery dinner rolls, cornbread, or crusty French bread are perfect for soaking up every bit of that cheesy goodness.
Light Sides: Steamed green beans, sautéed spinach with garlic, or a cucumber tomato salad keep things balanced and prevent the meal from feeling too heavy.
Beverages: This hearty dish pairs beautifully with iced tea, lemonade, crisp white wine like Sauvignon Blanc or Pinot Grigio, or a light beer.
Garnish Ideas: Beyond parsley, try sliced green onions, crispy bacon bits, a dollop of sour cream, or a squeeze of fresh lemon juice to brighten the flavors.
FAQs Section
Q: Can I use brown rice instead of white rice?
A: Yes, but you’ll need to adjust the cooking time and liquid. Brown rice typically requires 40-45 minutes of cooking time and a 1:2.5 ratio (1 cup rice to 2.5 cups liquid). I recommend partially cooking the brown rice separately first, then adding it to the chicken mixture for the final 15-20 minutes.
Q: My rice came out mushy. What went wrong?
A: Mushy rice usually means too much liquid or stirring while cooking. Make sure you’re using the correct 1:2 ratio and resist stirring once you’ve covered the pan. Also, check that your heat isn’t too high—it should be a gentle simmer, not a rolling boil.
Q: Can I use chicken drumsticks or bone-in chicken?
A: While boneless chicken works best for even cooking and easy serving, you can use bone-in pieces. Brown them first, then increase the cooking time to 35-40 minutes to ensure the chicken is fully cooked. Remove the bones before serving, or warn your guests!
Q: What if I don’t have an oven-safe skillet?
A: No problem! Cook everything on the stovetop as directed, then transfer to a greased 9×13-inch baking dish, top with cheese, and broil for those few minutes. Or simply let the cheese melt from the residual heat by covering the pot.
Q: How do I know when the rice is done?
A: The rice is done when it’s tender to the bite, has absorbed most of the liquid, and the chicken has reached 165°F internal temperature. If there’s still liquid but the rice is tender, remove the lid and cook for a few more minutes to evaporate excess moisture.
Q: Can I make this dairy-free?
A: Yes! Use dairy-free butter or olive oil, skip the cream, and substitute with dairy-free cheese alternatives. Keep in mind that dairy-free cheese doesn’t always melt the same way, so the texture will be slightly different but still delicious.
Q: Why is my chicken dry?
A: Overcooked chicken is the culprit. Cut pieces no larger than 1 inch so they cook through without drying out. Chicken thighs are also more forgiving than breasts. If using breasts, remove them once they hit 165°F and shred them back into the rice just before serving.
Conclusion
There you have it—the ultimate cheesy chicken rice recipe that’s about to become your family’s new favorite weeknight dinner! This dish proves that comfort food doesn’t have to be complicated or time-consuming. With simple ingredients, one pan, and less than an hour, you can create a meal that tastes like you spent all day in the kitchen.
The beauty of this recipe lies in its versatility. Whether you keep it classic or experiment with the variations I’ve shared, you’re guaranteed a satisfying, delicious meal that brings everyone to the table with smiles. It’s the kind of recipe you’ll make again and again, tweaking it each time to suit your family’s changing tastes and what you have in your pantry.
I hope this recipe brings as much joy to your dinner table as it has to mine. Don’t forget to snap a photo of your beautiful, cheesy creation and share it—I’d love to see your version! And if you make any fun variations or have tips to share with other home cooks, drop them in the comments below.
Happy cooking, and here’s to many cozy, cheesy dinners ahead!

