

If you’ve been searching for a chicken recipe that’s incredibly flavorful, ridiculously easy, and guaranteed to please even the pickiest eaters, this Garlic Parmesan Baked Chicken is about to become your new go-to dinner hero. Imagine juicy, tender chicken breasts coated in a crispy, golden crust that’s loaded with savory garlic, nutty Parmesan cheese, and aromatic herbs. Every bite delivers that satisfying crunch on the outside while staying perfectly moist and flavorful on the inside.
This recipe is the epitome of comfort food done right. It’s fancy enough to serve when you have guests over for dinner, yet simple enough to throw together on a busy Tuesday night when you’re running on fumes. The best part? Everything happens in the oven, which means you can prep it, pop it in, and walk away to help with homework, catch up on laundry, or simply relax with a glass of wine while your kitchen fills with the most incredible aroma.
The garlic and Parmesan combination is absolutely timeless and universally loved. Kids adore the cheesy coating, adults appreciate the sophisticated garlic flavor, and everyone loves that crispy texture that rivals anything you’d order at a restaurant. Serve it alongside roasted vegetables, over pasta, with a fresh salad, or even sliced up in sandwiches the next day. Whether you’re feeding a family of four, meal prepping for the week ahead, or hosting a casual dinner party, this baked chicken delivers restaurant-quality results without the hefty price tag or complicated techniques. It’s comfort food that actually fits into your real life, and trust me when I say that once you make this, it’ll be in constant rotation in your meal plan.
History / Background
The combination of garlic, Parmesan cheese, and chicken has deep roots in Italian-American cuisine, though the specific technique of coating and baking chicken with these ingredients is a more modern American adaptation. Traditional Italian cooking has long celebrated the marriage of Parmigiano-Reggiano cheese with garlic in countless preparations, from pasta dishes to meat preparations, recognizing how beautifully these two powerhouse ingredients complement each other.
Parmesan cheese itself—authentic Parmigiano-Reggiano—has been produced in Italy for over 800 years, originating in the provinces of Parma, Reggio Emilia, Modena, and parts of Bologna and Mantua. Italian monks in the Middle Ages developed this hard, aged cheese as a way to preserve milk’s nutrients for long periods. The sharp, nutty, umami-rich flavor of aged Parmesan became a cornerstone of Italian cooking, enhancing everything it touched with depth and complexity.
When Italian immigrants came to America in large waves during the late 19th and early 20th centuries, they brought their culinary traditions with them, adapting recipes to incorporate readily available American ingredients and cooking methods. The Italian-American community created what we now recognize as red sauce Italian food—dishes like chicken Parmesan, baked ziti, and various breaded and baked meat preparations that honored their heritage while embracing their new home.
The specific technique of coating chicken with Parmesan and breadcrumbs before baking became popular in American home kitchens during the 1950s and 1960s, when convenience and oven-baked casseroles dominated the cooking landscape. Home cooks appreciated how this method delivered crispy, flavorful results without the mess and hassle of deep frying. As garlic became more mainstream in American cooking during the 1970s and 1980s—moving beyond its ethnic associations—the garlic Parmesan combination became an absolute classic.
Today, garlic Parmesan baked chicken represents the best of Italian-American home cooking: simple ingredients transformed into something special through smart technique. It’s comfort food that bridges generations, satisfying both traditionalists who appreciate classic flavors and modern home cooks who need quick, reliable weeknight dinners. This recipe honors that heritage while streamlining the process for today’s busy families, proving that some flavor combinations truly are timeless.
Why You’ll Love This Recipe
This Garlic Parmesan Baked Chicken is honestly one of those recipes that checks every single box for what makes a dinner recipe truly great. It’s packed with flavor, surprisingly simple to prepare, and produces consistently delicious results every time you make it.
Here’s why this recipe deserves a permanent spot in your dinner rotation:
- Incredibly crispy without frying – Achieves that satisfying crunch using the oven, which means less mess, less oil, and fewer calories while still delivering amazing texture
- Packed with flavor – The combination of garlic, Parmesan, and herbs creates layers of savory deliciousness that make plain chicken breast taste absolutely extraordinary
- Kid-approved and family-friendly – The cheesy, mild flavors appeal to children while being sophisticated enough for adult palates
- Hands-off cooking – Once it’s in the oven, you’re done! No babysitting the stove or flipping pieces constantly
- Budget-friendly protein – Uses affordable chicken breast and pantry staples to create an impressive meal without breaking the bank
- Perfect for meal prep – Makes fantastic leftovers that taste great reheated, and it’s easy to double or triple the batch
- Naturally low-carb and keto-friendly – The breading uses minimal carbs compared to traditional fried chicken, and you can make it even lower-carb with almond flour
- Versatile for different occasions – Casual enough for weeknight dinners but impressive enough for company
- Minimal cleanup – Just one baking dish and a few prep bowls means you won’t spend all evening doing dishes
- Customizable to your taste – Easy to adjust the garlic level, add heat with red pepper flakes, or incorporate your favorite herbs
- Reheats beautifully – Unlike many chicken recipes that turn dry and rubbery as leftovers, this one maintains moisture and crispiness when properly reheated
Whether you’re a novice cook just building your recipe collection or an experienced home chef looking for reliable weeknight solutions, this garlic Parmesan baked chicken delivers every single time. It’s the kind of recipe that makes you look like a kitchen rockstar with minimal effort.
Ingredient Notes
Let’s dive into what makes this garlic Parmesan chicken so incredibly delicious. Understanding your ingredients helps you make smart choices and achieve the best results.
Chicken Breasts – The foundation of this dish. Look for chicken breasts that are similar in size for even cooking. If you find very large breasts (over 8 ounces each), consider butterflying or pounding them to an even thickness of about ¾ inch. Organic or free-range chicken tends to have better flavor and texture. You can absolutely substitute boneless, skinless chicken thighs for a juicier, more forgiving option that’s harder to overcook.
Parmesan Cheese – This is where quality truly matters. Freshly grated Parmigiano-Reggiano or high-quality domestic Parmesan delivers superior flavor and texture compared to pre-grated cheese from a canister. The pre-shredded stuff often contains anti-caking agents that prevent proper crisping. Grate your own from a block for the best results—it takes just minutes and makes a noticeable difference in both flavor and texture.
Breadcrumbs – Italian-seasoned breadcrumbs work beautifully here, adding extra flavor along with texture. Panko breadcrumbs create an even crispier coating if you prefer maximum crunch. For gluten-free diets, use certified gluten-free breadcrumbs or crushed gluten-free crackers. For keto or low-carb, substitute with almond flour or crushed pork rinds.
Garlic – Fresh garlic is absolutely essential for authentic, robust flavor. Four to six cloves might seem like a lot, but garlic mellows significantly during baking and creates that signature savory aroma. Garlic powder in the coating adds extra garlic punch throughout. Never substitute pre-minced garlic from a jar—it lacks the pungent freshness that makes this dish special.
Butter – Provides richness, helps the coating adhere, and aids in achieving that golden-brown color. Use real unsalted butter so you can control the salt level. The butter also adds moisture, preventing the chicken from drying out during baking. For dairy-free diets, olive oil works as a substitute, though the flavor will be slightly different.
Mayonnaise – This is a secret ingredient that many people don’t expect. Mayo creates an incredibly moist interior and helps the breadcrumb coating stick without needing eggs. It adds richness without being detectable in the final dish. For those avoiding mayo, Greek yogurt or sour cream work as alternatives.
Italian Seasoning – A blend of oregano, basil, thyme, and sometimes rosemary and marjoram. This herb mixture brings that classic Italian-American flavor profile. You can make your own blend or use store-bought. Fresh herbs can be substituted but use three times the amount since dried herbs are more concentrated.
Paprika – Adds subtle sweetness, beautiful color, and a hint of smokiness if you use smoked paprika. It’s not overpowering but adds complexity to the flavor profile.
Equipment Needed
You won’t need any special equipment for this recipe, just standard kitchen tools that most home cooks already have on hand.
- 9×13-inch baking dish – Glass or ceramic works beautifully. Metal pans also work but may cook slightly faster
- Cooking spray or oil – For greasing the baking dish to prevent sticking
- Two shallow bowls or plates – One for the mayo mixture, one for the breadcrumb coating
- Measuring cups and spoons – For accurate ingredient portions
- Sharp chef’s knife – For trimming chicken if needed
- Cutting board – Preferably one designated for raw poultry
- Grater or food processor – For grating fresh Parmesan cheese
- Garlic press or microplane – For mincing garlic finely
- Meat thermometer – Takes the guesswork out of perfect doneness
- Tongs or fork – For handling the chicken during coating
- Paper towels – For patting chicken dry before coating
- Wire cooling rack (optional) – Placing chicken on a rack set in the baking dish allows air circulation for extra crispiness on all sides
Garlic Parmesan Baked Chicken Recipe
- Total Time: 45-50 minutes
- Yield: 4 servings 1x
- Diet: Gluten Free
Description
Tender, juicy chicken breasts coated in a crispy garlic Parmesan crust and baked to golden perfection. This easy weeknight dinner requires just 15 minutes of prep and delivers restaurant-quality flavor with minimal effort. The combination of savory garlic, nutty Parmesan, and aromatic herbs creates an irresistible coating that stays crispy outside while keeping the chicken incredibly moist inside.
Ingredients
For the Chicken:
- 4 boneless, skinless chicken breasts (about 1½-2 pounds total)
- ½ teaspoon salt
- ¼ teaspoon black pepper
For the Coating:
- ½ cup mayonnaise (or Greek yogurt)
- 3 tablespoons melted butter
- 4-5 cloves garlic, minced or pressed
- 1 cup freshly grated Parmesan cheese, divided
- ¾ cup Italian-seasoned breadcrumbs (or panko for extra crunch)
- 1 teaspoon garlic powder
- 1 teaspoon Italian seasoning
- ½ teaspoon paprika
- ¼ teaspoon black pepper
- 2 tablespoons fresh parsley, chopped (for garnish)
- Lemon wedges (optional, for serving)
Instructions
- Preheat and prep: Preheat your oven to 400°F (200°C). Lightly grease a 9×13-inch baking dish with cooking spray or a thin coating of olive oil. This prevents sticking and makes cleanup easier.
- Prepare the chicken: Pat the chicken breasts completely dry with paper towels—this is crucial for the coating to adhere properly. If your chicken breasts are very thick (over 1 inch), place them between plastic wrap and gently pound to an even ¾-inch thickness for uniform cooking. Season both sides lightly with salt and pepper.
- Make the mayo mixture: In a shallow bowl, combine mayonnaise, melted butter, and minced garlic. Whisk together until smooth and well blended. This mixture acts as the “glue” for your coating and adds incredible moisture to the chicken.
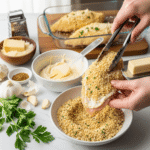
- Prepare the breadcrumb mixture: In another shallow bowl or plate, combine breadcrumbs, ½ cup of the grated Parmesan (reserve the other ½ cup for later), garlic powder, Italian seasoning, paprika, and black pepper. Mix thoroughly with a fork to distribute all the seasonings evenly.
- Coat the chicken: Working with one chicken breast at a time, use tongs or your hands to coat it thoroughly with the mayo-garlic mixture on all sides. Let excess drip off, then press firmly into the breadcrumb mixture, coating all surfaces generously. Press the coating onto the chicken to ensure it adheres well. Place coated chicken in the prepared baking dish. Repeat with remaining chicken breasts.
- Add the final cheese layer: Once all chicken is coated and arranged in the baking dish (with a little space between pieces for air circulation), sprinkle the remaining ½ cup of Parmesan cheese evenly over the tops. This creates an extra cheesy, golden crust.
- Bake to perfection: Place the baking dish in the preheated oven and bake for 25-30 minutes, or until the coating is golden brown and crispy, and the internal temperature of the chicken reaches 165°F when measured with a meat thermometer inserted into the thickest part. The juices should run clear when pierced.
- Optional broil for extra crispiness: If you want an even crispier, more golden top, turn on the broiler for the last 2-3 minutes of cooking. Watch very carefully to prevent burning—broilers work fast!
- Rest and serve: Remove from the oven and let the chicken rest for 5 minutes before serving. This allows the juices to redistribute throughout the meat. Garnish with freshly chopped parsley and serve with lemon wedges for squeezing over the top if desired.
Notes
- Don’t skip patting the chicken dry—excess moisture prevents the coating from adhering and crisping properly.
- For extra crispy chicken, place breasts on a wire rack set inside the baking dish rather than directly on the bottom. This allows hot air to circulate all around.
- If your breadcrumb coating isn’t browning enough, increase oven temperature to 425°F or finish under the broiler for 1-2 minutes.
- Internal temperature should reach 165°F for food safety. If your chicken reaches temperature but the coating isn’t golden enough, remove chicken and broil the coating separately, or increase oven temperature next time.
- Chicken breast size matters—smaller breasts (4-6 oz) will cook in about 20-25 minutes, while larger ones (8+ oz) may need 30-35 minutes.
- For maximum garlic flavor, add an extra clove or two to the mayo mixture.
- The coating can be made dairy-free by using nutritional yeast instead of Parmesan and olive oil instead of butter.
- Prep Time: 15 minutes
- Cook Time: 25-30 minutes
- Category: Dinner
- Method: Baking
- Cuisine: Italian-American
Nutrition
- Serving Size: 1 chicken breast with coating (approximately ¼ of recipe)
- Calories: 425
- Sugar: 2g
- Sodium: 780mg
- Fat: 23g
- Saturated Fat: 8g
- Unsaturated Fat: 13g
- Trans Fat: 0g
- Carbohydrates: 15g
- Fiber: 1g
- Protein: 39g
- Cholesterol: 125mg
Nutrition information is approximate and will vary based on specific ingredients used and portion sizes. Calculations based on using mayonnaise, Italian breadcrumbs, and chicken breast.
Tips & Variations
The beauty of this garlic Parmesan chicken is how easily you can customize it to suit your preferences, dietary needs, or whatever ingredients you have in your pantry.
Spicy Garlic Parmesan: Add ½ teaspoon of cayenne pepper or red pepper flakes to the breadcrumb mixture for a pleasant kick. You can also drizzle with hot honey or sriracha mayo after baking.
Extra Crispy Version: Use panko breadcrumbs instead of regular breadcrumbs, and place chicken on a wire rack set in the baking dish so air circulates on all sides. You can also spray the tops lightly with cooking spray before baking for even more crispiness.
Herb Variations: Mix in fresh chopped herbs like rosemary, thyme, or basil to the breadcrumb mixture. Fresh herbs add brightness and complexity to the coating.
Lemon Garlic Parmesan: Add the zest of one lemon to the mayo mixture and serve with fresh lemon wedges for squeezing. The citrus brightens all the flavors beautifully.
Keto and Low-Carb Version: Replace breadcrumbs with almond flour, crushed pork rinds, or a combination of both. The texture will be slightly different but still delicious and satisfying.
Gluten-Free Option: Use certified gluten-free breadcrumbs or make your own by processing gluten-free bread or crackers in a food processor.
With Vegetables: Arrange cherry tomatoes, asparagus spears, or broccoli florets around the chicken in the baking dish during the last 15 minutes of cooking for a complete one-pan meal.
Stuffed Version: Butterfly the chicken breasts and stuff with a mixture of spinach, cream cheese, and sun-dried tomatoes before coating and baking. You’ll need to increase cooking time by about 5-10 minutes.
Ranch Parmesan: Add 1-2 tablespoons of ranch seasoning mix to the breadcrumb coating for a ranch-Parmesan fusion that kids especially love.
Pro Chef Tips
Want to elevate your garlic Parmesan chicken from good to absolutely restaurant-quality? These professional techniques make all the difference.
Pound to even thickness: This is crucial for even cooking. Use a meat mallet to create uniform ¾-inch thickness throughout each breast. This ensures the thin end doesn’t overcook while waiting for the thick end to reach temperature. It’s the number one tip for juicy chicken breast.
Double coating for maximum crunch: For an even thicker, crunchier crust, do a double coating. After the first coat, dip back in the mayo mixture and then breadcrumbs again. This creates an extra-substantial crust similar to fried chicken.
Let the coating set: After coating the chicken, let it sit in the refrigerator for 15-30 minutes before baking. This “rest” helps the coating adhere better and creates a crispier final result. Great if you’re prepping ahead anyway.
Room temperature chicken: Remove chicken from the refrigerator 15-20 minutes before coating and baking. Room temperature chicken cooks more evenly, resulting in juicier meat with better texture throughout.
Use a thermometer religiously: Don’t guess on doneness. Insert an instant-read thermometer into the thickest part of the chicken, being careful not to touch the pan. Pull at exactly 165°F for perfectly cooked, juicy chicken every time.
Finish with fresh herbs and lemon: Right before serving, sprinkle fresh chopped parsley, basil, or chives over the chicken and provide lemon wedges. This final touch adds brightness and freshness that elevates the dish from everyday to special.
Proper spacing matters: Don’t crowd the chicken in the pan. Leave at least half an inch between pieces so hot air can circulate. Crowding causes steaming instead of crisping and leads to soggy coating.
Toast your breadcrumbs: For an even deeper, nuttier flavor, lightly toast your breadcrumbs in a dry skillet for 2-3 minutes before mixing with the Parmesan and spices. This extra step adds impressive depth.
Common Mistakes to Avoid
Even straightforward recipes can go wrong if you’re not careful. Here’s how to sidestep the most common pitfalls with baked chicken.
Not drying the chicken properly: This is the most common mistake. Excess moisture creates a barrier between the chicken and coating, preventing adhesion and causing a soggy crust instead of crispy. Always pat completely dry with paper towels before coating.
Using pre-grated Parmesan from a container: Those shaky containers of pre-grated cheese contain cellulose (wood pulp) as an anti-caking agent, which prevents the cheese from melting and crisping properly. Always grate fresh Parmesan from a block for superior flavor and texture.
Overcooking the chicken: Chicken breast has very little fat, so it dries out quickly when overcooked. Use a meat thermometer and pull it from the oven at exactly 165°F. Carryover cooking will occur during resting, so don’t wait until it’s 170°F or higher.
Skipping the mayo layer: Some people try to skip the mayo to save calories, but this is a mistake. The mayo creates moisture, helps the coating stick, and adds richness without being detectable in the final dish. Greek yogurt or sour cream work if you truly can’t use mayo.
Coating the chicken too far in advance: If you coat the chicken more than 30 minutes before baking (without refrigerating), the moisture from the chicken will make the coating soggy. Either refrigerate coated chicken or coat right before baking for optimal crispiness.
Using too much or too little coating: Press the breadcrumb mixture onto the chicken firmly but don’t go overboard. Too thick and it won’t cook through; too thin and you won’t get that satisfying crunch. Aim for an even, generous coating on all surfaces.
Storage & Meal Prep
This garlic Parmesan chicken is fantastic for meal prep and stores beautifully, making it perfect for batch cooking and weekly meal planning.
Refrigerator Storage: Allow cooked chicken to cool to room temperature (don’t leave it out for more than 2 hours for food safety). Transfer to an airtight container and refrigerate for up to 4 days. For best results, store the chicken pieces in a single layer rather than stacking to maintain the coating’s texture.
Maintaining Crispiness: The coating will soften slightly in the refrigerator, but you can restore much of the crispiness when reheating. The key is using dry heat rather than microwaving in a covered container, which creates steam and makes everything soggy.
Reheating for Best Results: For the crispiest reheated chicken, use the oven or toaster oven. Place chicken on a baking sheet and reheat at 350°F for 10-15 minutes until heated through. You can also use an air fryer at 350°F for 5-7 minutes for perfectly crispy results. If you must use a microwave, place chicken on a microwave-safe plate and reheat in 30-second intervals uncovered, which helps prevent excessive moisture buildup.
Meal Prep Containers: Portion the baked chicken into individual meal prep containers with your choice of sides—roasted vegetables, rice, quinoa, or salad. This makes healthy lunches effortless throughout the week. Keep any sauces or dressings separate to prevent sogginess.
Repurposing Leftovers: Slice or dice leftover chicken and use it in Caesar salads, pasta dishes, wraps, quesadillas, or grain bowls. The Parmesan coating adds incredible flavor to any dish you incorporate it into.
Make-Ahead & Freezer Notes
Planning ahead makes weeknight cooking so much easier, and this recipe is wonderfully flexible for advance preparation.
Preparing Ahead: You can coat the raw chicken up to 24 hours in advance. After coating, place in a covered container or cover the baking dish tightly with plastic wrap and refrigerate. When ready to cook, let it sit at room temperature for 15 minutes, then bake as directed. The coating may need an extra 2-3 minutes in the oven since it’s starting cold.
Freezing Coated Raw Chicken: This is one of the best make-ahead strategies. Coat the raw chicken as directed, place pieces on a parchment-lined baking sheet, and freeze until solid (about 2 hours). Transfer frozen coated chicken to freezer bags, removing as much air as possible. Label with the date and contents. Freeze for up to 3 months. To cook, bake from frozen at 400°F for 35-45 minutes, checking internal temperature to ensure it reaches 165°F.
Freezing Cooked Chicken: Fully cooked garlic Parmesan chicken freezes reasonably well for up to 2 months, though the coating won’t be quite as crispy as fresh. Cool completely, wrap individual pieces tightly in plastic wrap, then place in freezer bags or containers. This works great for quick single-serve meals.
Thawing and Reheating Frozen Chicken: The safest method is thawing overnight in the refrigerator. Reheat thawed chicken in a 350°F oven for 15-20 minutes until heated through. For frozen cooked chicken, you can reheat directly from frozen at 350°F for 25-30 minutes, though thawing first gives better texture.
Batch Cooking: This recipe doubles or triples easily. Make multiple batches, freeze the extras, and you’ll have quick dinners ready whenever you need them. This is especially helpful for new parents, busy professionals, or anyone who wants healthy homemade meals without daily cooking.
Serving Suggestions
This versatile garlic Parmesan chicken pairs beautifully with countless sides and accompaniments. Here are some delicious combinations to inspire your next meal.
Classic Italian Pairings:
- Pasta with marinara sauce, Alfredo, or simply tossed with olive oil and garlic
- Caesar salad with homemade croutons and extra Parmesan shavings
- Garlic bread or cheesy breadsticks for soaking up any extra goodness
- Roasted or sautéed green beans with lemon and almonds
Lighter, Healthier Options:
- Zucchini noodles or spaghetti squash for a low-carb base
- Simple arugula salad with cherry tomatoes, balsamic vinegar, and olive oil
- Roasted Brussels sprouts or asparagus with garlic and lemon
- Cauliflower rice or quinoa pilaf with herbs
Comfort Food Style:
- Creamy mashed potatoes or garlic mashed cauliflower
- Mac and cheese (kids especially love this combination!)
- Buttered egg noodles with fresh herbs
- Roasted potatoes with rosemary and olive oil
Complete Meal Ideas:
- Slice the chicken and serve over a bed of mixed greens with cherry tomatoes, cucumber, olives, and Italian dressing for a Parmesan chicken salad
- Create a chicken Parmesan sandwich by placing it on a toasted hoagie roll with marinara and mozzarella
- Dice and toss with penne pasta, sun-dried tomatoes, spinach, and cream sauce
- Serve alongside risotto or polenta for an elegant Italian-inspired dinner
Vegetable Sides:
- Roasted Mediterranean vegetables (zucchini, bell peppers, onions, tomatoes)
- Steamed broccoli with lemon butter
- Caprese salad with fresh mozzarella, tomatoes, and basil
- Ratatouille or caponata for a Provençal twist
Beverage Pairings: A crisp Italian white wine like Pinot Grigio or Vermentino complements the cheese and garlic beautifully. For non-alcoholic options, try sparkling water with lemon, iced tea, or Italian sodas.
FAQs Section
Can I use chicken thighs instead of chicken breasts?
Absolutely! Bone-in, skin-on thighs work wonderfully with this coating and stay even juicier than breasts. Boneless, skinless thighs also work great. Increase cooking time to 30-35 minutes for bone-in thighs, and check that internal temperature reaches 175°F (thighs are best when cooked slightly higher than breasts).
My coating isn’t getting crispy. What am I doing wrong?
The most common culprits are: (1) not drying the chicken thoroughly before coating, (2) overcrowding the baking dish preventing air circulation, (3) oven temperature too low, or (4) using pre-grated Parmesan with anti-caking agents. Make sure your oven is fully preheated to 400°F and consider placing chicken on a wire rack for maximum crispiness.
Can I make this without breadcrumbs for a keto diet?
Yes! Substitute the breadcrumbs with almond flour, crushed pork rinds, or a combination of both. The texture will be slightly different—less crunchy, more crispy—but still delicious. You can also use a mixture of grated Parmesan and almond flour for the coating.
How do I know when the chicken is fully cooked?
The only reliable method is using a meat thermometer. Insert it into the thickest part of the chicken breast, making sure not to touch the pan. It should read 165°F. Visual cues include clear (not pink) juices when pierced and firm (not jiggly) texture, but temperature is the only foolproof indicator.
Can I use this coating on other proteins?
Definitely! This coating works beautifully on pork chops, fish fillets (reduce cooking time to 12-15 minutes), shrimp (8-10 minutes), or even cauliflower steaks for a vegetarian option. Adjust cooking times based on the thickness and type of protein.
Why did my chicken turn out dry?
Overcooking is the most common cause of dry chicken breast. Always use a thermometer and pull the chicken at exactly 165°F, not higher. Also ensure you’re not using chicken breasts that are too thick without pounding them to even thickness. Finally, the mayo layer is crucial for moisture—don’t skip it.
Can I prep the coating mixture ahead of time?
Yes! Mix the breadcrumb coating and store it in an airtight container for up to a week. The mayo-garlic mixture is best made fresh, but you can prep the garlic ahead and mix with mayo right before coating. This makes weeknight cooking even faster.
Is this recipe gluten-free?
It can be easily made gluten-free by substituting regular breadcrumbs with certified gluten-free breadcrumbs or almond flour. Everything else in the recipe is naturally gluten-free, so this one simple swap makes the entire dish safe for gluten-sensitive diets.
Conclusion
There you have it—everything you need to make the most amazing Garlic Parmesan Baked Chicken that’ll have your family coming back for seconds! This recipe is proof that simple ingredients and straightforward techniques can create something truly spectacular. The crispy, cheesy coating combined with juicy, tender chicken makes this dish an absolute winner every single time.
Whether you’re feeding picky kids, impressing dinner guests, or just treating yourself to a delicious homemade meal, this garlic Parmesan chicken delivers on every level. The best part? You’ll spend just 15 minutes on prep work and let your oven do the rest of the heavy lifting. No complicated techniques, no hard-to-find ingredients, and no stress—just reliable, delicious results that make you look like a kitchen superstar.
I’d absolutely love to hear how your chicken turns out! Drop a comment below and let me know if you tried any of the variations, and don’t forget to pin this recipe to your favorite Pinterest boards so you can find it again whenever tha

