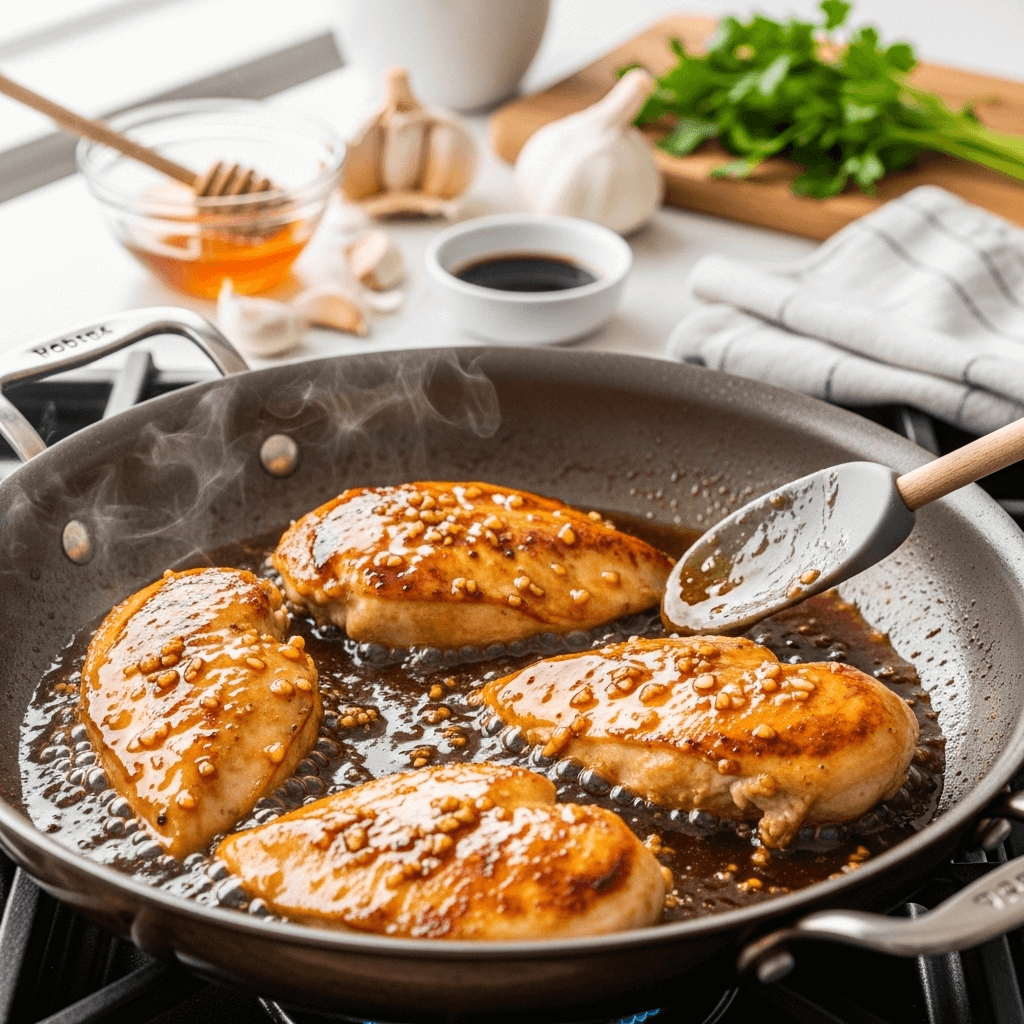

Get ready to fall in love with the most tender, flavorful chicken breast you’ve ever made! This Honey Garlic Chicken Breast recipe features perfectly pan-seared chicken smothered in a sweet and savory glaze that’s absolutely irresistible. The combination of golden honey, aromatic garlic, and a hint of soy sauce creates a sticky, caramelized coating that transforms ordinary chicken breast into something truly special.
This recipe is a total game-changer for anyone who thinks chicken breast is boring or dry. The secret is in the cooking technique and that gorgeous honey garlic sauce that keeps everything moist and packed with flavor. It’s the kind of dish that works beautifully for a quick weeknight dinner when you’re rushing to get food on the table, yet it’s impressive enough to serve to guests without breaking a sweat.
Perfect for meal prep, family dinners, or even a romantic dinner for two, this honey garlic chicken pairs wonderfully with rice, roasted vegetables, or a simple green salad. Kids absolutely love the slightly sweet flavor profile, while adults appreciate the depth that garlic and soy sauce bring to the table. And the best part? You’ll have dinner ready in just 30 minutes from start to finish, with minimal cleanup and maximum flavor. Whether you’re a beginner cook or an experienced home chef, this foolproof recipe will quickly become a staple in your dinner rotation.
History / Background
The honey garlic flavor combination has roots that span multiple culinary traditions, making it a truly global favorite. In Chinese cuisine, the marriage of sweet and savory elements has been fundamental for thousands of years, with honey often used alongside soy sauce and garlic in traditional stir-fries and glazes. The Cantonese cooking style, in particular, is famous for its balanced approach to flavors, where sweetness from honey or sugar perfectly complements the umami depth of soy-based sauces.
Western adaptations of Asian-inspired honey garlic chicken began appearing in North American home kitchens during the 1970s and 1980s, as international travel became more accessible and fusion cooking gained popularity. Home cooks were drawn to the simplicity of the flavor profile and how easily it could be recreated with pantry staples. Unlike complex regional dishes that required hard-to-find ingredients, honey garlic chicken could be made with items most families already had on hand.
The chicken breast specifically became the protein of choice for this preparation in the health-conscious 1990s and early 2000s, when lean white meat was heavily promoted as a nutritious dinner option. Creative home cooks needed ways to keep boneless, skinless chicken breast moist and flavorful—a notoriously difficult task since this lean cut can easily become dry and bland. The honey garlic glaze solved this problem beautifully, creating a moisture-retaining coating while adding incredible flavor.
Today, honey garlic chicken has become a Pinterest phenomenon and social media favorite, with thousands of variations floating around the internet. From slow cooker versions to baked preparations, this versatile recipe has proven its staying power. The version I’m sharing with you today combines the best techniques from restaurant kitchens with the practicality home cooks need—a pan-seared method that creates a caramelized exterior while keeping the inside juicy and tender, all finished with a glossy, finger-licking-good sauce.
Why You’ll Love This Recipe
This Honey Garlic Chicken Breast recipe is about to solve all your weeknight dinner dilemmas. It delivers restaurant-quality results with minimal effort, using ingredients you probably already have in your pantry. The sweet-savory glaze is incredibly versatile and appeals to even the pickiest eaters in your household.
Here’s why this recipe is absolutely worth making:
- Super quick and beginner-friendly – With just 30 minutes total time and simple steps, this recipe is perfect for busy weeknights or when you’re new to cooking
- Naturally gluten-free option – Easily made gluten-free by using tamari or coconut aminos instead of regular soy sauce
- Budget-friendly protein – Chicken breast is affordable and widely available, making this an economical choice for feeding a family
- Meal prep champion – Makes excellent leftovers that actually taste great reheated, perfect for weekly meal planning
- Kid-approved flavor – The mild sweetness appeals to children while still being sophisticated enough for adult palates
- One-pan wonder – Everything cooks in a single skillet, meaning less cleanup and more time to relax after dinner
- Versatile for different diets – Works great with modifications for keto (use sugar-free sweetener), paleo (use coconut aminos), or whole30 (skip the honey during compliant phases)
- Impressive presentation – That glossy, caramelized glaze looks absolutely stunning and makes the dish appear far more complicated than it actually is
- Customizable spice level – Add red pepper flakes or sriracha to make it as mild or spicy as your family prefers
- Freezer-friendly – Doubles easily for batch cooking and freezes beautifully for future quick meals
Whether you’re cooking for a family of four, meal prepping for the week ahead, or just craving something delicious and comforting, this recipe delivers every single time. The balance of flavors is spot-on, and the texture is absolutely perfect—no more dry, rubbery chicken breast!
Ingredient Notes
Let’s break down what makes this honey garlic chicken so incredibly delicious. Understanding your ingredients helps you make smart substitutions and achieve the best possible results.
Chicken Breast – The star of the show. Look for chicken breasts that are similar in size so they cook evenly. Organic or free-range chicken tends to have better flavor and texture. If your breasts are very thick (more than 1 inch), consider butterflying them or pounding them to an even thickness for uniform cooking. You can substitute with chicken thighs for a juicier, more forgiving option, though cooking time may vary slightly.
Honey – Provides natural sweetness and helps create that signature sticky glaze. Raw honey offers the most complex flavor, but any quality honey works beautifully. For a refined sugar-free version, try maple syrup, though it will give a slightly different flavor profile. Agave nectar also works but is sweeter, so reduce the amount by about one-third.
Garlic – Fresh garlic cloves are absolutely essential here. The pungent, aromatic quality of fresh garlic creates depth that powdered garlic simply cannot replicate. Mince it finely for even distribution throughout the sauce. Four to five cloves might seem like a lot, but they mellow beautifully when cooked and create that addictive savory note.
Soy Sauce – Adds the crucial umami and salty element that balances the honey’s sweetness. Low-sodium soy sauce gives you better control over the salt level. For gluten-free diets, use tamari or coconut aminos. Coconut aminos are slightly sweeter and less salty, so you may need to adjust seasoning.
Apple Cider Vinegar or Rice Vinegar – A small amount of acid brightens all the flavors and prevents the sauce from being cloying. Apple cider vinegar adds a fruity note, while rice vinegar is milder and more traditional in Asian-inspired dishes. In a pinch, fresh lemon juice works too.
Ginger (optional but recommended) – Fresh ginger adds a warm, slightly spicy complexity that elevates the entire dish. If you don’t have fresh, use ¼ teaspoon ground ginger, though fresh is always better.
Olive Oil or Butter – For searing the chicken and creating that golden-brown exterior. Olive oil has a higher smoke point, while butter adds richness. I often use a combination of both for the best of both worlds.
Cornstarch – This is your secret weapon for a glossy, restaurant-style sauce that clings to the chicken instead of pooling on the plate. It thickens the glaze to the perfect consistency. Arrowroot powder works as a substitute for paleo or whole30 diets.
Equipment Needed
You don’t need a fancy kitchen to make this recipe, but having the right tools makes everything easier and more enjoyable.
- Large skillet or sauté pan – A 12-inch skillet with high sides is ideal. Cast iron or stainless steel works best for getting a good sear. Nonstick is fine but won’t give you quite the same caramelization
- Meat thermometer – This takes all the guesswork out of perfectly cooked chicken. An instant-read thermometer is invaluable and inexpensive
- Measuring cups and spoons – For accurate ingredient portions, especially important for the sauce
- Sharp chef’s knife – For mincing garlic and trimming chicken
- Cutting board – Preferably one designated for raw poultry
- Meat mallet or rolling pin (optional) – For pounding chicken to even thickness if needed
- Small mixing bowl – For combining sauce ingredients before adding to the pan
- Whisk or fork – To mix the cornstarch slurry without lumps
- Tongs or spatula – For flipping chicken without piercing it
- Paper towels – For patting chicken dry before cooking
Honey Garlic Chicken Breast Recipe
- Total Time: 30 minutes
- Yield: 4 servings 1x
- Diet: Gluten Free
Description
Tender, juicy chicken breasts pan-seared to golden perfection and coated in a sweet and savory honey garlic glaze. This easy 30-minute dinner is perfect for busy weeknights and meal prep, delivering restaurant-quality flavor with simple pantry ingredients.
Ingredients
For the Chicken:
- 4 boneless, skinless chicken breasts (about 1½-2 pounds total)
- 1 teaspoon salt
- ½ teaspoon black pepper
- ½ teaspoon garlic powder
- 2 tablespoons olive oil or butter
For the Honey Garlic Sauce:
- ⅓ cup honey
- 4-5 cloves garlic, minced
- ¼ cup low-sodium soy sauce (or tamari for gluten-free)
- 1 tablespoon apple cider vinegar or rice vinegar
- 1 teaspoon fresh ginger, grated (optional but recommended)
- ¼ teaspoon red pepper flakes (optional, for heat)
- 1 tablespoon cornstarch
- 2 tablespoons water
- 1 tablespoon butter (optional, for extra richness)
- Fresh parsley or green onions for garnish
Instructions
- Prep the chicken: If your chicken breasts are very thick or uneven, place them between two pieces of plastic wrap or parchment paper and gently pound to an even thickness of about ¾ inch. This ensures even cooking. Pat the chicken completely dry with paper towels—this is crucial for achieving a golden-brown sear. Season both sides generously with salt, pepper, and garlic powder.
- Prepare the sauce ingredients: In a small bowl, whisk together honey, minced garlic, soy sauce, vinegar, and ginger if using. Set aside. In a separate small bowl, mix cornstarch with 2 tablespoons of water to create a slurry—this will thicken the sauce later. Set aside.
- Sear the chicken: Heat a large skillet over medium-high heat. Add olive oil and let it get hot until it shimmers, about 1-2 minutes. Carefully place chicken breasts in the pan, making sure not to overcrowd. You should hear an immediate sizzle. Cook without moving for 5-6 minutes until a golden-brown crust forms on the bottom.
- Flip and continue cooking: Flip the chicken using tongs and cook the other side for another 5-6 minutes, or until the internal temperature reaches 160°F (it will continue to rise to the safe 165°F while resting). Transfer chicken to a plate and tent loosely with foil to keep warm.
- Make the honey garlic glaze: In the same skillet, reduce heat to medium. If there’s excess oil, you can pour some out, but leave any browned bits—that’s flavor! Pour in the honey garlic sauce mixture. It will bubble and steam immediately. Let it simmer for 2-3 minutes, stirring occasionally, until the garlic becomes fragrant and the sauce darkens slightly.
- Thicken the sauce: Give your cornstarch slurry a quick stir (it may have settled), then pour it into the bubbling sauce while whisking constantly. The sauce will thicken within 30-60 seconds to a beautiful, glossy consistency. If it gets too thick, add a splash of water or chicken broth. If you want extra richness, stir in that tablespoon of butter until melted.
- Combine and glaze: Return the chicken breasts to the skillet along with any accumulated juices from the plate. Spoon the sauce over the chicken, turning to coat all sides. Let everything simmer together for 1-2 minutes so the flavors meld and the chicken is heated through and beautifully glazed.
- Serve and garnish: Transfer the honey garlic chicken to serving plates, spooning extra sauce over the top. Garnish with freshly chopped parsley or sliced green onions for a pop of color and freshness. Serve immediately while hot.
Notes
- Don’t skip patting the chicken dry—moisture prevents proper browning and creates steam instead of a sear.
- If your sauce seems too thick, thin it with a tablespoon of water or chicken broth. If it’s too thin, simmer it a bit longer or add a touch more cornstarch slurry.
- Internal temperature should reach 165°F for food safety, but pulling the chicken at 160°F accounts for carryover cooking.
- For extra caramelization, you can broil the sauced chicken for 1-2 minutes at the end, watching carefully to prevent burning.
- This sauce contains honey, which can burn if the heat is too high. Medium heat is perfect for the sauce stage.
- Leftover sauce can be stored separately and used as a glaze for vegetables, salmon, or pork chops.
- Prep Time: 10 minutes
- Cook Time: 20 minutes
- Category: Dinner
- Method: Stovetop
- Cuisine: Asian-American Fusion
Nutrition
- Serving Size: 1 chicken breast with sauce (approximately ¼ of recipe)
- Calories: 320
- Sugar: 18g
- Sodium: 680mg
- Fat: 9g
- Saturated Fat: 2g
- Unsaturated Fat: 6g
- Trans Fat: 0g
- Carbohydrates: 22g
- Fiber: 0g
- Protein: 36g
- Cholesterol: 95mg
Nutrition information is approximate and will vary based on specific ingredients used and portion sizes. Calculations based on using chicken breast, low-sodium soy sauce, and olive oil.
Tips & Variations
The beauty of this honey garlic chicken is how easily you can customize it to match your preferences, dietary needs, or whatever you have in your pantry.
Spicy Honey Garlic Chicken: Double the red pepper flakes or add a teaspoon of sriracha or sambal oelek to the sauce for a sweet heat combination that’s absolutely addictive. You can also drizzle hot honey over the finished dish.
Asian-Style with Sesame: Add a tablespoon of sesame oil to the sauce and garnish with toasted sesame seeds and sliced green onions for an authentic Asian-restaurant feel.
Orange Honey Garlic: Add 2 tablespoons of fresh orange juice and a teaspoon of orange zest to the sauce for a citrusy twist that’s especially refreshing in spring and summer.
Creamy Version: Stir in ¼ cup of heavy cream or coconut cream after the sauce thickens for a luscious, creamy honey garlic sauce that’s incredible over pasta or rice.
Baked Option: For a hands-off version, sear the chicken briefly (2-3 minutes per side), then transfer to a baking dish, pour the sauce over, and bake at 375°F for 20-25 minutes until cooked through.
Slow Cooker Method: Place raw chicken in the slow cooker, pour sauce over (skip the cornstarch initially), cook on low for 3-4 hours. Remove chicken, thicken the sauce with cornstarch slurry on the stovetop, then return chicken to coat.
Add Vegetables: Toss in broccoli florets, snap peas, bell peppers, or green beans during the last 5 minutes of cooking for a complete one-pan meal.
Keto-Friendly: Substitute honey with a sugar-free sweetener like monk fruit or erythritol. The texture will be slightly different but still delicious.
Herb Variations: Add fresh thyme, rosemary, or basil to the sauce for an herby twist that complements the garlic beautifully.
Pro Chef Tips
Want to take your honey garlic chicken from good to absolutely restaurant-quality? These professional techniques make all the difference.
Brine for extra juiciness: If you have 30 minutes to an hour before cooking, brine your chicken breasts in a solution of 4 cups water mixed with ¼ cup salt and 2 tablespoons sugar. This adds moisture and flavor from the inside out. Rinse and pat completely dry before seasoning.
Pound to even thickness: This is the single most important step for evenly cooked chicken breast. Use a meat mallet to create uniform thickness so the thin end doesn’t overcook while waiting for the thick end to finish.
Let chicken rest before slicing: After cooking, let the chicken rest for 5 minutes before cutting. This allows juices to redistribute throughout the meat instead of spilling out onto your cutting board, keeping every bite moist and tender.
Control your heat zones: Start with high heat for the sear, then reduce to medium or medium-low for the sauce. Honey burns easily at high temperatures, so managing heat is crucial for a perfect glaze without burnt bits.
Build layers of flavor: Toast the garlic in the pan for 30 seconds before adding the liquid ingredients. This develops deeper, nuttier garlic flavor that tastes more complex and less harsh.
Reserve some sauce: Before adding the chicken back to the pan, reserve a few tablespoons of that gorgeous glaze in a small bowl. Drizzle it over the plated chicken right before serving for a stunning, glossy presentation that looks professionally styled.
Use a thermometer religiously: This is your insurance policy against dry chicken. Pull the chicken at exactly 160°F (internal temperature), and carryover cooking will bring it to the safe 165°F while keeping it incredibly juicy.
Common Mistakes to Avoid
Even straightforward recipes can go sideways if you’re not careful. Here’s how to avoid the most common pitfalls with honey garlic chicken.
Cooking chicken straight from the fridge: Cold chicken placed in a hot pan creates uneven cooking—overcooked exterior, undercooked center. Let it sit at room temperature for 15-20 minutes before cooking for more even results throughout.
Not patting the chicken dry: This is the number one reason chicken doesn’t brown properly. Excess moisture creates steam instead of a sear, leaving you with pale, rubbery chicken. Use paper towels and really press to absorb all surface moisture.
Overcrowding the pan: If you’re doubling the recipe or your chicken breasts are large, cook in batches. Crowding drops the pan temperature, causes steaming instead of searing, and you’ll end up with gray, soggy chicken instead of a beautiful golden crust.
Using high heat for the sauce: Once you add the honey garlic sauce, reduce to medium heat. Honey contains natural sugars that caramelize and burn quickly. Burnt honey tastes bitter and will ruin your dish. Low and slow wins the race here.
Overcooking the chicken: This is probably the most common mistake home cooks make with chicken breast. Use a meat thermometer and pull it at 160°F—no guessing. Overcooked chicken breast is dry, tough, and no amount of sauce can fix that texture issue.
Skipping the cornstarch slurry: Without a thickening agent, your sauce will be thin and watery, sliding right off the chicken. The cornstarch creates that glossy, clingy restaurant-style glaze that makes this dish special.
Storage & Meal Prep
This honey garlic chicken is a meal prep superstar and stores beautifully, making it perfect for busy weeks when you need grab-and-go lunches or quick dinners.
Refrigerator Storage: Let the cooked chicken cool completely to room temperature before storing—this prevents condensation that makes food soggy. Transfer to an airtight container, ideally with the sauce stored separately if you want to maintain the best texture. Properly stored, honey garlic chicken will keep in the refrigerator for 3-4 days.
Reheating: The key to reheating chicken without drying it out is gentle, moist heat. Place chicken in a skillet over medium-low heat with a splash of water or chicken broth, cover with a lid, and warm for 3-4 minutes per side. Alternatively, microwave in 30-second intervals, covered with a damp paper towel. Add a bit of fresh sauce when reheating to refresh the glaze.
Meal Prep Containers: Portion the chicken into individual meal prep containers with your choice of sides—rice, quinoa, roasted vegetables, or salad. This makes healthy lunches effortless throughout the week. The chicken actually tastes better on day two after the flavors have had time to meld.
Slicing for Salads: If you’re meal-prepping for salads, let the chicken cool completely, then slice it. Store the sliced chicken and greens separately, adding the chicken to salads right before eating to keep everything fresh.
Make Extra Sauce: The honey garlic sauce stores beautifully on its own for up to a week. Make a double batch and use it throughout the week on salmon, shrimp, pork chops, or roasted vegetables for quick flavor transformations.
Make-Ahead & Freezer Notes
Planning ahead has never been easier with this versatile recipe that adapts beautifully to your schedule.
Marinating Ahead: Mix the sauce ingredients (except cornstarch slurry) and marinate the raw chicken in a ziplock bag or covered container for 2-24 hours before cooking. This infuses even more flavor into the meat. When ready to cook, remove chicken from marinade, pat dry, then follow the recipe as written, using fresh sauce for the glaze.
Pre-Portioned Freezer Bags: Season raw chicken breasts and place them in individual freezer bags with the honey garlic sauce (again, skip the cornstarch for now). Freeze flat for easy storage. Thaw overnight in the refrigerator, then cook as directed, thickening the sauce with cornstarch at the end.
Freezing Cooked Chicken: Fully cooked honey garlic chicken freezes well for up to 3 months. Let it cool completely, then freeze in airtight containers or heavy-duty freezer bags with as much air removed as possible. Label with the date and contents. For best results, slice before freezing so you can remove just what you need.
Thawing and Reheating Frozen Chicken: The safest method is thawing overnight in the refrigerator. In a pinch, you can defrost in the microwave using the defrost setting, but this can create uneven texture. Reheat thawed chicken gently in a covered skillet with a splash of liquid, or microwave until heated through.
Batch Cooking: This recipe doubles or triples beautifully. Make a large batch on meal prep Sunday, portion into containers, and you’ll have healthy, delicious lunches and quick dinners ready all week long.
Serving Suggestions
This versatile honey garlic chicken pairs wonderfully with so many sides and accompaniments. Here are some delicious combinations to inspire your next meal.
Classic Pairings:
- Fluffy white rice, brown rice, or cauliflower rice to soak up every drop of that incredible sauce
- Steamed broccoli or roasted Brussels sprouts for a nutritious, colorful side
- Garlic mashed potatoes or sweet potato mash for ultimate comfort food vibes
- Simple cucumber salad with rice vinegar dressing for refreshing contrast
Asian-Inspired Meals:
- Stir-fried vegetables with snap peas, bell peppers, and baby corn
- Coconut rice or jasmine rice for an aromatic base
- Sesame green beans or bok choy sautéed with garlic
- Spring rolls or vegetable dumplings as appetizers
Lighter Options:
- Mixed greens salad with sesame ginger dressing and mandarin oranges
- Zucchini noodles or shirataki noodles for a low-carb option
- Roasted asparagus with lemon and garlic
- Quinoa pilaf with dried cranberries and almonds
Comfort Food Style:
- Buttered egg noodles tossed with fresh herbs
- Creamy coleslaw for crunch and tang
- Dinner rolls or garlic bread for soaking up sauce
- Mac and cheese (kids especially love this combination!)
Complete One-Bowl Meals:
- Build a rice bowl with chicken, edamame, shredded carrots, cucumber, and avocado
- Add to grain bowls with farro or quinoa, roasted vegetables, and tahini drizzle
- Toss with ramen noodles and stir-fried vegetables for an easy noodle bowl
Beverage Pairings: A crisp white wine like Riesling or Sauvignon Blanc complements the sweet-savory flavors beautifully. For non-alcoholic options, try iced green tea, sparkling water with lime, or a light ginger ale.
FAQs Section
Can I use chicken thighs instead of chicken breast?
Absolutely! Boneless, skinless chicken thighs are more forgiving and naturally juicier than breast meat. They’ll take about the same cooking time, though you may need an extra minute or two since thighs are slightly denser. The honey garlic glaze works beautifully with either cut.
How do I know when the chicken is fully cooked?
The most reliable method is using an instant-read meat thermometer inserted into the thickest part of the chicken. It should read 165°F for safe consumption. Visual cues include clear (not pink) juices when pierced and firm, not jiggly, texture when touched.
Can I make this recipe without cornstarch?
Yes, though the sauce will be thinner. You can skip the thickener entirely for a lighter glaze, or substitute with arrowroot powder (use the same amount) for paleo diets. Another option is to simply simmer the sauce longer to reduce and thicken naturally, though this concentrates the sweetness.
My sauce is too thick/too thin. How do I fix it?
If too thick, simply whisk in water or chicken broth one tablespoon at a time until you reach desired consistency. If too thin, make another small cornstarch slurry (1 teaspoon cornstarch + 1 tablespoon water) and add gradually while simmering until thickened.
Is this recipe gluten-free?
It can be! Simply substitute regular soy sauce with tamari or coconut aminos, both of which are naturally gluten-free. Everything else in the recipe is already gluten-free, so this one simple swap makes the entire dish safe for gluten-sensitive diets.
Can I prepare this in an Instant Pot or pressure cooker?
Yes! Use the sauté function to sear the chicken first (2-3 minutes per side), then add the sauce (skip cornstarch initially), secure lid, and cook on high pressure for 8 minutes. Quick release, remove chicken, switch back to sauté mode, add cornstarch slurry to thicken sauce, then return chicken to coat.
Why is my chicken tough or rubbery?
The most common culprit is overcooking. Chicken breast has very little fat, so it dries out quickly when overcooked. Always use a meat thermometer and pull it from heat at 160°F. Also ensure you’re not cooking straight from the fridge—room temperature chicken cooks more evenly and stays tender.
Can I use this sauce on other proteins?
Definitely! This honey garlic sauce is incredibly versatile. It works wonderfully on salmon, shrimp, pork chops, pork tenderloin, tofu, or even meatballs. Adjust cooking times based on your protein choice, but the sauce preparation stays the same.
Conclusion
There you have it—everything you need to make the most incredible Honey Garlic Chicken Breast that’ll have your family asking for seconds (and thirds!). This recipe proves that weeknight dinners don’t have to be boring or complicated. With just a handful of simple ingredients and 30 minutes of your time, you can create a meal that tastes like it came from your favorite restaurant.
The sweet and savory glaze, the perfectly cooked tender chicken, and the versatility of this dish make it an absolute winner in my book. Whether you’re meal prepping for the week, feeding a hungry family, or looking for something special to serve guests, this honey garlic chicken delivers every single time.

