
There’s something undeniably magical about a perfectly roasted chicken—golden-brown skin that crackles when you slice into it, tender meat that practically falls off the bone, and an aroma so intoxicating it draws everyone to the kitchen like a magnet. This Garlic Butter Roasted Chicken takes that classic Sunday dinner and elevates it with a luscious garlic butter that seeps into every crevice, creating layers of flavor that’ll make this your new go-to chicken recipe.
Whether you’re hosting Sunday dinner, meal prepping for the week, or just want to feel like a kitchen rockstar on a Tuesday night, this recipe delivers. The best part? It’s surprisingly simple. You don’t need fancy techniques or a culinary degree—just a good chicken, some butter, garlic, and about 15 minutes of hands-on time. The oven does the heavy lifting while you relax, and what emerges is restaurant-quality poultry that’ll have your family convinced you’ve been holding out on them. This is comfort food at its absolute finest, the kind of meal that creates memories and becomes a family tradition.
History / Background
Roasted chicken has been a centerpiece of family meals for centuries, transcending cultures and continents. The practice of roasting whole birds dates back thousands of years, likely beginning when humans first discovered fire and realized that slow-cooking meat over flames created something incredibly delicious. Archaeological evidence suggests that chickens were first domesticated in Southeast Asia around 8,000 years ago, eventually spreading across the globe through trade routes and migration.
In medieval Europe, roasted chicken was considered a luxury reserved for special occasions and the wealthy, as chickens were valued more for their eggs than their meat. The famous quote attributed to King Henry IV of France, “I want there to be no peasant in my kingdom so poor that he cannot have a chicken in his pot every Sunday,” reflects how roasted chicken became a symbol of prosperity and celebration by the 16th century.
The French perfected the art of roasting chicken, developing techniques like trussing and basting that are still used today. Their “Poulet Rôti” became the gold standard—simple seasoning, careful temperature control, and constant attention to achieve that coveted crispy skin and juicy meat. Julia Child famously brought French roast chicken techniques to American kitchens in the 1960s, demystifying the process and proving that anyone could achieve restaurant-quality results at home.
The garlic butter variation we’re making today is a relatively modern American adaptation, though it draws inspiration from French “beurre composé” (compound butter) traditions. Americans have long loved bold flavors, and in the latter half of the 20th century, garlic went from being viewed with suspicion to becoming a kitchen staple. The combination of butter and garlic—two ingredients that make everything better—was a natural evolution, creating a self-basting bird that emerges from the oven ridiculously flavorful and moist.
Today, roasted chicken remains one of the most universally beloved meals. It’s economical, feeds a crowd, provides leftovers for days, and offers incredible versatility. This garlic butter version represents the perfect marriage of classic technique and contemporary flavor preferences—honoring tradition while delivering the bold taste modern home cooks crave.
Why You’ll Love This Recipe
This Garlic Butter Roasted Chicken isn’t just another chicken recipe—it’s the chicken recipe you’ll return to again and again, the one you’ll recommend to friends and eventually teach your kids to make. It hits that sweet spot of being impressive enough for company yet simple enough for a regular weeknight.
Here’s why this recipe will become your new favorite:
- Ridiculously flavorful – The garlic butter penetrates the meat and creates a golden, herb-infused crust that’s absolutely addictive
- Surprisingly easy – Despite looking and tasting gourmet, this requires minimal skill and just basic ingredients
- Hands-off cooking – Once it’s in the oven, you’re free to prep sides, set the table, or just relax
- Budget-friendly – Whole chickens cost significantly less per pound than chicken parts, making this an economical choice
- Feeds a crowd – One chicken serves 4-6 people generously, perfect for family dinners
- Amazing leftovers – The cooked chicken is fantastic in sandwiches, salads, soups, and casseroles throughout the week
- Naturally gluten-free and keto-friendly – Fits multiple dietary preferences without modification
- Impressive presentation – Bringing a whole roasted chicken to the table feels special and looks stunning
- Versatile seasoning base – Easy to customize with different herbs and spices to suit your taste
- Teaches fundamental skills – Learning to roast chicken properly is a foundational cooking technique that builds confidence
- Minimal cleanup – Just one roasting pan to wash
- Perfect for meal prep – Roast on Sunday, enjoy various chicken dishes all week long
Ingredient Notes
Let’s talk about what goes into making this gorgeous bird. Each ingredient plays a crucial role in creating that perfect roasted chicken.
Whole Chicken: You’ll want a 4-5 pound chicken for this recipe. Look for the freshest bird you can find—check the sell-by date and make sure the packaging is intact without tears or excessive liquid. Organic, free-range, or air-chilled chickens often have better flavor and texture, but standard grocery store chickens work perfectly well too. If your chicken is frozen, thaw it completely in the refrigerator (allow 24 hours for every 4-5 pounds). Never thaw chicken at room temperature due to food safety concerns.
Butter: Unsalted butter is essential here because it allows you to control the salt level in your seasoning. The butter serves multiple purposes—it helps the skin crisp up beautifully, carries the garlic and herb flavors, keeps the meat moist, and creates those incredible pan drippings for gravy. Use real butter, not margarine—the flavor difference is significant. For the best results, use butter at room temperature so it mixes easily with the garlic and herbs.
Garlic: Fresh garlic is non-negotiable for this recipe. You’ll need about 6-8 large cloves, minced. The garlic infuses the butter and creates an aromatic coating that permeates the chicken. Pre-minced jarred garlic doesn’t have the same potency or fresh flavor. Roasting mellows garlic’s sharpness, creating a sweet, nutty flavor that’s irresistible. If you’re a garlic lover, don’t be shy about adding an extra clove or two.
Fresh Herbs: A combination of fresh rosemary, thyme, and parsley creates aromatic complexity. Fresh herbs are far superior to dried for this application—they provide more nuanced flavor and their essential oils bloom beautifully during roasting. If you can only get one fresh herb, make it thyme. In a pinch, you can substitute 1 teaspoon of dried herbs for every tablespoon of fresh, but the flavor won’t be quite as vibrant.
Lemon: A fresh lemon does double duty in this recipe. The juice adds brightness that cuts through the rich butter, while placing lemon halves inside the cavity infuses the meat with subtle citrus notes and helps keep it moist. Always use fresh lemons—bottled lemon juice lacks the aromatic oils found in the zest and flesh.
Olive Oil: A small amount of olive oil mixed into the garlic butter helps it spread more easily and can increase the smoke point slightly. Extra virgin olive oil adds a fruity note that complements the herbs beautifully.
Salt and Pepper: These are your foundational seasonings. Kosher salt or sea salt is best—avoid iodized table salt which can taste harsh. Freshly cracked black pepper provides more flavor than pre-ground. Don’t be timid with the salt—chicken needs generous seasoning to be flavorful.
Optional Aromatics: Onion quarters, carrot chunks, and celery stalks placed in the roasting pan add flavor to the drippings and create a built-in vegetable side dish. They’re not essential but highly recommended.
Equipment Needed
Roasting a chicken doesn’t require specialty equipment, but having the right tools makes the process easier and produces better results:
- Roasting pan with rack (or large baking dish) – A proper roasting pan with a V-rack is ideal as it elevates the chicken, allowing hot air to circulate for even cooking and crispy skin all around. If you don’t have a rack, a large cast-iron skillet or 9×13-inch baking dish works fine—just arrange vegetables underneath to elevate the bird slightly.
- Instant-read meat thermometer – This is truly essential for perfectly cooked chicken. Digital thermometers give you accurate readings instantly, taking the guesswork out of doneness. It’s a small investment that prevents both undercooked and overcooked meat.
- Kitchen twine – For trussing the chicken, which helps it cook evenly and creates a prettier presentation. If you don’t have twine, you can skip this step, though the cooking time may vary slightly.
- Small mixing bowl – For combining your garlic butter mixture
- Basting brush or spoon – For applying the garlic butter to the chicken
- Sharp knife and cutting board – For mincing garlic, chopping herbs, and eventually carving the chicken
- Paper towels – Essential for patting the chicken completely dry before seasoning
- Aluminum foil – To tent the chicken if it’s browning too quickly, and for resting after cooking
- Carving knife and fork – For slicing the chicken at the table
- Large platter – For presenting your beautiful roasted chicken

Garlic Butter Roasted Chicken Recipe
- Total Time: 90 minutes (plus 10 minutes resting)
- Yield: 4-6 servings 1x
- Diet: Gluten Free
Description
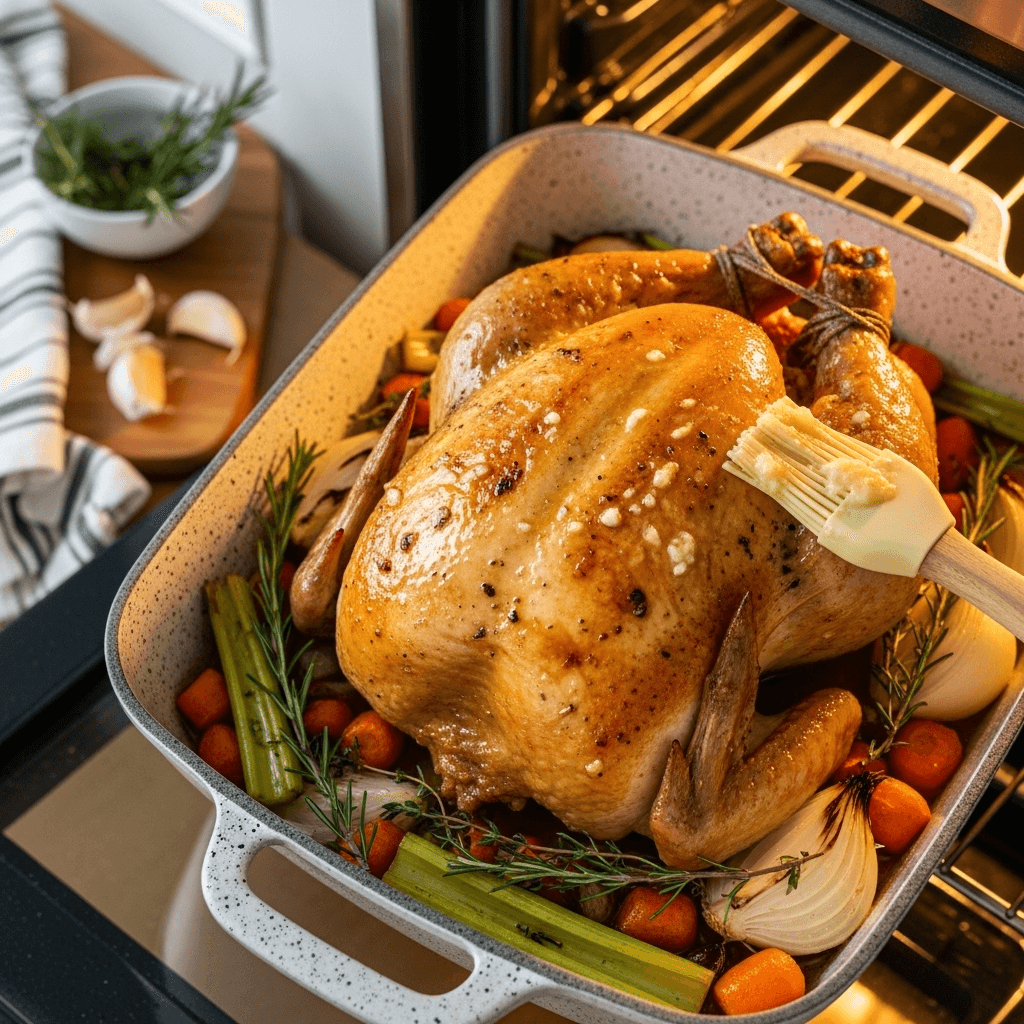
A succulent whole roasted chicken coated in rich garlic herb butter, producing golden-crispy skin and juicy, flavorful meat. This classic recipe is perfect for Sunday dinners, special occasions, or impressive weeknight meals that require minimal effort.
Ingredients
For the Chicken:
- 1 whole chicken (4-5 pounds)
- 6 tablespoons unsalted butter, softened to room temperature
- 6-8 cloves garlic, minced (about 2 tablespoons)
- 2 tablespoons fresh parsley, finely chopped
- 1 tablespoon fresh rosemary, finely chopped
- 1 tablespoon fresh thyme leaves
- 1 tablespoon olive oil
- 1 large lemon (halved)
- 2 teaspoons kosher salt
- 1 teaspoon black pepper
- ½ teaspoon paprika (optional, for color)
For the Roasting Pan:
- 1 large onion, quartered
- 2 large carrots, cut into chunks
- 2 celery stalks, cut into chunks
- 4-5 garlic cloves, smashed (optional)
- 1 cup chicken broth or water
Instructions
- Prep the chicken: Remove the chicken from the refrigerator 30 minutes before cooking to bring it to room temperature—this ensures even cooking. Remove the giblets and neck from the cavity (save these for stock if desired). Pat the entire chicken completely dry with paper towels, inside and out. This is crucial for crispy skin—moisture is the enemy of crispiness. Season the cavity generously with salt and pepper.
- Make the garlic butter: In a small bowl, combine the softened butter, minced garlic, chopped parsley, rosemary, thyme, olive oil, and a pinch of salt and pepper. Mix thoroughly until everything is evenly distributed and you have a fragrant, herb-flecked compound butter.
- Prepare for roasting: Preheat your oven to 425°F (220°C). If using vegetables, arrange the onion quarters, carrot chunks, and celery pieces in the bottom of your roasting pan. These create a natural roasting rack and add flavor to your pan drippings. Pour the chicken broth into the bottom of the pan—this prevents drippings from burning and creates steam for moisture.
- Butter the chicken: Using your hands (the best tool!), gently loosen the skin from the breast meat by carefully sliding your fingers between the skin and meat, starting at the cavity opening and working toward the neck. Be careful not to tear the skin. Spread about one-third of the garlic butter directly onto the breast meat under the skin. This ensures maximum flavor penetration. Rub another third of the butter all over the outside of the chicken, making sure to coat the legs, thighs, wings, and breast. Use the remaining butter to coat the inside of the cavity.
- Add aromatics: Stuff the cavity with the lemon halves (squeeze them slightly first to release some juice), and a few sprigs of fresh herbs if you have extra. This infuses the meat from the inside with subtle flavor.
- Truss the chicken (optional but recommended): Using kitchen twine, tie the legs together and tuck the wing tips under the body. This helps the chicken cook evenly and creates a more attractive presentation. If you don’t have twine, simply tuck the wings under.
- Season the outside: Sprinkle the entire outside of the chicken with the kosher salt, black pepper, and paprika (if using). Don’t be shy—the skin needs generous seasoning.
- Roast: Place the chicken breast-side up on the vegetables (or on your roasting rack). Roast in the preheated oven for 15 minutes at 425°F to get the skin started crisping. Then reduce the temperature to 375°F (190°C) and continue roasting for about 60-70 minutes, or until the internal temperature reaches 165°F in the thickest part of the thigh (not touching bone). Baste the chicken with the pan drippings every 20-25 minutes for extra flavor and moisture.
- Check for doneness: Insert your instant-read thermometer into the thickest part of the thigh without touching the bone. It should read 165°F. The juices should run clear when you cut between the leg and thigh. If the chicken is getting too brown but isn’t cooked through, tent it loosely with aluminum foil.
- Rest the chicken: This step is crucial! Remove the chicken from the oven and transfer it to a cutting board. Tent loosely with foil and let it rest for 10-15 minutes. This allows the juices to redistribute throughout the meat, ensuring every bite is moist and tender. Resting also makes carving easier.
- Make pan gravy (optional): While the chicken rests, strain the pan drippings and skim off excess fat. Pour the drippings into a small saucepan, bring to a simmer, and reduce slightly. You can thicken with a cornstarch slurry (1 tablespoon cornstarch mixed with 2 tablespoons water) if desired.
- Carve and serve: Carve the chicken, arrange on a platter, and drizzle with some of the pan drippings or gravy. Serve immediately while hot and glorious.
Notes
- Temperature is key: Don’t rely on timing alone—always use a meat thermometer. Ovens vary, and chicken sizes differ. The only reliable indicator of doneness is internal temperature.
- Crispy skin secrets: Dry skin + high initial heat = crispy skin. Make sure the chicken is completely dry before seasoning.
- Butter placement: Putting butter under the skin is what makes the breast meat incredibly juicy. Don’t skip this step!
- Resting is not optional: Cutting into the chicken immediately causes all those beautiful juices to run out onto the cutting board instead of staying in the meat.
- Pan size matters: Don’t use a pan that’s too large or the drippings will burn. The pan should fit the chicken with a little room around the edges.
- Dark meat safety: While breast meat is safe at 165°F, many prefer dark meat cooked to 175°F for better texture. The breast will stay safe and moist while the thighs reach this higher temperature.
- Prep Time: 15 minutes
- Cook Time: 75 minutes
- Category: Dinner
- Method: Roasting
- Cuisine: American
Nutrition
- Serving Size: 4-5 ounces chicken (about ¼ of the bird)
- Calories: 385
- Sugar: 0g
- Sodium: 520mg
- Fat: 24g
- Saturated Fat: 9g
- Unsaturated Fat: 13g
- Trans Fat: 0g
- Carbohydrates: 1g
- Fiber: 0g
- Protein: 38g
- Cholesterol: 145mg
Nutrition information is approximate and will vary based on chicken size and whether you eat skin or not. Values shown include skin.
Tips & Variations
The beauty of roasted chicken is how easily it adapts to different flavor profiles and preferences. Here are some ways to make this recipe your own:
Herb Variations: Switch up the herbs based on what you have or prefer. Sage and oregano create an Italian vibe. Tarragon makes it French. Cilantro and lime create a Mexican-inspired version. Dill is wonderful and unexpected.
Spicy Version: Add 1 teaspoon of red pepper flakes or cayenne to the butter mixture. Or rub the outside with your favorite hot sauce before roasting.
Lemon Pepper Style: Increase the lemon to 2, add extra black pepper (1 tablespoon), and include lemon zest in the butter mixture for bright, peppery flavor.
Asian-Inspired: Replace the butter with sesame oil, use ginger instead of garlic, add soy sauce, and include scallions in the cavity.
Mediterranean Version: Use oregano, add a teaspoon of za’atar to the butter, stuff with lemon and garlic, and serve with tzatziki sauce.
BBQ Style: Rub the chicken with your favorite dry rub instead of herbs, and baste with BBQ sauce during the last 15 minutes.
Lower Fat Option: Use only 3 tablespoons of butter and increase the olive oil. Skip putting butter under the skin. The chicken won’t be quite as rich but will still be delicious.
Add Vegetables: Surround the chicken with potatoes, Brussels sprouts, green beans, or any vegetables. They’ll roast alongside and absorb all those wonderful drippings.
Compound Butter Variations: Try mixing blue cheese, sun-dried tomatoes, or roasted red peppers into your butter for unique flavor combinations.
Pro Chef Tips
Want to take your roasted chicken from good to absolutely phenomenal? Here are some professional techniques that make a real difference:
Dry brine overnight: The single best thing you can do for flavor and texture is to salt the chicken and leave it uncovered in the refrigerator for 12-24 hours before cooking. The salt penetrates deep into the meat, seasoning it throughout and changing the protein structure to retain more moisture. Pat dry before proceeding with the recipe.
Compound butter under AND on the skin: Don’t just put butter on top—getting it under the skin is what creates incredibly juicy breast meat. The butter bastes the meat from the inside while it renders.
Start high, finish lower: Beginning at 425°F quickly renders the fat under the skin and starts the crisping process. Reducing to 375°F prevents burning while allowing the interior to cook through gently.
Air circulation is crucial: Elevating the chicken on a rack or vegetables allows hot air to circulate underneath, creating crispy skin all around rather than soggy bottoms.
Don’t oversalt the outside if you dry-brined: If you salted the chicken the night before, go lighter on the salt right before roasting—you’ve already seasoned the meat.
Baste strategically: Basting adds flavor but opening the oven repeatedly drops the temperature. Baste only 2-3 times maximum during cooking.
Use pan drippings wisely: Those drippings are liquid gold. Strain them, skim the fat, and use as gravy, for making rice, or save for cooking vegetables later in the week.
Temperature zones: Remember that dark meat (legs and thighs) can handle higher temperatures than white meat (breast). If your breast is getting too dark before the thighs are done, tent just the breast with foil.
Let butter soften naturally: Room temperature butter mixes smoothly with herbs and garlic. Cold butter won’t spread evenly; melted butter runs off instead of staying put.
Save the carcass: After everyone’s eaten, save the bones and make homemade chicken stock. It’s incredibly flavorful and makes the most of your chicken investment.
Common Mistakes to Avoid
Even a simple roasted chicken can go wrong. Here are the pitfalls to watch out for:
Not drying the chicken thoroughly: This is the #1 reason for rubbery, pale skin instead of crispy, golden perfection. Water creates steam, which prevents browning. Take the extra minute to thoroughly pat every surface with paper towels—it makes a huge difference.
Skipping the rest time: Cutting into the chicken immediately after it comes out of the oven causes all the juices to flood out, leaving you with dry meat. Those 10-15 minutes of resting are essential—plan for them as part of your cooking time.
Overcooking the breast meat: Many people roast until the breast meat reaches 165°F, but if you wait until the thighs reach 165°F, the breast will be overcooked and dry. Pull the chicken when the thighs hit 165°F—the breast will be perfect (around 155-160°F), and carryover cooking during resting will bring everything to safe temperatures.
Roasting straight from the fridge: A cold chicken takes longer to cook and cooks unevenly—the outside overcooks while the inside struggles to come to temperature. Let it sit at room temperature for 30 minutes before roasting for more even cooking.
Using a pan that’s too large: If your roasting pan is significantly bigger than the chicken, the drippings spread out too thinly and burn. This creates smoke in your kitchen and bitter flavors. Use a pan that fits the chicken with just a couple inches of space around it.
Not using a thermometer: Relying on timing alone is unreliable. Ovens vary, chicken sizes differ, and whether it’s stuffed affects cooking time. An instant-read thermometer is the only accurate way to know when your chicken is perfectly done.
Forgetting to remove giblets: Those little packages inside the cavity must come out before roasting! Forgetting them won’t hurt you, but it’s definitely not ideal for flavor or presentation.
Storage & Meal Prep
Roasted chicken is a meal prep champion, providing the foundation for multiple meals throughout the week.
Refrigerator Storage: Let the chicken cool completely, then store in airtight containers in the refrigerator for up to 4 days. For best results, separate the meat from the bones—carved meat stores better and is ready to use in other recipes. Store the carcass separately to make stock.
Storing with or without skin: Remove the skin before storing if you want to reduce fat and calories. The skin doesn’t reheat well anyway—it loses its crispiness. However, storing meat with some skin on can help keep it moist.
Reheating Tips: The microwave works but can dry out the meat. Better methods include: (1) Gentle reheating in a covered dish in a 325°F oven with a splash of broth, (2) Shredding the meat and reheating in sauces or soups, or (3) Eating it cold in salads and sandwiches where texture matters less.
Meal Prep Ideas: A single roasted chicken can become:
- Day 1: Roasted chicken dinner with sides
- Day 2: Chicken Caesar salad
- Day 3: Chicken quesadillas or tacos
- Day 4: Chicken noodle soup (using the carcass for stock)
- Day 5: Chicken fried rice or pasta
Portioning for the week: After the initial dinner, carve all remaining meat and divide into containers: one for sandwiches/salads, one for quick dinners, and store the carcass for soup-making.
Make-Ahead & Freezer Notes
Planning ahead makes this recipe even more convenient for busy schedules.
Make-Ahead Prep: You can prepare the garlic butter mixture up to 3 days in advance—store it covered in the refrigerator. You can also prep your vegetables and have them ready to go. The most beneficial make-ahead step is dry-brining: salt the chicken and refrigerate uncovered for 12-24 hours before roasting day.
Freezing Cooked Chicken: Cooked chicken freezes beautifully for up to 3 months. For best results: (1) Let it cool completely, (2) Remove meat from bones and slice or shred, (3) Store in freezer-safe containers or bags with as much air removed as possible, (4) Add a splash of chicken broth to prevent drying. Label with the date.
Freezing the Whole Cooked Chicken: You can freeze the entire roasted chicken whole, but it takes up significant freezer space and thaws slowly. It’s more practical to carve it first.
Thawing Frozen Cooked Chicken: Always thaw in the refrigerator overnight, never at room temperature. For quick thawing, place the sealed container in a bowl of cold water, changing the water every 30 minutes.
Freezing Raw Chicken: You can also prepare the raw chicken with the garlic butter (steps 1-6), freeze it, and roast it later. Thaw completely in the refrigerator (24-48 hours) before roasting. Add 10-15 minutes to the cooking time if roasting from cold.
Stock from the carcass: After making stock from the bones, freeze it in ice cube trays or small containers for easy portioning. Homemade stock keeps frozen for up to 6 months and is far superior to store-bought.
Serving Suggestions
A beautiful roasted chicken deserves equally delicious accompaniments. Here’s how to build a complete, memorable meal:
Classic Pairings: Roasted chicken is naturally versatile and pairs with countless sides. Traditional favorites include mashed potatoes, roasted vegetables, stuffing, dinner rolls, and gravy made from the pan drippings.
Potato Options: Crispy roasted potatoes, creamy mashed potatoes, potato gratin, twice-baked potatoes, or simple boiled new potatoes with butter and parsley all complement roasted chicken beautifully.
Vegetable Sides: Roasted Brussels sprouts, green beans almondine, glazed carrots, roasted asparagus, sautéed spinach, or a medley of roasted root vegetables. The key is choosing vegetables that can roast alongside the chicken or cook quickly while it rests.
Salads: A fresh salad adds brightness and crunch. Try Caesar salad, mixed greens with vinaigrette, arugula salad with lemon dressing, or a classic wedge salad with blue cheese.
Bread: Crusty French bread, homemade biscuits, dinner rolls, or garlic bread are perfect for soaking up those delicious pan juices.
Grains: Herbed rice, wild rice pilaf, quinoa, or couscous make excellent bases for the chicken and absorb the flavorful drippings.
Sauces: While the garlic butter and pan drippings are delicious on their own, you can serve alongside: mushroom gravy, cranberry sauce (not just for Thanksgiving!), chimichurri, or herb aioli.
Wine Pairing: Chardonnay, Pinot Noir, or Sauvignon Blanc all pair wonderfully with roasted chicken. For non-alcoholic options, try sparkling cider or lemonade.
Complete Menu Ideas:
- Sunday Dinner: Garlic butter roasted chicken, mashed potatoes, roasted green beans, dinner rolls, and apple pie
- Weeknight Simple: Roasted chicken, roasted potato wedges, side salad, and store-bought bread
- Fancy Dinner Party: Roasted chicken, potato gratin, roasted asparagus, arugula salad, crusty bread, and crème brûlée
FAQs Section
How do I know when the chicken is fully cooked?
The only reliable method is using an instant-read thermometer. Insert it into the thickest part of the thigh without touching bone—it should read 165°F. The juices should run clear (not pink) when you cut between the leg and thigh. The leg should wiggle easily in the joint. Don’t rely on timing alone, as oven temperatures vary and chicken sizes differ.
Why is my chicken skin not crispy?
The most common cause is moisture. Make absolutely sure to pat the chicken completely dry before seasoning. Other factors include: roasting at too low a temperature (start at 425°F), overcrowding the pan (which creates steam), or not elevating the chicken off the pan bottom (which prevents air circulation). Don’t baste too frequently, as this adds moisture to the skin.
Can I stuff the chicken with stuffing/dressing?
While you can, it’s not recommended for food safety reasons. Stuffing inside the cavity prevents the chicken from cooking evenly and can remain at unsafe temperatures while the outer meat overcooks. It’s safer and produces better results to stuff the cavity with only aromatics (lemon, herbs, onion) and bake dressing separately. If you must stuff it, ensure the stuffing reaches 165°F internal temperature as well.
My chicken breast is dry but the thighs aren’t cooked—what happened?
This is very common! Breast meat cooks faster and dries out at high temperatures, while dark meat needs longer. Solutions: (1) Start the chicken breast-side down for the first 30 minutes, then flip it, (2) Tent just the breast with foil once it reaches 155-160°F while the thighs finish, (3) Remove the chicken at 165°F in the thighs and accept that the breast will be around 155-160°F (it will reach 165°F during resting), or (4) Consider spatchcocking the chicken, which allows more even cooking.
Can I use this recipe for a larger or smaller chicken?
Absolutely! Adjust the cooking time: for a 3-pound chicken, check after about 50-60 minutes; for a 6-7 pound chicken, plan for 90-110 minutes. Always rely on internal temperature (165°F in the thigh), not time. The garlic butter amount works for chickens from 3-6 pounds without adjustment.
How do I carve a roasted chicken?
Let it rest first! Then: (1) Remove the legs by cutting through the skin between the thigh and breast, then pulling the leg away and cutting through the joint, (2) Separate the drumstick from the thigh by cutting through the joint, (3) Remove the wings by cutting through the shoulder joint, (4) Slice the breast meat by making a long horizontal cut above the wing joint, then slicing down vertically to create even slices. YouTube has excellent visual tutorials if you’re a visual learner.
Can I make this in a slow cooker or Instant Pot?
You can cook chicken in both appliances, but you won’t achieve the crispy skin that makes roasted chicken special. The slow cooker and Instant Pot excel at tender, fall-off-the-bone meat but produce pale, rubbery skin. For best results, use the oven roasting method in this recipe. If you must use a slow cooker, cook on low for 6-7 hours, then transfer to a hot oven for 10-15 minutes to crisp the skin.
Conclusion
There’s a reason roasted chicken has stood the test of time as one of the most beloved meals across cultures and generations. It’s wholesome, satisfying, economical, and when you make it with garlic butter and fresh herbs, it becomes something truly special—the kind of meal that fills your home with incredible aromas and brings everyone running to the dinner table with genuine excitement.
This Garlic Butter Roasted Chicken recipe gives you all the tools you need to create restaurant-quality results in your own kitchen. Whether this is your first time roasting a chicken or your hundredth, the combination of detailed instructions, pro tips, and troubleshooting advice ensures your success. Remember, cooking is as much about the process as the result—enjoy the ritual of preparing this beautiful bird, and take pride in serving something made with your own hands.
I’d absolutely love to hear about your roasted chicken adventures! Did you try a different herb combination? Add extra garlic because you’re a garlic fanatic like me? Serve it with your family’s favorite sides? Drop a comment below and share your experience. And please, if this recipe becomes a favorite in your home (I have a feeling it will!), pin it to your Pinterest boards so you can find it easily whenever Sunday dinner rolls around. Share it with friends who are learning to cook or anyone who needs a reliable, impressive chicken recipe in their repertoire.
Now preheat that oven, grab a chicken, and let’s get roasting! Your kitchen is about to smell absolutely incredible.

