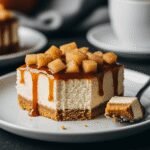
If you’ve ever wished you could combine the creamy richness of New York-style cheesecake with the comforting flavors of a homemade apple pie, these Caramel Apple Cheesecake Bars are your answer. This dreamy dessert brings together a buttery graham cracker crust, a velvety cream cheese layer, tender cinnamon-spiced apples, and a luscious caramel drizzle that’ll have everyone asking for seconds.
These bars are absolutely perfect for fall gatherings, Thanksgiving dessert tables, holiday potlucks, or any time you’re craving something that tastes like autumn in dessert form. They’re easier to make than traditional cheesecake since there’s no water bath required, and they’re simpler to serve than pie since you just slice them into neat squares. Whether you’re hosting a crowd or just want to treat your family to something special, these caramel apple cheesecake bars deliver bakery-quality results right from your home kitchen.
The best part? You can make them a day ahead, which means less stress when you’re entertaining. They slice beautifully, travel well to potlucks, and look absolutely stunning on any dessert spread.
History & Background of Caramel Apple Cheesecake Bars
The beauty of caramel apple cheesecake bars lies in how they bring together three beloved American dessert traditions into one irresistible treat. Cheesecake itself has ancient roots dating back to Greece, but the cream cheese-based version we know and love today became an American classic in the late 1800s when cream cheese was invented in New York. The iconic New York-style cheesecake with its dense, creamy texture became the gold standard for cheesecake lovers everywhere.
Apple desserts have been a cornerstone of American baking since colonial times, when European settlers discovered the abundance of apple orchards in the New World. The combination of apples with warm spices like cinnamon became synonymous with comfort food and home baking. Meanwhile, caramel sauce has French origins but was wholeheartedly embraced by American candy makers and dessert creators in the 19th century.
The genius of combining these elements into bar form is a more modern innovation, likely emerging from the home baking revolution of the 1970s and 80s when bar desserts became incredibly popular for their convenience and portability. Bars offered all the flavor of elaborate cakes and pies but were easier to make, serve, and transport to potlucks and bake sales.
Today, caramel apple cheesecake bars represent the evolution of American comfort baking where busy home cooks want impressive results without spending all day in the kitchen. They capture everything we love about fall flavors while being accessible enough for bakers of any skill level.
Why You’ll Love This Caramel Apple Cheesecake Bars Recipe
These caramel apple cheesecake bars are about to become your new favorite dessert to make for gatherings, and here’s why. They deliver that “wow factor” presentation that makes people think you spent hours in the kitchen, but the actual hands-on time is surprisingly manageable. The layers work together beautifully with each component complementing the others perfectly.
Here’s what makes this recipe absolutely irresistible:
- No water bath required – Unlike traditional cheesecake, these bars bake perfectly without the fussy water bath setup that intimidates many home bakers
- Make-ahead friendly – These actually taste better the next day after the flavors have melded together, making them perfect for stress-free entertaining
- Feeds a crowd – One 9×13 pan yields 24 generous bars, ideal for potlucks, family reunions, or holiday gatherings
- Crowd-pleasing flavors – The combination of creamy cheesecake, spiced apples, and buttery caramel appeals to almost everyone
- Budget-friendly ingredients – You probably have most of what you need already, and apples are affordable year-round
- Easier than pie – No rolling out dough, no crimping crusts, no worrying about soggy bottoms
- Clean slicing – They cut into beautiful, Instagram-worthy squares that are easy to serve and eat
- Seasonal versatility – Perfect for fall but welcomed at gatherings year-round
- Beginner-friendly – Even if you’ve never made cheesecake before, you can nail this recipe
The texture combination is absolutely divine with the crunchy graham cracker base, silky cream cheese layer, tender apple chunks, and that glossy caramel finish. Every bite is pure dessert heaven.
Ingredient Notes for Caramel Apple Cheesecake Bars
Understanding your ingredients helps you make better decisions in the kitchen and troubleshoot if needed. Here’s what you need to know about each component:
Graham Cracker Crumbs – These form the foundation of your bars. You can buy pre-crushed crumbs or make your own by processing whole graham crackers in a food processor. Homemade crumbs often have better texture. If you want to substitute, vanilla wafer crumbs or gingersnap crumbs work beautifully and add extra flavor.
Cream Cheese – This is the star of the cheesecake layer, so don’t skimp on quality. Use full-fat brick-style cream cheese, not spreadable or whipped varieties. Make sure it’s fully softened to room temperature before mixing to avoid lumps in your batter.
Granulated Sugar – Provides sweetness throughout the recipe. The sugar in the crust helps it crisp up and hold together, while sugar in the filling creates that classic cheesecake texture.
Butter – Use unsalted butter so you can control the salt level. It binds the crust together and adds richness throughout the recipe.
Apples – Granny Smith apples are ideal because their tartness balances the sweet caramel and rich cheesecake. They also hold their shape well when baked. Honeycrisp, Braeburn, or Jonagold also work wonderfully. Avoid Red Delicious or Gala as they can turn mushy.
Cinnamon and Nutmeg – These warm spices are essential for that classic apple pie flavor. Fresh spices make a noticeable difference, so check your spice cabinet and replace anything that’s been sitting there for years.
Eggs – They provide structure to the cheesecake layer. Room temperature eggs incorporate more smoothly into the batter.
Vanilla Extract – Use pure vanilla extract rather than imitation for the best flavor. It enhances both the cheesecake and apple layers.
Caramel Sauce – You can use store-bought or homemade. If buying, look for quality caramel topping rather than ice cream sauce, which can be too thin. Homemade caramel takes the bars to the next level if you have time.
Heavy Cream – A splash of cream makes the cheesecake layer extra luxurious and smooth.
Brown Sugar – Using brown sugar in the apple mixture adds a deeper, more complex sweetness with subtle molasses notes that complement the caramel beautifully.
Equipment Needed
Having the right tools makes this recipe much easier to execute. Here’s what you’ll need:
- 9×13-inch baking pan – A metal or glass pan works fine; metal conducts heat more evenly
- Parchment paper – Line your pan for easy removal and clean slicing
- Mixing bowls – At least two medium bowls and one large bowl
- Electric mixer – A stand mixer or hand mixer ensures lump-free cheesecake filling
- Measuring cups and spoons – For accurate measurements
- Rubber spatula – Essential for scraping bowls and spreading layers evenly
- Medium saucepan – For cooking the apple mixture
- Sharp knife – For dicing apples and slicing the finished bars
- Cutting board – For prep work
- Peeler – To remove apple skins
- Offset spatula (optional) – Makes spreading the cheesecake layer easier
- Cooling rack – Allows air circulation for even cooling
Caramel Apple Cheesecake Bars Recipe
- Total Time: 5 hours 10 minutes
- Yield: 24 bars 1x
- Diet: Vegetarian
Description
Rich, creamy cheesecake bars layered with cinnamon-spiced apples, a buttery graham cracker crust, and luxurious caramel drizzle. These make-ahead bars are perfect for fall gatherings and taste even better the next day.
Ingredients
For the Crust:
- 2 cups graham cracker crumbs (about 16 full crackers)
- ½ cup unsalted butter, melted
- ¼ cup granulated sugar
- ½ teaspoon ground cinnamon
For the Cheesecake Layer:
- 24 ounces cream cheese, softened to room temperature (three 8-oz packages)
- ¾ cup granulated sugar
- 3 large eggs, room temperature
- 2 teaspoons pure vanilla extract
- ¼ cup heavy cream
- 2 tablespoons all-purpose flour
For the Apple Topping:
- 3 medium Granny Smith apples, peeled and diced into ½-inch pieces (about 3 cups)
- ⅓ cup packed light brown sugar
- 2 tablespoons unsalted butter
- 1½ teaspoons ground cinnamon
- ¼ teaspoon ground nutmeg
- ⅛ teaspoon salt
- 1 tablespoon lemon juice
For the Caramel Drizzle:
- ¾ cup caramel sauce (store-bought or homemade)
- 1 tablespoon heavy cream (to thin, if needed)
Instructions
Step 1: Prepare the Pan and Preheat
Preheat your oven to 325°F. Line a 9×13-inch baking pan with parchment paper, leaving overhang on two sides for easy removal. Lightly spray with non-stick cooking spray.
Step 2: Make the Crust
In a medium bowl, combine graham cracker crumbs, melted butter, sugar, and cinnamon. Mix until the texture resembles wet sand and the mixture holds together when pressed. Press firmly and evenly into the bottom of your prepared pan. Bake for 10 minutes, then remove and let cool slightly while preparing the filling.
Step 3: Prepare the Cheesecake Layer
In a large bowl using an electric mixer, beat the softened cream cheese on medium speed for about 2 minutes until completely smooth and fluffy with no lumps. Add the sugar and beat for another minute. Add the flour and mix until incorporated. Add eggs one at a time, beating on low speed after each addition just until combined. Mix in vanilla extract and heavy cream until smooth. Don’t overmix after adding eggs or your cheesecake may crack.
Step 4: Assemble the Base Layers
Pour the cheesecake batter over the pre-baked crust, spreading evenly with a spatula. Tap the pan gently on the counter a few times to release any air bubbles.
Step 5: Bake the Cheesecake Layer
Bake for 30-35 minutes until the edges are set but the center still has a slight jiggle when you gently shake the pan. The cheesecake will continue cooking as it cools. Don’t overbake or it will become dry. Remove from oven and let cool completely at room temperature for about 1 hour.
Step 6: Prepare the Apple Topping
While the cheesecake is baking or cooling, prepare your apples. In a medium saucepan over medium heat, melt the butter. Add the diced apples, brown sugar, cinnamon, nutmeg, salt, and lemon juice. Cook, stirring occasionally, for 8-10 minutes until apples are tender but still hold their shape and the mixture has thickened slightly. Remove from heat and let cool to room temperature.
Step 7: Add the Apple Layer
Once the cheesecake layer is completely cool, spoon the cooled apple mixture evenly over the top, spreading it gently with a spatula.
Step 8: Add Caramel Drizzle
If your caramel sauce is very thick, warm it slightly and stir in 1 tablespoon of heavy cream to reach a drizzling consistency. Drizzle the caramel sauce over the apple layer in a decorative pattern. You can use a spoon or transfer it to a squeeze bottle for more control.
Step 9: Chill and Set
Cover the pan with plastic wrap (don’t let it touch the caramel) and refrigerate for at least 4 hours or preferably overnight. This allows the layers to set properly and the flavors to meld together beautifully.
Step 10: Slice and Serve
Using the parchment paper overhang, lift the entire bar dessert out of the pan. Place on a cutting board. Use a sharp knife, wiping it clean between cuts, to slice into 24 bars (6 rows by 4 rows). Serve chilled or at room temperature.
Notes
- Make sure cream cheese is fully softened or your cheesecake layer will have lumps. Leave it out for at least 1 hour before starting.
- Don’t skip the lemon juice in the apple mixture – it prevents browning and brightens the flavors.
- These bars slice cleanest when completely chilled, so patience pays off.
- For cleaner cuts, dip your knife in hot water and wipe it dry between each slice.
- Store any leftover caramel sauce separately and drizzle fresh when serving for the best presentation.
- Prep Time: 25 minutes
- Cook Time: 45 minutes
- Category: Dessert
- Method: Baking
- Cuisine: American
Nutrition
- Serving Size: 1 bar (1/24 of recipe)
- Calories: 285
- Sugar: 24g
- Sodium: 180mg
- Fat: 16g
- Saturated Fat: 9g
- Unsaturated Fat: 6g
- Trans Fat: 0g
- Carbohydrates: 32g
- Fiber: 1g
- Protein: 4g
- Cholesterol: 65mg
Nutrition information is approximate and based on standard ingredient measurements. Individual values may vary based on specific brands and substitutions used.
Tips & Variations for Caramel Apple Cheesecake Bars
Flavor Variations:
- Salted Caramel Version – Sprinkle flaky sea salt over the caramel drizzle for a sweet-salty contrast that’s absolutely addictive
- Pecan Crunch – Add ½ cup chopped toasted pecans to the apple mixture or sprinkle on top of the caramel for added texture
- Spice It Up – Add a pinch of ground ginger or cardamom to the apple mixture for more complex fall spice flavors
- Chocolate Lovers – Drizzle melted dark chocolate over the caramel or add mini chocolate chips to the apple layer
- Berry Twist – Mix ½ cup fresh or frozen cranberries into the apple mixture for a tart contrast
Dietary Modifications:
- Gluten-Free – Use gluten-free graham crackers for the crust and ensure your caramel sauce is gluten-free
- Lower Sugar – Reduce the sugar in the cheesecake layer by ¼ cup; the caramel and apples provide plenty of sweetness
- Different Crust – Try gingersnap cookies, vanilla wafers, or even crushed pretzels for the base
Presentation Ideas:
- Top each bar with a small dollop of whipped cream and a thin apple slice before serving
- Dust with cinnamon sugar for an extra pretty finish
- Serve slightly warm with vanilla ice cream for an a la mode experience
Pro Chef Tips for Perfect Caramel Apple Cheesecake Bars
Temperature is Everything – The single most important tip for smooth, lump-free cheesecake is having all your dairy ingredients at room temperature. Cold cream cheese will never fully smooth out no matter how long you beat it, and cold eggs can cause the batter to seize up. Plan ahead and leave everything out for at least an hour before starting.
The Tap Test – After pouring your cheesecake batter, tap the pan firmly on the counter 10-15 times. This releases air bubbles that can create holes or cracks in your finished bars. You’ll actually see bubbles rise to the surface.
Apple Prep Matters – Cut your apples into uniform ½-inch pieces so they cook evenly. Any smaller and they’ll turn to mush; any larger and they’ll be undercooked and crunchy. Also, toss them with lemon juice immediately after cutting to prevent oxidation and browning.
Don’t Overbake – The cheesecake layer should still jiggle slightly in the center when you remove it from the oven. It will continue to cook and set as it cools. Overbaking creates a dry, cracked cheesecake that’s lost that signature creamy texture.
The Patient Approach – Rushing the cooling process creates condensation and ruins the texture. Let the bars cool at room temperature for a full hour before refrigerating, then give them a full 4 hours (or overnight) in the fridge. This patience is rewarded with perfect slicing and the best flavor.
Knife Wisdom – For professional-looking slices, use a large sharp knife dipped in hot water, then wiped completely dry before each cut. This warm, clean blade glides through the layers without dragging or smearing. It’s the secret bakeries use for perfect cheesecake slices.
Common Mistakes to Avoid
Lumpy Cheesecake Filling – This happens when cream cheese isn’t fully softened or when you add ingredients in the wrong order. Always beat cream cheese alone first until completely smooth before adding anything else. If you do get lumps, pass the batter through a fine-mesh strainer before pouring it into the pan.
Soggy Crust – Pre-baking the crust for 10 minutes is non-negotiable. This sets the butter and creates a barrier that prevents the cheesecake layer from making the crust soggy. Skipping this step results in a mushy bottom layer that won’t hold up when you slice the bars.
Watery Apple Layer – If your apples release too much liquid and the mixture looks soupy, continue cooking it a bit longer to evaporate excess moisture. You want a thick, jammy consistency. Also, make sure apples are completely cooled before adding them to the cheesecake layer or the heat will create steam and mess up the texture.
Caramel That Won’t Drizzle – If your caramel is too thick to drizzle nicely, it needs to be thinned. Gently warm it with a tablespoon of heavy cream, stirring until you reach a pourable consistency. Cold caramel straight from the jar won’t create those beautiful decorative drizzles.
Messy Slicing – Trying to cut these bars while they’re warm or after only brief chilling creates a disaster. The cheesecake needs to be completely firm for clean cuts. Also, using a dull knife drags and tears the layers instead of slicing cleanly through them. Sharp knife, hot water rinse between cuts, problem solved.
Storage & Meal Prep
Refrigerator Storage: Store caramel apple cheesecake bars in an airtight container in the refrigerator for up to 5 days. Layer parchment paper between stacked bars to prevent them from sticking together. The bars actually improve in flavor after the first day as the components meld together, so they’re ideal for making ahead.
Serving Temperature: These bars can be served chilled straight from the fridge or at cool room temperature. If you prefer a softer texture, remove them from the refrigerator about 15-20 minutes before serving.
Reheating: While these bars are traditionally served cold, you can warm individual portions in the microwave for 10-15 seconds if you prefer a slightly warm apple layer. Don’t overdo it or the cheesecake will start to melt. Alternatively, let bars sit at room temperature for 30 minutes before serving.
Covering for Storage: Use plastic wrap pressed directly onto the surface to prevent the top from drying out, or store in an airtight container. The caramel may absorb into the apples slightly over time, which is perfectly fine. You can always drizzle fresh caramel on individual bars when serving.
Make-Ahead & Freezer Notes
Make-Ahead Timeline: These bars are actually perfect for advance preparation and often taste better after sitting overnight. You can make them up to 3 days ahead of when you plan to serve them. In fact, many bakers prefer making them 1-2 days in advance because the flavors develop and deepen beautifully.
Freezing Instructions: Caramel apple cheesecake bars freeze exceptionally well for up to 2 months. Here’s the best method: After the bars are completely set, slice them into individual portions. Place bars on a parchment-lined baking sheet and freeze until solid (about 2 hours). Then wrap each bar individually in plastic wrap, place them in a freezer-safe container or zip-top bag, and freeze. This individual wrapping prevents freezer burn and allows you to thaw only what you need.
Thawing Method: Transfer frozen bars to the refrigerator and let them thaw overnight (about 8 hours). Never thaw at room temperature or in the microwave, as this can create a watery texture. For best results, add fresh caramel drizzle after thawing since frozen and thawed caramel can sometimes look less appealing.
Freezing Without Caramel: For the absolute best results, some bakers prefer to freeze the bars before adding the final caramel drizzle, then add fresh caramel after thawing. This ensures the caramel looks perfect when serving.
Serving Suggestions
These caramel apple cheesecake bars are substantial and rich, so they pair best with beverages and lighter accompaniments that complement rather than compete with the flavors.
Perfect Beverage Pairings:
- Hot coffee or espresso cuts through the richness beautifully
- Spiced apple cider (hot or cold) doubles down on the apple flavor
- Hot tea, especially chai or cinnamon spice blends
- Cold milk for a classic combination
- Dessert wine like late-harvest Riesling or Moscato
Complementary Sides:
- Fresh whipped cream or vanilla ice cream alongside (not on top to preserve the caramel drizzle)
- A small scoop of cinnamon ice cream
- Additional warm caramel sauce for drizzling at the table
- Fresh apple slices and a cheese board for a composed dessert platter
- Candied pecans or walnuts for added crunch
Serving Occasions: These bars shine at Thanksgiving dessert tables, fall birthday celebrations, harvest parties, bake sales, potlucks, holiday cookie exchanges (even though they’re bars!), autumn bridal or baby showers, and casual weekend gatherings. They’re elegant enough for special occasions but approachable enough for everyday enjoyment.
Presentation Tips: Serve on white plates to make the golden caramel really pop, or use rustic wooden boards for a farmhouse aesthetic. A light dusting of cinnamon or a small mint leaf garnish adds a professional bakery look.
Frequently Asked Questions
Can I use a different type of apple?
Absolutely! While Granny Smith apples are recommended for their tartness and firm texture, Honeycrisp, Braeburn, Pink Lady, or Jonagold apples all work wonderfully. Avoid softer apples like Red Delicious or McIntosh as they can turn mushy when cooked. You can even mix two varieties for more complex flavor.
Why did my cheesecake layer crack?
Cracks typically happen from overbaking, overmixing after adding eggs, or cooling too quickly. The good news is that with this recipe, any cracks will be covered by the apple and caramel topping, so they won’t affect the final appearance. To minimize cracking, bake until just set, avoid overbeating once eggs are added, and let cool gradually at room temperature.
Can I make these in a different pan size?
While a 9×13-inch pan is ideal for the right bar thickness, you can use a 9×9-inch square pan for thicker bars (increase baking time by 10-15 minutes) or a quarter sheet pan for thinner bars (decrease baking time by 5-10 minutes). Just watch for the edges to be set while the center still jiggles slightly.
My caramel sauce is too runny or too thick. Help!
For too-thick caramel, warm it gently and whisk in heavy cream one tablespoon at a time until it reaches drizzling consistency. For too-thin caramel, simmer it in a saucepan for a few minutes to reduce and thicken, stirring constantly. Store-bought caramel brands vary widely in consistency, so don’t be afraid to adjust.
Do I have to peel the apples?
Peeling is recommended for the best texture in this recipe. Apple peels can be tough and chewy after cooking, and they don’t break down well in the relatively short cooking time. Peeling also creates a smoother, more uniform appearance in the final bars.
Can I skip pre-baking the crust?
It’s really not recommended. Pre-baking sets the crust and creates a barrier that prevents sogginess. Without this step, you’ll likely end up with a soft, almost paste-like bottom layer instead of a crisp, cookie-like crust. Those 10 minutes make a significant difference in the final texture.
How do I know when the cheesecake layer is done?
The edges should be set and slightly puffed, while the center should still jiggle slightly when you gently shake the pan. Think of it like Jell-O that’s set but still wiggles. The residual heat will continue cooking the center as it cools. An instant-read thermometer should register 150-155°F in the center.
Conclusion
These Caramel Apple Cheesecake Bars bring together everything we love about fall baking into one show-stopping dessert that’s surprisingly easy to make. The buttery graham cracker crust provides the perfect foundation for creamy, rich cheesecake, topped with tender cinnamon-spiced apples and finished with that irresistible caramel drizzle. Whether you’re bringing them to a potluck, serving them at Thanksgiving, or just treating your family to something special on a crisp autumn evening, these bars deliver every single time.
The beauty of this recipe is that it looks and tastes like you spent hours in the kitchen, but the actual process is straightforward enough for even beginner bakers. And since they’re make-ahead friendly and actually taste better the next day, you can cross dessert off your to-do list early and enjoy your gathering stress-free.
I’d love to hear how your Caramel Apple Cheesecake Bars turn out! Leave a comment below with your results, any fun variations you tried, or questions you have. And if you love this recipe, please share it on Pinterest so other home bakers can discover it too. Don’t forget to save this recipe to your Pinterest boards for easy access when fall baking season rolls around. Happy baking, friends!