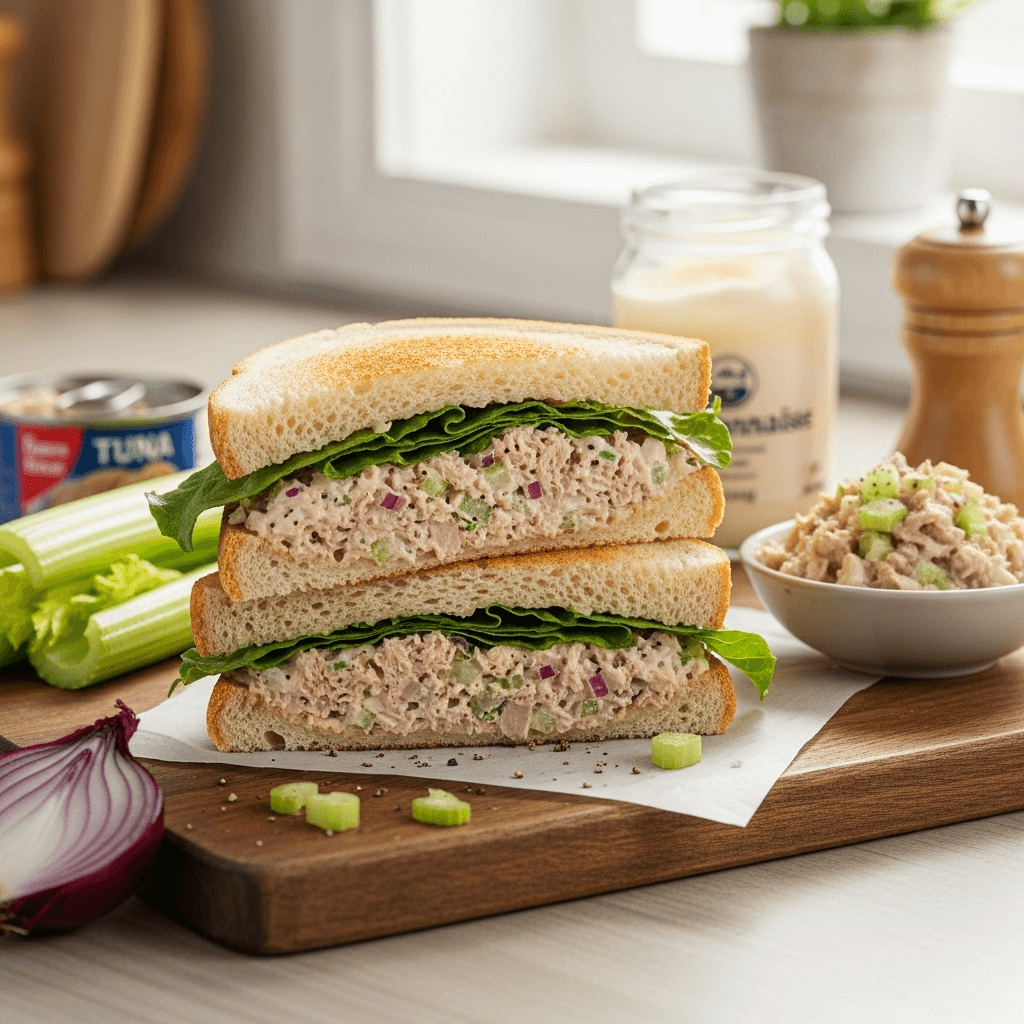

There’s something truly comforting about a classic tuna salad sandwich. It’s one of those timeless recipes that brings back memories of school lunches, weekend picnics, and quick weekday meals that somehow always hit the spot. This isn’t just any tuna sandwich—it’s the perfect tuna salad sandwich, with a creamy, flavorful filling that’s perfectly balanced between tangy and savory, tucked between two slices of your favorite bread.
Whether you’re packing lunches for the week, need a protein-packed post-workout meal, or simply want something satisfying without turning on the stove, this classic tuna salad sandwich recipe is your answer. It takes just 10 minutes to prepare, requires no cooking, and uses simple pantry staples that you probably already have on hand. The best part? It’s endlessly customizable to suit your taste preferences, dietary needs, and what you have in your refrigerator.
This recipe strikes the perfect balance—it’s creamy but not too heavy, has just enough crunch from the celery and onion, and features a hint of tanginess from the lemon juice and pickle relish. Serve it on toasted bread, in a wrap, over crisp lettuce leaves, or even stuffed into a ripe avocado for a low-carb option. No matter how you enjoy it, this tuna salad sandwich is about to become your new favorite go-to meal.
History / Background
The tuna salad sandwich has deep roots in American culinary history, becoming a beloved staple particularly during the early 20th century. While tuna has been consumed for centuries across Mediterranean and Asian cultures, the canned tuna revolution began in 1903 when Albert P. Halfhill began canning albacore tuna in California. This innovation made tuna accessible and affordable to households across America, transforming it from a luxury item into an everyday pantry essential.
During World War I and World War II, canned tuna became even more popular as a protein source that didn’t require refrigeration and had a long shelf life—perfect for rationing times. The combination of canned tuna with mayonnaise (which became widely available in the early 1900s) created the foundation for what we now know as tuna salad. By the 1950s, the tuna salad sandwich had firmly established itself in American lunch culture, appearing in school cafeterias, diners, and home kitchens across the country.
The classic tuna salad sandwich also gained popularity through women’s magazines and community cookbooks of the post-war era, which promoted quick, economical meals for busy homemakers. It represented the modern convenience foods that were reshaping American cooking—simple, affordable, and requiring minimal preparation. The deli counter culture of the Northeast, particularly in New York City, further elevated the tuna salad sandwich, with each deli claiming to have the “best” recipe, whether it included celery, pickles, hard-boiled eggs, or special seasonings.
Today, the tuna salad sandwich remains a cornerstone of American comfort food. It’s crossed cultural boundaries and adapted to regional preferences—some versions include grapes or apples for sweetness, others add curry powder for an international twist, and health-conscious variations swap mayo for Greek yogurt or avocado. Despite these innovations, the classic version continues to be the most beloved, proving that sometimes the simplest recipes are the ones that stand the test of time.
Why You’ll Love This Recipe
This classic tuna salad sandwich recipe is everything you want in a quick meal—it’s incredibly simple to make, requires no cooking skills, and delivers satisfying, delicious results every single time. If you’ve been searching for that perfect balance of creamy, crunchy, tangy, and savory, this is the recipe you’ve been looking for.
Here’s why this recipe will become your new favorite:
- Ready in just 10 minutes – No cooking required, just simple mixing and assembling
- Protein-packed and filling – Each sandwich provides approximately 25-30 grams of protein to keep you satisfied for hours
- Budget-friendly – Made with affordable pantry staples that won’t break the bank
- Perfect for meal prep – Make the tuna salad ahead and enjoy sandwiches all week long
- Incredibly versatile – Serve it on bread, crackers, lettuce wraps, or straight from the bowl
- Kid-approved – A mild, approachable flavor that even picky eaters love
- Customizable to your taste – Easy to adapt with add-ins, substitutions, and flavor variations
- No special equipment needed – Just a bowl and a fork, making it perfect for dorm rooms, offices, or camping
- Healthier than takeout – Control exactly what goes into your meal with wholesome, real ingredients
- Great for any occasion – Works for lunch boxes, picnics, game day, or a quick dinner
This isn’t one of those recipes that requires precise measurements or perfect technique. It’s forgiving, flexible, and genuinely foolproof, making it ideal for beginner cooks and experienced chefs alike who just want something delicious without the fuss.
Ingredient Notes
Let’s break down each ingredient in this classic tuna salad sandwich so you understand exactly what you’re working with and how to make smart substitutions when needed.
Canned Tuna: The star of the show! I recommend using tuna packed in water for a lighter result, though tuna in olive oil adds richness. Albacore (white tuna) has a milder flavor and firmer texture, while chunk light tuna is more budget-friendly with a slightly stronger taste. Always drain the tuna thoroughly by pressing it against the can lid or using a fine-mesh strainer—excess liquid will make your salad watery.
Mayonnaise: This provides the creamy base that binds everything together. Full-fat mayo gives the best flavor and texture, but you can substitute half or all of it with Greek yogurt for a lighter, tangier version. Avocado-based mayo is a great option for those avoiding eggs, and even a combination of Greek yogurt and a little olive oil works beautifully.
Celery: Adds essential crunch and freshness to the salad. Dice it finely so you get texture in every bite without overwhelming pieces. If you don’t have celery, finely diced cucumber, bell pepper, or even apple can provide similar crunch with different flavor profiles.
Red Onion: Provides a sharp, zesty bite that balances the creaminess. Red onion is milder and sweeter than white onion, making it perfect for raw applications. You can also use finely chopped green onions (scallions) for a milder flavor, or soak diced onion in cold water for 10 minutes to mellow the sharpness.
Pickle Relish: This ingredient adds tangy, briny flavor and a touch of sweetness. Sweet pickle relish is traditional, but dill pickle relish works if you prefer less sweetness. You can also substitute with finely chopped pickles (sweet or dill) or even capers for a more sophisticated flavor.
Fresh Lemon Juice: Brightens all the flavors and adds a fresh, citrusy note that keeps the salad from tasting too heavy. Always use fresh lemon juice rather than bottled—it makes a noticeable difference. Lime juice or a splash of white wine vinegar can substitute in a pinch.
Dijon Mustard: Adds depth, tanginess, and a subtle spicy kick that elevates the flavor profile. Yellow mustard works too, though it’s a bit sharper and more acidic. Whole grain mustard adds nice texture and visual interest.
Salt and Black Pepper: Essential for bringing out all the other flavors. Don’t skip the seasoning step—taste as you go and adjust to your preference.
Bread: The vehicle for your delicious tuna salad! Classic white sandwich bread, whole wheat, sourdough, rye, or even a croissant all work wonderfully. Toasting the bread adds texture and prevents sogginess.
Equipment Needed
One of the best things about this classic tuna salad sandwich recipe is that it requires minimal equipment—most of which you already have in your kitchen!
- Medium mixing bowl – For combining all the tuna salad ingredients
- Fork – For flaking the tuna and mixing everything together (you can also use a spoon or spatula)
- Can opener – To open your tuna cans
- Fine-mesh strainer or colander – For thoroughly draining the tuna
- Sharp knife – For dicing celery and onion
- Cutting board – For prep work
- Measuring cups and spoons – For accurate ingredient portions
- Citrus juicer (optional) – Makes squeezing lemon juice easier, though you can absolutely do it by hand
- Toaster or toaster oven (optional) – If you prefer toasted bread for your sandwich
- Airtight container – For storing leftover tuna salad
That’s it! No food processor, stand mixer, or fancy appliances needed. This recipe is all about simplicity and accessibility, making it perfect whether you’re cooking in a full kitchen or a tiny apartment.
Print
Classic Tuna Salad Sandwich Recipe
- Total Time: 10 minutes
- Yield: 4 sandwiches (approximately 2 cups tuna salad) 1x
- Diet: Vegetarian
Description
This classic tuna salad sandwich recipe features perfectly seasoned, creamy tuna salad with crunchy celery, tangy pickles, and a hint of lemon brightness. Ready in just 10 minutes with simple pantry ingredients, it’s the ultimate quick and satisfying lunch that works for meal prep, packed lunches, or a simple weeknight dinner.
- 3 cans (5 oz each) tuna in water, drained thoroughly
- 1/2 cup mayonnaise (or substitute with Greek yogurt)
- 1/2 cup celery, finely diced (about 2 stalks)
- 1/4 cup red onion, finely diced
- 2 tablespoons sweet pickle relish
- 1 tablespoon fresh lemon juice
- 1 teaspoon Dijon mustard
- 1/2 teaspoon salt (adjust to taste)
- 1/4 teaspoon black pepper
- 8 slices bread of choice
- Optional add-ins: lettuce, tomato slices, avocado, bacon
Ingredients
- 3 cans (5 oz each) tuna in water, drained thoroughly
- 1/2 cup mayonnaise (or substitute with Greek yogurt)
- 1/2 cup celery, finely diced (about 2 stalks)
- 1/4 cup red onion, finely diced
- 2 tablespoons sweet pickle relish
- 1 tablespoon fresh lemon juice
- 1 teaspoon Dijon mustard
- 1/2 teaspoon salt (adjust to taste)
- 1/4 teaspoon black pepper
- 8 slices bread of choice
- Optional add-ins: lettuce, tomato slices, avocado, bacon
Instructions
- Drain the tuna thoroughly: Open the cans of tuna and press down on the lid to squeeze out as much liquid as possible. You can also transfer to a fine-mesh strainer and press with a spoon. This step is crucial for preventing a watery salad.
- Combine tuna in mixing bowl: Transfer the drained tuna to a medium mixing bowl. Use a fork to break up any large chunks and flake the tuna into smaller, bite-sized pieces.
- Add the creamy base: Add the mayonnaise to the bowl with the tuna. Mix gently but thoroughly until the tuna is evenly coated. This creates the creamy foundation of your salad.
- Mix in vegetables and flavorings: Add the diced celery, red onion, pickle relish, lemon juice, Dijon mustard, salt, and pepper to the bowl. Stir everything together until all ingredients are evenly distributed throughout the tuna salad.
- Taste and adjust seasoning: Take a small taste and adjust the seasoning as needed. You might want more salt, pepper, lemon juice, or even a touch more mayo depending on your preference. The tuna salad should be creamy, well-seasoned, and balanced.
- Let flavors meld (optional): For best results, cover and refrigerate the tuna salad for at least 15-30 minutes before serving. This allows all the flavors to marry together beautifully. However, you can also serve immediately if you’re in a hurry.
- Assemble sandwiches: Toast your bread if desired. Spread a generous portion of tuna salad (about 1/2 cup) onto one slice of bread. Top with lettuce, tomato, or any other desired toppings. Place the second slice of bread on top, slice in half diagonally, and serve immediately.
- Store leftovers: Transfer any remaining tuna salad to an airtight container and refrigerate for up to 3-4 days. Assemble sandwiches fresh when ready to eat to prevent soggy bread.
Notes
- For a lighter version, substitute half or all of the mayonnaise with plain Greek yogurt
- If you’re sensitive to raw onion, soak the diced onion in cold water for 10 minutes, then drain and pat dry before adding
- Hard-boiled eggs (chopped) can be added for extra protein and richness
- Add a pinch of garlic powder, onion powder, or Old Bay seasoning for additional flavor depth
- For a lower-carb option, serve the tuna salad in lettuce wraps, on cucumber slices, or stuffed in bell pepper halves
- The tuna salad tastes even better the next day after the flavors have had time to develop
- Prep Time: 10 minutes
- Cook Time: 0 minutes
- Category: Lunch, Sandwich
- Method: No-Cook, Mixing
- Cuisine: American
Nutrition
- Serving Size: 1 sandwich (1/2 cup tuna salad + 2 slices bread)
- Calories: 385
- Sugar: 4g
- Sodium: 850mg
- Fat: 18g
- Saturated Fat: 3g
- Unsaturated Fat: 14g
- Trans Fat: 0g
- Carbohydrates: 28g
- Fiber: 3g
- Protein: 28g
- Cholesterol: 45mg
Note: Nutrition information is approximate and will vary based on specific ingredients and brands used. Using Greek yogurt instead of mayo will reduce calories and fat while increasing protein.
Tips & Variations
The beauty of this classic tuna salad sandwich is its versatility. Here are some delicious ways to customize it to your taste preferences and dietary needs:
Flavor Variations:
- Mediterranean Tuna Salad: Add chopped kalamata olives, sun-dried tomatoes, capers, and a sprinkle of dried oregano
- Curry Tuna Salad: Mix in 1-2 teaspoons curry powder, raisins, and chopped cashews or almonds
- Buffalo Tuna Salad: Stir in hot sauce, a bit of ranch dressing, and crumbled blue cheese
- Italian-Style: Add diced roasted red peppers, fresh basil, Italian seasoning, and a drizzle of balsamic glaze
- Asian-Inspired: Replace mayo with a mixture of sesame oil and soy sauce, add diced water chestnuts, and serve in lettuce wraps
Healthy Swaps:
- Use plain Greek yogurt instead of mayo for higher protein and fewer calories
- Mix half mayo and half mashed avocado for healthy fats
- Choose whole grain or sprouted grain bread for added fiber
- Add chopped spinach or kale for extra nutrients
- Use low-sodium tuna to reduce the salt content
Texture Add-Ins:
- Diced apple or grapes for sweetness and crunch
- Chopped walnuts, pecans, or sunflower seeds for nutty flavor
- Diced cucumber for extra freshness
- Crumbled bacon for smoky richness
- Hard-boiled eggs for additional protein and creaminess
Serving Options Beyond Sandwiches:
- Stuff into hollowed-out tomatoes or avocado halves
- Serve over mixed greens as a protein-packed salad
- Spread on crackers for an appetizer or snack
- Roll up in a tortilla or flatbread with lettuce and tomato
- Enjoy straight from the bowl with veggie sticks for dipping
Pro Chef Tips
Taking your tuna salad sandwich from good to absolutely incredible comes down to a few professional techniques:
Drain thoroughly and pat dry: The number one mistake people make is not draining the tuna well enough. After draining through the can lid, transfer the tuna to a paper towel-lined plate and gently pat it dry. This prevents a watery, diluted salad and allows the seasonings to properly coat the tuna.
Season in layers: Don’t just add all the salt at the end. Season the drained tuna lightly before adding the mayo, then taste and adjust after everything is mixed. This ensures every component is properly seasoned, not just the surface.
Dice vegetables uniformly: Keep your celery and onion pieces small and consistent in size—about 1/4-inch dice. This ensures you get a bit of everything in each bite without any overpowering chunks.
Toast your bread: This simple step elevates the entire sandwich. Toasted bread provides textural contrast, adds flavor, and creates a barrier that prevents the tuna salad from making the bread soggy. Lightly butter the bread before toasting for even more flavor.
Let it rest: If time allows, refrigerating the tuna salad for 30 minutes to an hour before serving makes a huge difference. The flavors meld together, the vegetables release their aromatics, and the overall taste becomes more cohesive and developed.
Add a layer of lettuce: Always place a leaf of crisp lettuce between the bread and tuna salad. This acts as a moisture barrier and keeps your sandwich from getting soggy, especially important for packed lunches.
Don’t overmix: When combining the ingredients, use a gentle folding motion rather than vigorous stirring. This keeps the tuna in nice flakes rather than turning it into a paste, maintaining better texture in your finished salad.
Common Mistakes to Avoid
Even with a simple recipe like tuna salad, there are a few pitfalls that can affect the final result. Here’s what to watch out for:
Using too much mayonnaise: While you want the salad to be creamy, adding too much mayo can make it heavy, overwhelm the tuna flavor, and create a sloppy consistency. Start with less than you think you need—you can always add more, but you can’t take it away. The tuna should be lightly coated and bound together, not swimming in mayo.
Not draining the tuna properly: Excess liquid from the can will dilute your seasonings and create a watery, unappetizing salad. Take the extra 30 seconds to thoroughly drain and even pat the tuna dry with paper towels. Your tuna salad will have much better texture and flavor.
Adding warm or room temperature tuna to cold ingredients: If you’re in a hurry and just opened the cans, the tuna might be room temperature. For best results and food safety, refrigerate the drained tuna for 10-15 minutes before mixing with mayo and other ingredients. This keeps everything properly chilled and food-safe.
Forgetting to taste and adjust seasoning: Every can of tuna has slightly different sodium levels, and everyone’s taste preferences vary. Always taste your tuna salad before serving and adjust the salt, pepper, lemon juice, or other seasonings to your liking. A little extra seasoning can transform a bland salad into something spectacular.
Making sandwiches too far in advance: While the tuna salad itself gets better after resting, assembled sandwiches get soggy quickly. If meal prepping, store the tuna salad separately and assemble sandwiches fresh when ready to eat, or use the lettuce barrier method and store sandwiches for no more than a few hours.
Storage & Meal Prep
This classic tuna salad sandwich is perfect for meal prep, making it an ideal solution for busy weekday lunches.
Refrigerator Storage: Store tuna salad in an airtight container in the refrigerator for 3-4 days maximum. The salad will actually taste better after a day as the flavors meld together. Make sure to keep it properly chilled at 40°F or below for food safety. Give it a quick stir before using as some liquid separation is normal.
Assembled Sandwiches: If you need to assemble sandwiches ahead of time, they’ll stay fresh for about 4-6 hours in the refrigerator when properly wrapped. Use the lettuce barrier method—place a crisp lettuce leaf between the bread and tuna salad on both sides to prevent sogginess. Wrap tightly in plastic wrap or store in an airtight container.
Meal Prep Tips: Make a large batch of tuna salad on Sunday and portion it into individual containers (about 1/2 cup each). Pack separately from bread, crackers, or lettuce cups. This way, you can grab-and-go throughout the week, assembling fresh sandwiches or meals daily without any sogginess issues.
How to Refresh: If your tuna salad seems a bit dry after a day or two in the fridge, stir in a teaspoon or two of mayo or Greek yogurt to restore creaminess. A small squeeze of fresh lemon juice can also brighten up the flavors.
Food Safety Note: Never leave tuna salad at room temperature for more than 2 hours (1 hour if the temperature is above 90°F). The mayo-based mixture requires consistent refrigeration to prevent bacterial growth. Use ice packs in lunch boxes to keep everything safely chilled.
Make-Ahead & Freezer Notes
Make-Ahead Instructions: Tuna salad actually benefits from being made ahead! Prepare the salad up to 24 hours in advance and store it covered in the refrigerator. The flavors will meld together beautifully, creating an even more delicious result. However, wait to add any mix-ins like apples or grapes until just before serving, as they can release water and make the salad watery.
You can also prep all your vegetables ahead of time—dice the celery and onion and store them separately in small airtight containers or zip-top bags in the refrigerator for up to 3 days. When you’re ready to make the salad, everything is prepped and ready to go, making the process even faster.
Freezer Information: Unfortunately, tuna salad does not freeze well due to the mayonnaise. Mayo-based salads separate, become watery, and develop an unpleasant texture when frozen and thawed. The celery and onion also become mushy after freezing. If you want to prep tuna salad in bulk, it’s better to make multiple batches fresh throughout the week rather than trying to freeze it.
However, you can freeze canned tuna itself (unopened cans) if you find a great sale and want to stock up. Once opened and drained, use the tuna within 3-4 days and do not refreeze.
Best Reheating Method: Tuna salad is meant to be served cold or at room temperature—never reheat it. The mayonnaise will separate and become oily, and the texture will be completely compromised. If your tuna salad is too cold straight from the fridge, simply let it sit at room temperature for 10-15 minutes before serving to take the chill off.
Serving Suggestions
A classic tuna salad sandwich is delicious on its own, but pairing it with the right sides and accompaniments creates a complete, satisfying meal.
Classic Pairings:
- Kettle-cooked potato chips – The crispy, salty crunch is the perfect contrast to creamy tuna salad
- Pickle spear – A dill pickle on the side adds tangy brightness and cuts through the richness
- Fresh fruit – Apple slices, grapes, strawberries, or watermelon provide refreshing sweetness
- Coleslaw – Creamy or vinegar-based slaw adds crunch and complements the sandwich beautifully
Soup and Sandwich Combo: Pair your tuna sandwich with a warm bowl of:
- Classic tomato soup
- Vegetable soup
- Chicken noodle soup
- Creamy broccoli cheddar soup
- Minestrone
Salad Sides:
- Simple mixed green salad with vinaigrette
- Caesar salad
- Cucumber and tomato salad
- Three-bean salad
- Pasta salad
Lighter Options:
- Carrot and celery sticks with hummus
- Cherry tomatoes and mozzarella balls
- Sliced bell peppers
- Snap peas
- Radishes with butter and sea salt
Beverage Pairings:
- Iced tea (sweetened or unsweetened)
- Lemonade
- Sparkling water with lemon or lime
- Cold brew coffee (surprisingly good for lunch!)
- Light white wine or rosé for adult gatherings
For a Party or Picnic: Cut sandwiches into quarters for easy finger food, serve tuna salad on a platter with assorted crackers and vegetable crudités, or set up a tuna salad bar where guests can customize their own sandwiches or wraps with various breads, toppings, and add-ins.
FAQs Section
Q: Can I use fresh tuna instead of canned? A: Yes! You can poach or sear fresh tuna, let it cool completely, then flake it and use it in place of canned. Fresh tuna will give you a slightly different texture—firmer and meatier—and a cleaner flavor. However, it’s more expensive and requires cooking time, so canned tuna remains the most convenient and traditional option for tuna salad.
Q: How long does tuna salad last in the refrigerator? A: Homemade tuna salad will last 3-4 days when stored properly in an airtight container in the refrigerator at 40°F or below. Always check for any off odors or changes in appearance before eating. If it smells fishy, sour, or just “off,” discard it immediately. The mayo-based mixture is perishable and should never be left at room temperature for more than 2 hours.
Q: Can I make tuna salad without mayonnaise? A: Absolutely! There are several mayo-free alternatives that work beautifully. Plain Greek yogurt is the most popular substitute, providing creaminess with more protein and less fat. Mashed avocado creates a rich, creamy texture with healthy fats. Hummus can also work as a binder with Mediterranean flavors. Olive oil mixed with lemon juice and Dijon mustard creates a lighter, vinaigrette-style tuna salad. Each option gives a slightly different flavor profile, so choose based on your preferences.
Q: Why does my tuna salad taste bland? A: The most common reason is underseasoning. Canned tuna can vary in sodium levels, so you need to taste and adjust. Make sure you’re adding enough salt, pepper, and acid (lemon juice). The pickle relish and mustard also contribute to flavor complexity—don’t skip these ingredients. Finally, letting the salad rest for 30 minutes in the refrigerator allows the flavors to develop and meld together, resulting in a more flavorful salad.
Q: Can I add hard-boiled eggs to tuna salad? A: Yes! Chopped hard-boiled eggs are a classic addition that makes the salad even more protein-rich and adds extra creaminess. Add 2-3 chopped hard-boiled eggs to this recipe. Some people love this combination (sometimes called “tuna egg salad”), while others prefer their tuna salad egg-free. It’s completely a matter of personal preference.
Q: What’s the best bread for tuna salad sandwiches? A: This is subjective and depends on your preferences! Classic white sandwich bread is traditional and soft, whole wheat adds nuttiness and fiber, sourdough provides tangy flavor and chewy texture, rye bread offers a distinctive taste that pairs well with tuna, and croissants create a more indulgent sandwich. Toasting any bread choice will improve texture and prevent sogginess. For low-carb options, use lettuce wraps, cucumber slices, or bell pepper halves.
Q: Can I meal prep tuna salad sandwiches for the week? A: You can meal prep the tuna salad itself for 3-4 days, but assembled sandwiches don’t hold up well beyond 4-6 hours due to sogginess. The best meal prep approach is to portion the tuna salad into individual containers and pack bread, crackers, or lettuce cups separately. Assemble fresh each day for the best texture and taste. If you must assemble ahead, use the lettuce barrier method and consume within 6 hours.
Conclusion
There you have it—the ultimate classic tuna salad sandwich recipe that’s simple, satisfying, and absolutely delicious! Whether you’re packing lunch for work, feeding hungry kids after school, or just need a quick and easy meal solution, this recipe delivers every single time. The beauty of this tuna salad is that it’s endlessly customizable, budget-friendly, and comes together in just 10 minutes with ingredients you probably already have in your pantry.
From the creamy, tangy filling to the satisfying crunch of fresh celery and the brightness of lemon juice, every bite is perfectly balanced and incredibly flavorful. This isn’t just any tuna sandwich—it’s the kind of meal that brings comfort, nostalgia, and genuine satisfaction with every bite.
I’d love to hear how your classic tuna salad sandwich turns out! Did you try any of the variations? What’s your favorite way to serve it? Leave a comment below and let me know. If you loved this recipe, please share it with your friends and family, and don’t forget to save it to your Pinterest boards so you can find it again when you need a quick lunch idea. Happy cooking!

