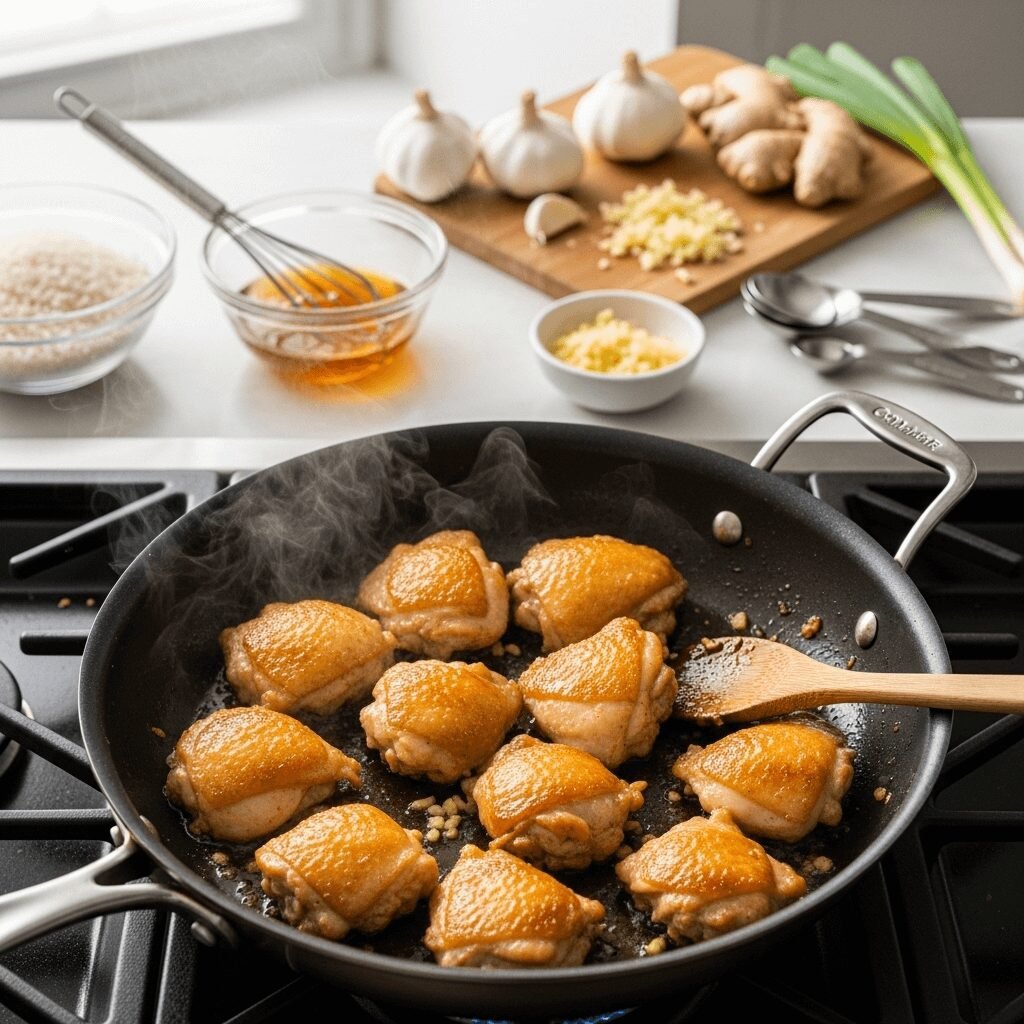

Get ready to discover your new favorite weeknight dinner – this Honey Garlic Chicken and Rice is about to become the recipe you make again and again! Imagine tender, juicy chicken thighs glazed with a sweet and savory honey garlic sauce, nestled on a bed of perfectly fluffy rice that’s cooked right in the same pot, absorbing all those incredible flavors. This isn’t just another chicken and rice recipe – it’s a complete, satisfying meal that delivers restaurant-quality taste with minimal effort and just one pot to clean!
What makes this recipe absolutely irresistible is the perfect balance of flavors. The honey provides natural sweetness that caramelizes beautifully on the chicken, the garlic adds aromatic depth and that savory punch everyone loves, while soy sauce brings umami richness that ties everything together. The rice cooks directly in the flavorful sauce and chicken drippings, becoming infused with all those delicious flavors rather than being bland and boring on the side. Every single bite is packed with taste!
This Honey Garlic Chicken and Rice is incredibly versatile and perfect for so many occasions! Make it for busy weeknight dinners when you need something quick but satisfying, serve it for casual family gatherings where everyone loves comfort food, prepare it for meal prep Sunday to have delicious lunches all week, bring it to potlucks where it’s guaranteed to be a crowd-pleaser, or cook it when you’re craving takeout but want something healthier and more budget-friendly at home. Best of all? Everything cooks in one pot, which means minimal cleanup – your future self will thank you! At just 45 minutes from start to finish with only 15 minutes of actual hands-on work, this is weeknight cooking at its absolute finest.
History / Background
The story of honey garlic chicken is a fascinating example of how global flavors merge to create something universally beloved. While there’s no single “origin” for this dish, it represents a beautiful fusion of Asian-inspired flavors adapted for American home cooking – the kind of cross-cultural culinary evolution that defines modern comfort food.
Honey and garlic as a flavor combination has ancient roots across multiple cultures. In Chinese cuisine, honey has been used for thousands of years not just as a sweetener but as a glazing agent that creates beautiful caramelization and lacquered finishes on roasted meats. The famous Cantonese “char siu” (barbecued pork) often incorporates honey for its signature glossy appearance and sweet-savory balance. Garlic, meanwhile, has been a fundamental ingredient in Asian cooking for millennia, prized for both its flavor and purported health benefits.
The technique of combining sweet and savory flavors – what food scientists call “flavor bridging” – is central to many Asian cuisines, particularly Chinese, Japanese, and Korean cooking. Soy sauce, another key component in this recipe, has been produced in China for over 2,500 years and spread throughout East Asia, becoming foundational to the region’s culinary identity. The combination of soy sauce with sweeteners like honey, sugar, or mirin creates the base for countless glazes and sauces.
The modern American version of honey garlic chicken likely emerged in the late 20th century as Asian-American fusion cuisine gained popularity. Chinese-American restaurants pioneered the sweet-and-savory glazed chicken style with dishes like General Tso’s chicken and orange chicken. Home cooks began adapting these restaurant favorites, simplifying ingredient lists and techniques to make them accessible for everyday cooking. Honey became a popular choice over traditional Asian sweeteners because it was readily available in American pantries and provided both sweetness and that desirable sticky glaze.
The one-pot chicken and rice format reflects America’s love of convenience cooking and complete meals. While Asian cuisines traditionally serve rice as a separate side dish, American home cooks have long favored one-dish meals that combine protein, starch, and sometimes vegetables all together – think casseroles, skillet dinners, and slow cooker meals. This approach saves time, reduces cleanup, and ensures every component absorbs complementary flavors.
Today’s Honey Garlic Chicken and Rice represents the best of fusion cooking: it takes inspiration from Asian flavor profiles while adapting to American cooking methods and preferences. It’s comfort food that crosses cultural boundaries, proving that the best recipes are often those that bring together different culinary traditions into something new, accessible, and absolutely delicious. It’s the kind of dish that feels familiar and crave-worthy while still delivering exciting, bold flavors that keep dinner interesting.
Why You’ll Love This Recipe
This Honey Garlic Chicken and Rice is about to become your go-to weeknight hero, and once you make it, you’ll completely understand why it’s such a beloved recipe across the internet! The combination of sweet honey, savory garlic, and tender chicken creates comfort food magic that appeals to absolutely everyone – from picky kids to discerning adults.
What really sets this recipe apart is how it delivers maximum flavor with minimum effort. You’re getting a complete meal – protein, starch, and tons of flavor – all from one single pot. No need to cook rice separately, no need to make a complicated sauce, no juggling multiple pans and components. Everything comes together beautifully with straightforward steps that even beginner cooks can master with confidence. The result? Dinner that tastes like you spent hours in the kitchen when you really only spent about 15 minutes of active work!
Here’s why this recipe absolutely deserves a permanent spot in your weekly dinner rotation:
- One-pot wonder – Everything cooks together in a single pot for ridiculously easy cleanup
- Budget-friendly – Uses affordable chicken thighs and pantry staples, feeds a family for under $15
- Quick weeknight meal – Just 45 minutes total with only 15 minutes hands-on time
- Family-friendly flavors – Sweet and savory taste that even picky eaters love
- Naturally gluten-free option – Use gluten-free soy sauce or tamari for dietary needs
- Meal prep champion – Reheats beautifully, perfect for making ahead for the week
- Foolproof technique – Hard to mess up, delivers consistent delicious results every time
- Complete meal – No need for sides, though you can add vegetables if desired
- Pantry-friendly – Most ingredients you probably already have on hand
- Customizable base – Easy to adapt with different vegetables, proteins, or spice levels
- Kid-approved – The sweet honey glaze makes this a favorite with children
- Better than takeout – Healthier, cheaper, and just as delicious as restaurant versions
- Impressive presentation – Looks fancy enough for company despite being simple to make
- Leftovers improve – Actually tastes even better the next day as flavors meld
Ingredient Notes
Chicken Thighs: Boneless, skinless chicken thighs (about 1½ to 2 pounds) are absolutely ideal for this recipe. Thighs stay incredibly juicy and tender even if slightly overcooked, thanks to their higher fat content compared to breasts. They also have richer, more flavorful meat that stands up beautifully to the bold honey garlic sauce. You can use chicken breasts if you prefer (they’re leaner), but watch cooking time carefully as they can dry out more easily. Bone-in, skin-on thighs work too but require longer cooking time – about 40-45 minutes total.
Honey: Pure, natural honey (about ⅓ to ½ cup) provides the essential sweetness and creates that gorgeous sticky glaze. Honey caramelizes beautifully when cooked, creating a lacquered finish on the chicken. It also helps the sauce cling to the meat rather than sliding off. Any variety works – clover honey is mild and versatile, while darker honeys like buckwheat add more robust flavor. In a pinch, you can substitute with maple syrup (less sticky) or brown sugar mixed with a bit of water, though honey truly gives the best results.
Garlic: Fresh garlic cloves (5-6, minced) are absolutely essential for authentic flavor. Fresh garlic provides that pungent, aromatic quality that makes this dish so crave-worthy. As it cooks, the garlic mellows and sweetens, losing its harsh bite while maintaining wonderful flavor. Don’t substitute with garlic powder here – fresh is truly necessary. Pre-minced garlic from a jar works in a pinch, though fresh tastes better. If you’re a garlic lover, feel free to add even more!
Soy Sauce: Regular or low-sodium soy sauce (about ¼ cup) adds essential umami depth, saltiness, and that savory balance to the sweet honey. It also contributes to the sauce’s beautiful dark color. Low-sodium is recommended so you can control salt levels, as different brands vary significantly in saltiness. For gluten-free diets, use tamari or gluten-free soy sauce – they work perfectly. Coconut aminos provide a soy-free alternative with slightly sweeter, less salty flavor.
Rice: Long-grain white rice (1½ cups uncooked) is traditional and cooks perfectly in about 18-20 minutes, absorbing all the flavorful cooking liquid. Jasmine or basmati rice add lovely aromatic qualities. Brown rice works but requires significantly more liquid (about 1 additional cup) and longer cooking time (45-50 minutes total). For quicker cooking, use instant rice (add during the last 10 minutes of cooking). Avoid arborio or short-grain rice, which become too sticky for this dish.
Chicken Broth: Good quality chicken broth or stock (about 1¾ to 2 cups) provides the cooking liquid for the rice and adds savory depth to the entire dish. Low-sodium is best so you control seasoning. Homemade stock is wonderful if you have it, but quality store-bought works perfectly. In a pinch, water works too, though you’ll lose some flavor depth. Vegetable broth can substitute for a lighter flavor profile.
Butter: A tablespoon or two of real butter adds richness and helps create a glossy sauce. Butter also aids in browning the chicken and adds wonderful flavor. You can substitute with olive oil for a dairy-free version, though you’ll lose some of that rich, buttery taste.
Rice Vinegar or Apple Cider Vinegar: Just a tablespoon adds brightness and acidity that cuts through the sweetness and richness, creating better flavor balance. This small addition makes a big difference in preventing the dish from tasting one-dimensionally sweet. Regular white vinegar works in a pinch, though rice vinegar is more mellow.
Ginger: Fresh grated ginger (1 teaspoon) or ground ginger (½ teaspoon) adds warm, slightly spicy aromatic notes that complement the garlic beautifully. Fresh provides brighter, more pronounced flavor, while ground is more subtle. This is optional but highly recommended for authentic Asian-inspired flavor.
Cornstarch: A tablespoon of cornstarch mixed with water (called a slurry) thickens the sauce to perfect sticky, glazed consistency. This is what creates that restaurant-style coating on the chicken. Arrowroot powder works as a substitute.
Green Onions and Sesame Seeds: Fresh sliced green onions and toasted sesame seeds (for garnish) add color, fresh flavor, and visual appeal. They’re optional but make the dish look professionally prepared and add nice textural and flavor contrast.
Equipment Needed
Creating this delicious Honey Garlic Chicken and Rice requires minimal equipment – most of which you probably already have:
- Large, deep skillet or sauté pan with lid (12-inch diameter, at least 2-3 inches deep) – essential for browning chicken and cooking everything together
- Alternative: Dutch oven or large pot with lid (at least 4-quart capacity) – works perfectly and provides more depth
- Measuring cups and spoons (for accurate ingredient quantities)
- Small mixing bowl (for whisking together honey garlic sauce)
- Whisk or fork (for mixing sauce ingredients smoothly)
- Tongs or spatula (for easily flipping and removing chicken)
- Sharp knife (for trimming chicken and mincing garlic)
- Cutting board (preferably separate for raw chicken)
- Grater or microplane (if using fresh ginger)
- Wooden spoon or silicone spatula (for stirring rice)
- Small bowl (for cornstarch slurry)
- Meat thermometer (optional but helpful for checking chicken doneness – 165°F)
- Paper towels (for patting chicken dry)
- Serving spoon or ladle (for plating)

Honey Garlic Chicken and Rice Recipe
- Total Time: 45 minutes
- Yield: 4 servings 1x
- Diet: Gluten Free
Description
This Creamy Lemon Shrimp Risotto features succulent shrimp and impossibly creamy Arborio rice infused with garlic, Parmesan, and fresh lemon. Restaurant-quality Italian elegance made at home!
Ingredients
For the Shrimp:
- 1 lb large shrimp (21-25 count), peeled and deveined
- 2 tablespoons olive oil
- 2 cloves garlic, minced
- Salt and pepper to taste
- Optional: pinch of red pepper flakes
For the Risotto:
- 5-6 cups seafood stock or chicken broth, kept warm
- 3 tablespoons butter, divided
- 1 tablespoon olive oil
- 2-3 shallots (or 1 medium onion), finely diced
- 4-5 cloves garlic, minced
- 1½ cups Arborio rice
- ¾ cup dry white wine
- ¾ to 1 cup freshly grated Parmesan cheese
- Zest of 2 lemons
- Juice of 2 lemons (about ⅓ cup)
- 2 tablespoons butter (for finishing)
- ¼ cup fresh parsley, chopped
- Salt and pepper to taste
- Optional: 2-3 tablespoons heavy cream
- Extra Parmesan, lemon wedges, and parsley for serving
Instructions
- Warm the broth: Pour seafood stock or chicken broth into a medium saucepan and bring to a gentle simmer over low heat. Keep it warm throughout the entire cooking process – this is absolutely crucial for proper risotto texture and cannot be skipped. Cold broth will interrupt the cooking process and prevent creamy results.
- Prep the shrimp: Pat shrimp completely dry with paper towels – this is important for achieving good browning rather than steaming. Season generously with salt and pepper on both sides.
- Cook the shrimp: Heat 2 tablespoons olive oil in a large skillet over medium-high heat until shimmering. Add shrimp in a single layer (don’t overcrowd – work in batches if necessary). Cook for 2-3 minutes on the first side until pink and starting to curl. Flip and add minced garlic and optional red pepper flakes. Cook another 1-2 minutes until shrimp are just cooked through and opaque (internal temperature of 120-125°F – they’ll finish cooking later). Don’t overcook! Remove to a plate and set aside. Shrimp will continue cooking from residual heat.
- Start the risotto base: In a large, heavy-bottomed pot or Dutch oven, melt 2 tablespoons butter with 1 tablespoon olive oil over medium heat. Once butter melts and stops foaming, add finely diced shallots. Sauté for 3-4 minutes, stirring frequently, until softened, translucent, and fragrant but not browned.
- Add aromatics: Add minced garlic to the shallots. Cook for 1 minute, stirring constantly, until wonderfully fragrant but not browned (burnt garlic is bitter). Your kitchen should smell absolutely amazing at this point!
- Toast the rice: Add Arborio rice to the pot. Stir continuously for 2-3 minutes, coating every single grain with the butter and oil. The rice should become slightly translucent at the edges and smell toasted and nutty. This crucial step is essential for proper texture and helps the rice absorb liquid evenly while maintaining structure.
- Deglaze with wine: Pour in the white wine and stir constantly. The liquid will sizzle dramatically and steam – this is perfect! Keep stirring until the wine is almost completely absorbed by the rice, about 2-3 minutes. Use this opportunity to scrape up any flavorful bits from the bottom of the pot.
- Begin adding broth: Using a ladle, add about one cup of warm broth to the rice. Stir frequently (but not constantly – every 30-45 seconds is fine) until the liquid is almost completely absorbed. You’ll know it’s time to add more when you can draw a clear line through the rice with your spoon and it doesn’t immediately fill with liquid.
- Continue the gradual process: Keep adding broth one ladle at a time (about ½ to ¾ cup), stirring frequently and waiting until each addition is mostly absorbed before adding more. This slow, gradual process releases the rice’s starch and creates that signature creamy texture. Continue for about 18-22 minutes total. Don’t rush this part – it’s where the magic happens!
- Test for doneness: After about 18 minutes, start tasting the rice frequently. It should be creamy and tender but still have a slight pleasant firmness in the very center (al dente) – not crunchy or raw-tasting, but with just a tiny bit of gentle resistance when you bite down. If it’s still too firm, continue adding broth and cooking until you reach the perfect texture. Different rice brands can vary slightly in cooking time.
- Add lemon and shrimp: Once the rice reaches perfect al dente doneness, stir in the lemon zest and about half the lemon juice (you can adjust to taste). Gently fold in the cooked shrimp along with any accumulated juices from the plate. Mix gently and let warm through for about 2 minutes. The residual heat will finish cooking the shrimp perfectly without making them rubbery.
- Finish with cheese and butter (mantecatura): Remove the pot from heat. This next step is crucial! Add remaining 2 tablespoons cold butter, grated Parmesan cheese, and remaining lemon juice. Stir vigorously and energetically for 1-2 minutes – this Italian technique called “mantecatura” creates an emulsion that makes the risotto incredibly creamy, glossy, and luxurious. The risotto should be loose enough to flow slowly like lava when you tilt the pot, not stiff or dry. If too thick, stir in a bit more warm broth.
- Final seasoning and serve: Taste and adjust seasonings, adding more salt, pepper, or lemon juice as needed. The risotto should taste bright, savory, perfectly balanced, and luxurious. Stir in optional heavy cream if desired for extra decadence. Mix in fresh chopped parsley, reserving some for garnish. Serve immediately in shallow bowls, topped with extra Parmesan, a drizzle of quality olive oil, fresh parsley, and lemon wedges on the side. Present beautifully and serve right away!
Notes
- Timing is everything: Risotto must be served immediately – it continues absorbing liquid and becomes thick and gluey if left sitting
- Keep broth warm: Always maintain warm broth temperature; cold broth shocks the rice and ruins texture
- Don’t overcook shrimp: Slightly undercook shrimp initially since they’ll finish cooking in the hot risotto
- Stir frequency: Frequent stirring (every 30-45 seconds) is needed, but not literally constant every-second stirring
- Perfect consistency: Risotto should be “all’onda” (wavy) – flowing slowly when tilted, not standing stiff
- Wine substitute: Replace wine with additional broth plus 2 tablespoons lemon juice or white wine vinegar
- Make it creamier: Stir in 2-3 tablespoons heavy cream or mascarpone at the end for ultimate decadence
- Seafood variations: Try scallops, lobster, or mixed seafood instead of or in addition to shrimp
- Prep Time: 15 minutes
- Cook Time: 30 minutes
- Category: Dinner
- Method: Stovetop
- Cuisine: Italian
Nutrition
- Serving Size: 1/4 of recipe (approximately 2 cups)
- Calories: 580
- Sugar: 3g
- Sodium: 920g
- Fat: 18g
- Saturated Fat: 9g
- Unsaturated Fat: 8g
- Trans Fat: 0g
- Carbohydrates: 65g
- Fiber: 2g
- Protein: 35g
- Cholesterol: 200mg
Nutrition information is approximate and calculated using standard ingredient measurements. Values may vary based on specific brands, portion sizes, and ingredient substitutions used.
Tips & Variations
The beauty of this Creamy Lemon Shrimp Risotto is how wonderfully versatile it is! Here are fantastic ways to make this recipe completely your own:
Luxe Seafood Version: Add scallops along with the shrimp for ultimate indulgence. Or try lobster tail meat for special celebrations. Mixed seafood (shrimp, scallops, mussels, and clams) creates a spectacular “Risotto ai Frutti di Mare.”
Asparagus Addition: Fold in blanched asparagus tips during the last 5 minutes of cooking for gorgeous green color and fresh spring flavor that pairs perfectly with lemon and shrimp.
Peas and Mint: Stir in frozen peas (they cook instantly in the hot risotto) and fresh mint along with the parsley for a beautiful English garden-inspired variation.
Tomato Twist: Add ½ cup of halved cherry tomatoes when you add the shrimp. They’ll burst and create pockets of sweet-tart juice throughout. Sun-dried tomatoes also work beautifully.
Spicy Kick: Add ½ teaspoon red pepper flakes with the garlic, or finish with a drizzle of chili oil. The heat complements seafood wonderfully and adds exciting complexity.
Extra Creamy Decadence: Stir in 3-4 tablespoons of mascarpone cheese or cream cheese along with the Parmesan for unbelievable richness and tang.
Herb Variations: Try fresh basil, tarragon, or dill instead of or in addition to parsley. Basil is especially lovely with lemon, while tarragon adds elegant, anise-like notes.
White Wine Butter Sauce: Reserve some of the white wine and reduce it with butter, garlic, and lemon to create a sauce to drizzle over the finished risotto for restaurant-level presentation.
Bacon Enhancement: Cook 3-4 strips of bacon until crispy, crumble, and sprinkle on top. The smoky, salty crunch adds wonderful contrast and makes it feel even more indulgent.
Lighter Version: Use all olive oil instead of butter (except for the final mantecatura – that butter is essential!), reduce Parmesan to ½ cup, and skip the optional cream. Still delicious with fewer calories.
Pro Chef Tips
Want to elevate your Creamy Lemon Shrimp Risotto from homemade to Michelin-star quality? Here are professional secrets:
The warm broth rule is sacred: This cannot be overstated – it’s the single most important technical point! Cold broth shocks the rice, stopping starch release and creating uneven texture. Keep that broth at a gentle simmer in a separate pot throughout cooking. This one tip makes the biggest difference between good and spectacular risotto.
Don’t over-stir obsessively: While risotto needs frequent attention, you don’t need to stir literally every single second for 25 minutes. Stir well when adding each ladle of broth, then stir every 30-45 seconds until absorbed. Over-stirring can actually break rice grains and create gluey texture rather than creamy.
Master “all’onda” consistency: Perfect risotto should be “all’onda” – Italian for “like a wave.” When you tilt the plate, risotto should flow slowly in waves, not sit there in a stiff mound. It should be slightly loose and pourable, almost soupy-looking. Many home cooks make it too thick. If this happens, simply stir in warm broth to loosen.
Toast the rice properly: That 2-3 minute toasting step before adding wine is crucial. You’re not browning the rice, but rather coating every grain with fat and slightly drying the exterior. Rice should become translucent at edges and smell toasted. This creates better texture and helps rice absorb liquid evenly.
Cook shrimp in batches: Don’t crowd the pan when cooking shrimp. Overcrowding creates steam instead of searing, resulting in gray, rubbery shrimp instead of golden, caramelized ones. Cook in a single layer with space between each shrimp.
Slightly undercook the shrimp: Since shrimp will be added back to hot risotto, cook them to about 80% done initially. They’ll finish cooking from residual heat without becoming rubbery. Overcooked shrimp are chewy and disappointing.
The mantecatura is magic: This Italian technique of vigorously stirring in cold butter and cheese off the heat creates an emulsion that makes risotto incredibly creamy and glossy. Don’t skip it! Stir energetically for 1-2 minutes to incorporate air and create that restaurant-quality shine. This is what separates good risotto from transcendent risotto.
Layer the lemon: Add lemon zest before juice. Zest provides intense lemon flavor without acidity, while juice adds brightness. Adding them separately creates more complex, layered citrus notes throughout the dish rather than one-dimensional lemon flavor.
Use the shrimp cooking oil: Don’t discard the garlic-infused oil from cooking the shrimp! Drizzle it over individual servings for extra flavor and that glistening, professional appearance.
Plate immediately and beautifully: Serve in wide, shallow bowls rather than deep ones. Arrange shrimp on top artfully rather than mixing them in completely. This creates restaurant-level presentation that makes people pull out their phones for photos!
Common Mistakes to Avoid
Even with detailed instructions, there are common pitfalls that can prevent perfection:
Adding broth too quickly: This is the number one mistake! Dumping in all the broth at once or adding too much too fast creates rice soup, not creamy risotto. The slow, gradual addition and absorption releases the starch that creates creaminess. Be patient – this is literally the entire technique!
Using the wrong rice: Long-grain rice, jasmine, basmati, or instant rice will absolutely NOT work for risotto. You must use short-grain, high-starch Italian rice like Arborio or Carnaroli. The starch content is what creates creamy texture. This is genuinely non-negotiable.
Not keeping broth warm: Adding cold broth to hot rice causes temperature shock that stops the cooking process and prevents proper starch release. Temperature fluctuation also means uneven cooking. Always keep broth at a gentle simmer in a separate pot!
Overcooking the shrimp initially: Shrimp cook incredibly fast and continue cooking from residual heat. If you fully cook them during the initial searing, they’ll be overcooked and rubbery by the time they’re stirred into hot risotto. Slightly undercook them – they should still have a tiny translucent center.
Walking away from the pot: Risotto genuinely needs your attention and presence! While you don’t need constant every-second stirring, you must stay nearby, stir frequently, and monitor absorption. Walk away to scroll through your phone, and you risk burnt stuck rice or a watery mess.
Adding cheese while still on heat: Parmesan should always be added off the heat during mantecatura. Adding it while rice is still on the burner can make cheese seize up and become stringy or grainy rather than melting smoothly into luxurious creaminess.
Making it too thick: Risotto should be loose, creamy, and flow slowly when tilted – not standing up stiff like a mound of regular rice. Many home cooks make it way too thick. If this happens, stir in warm broth gradually until it reaches proper consistency. Remember: all’onda!
Storage & Meal Prep
While risotto is always best served fresh and immediately, here’s how to handle leftovers successfully:
Refrigerator Storage: Allow risotto to cool to room temperature (but don’t leave out more than 2 hours for food safety). Transfer to an airtight container and refrigerate for up to 3 days. The risotto will firm up considerably and look quite solid as rice continues absorbing liquid – this is completely normal.
Reheating Methods: Risotto never reheats to exactly the same creamy texture as fresh, but you can get close. The best method is in a skillet or saucepan over medium-low heat. Add ¼ to ⅓ cup warm seafood stock, chicken broth, or even water per serving and stir gently as it heats, about 5-7 minutes. The added liquid helps restore creaminess. Microwave reheating works but yields slightly less creamy results – use 50% power, heat in 1-minute intervals, adding a splash of broth and stirring between each interval.
Texture Changes: Reheated risotto will never be quite as luxuriously creamy as fresh because rice has absorbed all liquid and starches have set. However, adding broth while reheating and stirring vigorously can restore much of the original texture. The shrimp stay tender and flavorful even after refrigeration.
Shrimp Considerations: Reheated shrimp can become slightly tougher. If you know you’ll have leftovers, slightly undercook the shrimp even more initially, or remove some shrimp before mixing into risotto and add to individual portions when reheating.
Repurposing Leftovers: Turn leftover risotto into crispy arancini (Italian rice balls)! Form cold risotto into balls around a cube of mozzarella, coat in breadcrumbs, and fry until golden and crispy. This is actually a traditional Italian way to use leftover risotto and is absolutely delicious – many people make extra risotto specifically for this purpose!
Not Ideal for Traditional Meal Prep: While you can make risotto ahead, it’s genuinely not ideal for weekly meal prep in the way chicken and rice would be. The texture suffers significantly. This is more of a “make fresh when you want something special” recipe rather than a Sunday meal prep staple.
Make-Ahead & Freezer Notes
Planning ahead for entertaining? Here’s what you need to know:
Prep-Ahead Components: While you can’t fully make risotto ahead successfully, you can prep time-consuming components. Measure and organize all ingredients (mise en place). Peel and devein shrimp up to 24 hours ahead and refrigerate. Mince garlic and dice shallots, storing in separate airtight containers in the fridge. Grate cheese and zest lemons ahead. This makes actual cooking much faster and less stressful!
Partial Make-Ahead for Entertaining: You can cook risotto about 75% of the way (until rice is almost tender but still quite firm), spread it quickly on a baking sheet to stop cooking, then refrigerate for up to 24 hours. When ready to serve, return to the pot with warm broth and finish cooking for about 5-7 minutes. The texture won’t be quite as perfect as fresh, but it’s a workable compromise when hosting.
Freezing Cooked Risotto: Technically you can freeze cooked risotto for up to 2 months, but I’ll be honest – the texture suffers dramatically. The rice becomes mushy and that beautiful creaminess is lost. If you must freeze it, cool completely, portion into freezer-safe containers leaving ½ inch headspace, and freeze. Thaw overnight in refrigerator before reheating gently with added broth.
Better Freezing Option: Instead of freezing finished risotto, freeze cooked, seasoned shrimp separately in freezer bags (up to 3 months). Make completely fresh risotto when ready to serve and add the thawed shrimp. This gives you convenience without sacrificing risotto’s delicate texture.
Freezing Raw Shrimp: Raw shrimp freeze excellently! If you find a good sale, buy extra. Freeze in a single layer on a baking sheet until solid, then transfer to freezer bags. They’ll keep for 3-4 months. Thaw overnight in refrigerator or quickly under cold running water before cooking.
Reality Check: Risotto is genuinely meant to be enjoyed fresh and served immediately. While these make-ahead and freezing options work in a pinch for convenience, the incredible texture and cream
iness that make risotto special are truly best achieved by making it fresh. Since it only takes about 35 minutes total, plan your timing so you can cook it fresh when possible. The meditative stirring process is actually quite relaxing, and the results are absolutely worth it!
Best Strategy for Entertaining: Have all ingredients prepped and organized before guests arrive. Once you sit down for appetizers, excuse yourself about 35 minutes before you want to serve the main course. The actual hands-on work is minimal – mostly just stirring – so you can even chat with guests from the kitchen while you work. Present it hot and fresh for maximum wow factor!
Serving Suggestions
This elegant Creamy Lemon Shrimp Risotto is rich and satisfying, so it pairs best with lighter sides that provide contrast and balance:
Simple Salads: A crisp arugula salad with lemon vinaigrette echoes the citrus notes beautifully without competing. Classic Caesar salad adds satisfying crunch and familiar comfort. A simple mixed green salad with champagne vinaigrette provides delicate acidity that cuts through richness. Caprese salad with fresh mozzarella, heirloom tomatoes, and basil offers fresh, bright Mediterranean flavors.
Roasted or Grilled Vegetables: Roasted asparagus with Parmesan complements without overwhelming. Grilled zucchini and yellow squash add charred sweetness and beautiful color. Sautéed broccolini with garlic and lemon keeps the bright theme consistent. Roasted cherry tomatoes burst with sweet-tart juice that brightens every bite.
Bread Options: Crusty Italian bread or ciabatta is perfect for soaking up every drop of creamy risotto – don’t let a single bite go to waste! Garlic bread adds extra garlic punch if that’s your preference. Focaccia with rosemary or sea salt brings herbal, rustic notes. A warm baguette keeps things simple and classic, letting the risotto shine.
Italian-Themed Dinner Party: Start with bruschetta topped with tomatoes and basil or a light minestrone soup. Serve the risotto as the stunning main course with a simple arugula salad. Finish with classic tiramisu, silky panna cotta, or refreshing lemon sorbet that echoes the citrus theme. Your guests will feel like they’ve been transported to a coastal Italian trattoria!
Wine Pairings: A crisp, chilled white wine is absolutely perfect here. Pinot Grigio, Sauvignon Blanc, Vermentino, or an unoaked Chardonnay complement the lemon and seafood beautifully without overwhelming delicate flavors. Prosecco or other sparkling wine adds celebratory elegance. For those who prefer red (though unusual with seafood), a very light, chilled Pinot Noir can work. Non-alcoholic options include sparkling water with lemon, Italian soda, or white grape juice.
Romantic Date Night: This risotto is impressive enough to be the centerpiece of a romantic dinner at home! Serve with grilled asparagus, a wedge salad with blue cheese, crusty bread, and chilled white wine. Light some candles, put on soft music, and prepare to seriously impress your partner with your culinary skills!
Special Occasion Celebrations: This dish is perfect for anniversaries, Valentine’s Day, birthdays, or any milestone worth celebrating. The elegant presentation and luxurious flavors make people feel truly special and pampered.
Lighter Lunch Option: Serve smaller portions (about 1½ cups) with a large, fresh green salad for a satisfying but not overly heavy lunch. The protein from the shrimp makes it filling without feeling sluggish afterward.
Completing the Italian Experience: For a truly authentic Italian meal structure, serve the risotto as a “primo piatto” (first course) in smaller portions, followed by a simple grilled fish or meat as the “secondo piatto” (second course) with vegetables. This traditional Italian dining style allows you to savor each course separately.
FAQs Section
Q: Do I really need to stir risotto constantly for 25 minutes straight?
A: Not constantly every single second, but you do need to stir frequently and stay nearby! Stir well when you add each ladle of broth, then stir every 30-45 seconds or so until that addition is absorbed. This frequent stirring helps release the starch that creates creaminess and prevents sticking or burning. You can’t walk away and multitask in another room, but you also don’t need to literally never stop stirring for 25 minutes. Find a comfortable rhythm – many people find it actually quite meditative and relaxing! Put on some music or a podcast and enjoy the process.
Q: Can I use a different type of rice like jasmine or long-grain?
A: Unfortunately, absolutely not – and this is really important to understand! Arborio, Carnaroli, or Vialone Nano rice are the only options for authentic, creamy risotto. These specific Italian short-grain rice varieties have uniquely high starch content (specifically amylopectin) that creates the characteristic creamy, velvety texture when released through stirring. Long-grain rice, jasmine, basmati, or instant rice have completely different starch structures and will never achieve that creamy consistency no matter how perfectly you follow the technique. This is genuinely one ingredient where there’s no substitute that works. The good news? Arborio is widely available at virtually every grocery store and quite affordable!
Q: My shrimp turned out rubbery and tough. What did I do wrong?
A: Overcooked shrimp is the most common issue! Shrimp cook incredibly fast – we’re talking just 2-3 minutes per side. They’re done when they turn pink/orange and start curling into a C-shape. If they curl into tight circles (O-shape), they’re overcooked. For this recipe, slightly undercook the shrimp during initial cooking (cook to about 80% done, leaving a tiny translucent spot in the center) because they’ll finish cooking when added to the hot risotto. Also, make sure you’re not cooking them over heat that’s too high, which causes the exterior to toughen before the interior cooks. Medium-high heat is ideal. Finally, always pat shrimp completely dry before cooking – excess moisture creates steam instead of a nice sear.
Q: Can I make this recipe without wine? I don’t drink alcohol.
A: Absolutely yes! Replace the wine with an additional ¾ cup of broth plus 2 tablespoons of fresh lemon juice or white wine vinegar. The acid from the lemon or vinegar mimics the wine’s important role in brightening flavors and deglazing the pan to release flavorful browned bits. While wine does add a layer of complexity and depth, the dish is still absolutely delicious without it. The alcohol cooks off completely during cooking, but if you prefer not to use it for any reason, the substitution works beautifully!
Q: Why is keeping the broth warm so critically important? Can’t I just add cold broth?
A: Keeping broth warm is genuinely one of the most important technical points in making perfect risotto – it’s not just a suggestion! When you add cold broth to hot rice, you cause a dramatic temperature shock that interrupts the cooking process. The rice stops releasing starch properly, and you’ll end up with very uneven texture – some grains perfectly cooked and creamy, others undercooked and chalky, with an overall inconsistent result. Warm broth maintains the consistent cooking temperature needed for the rice to cook evenly while steadily releasing the starch that creates that signature creaminess. Keep the broth at a gentle simmer in a separate pot throughout cooking. This single tip makes an enormous difference in your final results!
Q: Can I use frozen shrimp instead of fresh?
A: Absolutely! High-quality frozen shrimp actually work perfectly well for this recipe and are often more affordable and convenient than fresh. Much of the “fresh” shrimp at grocery stores was actually previously frozen anyway. The key is thawing them properly – thaw overnight in the refrigerator for best results, or if you need them quickly, place sealed shrimp in a bowl under cold running water for about 15-20 minutes. Never thaw in warm water or the microwave, which can partially cook the exterior and make texture mushy. Once thawed, pat shrimp completely dry with paper towels before cooking – this is crucial for achieving good browning rather than steaming!
Q: My risotto turned out too thick and stiff like regular rice. How do I fix it?
A: This is actually super easy to fix and very common! Simply stir in warm broth (or even water in a pinch), a few tablespoons at a time, until you reach the desired consistency. Risotto should be loose, creamy, and flow slowly like lava when you tilt the plate – definitely not standing up in a stiff mound. The Italian term is “all’onda” (wavy). If your risotto firms up while sitting (which it will – it continues absorbing liquid even off heat), just add more liquid and stir to loosen it back up. This is also the fix for reheating leftover risotto. Many home cooks naturally make risotto too thick because they’re used to regular rice, but true risotto should be much looser and almost soupy-looking!
Q: How do I know when the risotto rice is perfectly done?
A: Perfect risotto rice should be “al dente” – tender and creamy throughout but with a slight pleasant firmness when you bite into the very center of a grain. It shouldn’t be crunchy or taste raw and starchy, but it also shouldn’t be completely soft and mushy like regular rice or baby food. Start tasting frequently at the 18-minute mark. When you bite down on a grain, there should be just a tiny bit of gentle resistance in the very center – almost imperceptible but there. The overall texture should be creamy and flowing, with individual grains still visible and distinct rather than broken down into mush. This perfect texture takes a bit of practice to recognize, but once you experience it, you’ll know exactly what to look for!
Conclusion
There you have it, friends – everything you need to know to create absolutely stunning, restaurant-quality Creamy Lemon Shrimp Risotto right in your own kitchen! This isn’t just dinner; it’s an experience, a celebration, a moment of culinary achievement that will have everyone at your table genuinely impressed. The combination of succulent shrimp, impossibly silky risotto, bright citrus, and aromatic garlic creates something truly magical that tastes like it came from an upscale Italian coastal restaurant.
The real beauty of this recipe lies in how it makes you feel accomplished and capable. Yes, risotto has an intimidating reputation, but once you understand the simple technique, you’ll realize it’s actually quite straightforward – just rice, warm broth, patience, and stirring. The process is rhythmic, almost meditative, and honestly quite relaxing once you get into the flow. There’s something deeply satisfying about standing at your stove, stirring slowly, watching ordinary rice transform into something extraordinary through your own hands and attention.
Best of all? You’ve just mastered a fundamental cooking technique that opens up endless possibilities! Once you’ve conquered risotto, you can adapt it infinitely – different proteins, seasonal vegetables, various cheeses and herbs. The technique remains the same while the flavor combinations are limited only by your imagination. You’ve genuinely leveled up your cooking skills!
Now it’s your turn to create kitchen magic! I would absolutely love to hear how your Creamy Lemon Shrimp Risotto turns out! Did your dinner guests shower you with compliments? Did you surprise yourself with how delicious it was? Did you make any creative variations? Drop a comment below sharing your experience – your feedback helps fellow home cooks and genuinely brightens my day!
📌 Please PIN this recipe to your Pinterest boards so you can find it easily whenever you need an impressive, special-occasion dinner! Save it to your “Date Night Recipes,” “Italian Cooking,” “Seafood Dinners,” “Special Occasion Meals,” “Impressive Dinner Party Recipes,” or “Restaurant Quality At Home” boards – wherever you keep your absolute favorites!
⭐ If you loved this recipe, please leave a 5-star rating! Your ratings help other home cooks discover delicious, reliable recipes like this one and support this blog tremendously. It takes just a moment and means the world to me!
Share your beautiful creations! Tag me on Instagram or Pinterest with photos of your gorgeous risotto – I absolutely love seeing your kitchen successes and sharing them with our wonderful cooking community! There’s nothing better than seeing these recipes come to life in your homes and on your tables.
Thank you for cooking with me today! Here’s to impressive dinners that look harder than they are, to the confidence that comes from mastering new techniques, to romantic date nights at home that rival any restaurant, and to the pure joy of creating something beautiful and delicious for the people you love. May your risotto always be creamy, your shrimp always be tender, and your lemon always be bright!

