
If you’re looking for a weeknight dinner that feels fancy but takes less than 30 minutes, this Honey Garlic Glazed Chicken Breast Recipe is about to become your new go-to! Imagine tender, juicy chicken breasts coated in a glossy, sticky-sweet glaze that perfectly balances honey’s natural sweetness with savory garlic and a hint of tanginess. This dish is incredibly versatile—serve it over fluffy rice, alongside roasted vegetables, or sliced over a fresh garden salad.
This recipe is perfect for busy families, meal preppers, and anyone who wants restaurant-quality chicken without spending hours in the kitchen. The simple ingredient list means you probably have everything you need already sitting in your pantry. Whether you’re hosting a casual dinner party, planning Sunday meal prep, or just trying to get a delicious, wholesome dinner on the table fast, this honey garlic glazed chicken delivers every single time.
The beauty of this dish lies in its simplicity and incredible flavor payoff. You’ll start by searing chicken breasts until they’re golden brown, then coat them in a luscious glaze made from honey, soy sauce, garlic, and a few other pantry staples. The result? Chicken that’s caramelized on the outside, tender on the inside, and bursting with that irresistible sweet-savory flavor combination that keeps everyone coming back for seconds.
History / Background
While honey garlic chicken doesn’t trace back to one specific cultural origin, this flavor combination has been beloved across multiple cuisines for centuries. The marriage of honey and garlic appears in Asian cooking traditions, particularly in Chinese-American cuisine where sweet and savory glazes became restaurant favorites in the mid-20th century. Think of classic dishes like General Tso’s chicken or sesame chicken—these popularized the concept of glossy, sticky-sweet glazes coating tender proteins.
The honey garlic combination also has roots in European cooking, where honey was used as a natural sweetener and preservative long before refined sugar became widely available. Medieval cooks would use honey-based glazes for roasted meats, and garlic has been a kitchen staple across nearly every culture for thousands of years, prized both for its bold flavor and medicinal properties.
In American home cooking, honey garlic chicken rose to popularity in the 1980s and 1990s as families sought easy, flavorful meals that could be prepared quickly after busy workdays. The combination hit that perfect sweet spot—literally—offering familiar flavors that appealed to both adults and children. Food bloggers and Pinterest users have since embraced this recipe, creating countless variations that range from slow-cooker versions to sheet pan dinners and Instant Pot adaptations.
Today, honey garlic glazed chicken breast represents the best of modern home cooking: simple ingredients, minimal prep time, maximum flavor, and endless adaptability. It’s become a staple in meal prep routines, family dinner rotations, and even appears on restaurant menus worldwide, proving that sometimes the simplest combinations create the most memorable dishes.
Why You’ll Love This Recipe
This honey garlic glazed chicken breast recipe is pure magic in a pan, and here’s why it deserves a permanent spot in your dinner rotation. First, it’s incredibly forgiving—even if you’re not an experienced cook, you’ll nail this recipe on the first try. The glaze comes together in minutes, and the cooking technique is straightforward enough that you can practically do it with your eyes closed (though we don’t recommend that!).
Here are the top reasons this recipe will become your favorite:
- Quick & Easy: Ready in under 30 minutes from start to finish—perfect for busy weeknights when you need dinner fast
- Budget-Friendly: Uses simple, affordable ingredients that won’t break the bank; chicken breasts are often on sale, making this an economical choice
- Family-Approved: The sweet and savory flavor appeals to picky eaters, kids, and adults alike—no separate “kid meal” needed!
- Meal Prep Champion: Makes excellent leftovers that taste just as good (or better!) the next day; perfect for weekly meal prepping
- Versatile Serving Options: Works beautifully over rice, noodles, quinoa, or alongside virtually any vegetable side dish
- Impressive Presentation: Looks restaurant-quality with that beautiful glossy glaze, making it perfect for casual entertaining
- Customizable: Easy to adjust the sweetness, add heat with red pepper flakes, or modify to suit dietary preferences
- One-Pan Wonder: Minimal cleanup since everything happens in a single skillet—less time washing dishes, more time enjoying your meal
- Pantry-Friendly: Requires basic ingredients you likely already have on hand, with no special trips to specialty grocery stores needed
- Healthier Alternative: When you make this at home, you control the ingredients—less sodium and sugar than takeout versions
This recipe also fits beautifully into various eating styles. It’s naturally gluten-free when you use tamari instead of soy sauce, can be made lower in sugar by adjusting the honey, and pairs perfectly with keto-friendly vegetable sides. Plus, the active cooking time is minimal—you can prep side dishes while the chicken cooks!
Ingredient Notes
Let’s break down what makes this honey garlic glaze so irresistibly delicious and why each ingredient plays an important role:
Chicken Breasts: Boneless, skinless chicken breasts are the star protein here. They cook quickly and evenly, providing a lean canvas for the flavorful glaze. Choose breasts that are similar in size for even cooking. Substitution: Chicken thighs work beautifully if you prefer darker meat—they’re more forgiving and stay juicy even if slightly overcooked.
Honey: Provides the signature sweetness and helps create that gorgeous glossy coating. Honey also helps the glaze caramelize beautifully during cooking. Use pure honey for best results. Substitution: Maple syrup or agave nectar can replace honey in a 1:1 ratio.
Garlic: Fresh garlic is essential for that robust, aromatic flavor. Minced garlic releases its oils into the sauce, creating depth and complexity. Don’t skip the fresh stuff—it makes a real difference! Substitution: In a pinch, use ½ teaspoon garlic powder per clove, though fresh is always better.
Soy Sauce: Adds salty, umami-rich flavor that balances the honey’s sweetness perfectly. It also gives the sauce its beautiful amber color. Substitution: Use tamari for gluten-free, coconut aminos for soy-free, or low-sodium soy sauce if watching salt intake.
Apple Cider Vinegar: Provides acidity that brightens the sauce and prevents it from tasting too sweet. The tangy note cuts through the richness beautifully. Substitution: Rice vinegar, white wine vinegar, or fresh lemon juice work equally well.
Butter: Adds richness and helps create a silky texture in the glaze. It also aids in browning the chicken. Substitution: Olive oil or avocado oil for dairy-free, though butter provides superior flavor.
Cornstarch: Acts as a thickening agent to give the glaze that signature sticky, clingy consistency that coats the chicken perfectly. Substitution: Arrowroot powder works in the same ratio for a paleo-friendly option.
Optional Add-ins: Red pepper flakes for heat, fresh ginger for brightness, sesame oil for nutty flavor, or a splash of orange juice for citrus notes. These additions can customize the flavor profile to your preferences.
Equipment Needed
Having the right tools makes cooking this recipe a breeze. Here’s everything you’ll need:
- Large Skillet or Frying Pan (10-12 inches): A good-quality skillet with high sides helps prevent splatter and gives you room to flip the chicken easily
- Sharp Knife: For slicing chicken breasts if needed and mincing garlic
- Cutting Board: Preferably one designated for raw poultry
- Meat Thermometer: Essential for checking doneness—chicken is safe at 165°F internal temperature
- Small Mixing Bowl: For whisking together the sauce ingredients
- Whisk or Fork: To blend the sauce and ensure the cornstarch dissolves completely
- Measuring Cups and Spoons: For accurate ingredient portions
- Tongs or Spatula: For flipping chicken breasts without piercing them
- Garlic Mincer or Grater (optional): Makes quick work of garlic prep
- Serving Platter: For presenting your beautiful glazed chicken
Most home cooks will have all of these items already. If you don’t have a meat thermometer, I highly recommend investing in one—it’s the best way to ensure perfectly cooked chicken every single time!

Honey Garlic Glazed Chicken Breast Recipe
- Total Time: 28 minutes
- Yield: 4 servings 1x
- Diet: Gluten Free
Description
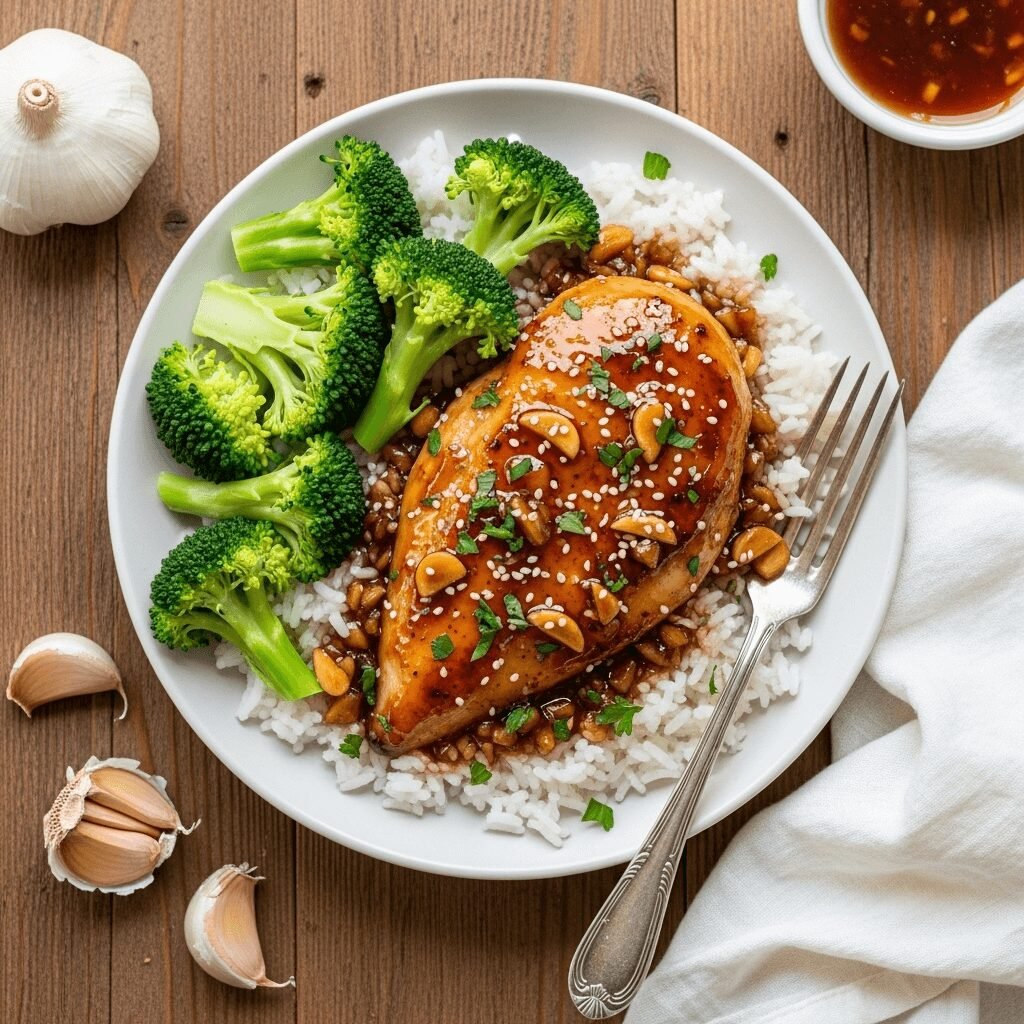
Tender, juicy chicken breasts coated in a sticky-sweet honey garlic glaze that’s perfectly balanced with savory and tangy notes. This easy 30-minute meal is perfect for weeknight dinners, meal prep, or casual entertaining. The glossy, caramelized exterior gives way to succulent chicken that pairs beautifully with rice, vegetables, or salad.
Ingredients
- 4 boneless, skinless chicken breasts (about 1.5-2 lbs total)
- 2 tablespoons unsalted butter, divided
- Salt and black pepper, to taste
- ⅓ cup honey
- ¼ cup soy sauce (or tamari for gluten-free)
- 5 cloves garlic, minced (about 1½ tablespoons)
- 2 tablespoons apple cider vinegar
- 1 tablespoon cornstarch
- 2 tablespoons water
- ½ teaspoon red pepper flakes (optional, for heat)
- Fresh parsley or green onions, chopped (for garnish)
- Sesame seeds (optional, for garnish)
Instructions
- Prepare the Chicken: Pat chicken breasts completely dry with paper towels. If any breasts are particularly thick (over 1 inch), butterfly them or pound to even thickness for consistent cooking. Season both sides generously with salt and black pepper.
- Make the Sauce: In a small bowl, whisk together honey, soy sauce, minced garlic, and apple cider vinegar until well combined. In a separate small cup, mix cornstarch with water until smooth to create a slurry. Set both aside.
- Sear the Chicken: Heat a large skillet over medium-high heat. Add 1 tablespoon of butter and let it melt, swirling to coat the pan. Once butter is sizzling, add chicken breasts. Cook undisturbed for 5-6 minutes until a golden-brown crust forms on the bottom.
- Flip and Continue Cooking: Flip chicken breasts using tongs and cook the second side for another 5-6 minutes. Reduce heat to medium if browning too quickly. The internal temperature should reach 165°F when checked with a meat thermometer at the thickest part.
- Create the Glaze: Once chicken is fully cooked, reduce heat to low. Remove chicken from the skillet and set aside on a plate. Add remaining tablespoon of butter to the skillet along with the honey-garlic sauce mixture. Stir constantly for about 1 minute as the sauce bubbles.
- Thicken the Sauce: Add the cornstarch slurry to the skillet, stirring continuously. The sauce will thicken noticeably within 30-60 seconds, becoming glossy and syrupy. If sauce becomes too thick, add a tablespoon of water to thin it out.
- Coat the Chicken: Return the chicken breasts to the skillet, spooning the glaze over them generously. Flip them once or twice to ensure they’re completely coated in the sticky glaze. Let them simmer in the sauce for 1-2 minutes to absorb the flavors.
- Serve: Transfer glazed chicken to a serving platter. Drizzle any remaining sauce from the skillet over the top. Garnish with chopped fresh parsley or sliced green onions and sesame seeds if desired. Serve immediately while hot.
Notes
- Even Cooking Tip: If your chicken breasts vary significantly in size, consider cutting larger ones into cutlets or purchasing similar-sized pieces for even cooking.
- Don’t Overcook: Chicken breasts can dry out quickly. Remove from heat as soon as they reach 165°F—carryover cooking will bring them a few degrees higher.
- Sauce Consistency: If your glaze is too thin, simmer it a bit longer. If too thick, add water one tablespoon at a time.
- Make it Spicy: Add ½-1 teaspoon red pepper flakes to the sauce, or drizzle with sriracha before serving.
- Low-Sodium Option: Use low-sodium soy sauce and reduce the amount to 3 tablespoons, adding more to taste if needed.
- Prep Time: 10 minutes
- Cook Time: 18 minutes
- Category: Dinner, Main Course
- Method: Stovetop, Pan-Seared
- Cuisine: Asian-Inspired, American
Nutrition
- Serving Size: 1 chicken breast with glaze (about 6 oz)
- Calories: 315
- Sugar: 18g
- Sodium: 685mg
- Fat: 8g
- Saturated Fat: 4g
- Unsaturated Fat: 3g
- Carbohydrates: 22g
- Fiber: 0g
- Protein: 38g
- Cholesterol: 115mg
Nutrition information is approximate and calculated per serving. Actual values may vary based on specific ingredients used and portion sizes.
Tips & Variations
This recipe is wonderfully adaptable! Here are some fantastic ways to customize it to suit your taste preferences or dietary needs:
Spicy Honey Garlic Chicken: Add 1-2 teaspoons of sriracha or hot sauce to the glaze, or increase red pepper flakes to 1 teaspoon. For serious heat lovers, add a diced jalapeño when cooking the garlic.
Citrus Twist: Add 2 tablespoons of fresh orange juice and 1 teaspoon of orange zest to the sauce for a bright, citrusy variation. Lemon juice and zest work beautifully too.
Asian-Style: Add 1 teaspoon of fresh grated ginger to the sauce, use sesame oil instead of half the butter, and finish with a generous sprinkle of toasted sesame seeds and sliced green onions.
Herb Garden: Stir in 2 teaspoons of fresh thyme or rosemary to the sauce for an earthy, aromatic twist that pairs especially well with roasted vegetables.
Bourbon Glaze: Add 2 tablespoons of bourbon to the sauce for a sophisticated, adult version with deeper caramelized notes.
Lower Sugar: Reduce honey to 3 tablespoons and add a pinch of stevia or monk fruit sweetener to maintain sweetness with fewer carbs.
Extra Crispy: After searing, finish the chicken in a 400°F oven for 5-7 minutes, then brush with the glaze and broil for 2 minutes for extra caramelization.
Meal Prep Version: Double or triple the recipe and store portions individually for easy grab-and-go lunches throughout the week.
Slow Cooker Adaptation: Place chicken in slow cooker with sauce ingredients (skip the cornstarch initially). Cook on low 3-4 hours. Before serving, remove chicken, thicken the sauce with cornstarch slurry on the stovetop, then pour over chicken.
Pro Chef Tips
Want to take your honey garlic chicken from good to absolutely restaurant-quality? Here are professional techniques that make all the difference:
Brine for Maximum Juiciness: Brine chicken breasts for 30 minutes before cooking in a solution of 4 cups water mixed with ¼ cup salt. This ensures ultra-juicy, well-seasoned chicken that’s nearly impossible to dry out. Rinse and pat completely dry before cooking.
Temper Your Chicken: Remove chicken from the refrigerator 20-30 minutes before cooking. Room-temperature chicken cooks more evenly and develops a better crust without overcooking the interior.
The Perfect Sear: Make sure your pan is properly preheated and the chicken is bone-dry before it hits the skillet. Listen for an immediate sizzle—that’s the sound of a proper sear forming. Don’t move the chicken around; let it develop that golden crust undisturbed.
Bloom Your Garlic: For even deeper flavor, add the minced garlic to the butter for 30 seconds before adding the liquid sauce ingredients. This “blooms” the garlic, releasing more aromatic compounds. Be careful not to burn it!
Use the Fond: Those brown bits stuck to the pan after cooking the chicken? That’s pure flavor! The acid in your sauce will deglaze the pan naturally, but you can help by scraping with a wooden spoon to incorporate all that deliciousness.
Sauce Temperature Control: When thickening the sauce, keep the heat at medium-low. Too much heat can cause the cornstarch to break down, resulting in a thin, stringy sauce instead of glossy and thick.
Rest Before Slicing: If you’re planning to slice the chicken, let it rest for 5 minutes after cooking. This allows juices to redistribute, ensuring every bite is moist rather than having all the juice run out onto your cutting board.
Double Glaze Technique: For an extra-glossy finish, reserve a few tablespoons of fresh glaze before returning chicken to the pan. After plating, brush this fresh glaze over the chicken for that “just-made” sheen.
Taste and Adjust: Always taste your sauce before adding the chicken back in. Need more sweetness? Add honey. Too sweet? A splash more vinegar. This is your chance to make it perfect!
Common Mistakes to Avoid
Even simple recipes can go wrong if you’re not careful. Here’s how to sidestep the most common pitfalls:
Mistake #1: Using Wet Chicken – Moisture is the enemy of a good sear. If your chicken is wet, it will steam rather than brown, resulting in pale, rubbery chicken without that beautiful caramelized crust. Always pat chicken completely dry with paper towels before seasoning and cooking.
Mistake #2: Cooking Over Too-High Heat – While you want a hot pan for searing, cooking the entire time over high heat will burn the outside before the inside cooks through. Start with medium-high for the initial sear, then reduce to medium or medium-low to finish cooking through evenly.
Mistake #3: Adding Sauce Too Early – If you add the honey-garlic sauce while the chicken is still cooking, it will burn and turn bitter. Always cook the chicken fully first, remove it from the pan, then make your glaze and return the chicken to coat it at the end.
Mistake #4: Skipping the Cornstarch Slurry – Adding cornstarch directly to the sauce causes clumps. Always mix it with cold water first to create a smooth slurry. This ensures even distribution and proper thickening without lumps.
Mistake #5: Overcooking the Chicken – Chicken breasts can go from perfectly juicy to dry in just a minute or two. Use a meat thermometer and remove chicken from heat at 165°F. The residual heat will continue cooking it slightly, bringing it to a perfect 170°F as it rests.
Mistake #6: Not Mincing Garlic Finely Enough – Large chunks of garlic can taste harsh and burn easily in the sauce. Take the time to mince your garlic very finely, or use a garlic press for the most even distribution of flavor.
Mistake #7: Crowding the Pan – If your skillet is too small or you’re trying to cook too much chicken at once, the pieces will steam instead of sear. Use a large enough pan with space between each piece, or cook in batches if necessary.
Storage & Meal Prep
This honey garlic glazed chicken is a meal prepper’s dream! Here’s everything you need to know about storing and reheating:
Refrigerator Storage: Store cooled chicken in an airtight container with the extra glaze spooned over top. Properly stored, it will keep for 4-5 days in the refrigerator. For best results, store the chicken whole rather than sliced to maintain moisture.
Reheating Instructions:
- Microwave: Place chicken on a microwave-safe plate, cover with a damp paper towel, and heat in 30-second intervals until warmed through. Be careful not to overheat as this can dry out the chicken.
- Stovetop: This is the best method! Add a tablespoon of water or chicken broth to a skillet over medium-low heat. Add the chicken and cover, heating for 3-4 minutes per side until warmed through. The added moisture keeps it juicy.
- Oven: Preheat to 350°F. Place chicken in a covered baking dish with a splash of water or broth. Heat for 15-20 minutes until warmed through.
Meal Prep Tips:
- Cook chicken breasts on Sunday and store them whole. Slice just before eating to maintain maximum juiciness.
- Pair with different sides throughout the week—Monday over rice, Wednesday with roasted vegetables, Friday over salad greens.
- Store sauce separately if you prefer to control how much glaze you use per serving, though chicken keeps well in the sauce.
- Portion into individual containers with your choice of sides for grab-and-go lunches.
Shelf Life: Cooked chicken should be consumed within 4-5 days when refrigerated at 40°F or below. Don’t leave chicken at room temperature for more than 2 hours after cooking.
Make-Ahead & Freezer Notes
Planning ahead? This recipe is incredibly freezer-friendly and perfect for batch cooking!
Make-Ahead Options:
- Sauce Prep: Mix the honey, soy sauce, garlic, and vinegar up to 3 days ahead and store refrigerated in an airtight container. When ready to cook, just make the cornstarch slurry and proceed with the recipe.
- Marinated Chicken: Marinate raw chicken in half the sauce for 2-4 hours or overnight before cooking for even deeper flavor penetration.
- Partially Cooked: Sear chicken breasts but don’t add sauce. Cool completely, wrap individually, and refrigerate up to 2 days. When ready to serve, reheat and make fresh sauce.
Freezing Cooked Chicken:
- Let chicken cool completely to room temperature first.
- Wrap each piece tightly in plastic wrap, then place in a freezer-safe bag or container.
- Label with the date and freeze for up to 3 months.
- For best texture, freeze chicken without the sauce and make fresh glaze when reheating.
- If freezing with sauce, leave a little headspace in your container as liquids expand when frozen.
Thawing & Reheating from Frozen:
- Best Method: Thaw overnight in the refrigerator for food safety.
- Quick Thaw: Place sealed chicken in a bowl of cold water, changing water every 30 minutes until thawed (usually 1-2 hours).
- From Frozen: Place frozen chicken in a covered baking dish with a splash of water or broth. Bake at 350°F for 30-40 minutes until heated through to 165°F.
- Sauce Revival: If the sauce separates after freezing, simply whisk in a teaspoon of hot water while reheating to bring it back together.
Batch Cooking: This recipe doubles and triples beautifully! Make a large batch, portion into meal-sized servings, and freeze for easy weeknight dinners. You’ll thank yourself later when dinner is just a reheat away!
Serving Suggestions
The beauty of honey garlic glazed chicken is how well it pairs with virtually any side dish! Here are some winning combinations:
Classic Pairings:
- Fluffy White or Brown Rice: The glaze soaks into the rice beautifully, making every bite flavorful
- Steamed Jasmine Rice: Its subtle floral notes complement the sweet-savory glaze perfectly
- Garlic Mashed Potatoes: Creamy potatoes balance the sticky glaze wonderfully
- Roasted Vegetables: Try broccoli, green beans, asparagus, or Brussels sprouts
Lighter Options:
- Fresh Garden Salad: Slice the chicken and serve over mixed greens with cucumber, tomatoes, and a light vinaigrette
- Cauliflower Rice: A low-carb alternative that still soaks up all that delicious sauce
- Zucchini Noodles: Spiralized zucchini makes a fresh, light base for the glazed chicken
- Quinoa: High in protein and provides a nutty flavor that pairs beautifully with the glaze
Asian-Inspired Sides:
- Stir-Fried Vegetables: Bell peppers, snap peas, and carrots tossed in a light sauce
- Egg Fried Rice: Turn leftovers into a complete meal by adding diced chicken to fried rice
- Sesame Green Beans: Simply prepared with garlic, sesame oil, and sesame seeds
- Lo Mein or Rice Noodles: Toss noodles with vegetables and slice the chicken on top
Comfort Food Combos:
- Buttered Egg Noodles: Simple but so satisfying with the rich glaze
- Creamy Coleslaw: The cool, crunchy slaw provides a perfect contrast to the warm, sticky chicken
- Corn on the Cob: Sweet corn echoes the honey notes in the glaze
- Dinner Rolls: Perfect for soaking up every last drop of that delicious sauce
Beverage Pairings:
- White Wine: A Riesling or Gewürztraminer complements the sweetness beautifully
- Iced Tea: Unsweetened or lightly sweetened balances the rich flavors
- Sparkling Water with Lemon: Refreshing and palate-cleansing
- Light Beer: A wheat beer or lager works wonderfully with the savory-sweet profile
Pro Serving Tip: Plate the chicken over your chosen base, drizzle with extra glaze, and garnish with fresh herbs and sesame seeds for a restaurant-quality presentation that’ll have your family thinking you’ve been secretly taking cooking classes!
FAQs Section
Q: Can I use chicken thighs instead of chicken breasts?
A: Absolutely! Chicken thighs are actually more forgiving and stay juicier than breasts. Use boneless, skinless thighs and cook for about the same amount of time, checking that the internal temperature reaches 165°F. The darker meat pairs beautifully with the honey garlic glaze and has incredible flavor. Just note that thighs have slightly higher fat content, so the nutrition information would change.
Q: How do I prevent the honey from burning in the pan?
A: The key is to add the honey-based sauce after the chicken is fully cooked, not during. Remove the chicken from the pan, reduce the heat to low or medium-low, then add your sauce ingredients. The brief cooking time at lower heat allows the sauce to thicken and become glossy without burning. If you notice any burning, immediately remove the pan from heat and add a splash of water to cool it down.
Q: Can I make this recipe without cornstarch?
A: Yes! While cornstarch creates that signature glossy, thick coating, you can simmer the sauce for a few extra minutes to reduce it naturally. It won’t be quite as thick, but it will still be delicious. Alternatively, use arrowroot powder as a 1:1 substitute for cornstarch, or try 1 tablespoon of flour mixed with 2 tablespoons of water (though this will make the sauce slightly less glossy).
Q: My chicken is dry—what did I do wrong?
A: Chicken breasts dry out easily when overcooked. The most common culprits are cooking over too-high heat for too long or not using a meat thermometer. Chicken is done at exactly 165°F—even 175°F can make it noticeably drier. Also, starting with brined chicken or chicken that’s been brought to room temperature helps tremendously. Consider switching to chicken thighs, which are much harder to overcook.
Q: Is this recipe gluten-free?
A: It can be! Simply substitute regular soy sauce with tamari (which is naturally gluten-free) or coconut aminos. All other ingredients are naturally gluten-free. Always check your specific brand labels to be certain, as manufacturing processes can vary.
Q: Can I double this recipe for a crowd?
A: Definitely! This recipe scales beautifully. However, avoid overcrowding your pan—you may need to cook the chicken in two batches to ensure proper browning. The sauce can easily be doubled in the same pan. Alternatively, after searing all the chicken (in batches if needed), you can finish everything together in a large roasting pan in a 375°F oven for about 10 minutes with the glaze poured over top.
Q: What if I don’t have apple cider vinegar?
A: No problem! Rice vinegar, white wine vinegar, or even fresh lemon juice work equally well. Each provides the acidity needed to balance the sweetness. Use the same amount called for in the recipe. In a true pinch, even regular white vinegar works, though it’s slightly harsher in flavor.
Q: How can I make this recipe less sweet?
A: Reduce the honey to 3-4 tablespoons instead of ⅓ cup, and increase the soy sauce by 1 tablespoon to maintain the sauce volume. You can also add an extra tablespoon of vinegar or a squeeze of fresh lemon juice to cut through the sweetness with more acid. Taste as you go and adjust to your preference.
Conclusion
There you have it—the ultimate guide to making perfectly sticky, sweet, and savory Honey Garlic Glazed Chicken Breast that’ll have your family asking for it on repeat! This recipe proves that you don’t need a long list of exotic ingredients or complicated techniques to create something truly special. With just a handful of pantry staples and about 30 minutes, you can serve up restaurant-quality chicken that looks and tastes like you spent hours in the kitchen.
The beauty of this dish is its incredible versatility. Serve it for a quick Tuesday night dinner with rice and vegetables, slice it over a fresh salad for a lighter meal, or plate it elegantly for date night at home. It’s equally at home in your weekly meal prep containers as it is on a serving platter for guests. Plus, once you master the basic technique, you can customize the flavors endlessly to suit your family’s tastes.
Remember, cooking should be fun and rewarding, not stressful! If your first attempt isn’t perfect, that’s completely okay—even imperfect honey garlic chicken is still delicious. The more you make it, the more confident you’ll become, and soon you’ll be adjusting seasonings and glazes without even measuring.
Now it’s your turn to get cooking! Try this recipe tonight and let me know how it turns out in the comments below. Did you add a spicy kick? Serve it with a creative side dish? Snap a photo and share it on Pinterest—I love seeing your creations! And if you enjoyed this recipe, be sure to pin it to your favorite dinner board so you can find it easily when you need it. Happy cooking, friends! 🍯✨
Related Recipes You’ll Love
Looking for more easy chicken dinner inspiration? Check out these reader favorites:
- “Crispy Baked Chicken Thighs with Lemon Butter”
- “One-Pan Garlic Parmesan Chicken and Vegetables”
- “Slow Cooker Teriyaki Chicken”
- “Easy Chicken Stir Fry with Vegetables”
- “Creamy Tuscan Garlic Chicken”

