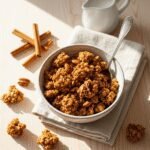
There’s something absolutely magical about the smell of homemade cinnamon granola baking in your oven on a Sunday morning. This homemade cinnamon granola recipe transforms simple pantry staples into crispy, clustered perfection that’s infinitely better than anything you’ll find in a store. Whether you’re sprinkling it over Greek yogurt for breakfast, enjoying it with cold milk, or grabbing a handful as an afternoon snack, this easy cinnamon granola delivers incredible flavor and satisfying crunch every single time.
What makes this recipe truly special is how customizable it is to your family’s tastes while remaining incredibly simple to make. Unlike store-bought granola that’s often loaded with refined sugars and mysterious ingredients, this homemade version lets you control exactly what goes into your bowl. Serve it for breakfast meal prep, pack it in lunchboxes, gift it to friends during the holidays, or keep a jar on your counter for healthy snacking throughout the week. Once you taste the warm cinnamon spice combined with toasted oats and the subtle sweetness of honey or maple syrup, you’ll never want to buy granola from the store again!
History / Background
Granola has a fascinating history that dates back to the late 1800s when it was first created as a health food in American sanitariums. Dr. James Caleb Jackson invented the original version called “granula” in 1863 at a health spa in New York, made from graham flour formed into nuggets. Later, Dr. John Harvey Kellogg (yes, that Kellogg!) created his own version in the 1870s at the Battle Creek Sanitarium in Michigan, calling it “granola.”
However, granola as we know it today really took off during the counterculture movement of the 1960s and 1970s. Hippies and health food enthusiasts embraced granola as a wholesome, natural food that represented a return to simpler, healthier eating habits. It became so associated with this lifestyle that “granola” even became slang for someone who was into natural living and environmental consciousness.
Cinnamon granola specifically holds a special place in American breakfast culture because cinnamon has always been a beloved spice in our kitchens—evoking memories of cinnamon rolls, apple pie, and cozy mornings. The combination of toasted oats with warm cinnamon creates that perfect balance of comfort and nutrition that has made this version a staple in homes across the country. Today, homemade granola has experienced a massive resurgence as people seek to avoid the excessive sugars and additives in commercial brands, returning to the wholesome roots of this classic breakfast food.
Why You’ll Love This Recipe
This homemade cinnamon granola recipe checks every single box for what makes a recipe truly keeper-worthy. It’s one of those rare recipes that delivers amazing flavor while being genuinely good for you, without requiring any special skills or fancy equipment. The best part? Your entire house will smell like a warm bakery while it bakes!
Here’s why this recipe will become your new breakfast obsession:
- Budget-Friendly – Uses affordable pantry staples; costs a fraction of store-bought gourmet granola
- Customizable – Easily adapt to your dietary needs and flavor preferences
- Make-Ahead Magic – Prepare once and enjoy for 2-3 weeks (if it lasts that long!)
- Naturally Sweetened – Uses honey or maple syrup instead of refined sugar
- Big Clusters – Learn the secret technique for those coveted crunchy clumps
- Kid-Approved – Even picky eaters love the cinnamon-spiced sweetness
- Meal Prep Champion – Perfect for busy mornings when you need grab-and-go nutrition
- Gift-Worthy – Package it in mason jars for thoughtful homemade gifts
- 45 Minutes Start to Finish – Minimal active time; the oven does most of the work
- No Refined Sugar – Sweetened naturally with options for various dietary approaches
Ingredient Notes
Let’s break down what you’ll need for this delicious homemade cinnamon granola and why each ingredient matters. Understanding the “why” behind ingredients will help you make smart substitutions!
Old-Fashioned Rolled Oats – The foundation of any great granola recipe. Use old-fashioned oats, NOT quick oats or steel-cut oats. Old-fashioned oats create the perfect texture with nice clusters. They’re also a fantastic source of fiber and will keep you satisfied all morning long.
Raw Nuts – Almonds, pecans, walnuts, or cashews add protein, healthy fats, and amazing crunch. You can use one type or mix several together. Roughly chop them so they distribute evenly and toast beautifully. If you have nut allergies, substitute with seeds like sunflower or pumpkin seeds.
Cinnamon – The star spice! Ground cinnamon gives this granola its signature warmth and cozy flavor. Don’t skimp here—use a full tablespoon for bold cinnamon taste. Ceylon cinnamon (also called “true cinnamon”) has a sweeter, more delicate flavor, while cassia cinnamon is more robust.
Honey or Maple Syrup – These natural liquid sweeteners help bind the granola together and create those coveted clusters. Honey gives a floral sweetness while maple syrup adds deeper, caramel-like notes. Both work equally well, so use what you prefer. For vegan granola, always choose maple syrup.
Coconut Oil or Butter – The fat component that helps everything crisp up beautifully. Melted coconut oil is fantastic and adds subtle tropical notes, while butter creates richer flavor. Both work perfectly, so choose based on your preference or dietary needs.
Vanilla Extract – A little goes a long way in boosting all the other flavors and adding aromatic depth. Pure vanilla extract is always best, but imitation will work in a pinch.
Salt – Never skip the salt! It balances the sweetness and makes all the flavors pop. Just a half teaspoon transforms the entire batch.
Optional Add-Ins – Dried fruit (raisins, cranberries, cherries), coconut flakes, chocolate chips (add after baking!), or additional spices like nutmeg or ginger let you customize to your heart’s content.
Equipment Needed
Good news—you probably already have everything you need to make this recipe! Here’s what you’ll use:
- Large Mixing Bowl – For combining all your dry ingredients
- Medium Saucepan or Microwave-Safe Bowl – To melt together your wet ingredients
- Large Rimmed Baking Sheet (18×13-inch) – A half-sheet pan works perfectly; make sure it has sides to contain the granola
- Parchment Paper or Silicone Baking Mat – Prevents sticking and makes cleanup a breeze
- Wooden Spoon or Silicone Spatula – For mixing and stirring
- Measuring Cups and Spoons – Accuracy matters for the best texture
- Wire Cooling Rack (optional but helpful) – Allows air circulation while cooling
- Airtight Container or Mason Jars – For storing your finished granola
Homemade Cinnamon Granola Recipe
- Total Time: 45 minutes
- Yield: 6 cups (12 servings) 1x
- Diet: Vegetarian
Description
This homemade cinnamon granola recipe creates perfectly crispy, clustered granola with warm spice and natural sweetness. Made with simple ingredients and ready in under an hour, it’s the ultimate healthy breakfast or snack!
Ingredients
- 4 cups old-fashioned rolled oats
- 1½ cups raw nuts (almonds, pecans, walnuts, or mix), roughly chopped
- 1 tablespoon ground cinnamon
- ½ teaspoon kosher salt
- ½ cup honey or pure maple syrup
- ⅓ cup coconut oil or unsalted butter, melted
- 2 teaspoons pure vanilla extract
- ½ cup dried fruit (raisins, cranberries, or cherries), optional – add after baking
- ½ cup unsweetened coconut flakes, optional
Instructions
- Preheat Your Oven: Set your oven to 325°F (163°C). Line a large rimmed baking sheet with parchment paper or a silicone baking mat. This temperature is key—too hot and your granola will burn; too low and it won’t crisp up properly.
- Mix Dry Ingredients: In a large mixing bowl, combine the rolled oats, chopped nuts, ground cinnamon, and salt. Stir everything together until the cinnamon is evenly distributed throughout. You should see a nice golden-brown color coating all your oats and nuts.
- Prepare Wet Ingredients: In a small saucepan over low heat (or in a microwave-safe bowl), gently warm the honey (or maple syrup) and coconut oil (or butter) together until melted and combined. Remove from heat and stir in the vanilla extract. The mixture should be liquid and easy to pour.
- Combine Everything: Pour the warm honey mixture over your dry ingredients. Using a wooden spoon or silicone spatula, stir everything together thoroughly. Keep mixing until every single oat and nut is coated with the sweet mixture. This even coating is crucial for getting those perfect clusters!
- Spread on Baking Sheet: Transfer the granola mixture onto your prepared baking sheet. Spread it out into an even layer, but here’s the secret—don’t spread it too thin, and press it down firmly with the back of your spatula. This compression is what creates those big, beautiful clusters everyone loves!
- Bake Low and Slow: Place the baking sheet in your preheated oven and bake for 35-40 minutes, rotating the pan once at the 20-minute mark for even browning. The granola is done when it’s golden brown and fragrant. It will still feel slightly soft when hot—that’s normal! It crisps up as it cools.
- Cool Completely: This step requires patience but is absolutely critical! Remove the pan from the oven and let the granola cool COMPLETELY on the baking sheet without stirring—at least 45 minutes to 1 hour. Resist the urge to touch it! This is when the clusters form and harden. If you stir it while warm, you’ll break up all those gorgeous clumps.
- Add Dried Fruit (If Using): Once the granola is completely cool and crispy, break it into clusters and add any dried fruit, coconut flakes, or chocolate chips. These items would burn in the oven, so always add them after baking and cooling.
- Store Properly: Transfer your finished granola to an airtight container or mason jars. Store at room temperature and enjoy for up to 3 weeks!
Notes
- For Extra Clusters: Press the granola firmly into the pan before baking and avoid stirring during baking or while cooling.
- Sweetness Level: This recipe is moderately sweet. If you prefer sweeter granola, increase honey/maple syrup to ⅔ cup.
- Oil-Free Option: Replace coconut oil with additional nut butter (almond or peanut) for binding, though it won’t be as crispy.
- Chocolate Lovers: Add ½ cup mini chocolate chips after the granola has completely cooled.
- Spice Variations: Add ½ teaspoon nutmeg or ¼ teaspoon cardamom along with the cinnamon for more complex flavor.
- Prep Time: 10 minutes
- Cook Time: 35 minutes
- Category: Breakfast
- Method: Baking
- Cuisine: American
Nutrition
- Serving Size: ½ cup
- Calories: 285
- Sugar: 12g
- Sodium: 100mg
- Fat: 15g
- Saturated Fat: 6g
- Unsaturated Fat: 8g
- Trans Fat: 0g
- Carbohydrates: 34g
- Fiber: 5g
- Protein: 7g
- Cholesterol: 0mg
Tips & Variations
One of the absolute best things about homemade granola is how easily you can customize it to fit your exact preferences, dietary needs, or whatever you happen to have in your pantry. Here are my favorite ways to switch things up:
Pumpkin Spice Granola: Add 1 teaspoon pumpkin pie spice along with the cinnamon, and use pecans as your nut of choice. Perfect for fall mornings!
Chocolate Chip Granola: Stir in ½ cup mini chocolate chips after the granola has cooled completely. Kids absolutely go crazy for this version!
Tropical Granola: Use macadamia nuts, add 1 cup coconut flakes, and toss in dried pineapple and mango chunks after cooling. Use coconut oil for the fat component.
Apple Cinnamon Granola: Add ½ cup dried apple chips (broken into pieces) and a pinch of nutmeg along with the cinnamon.
Protein-Packed Version: Stir in ¼ cup hemp hearts, chia seeds, or flax seeds before baking for an extra protein and omega-3 boost.
Sugar-Free Granola: Replace the honey with sugar-free maple-flavored syrup or increase the vanilla and use a monk fruit sweetener to taste.
Nut-Free for School Lunches: Replace all nuts with sunflower seeds and pumpkin seeds (pepitas). Works perfectly and is allergy-safe!
Berry Bliss Granola: Add dried blueberries, strawberries, and cranberries after baking for a fruity breakfast treat.
Pro Chef Tips
After making hundreds of batches of granola, I’ve learned the insider tricks that separate good granola from absolutely incredible granola. Here are my professional secrets:
Temperature Is Everything: Baking at 325°F is the sweet spot. Higher temperatures brown the outside too quickly while leaving the inside soggy. Lower temperatures take forever and don’t develop that deep toasted flavor. Trust the temperature!
The Cluster Secret: Want those big, chunky clusters that make granola irresistible? Press the granola mixture FIRMLY into the pan before baking, almost packing it down. Then—and this is crucial—don’t stir it at all during baking or while it’s cooling. The compression + undisturbed cooling = perfect clusters.
Watch the Last 5 Minutes: Granola can go from perfectly golden to burnt in mere minutes. Set a timer and stay nearby during the final 10 minutes of baking. Your nose will help too—when you smell that deep, toasted aroma, check on it!
Cool Completely Before Storing: Warm granola creates condensation in storage containers, which leads to soggy, soft granola. Always let it cool to room temperature first—at least 45 minutes, but preferably an hour.
Toast Your Nuts Separately (Optional Advanced Technique): For next-level flavor, toast your nuts in a dry skillet for 3-4 minutes before adding them to the recipe. This deepens their flavor dramatically, though it’s an extra step.
Rotate Your Pan: Ovens have hot spots. Rotating your baking sheet halfway through ensures even browning across the entire batch.
Use Real Vanilla: Pure vanilla extract makes a noticeable difference in the final flavor. It’s worth the extra dollar or two.
Common Mistakes to Avoid
Even though granola is pretty forgiving, there are a few pitfalls that can ruin an otherwise perfect batch. Here’s what to watch out for:
Stirring While Hot: This is the number one mistake! I know it’s tempting to break up those clumps or to stir it as it cools, but DON’T. Every time you disturb hot granola, you prevent clusters from forming. Leave it completely alone until it’s room temperature.
Using Quick Oats: Quick oats are cut smaller and processed more than old-fashioned rolled oats. They’ll turn mushy and won’t develop the right texture. Always use old-fashioned rolled oats for granola—never instant or quick oats!
Baking Too Hot: Cranking the oven up to 350°F or higher to save time backfires. The outside burns while the inside stays soft. Slow and low at 325°F gives even browning and perfect crispness throughout.
Adding Dried Fruit Before Baking: Dried fruit will burn and become hard as rocks if baked with the granola. Always add it after the granola has baked and cooled. The same goes for chocolate chips!
Spreading Too Thin: If you spread your granola in a very thin, sparse layer, you’ll end up with individual crispy oats rather than clusters. Keep it in a relatively thick, even layer and press it down for the best clustering.
Not Letting It Cool Enough: Granola continues to crisp up as it cools. What seems slightly underdone when it comes out of the oven will be perfect once cool. If you bake it until it’s completely crispy while hot, it will be over-toasted and bitter when cool.
Storing While Warm: Moisture is granola’s enemy. Storing it while even slightly warm creates humidity in the container, leading to soft, stale granola within days instead of weeks.
Storage & Meal Prep
Proper storage is key to keeping your homemade cinnamon granola fresh, crispy, and delicious for as long as possible. Here’s everything you need to know:
Room Temperature Storage: Store your completely cooled granola in an airtight container or mason jar at room temperature. Glass jars are ideal because they don’t absorb odors and keep moisture out effectively. Properly stored granola stays fresh and crunchy for 2-3 weeks, sometimes even up to a month!
Avoid Refrigeration: Don’t store granola in the refrigerator! The humidity inside your fridge will make it soft and chewy rather than crispy. Room temperature storage is always best.
Portion It Out: For meal prep, portion your granola into individual serving containers or small mason jars along with some dried fruit. This makes grab-and-go breakfasts incredibly easy during busy weekday mornings.
Keep It Dry: Make sure no moisture gets into your storage container. Even a little humidity can soften granola quickly. If you live in a very humid climate, consider adding a small food-safe silica gel packet (the kind that comes in vitamin bottles) to your storage container.
Reheating/Re-Crisping: If your granola does get a little soft, spread it on a baking sheet and warm it in a 300°F oven for 5-10 minutes. Let it cool completely and it should crisp back up!
Meal Prep Ideas: Make a big batch on Sunday and portion it into jars with alternating layers of Greek yogurt and granola. Refrigerate these parfaits and you’ll have ready-to-eat breakfasts for the entire week!
Make-Ahead & Freezer Notes
This homemade cinnamon granola is an absolute champion when it comes to make-ahead breakfast solutions, and it freezes beautifully for long-term storage!
Make-Ahead Tips: You can prepare the granola mixture, spread it on the baking sheet, and refrigerate it covered overnight. Just bake it fresh the next morning when you have time. The flavors actually meld together nicely overnight! Alternatively, bake the entire batch and store it as directed—it’s essentially already “made ahead” since it keeps so well at room temperature.
Freezer Instructions: Granola freezes exceptionally well for up to 6 months! Once your granola has completely cooled, transfer it to a freezer-safe container or heavy-duty freezer bag. Press out as much air as possible before sealing. Label with the date so you remember when you made it.
Thawing Method: Here’s the best part—you don’t even need to thaw frozen granola! It actually tastes amazing straight from the freezer, especially on yogurt or with cold milk. The granola stays crunchy even when frozen. If you prefer it at room temperature, simply let it sit out for 15-20 minutes.
Freezing for Gifting: Make multiple batches and freeze them, then thaw and package them in pretty jars when you need last-minute gifts. It’s a lifesaver during the holiday season!
Why Freeze?: Freezing is perfect if you want to make a double or triple batch while you have all the ingredients out. You’ll always have homemade granola on hand without having to mix up a new batch every few weeks.
Serving Suggestions
Homemade cinnamon granola is incredibly versatile—it’s delicious on its own but also plays beautifully with so many other foods! Here are my favorite ways to enjoy it:
Classic Breakfast Bowls: Layer it with Greek yogurt and fresh berries for a protein-packed parfait. Try it with vanilla or honey yogurt for extra sweetness, or plain yogurt if you prefer less sugar. Add sliced bananas, strawberries, blueberries, or whatever fruit is in season.
With Milk: Pour cold milk (dairy or your favorite non-dairy alternative like almond, oat, or coconut milk) over the granola just like cereal. It stays crunchy for a good 5-10 minutes, giving you that perfect texture contrast.
Smoothie Bowl Topper: Make your favorite smoothie bowl and sprinkle this cinnamon granola on top for texture. It adds amazing crunch to thick, creamy smoothies made with bananas, berries, and spinach.
Ice Cream Topping: Sprinkle it over vanilla, cinnamon, or apple pie ice cream for a healthy(ish) sundae! The warm cinnamon flavor pairs especially well with caramel or salted caramel ice cream.
Baked Apple or Pears: Use it as a crumble topping for baked apples or pears. Core the fruit, stuff with a little butter and brown sugar, top with granola, and bake until tender.
Afternoon Snack: Keep a jar on your counter and grab a handful when you need an energy boost. Mix it with some dark chocolate chips for a trail mix vibe!
With Fresh Fruit Salad: Toss together your favorite fresh fruits and top with this cinnamon granola for added crunch and substance. It turns a simple fruit salad into a satisfying meal.
Coffee Shop Style: Create your own “acai bowls” at home by blending frozen acai packets with banana and a splash of juice, then topping with granola, coconut, fresh fruit, and a drizzle of honey.
FAQs Section
Q: Why is my granola not crunchy?
A: The most common reason is that the granola wasn’t cooled completely before storing, or moisture got into the storage container. Make sure to cool it entirely (at least 45 minutes) and store it in an airtight container. If it’s soft, you can re-crisp it by spreading it on a baking sheet and warming it at 300°F for 5-10 minutes. Also make sure you’re baking it long enough—it should be golden brown.
Q: Can I make granola without oil or butter?
A: Yes! You can replace the oil with nut butter (almond, peanut, or cashew butter), though the texture will be slightly denser and less crispy. Use about ⅓ cup of nut butter and you may need to add 1-2 tablespoons of water to help it spread more easily. Another option is to use applesauce, but the clusters won’t be quite as pronounced.
Q: How do I get bigger clusters in my granola?
A: The secret is threefold: (1) Press the granola mixture firmly into the pan before baking, really pack it down. (2) Don’t stir the granola at all while it’s baking. (3) Let it cool completely undisturbed on the baking sheet—resist all temptation to poke at it! These three steps together create the best clusters. Using slightly more liquid sweetener (up to ⅔ cup) can also help with clustering.
Q: Can I use steel-cut oats or quick oats instead?
A: No, unfortunately those won’t work well in this recipe. Steel-cut oats are too hard and won’t soften properly during baking. Quick oats are too processed and will become mushy rather than crispy. Always use old-fashioned rolled oats for the best texture in granola.
Q: Is this recipe gluten-free?
A: It can be! Oats are naturally gluten-free, but they’re often processed in facilities that also process wheat, so cross-contamination can occur. If you need this to be gluten-free, make sure to purchase certified gluten-free oats. All the other ingredients are naturally gluten-free, so just check your labels to be safe.
Q: My granola burned on the edges but is undercooked in the middle. What happened?
A: This usually means your oven temperature is too high or has hot spots. Make sure you’re baking at 325°F (not higher), and rotate your pan halfway through baking. Also, spread the granola in an even layer—if it’s piled too high in some spots, those areas won’t cook evenly. An oven thermometer can help verify your oven temperature is accurate.
Q: Can I make this recipe vegan?
A: Absolutely! Just use maple syrup instead of honey (since honey isn’t vegan), and use coconut oil or vegan butter instead of regular butter. The recipe works exactly the same way with these simple swaps!
Conclusion
There you have it—everything you need to make the most delicious, crispy, clustered homemade cinnamon granola right in your own kitchen! This recipe has been my go-to for years because it’s genuinely foolproof, incredibly versatile, and so much better than anything you can buy at the store. Plus, you know exactly what’s going into your food, with no weird additives or excessive amounts of sugar.
The warm cinnamon spice combined with toasted oats and nuts creates that perfect cozy breakfast that makes you feel like you’ve got your life together, even on the busiest weekday mornings. Whether you’re meal prepping for the week ahead, looking for a healthier snack option, or wanting to give homemade gifts to friends and family, this cinnamon granola recipe has you covered.
I’d absolutely love to hear how your batch turns out! Did you add any fun mix-ins? Try any creative variations? Please leave a comment below and let me know! And if you loved this recipe, don’t forget to save it to your Pinterest boards so you can find it again easily—just click that Pinterest button and pin it to your favorite breakfast or healthy recipes board. Your future self will thank you when you’re craving this amazing homemade granola!
Happy baking, friends! Here’s to crispy, crunchy, cinnamon-spiced mornings! 🥣✨