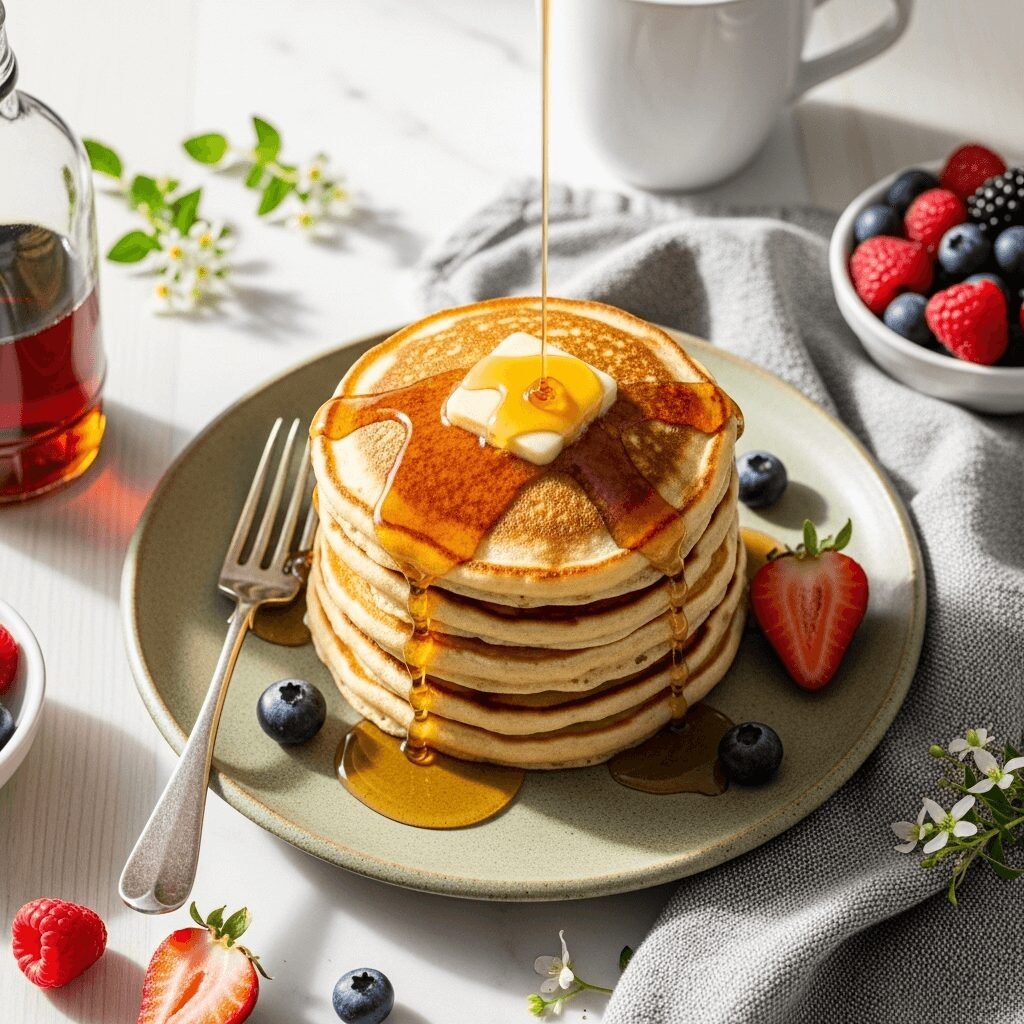

There’s something absolutely magical about waking up to the smell of fresh buttermilk pancakes sizzling on the griddle. These soft buttermilk pancakes are the ultimate breakfast comfort food—golden brown on the outside, impossibly fluffy on the inside, and just sweet enough to make your morning feel special. Whether you’re making weekend breakfast for the family, hosting a brunch gathering, or simply treating yourself to a cozy morning meal, this classic buttermilk pancake recipe delivers restaurant-quality results right in your own kitchen.
What makes these pancakes truly special is their tender, cloud-like texture that comes from the perfect combination of buttermilk’s tangy richness and just the right amount of leavening. They’re substantial enough to satisfy hungry appetites but light enough that you’ll want seconds (and maybe thirds!). Serve them for lazy Sunday mornings, holiday breakfasts, breakfast-for-dinner nights, or any time you’re craving that nostalgic diner-style pancake experience. Stack them high, drizzle with warm maple syrup, add a pat of butter, and watch them disappear from the table!
History / Background
Pancakes have been a beloved breakfast staple for centuries, with variations appearing in cultures around the world. The American-style buttermilk pancake as we know it today has its roots in early American colonial cooking, where buttermilk—the liquid left over from churning butter—was a common household ingredient that couldn’t be wasted. Resourceful cooks discovered that buttermilk’s natural acidity reacted beautifully with baking soda, creating lighter, fluffier pancakes than milk alone could produce.
The tradition of buttermilk pancakes became deeply embedded in American culinary culture throughout the 19th and 20th centuries. Diners and family restaurants made them a breakfast menu cornerstone, and home cooks passed down their secret recipes through generations. The combination of buttermilk, flour, eggs, and baking soda became the gold standard for achieving that perfect tender crumb and slightly tangy flavor that distinguishes truly exceptional pancakes from ordinary ones.
During the Great Depression, buttermilk pancakes gained even more popularity as an affordable, filling meal that could feed a family without breaking the bank. The tradition continued through the decades, with buttermilk pancakes becoming synonymous with Sunday morning family breakfasts, Saturday morning cartoons, and the comforting rituals of home cooking. Today, while instant pancake mixes line grocery store shelves, nothing quite compares to homemade buttermilk pancakes made from scratch—they’re a delicious connection to culinary tradition that tastes infinitely better than any box mix.
Why You’ll Love This Recipe
This soft buttermilk pancakes recipe is an absolute game-changer for your breakfast routine, delivering consistently perfect results that will have everyone asking for your secret. The batter comes together in just minutes with simple pantry ingredients, and the pancakes cook up beautifully with that signature golden-brown exterior and impossibly fluffy interior that makes breakfast feel like a special occasion.
Here’s why this recipe will become your go-to pancake recipe:
- Incredibly fluffy texture – The buttermilk and baking soda combination creates light, airy pancakes that practically melt in your mouth
- Simple ingredients – Made with basic pantry staples you likely already have on hand
- Quick and easy – From mixing bowl to breakfast table in under 30 minutes
- Foolproof technique – Clear instructions ensure perfect pancakes every single time, even for beginners
- Family-friendly – Kids and adults alike can’t resist these classic breakfast treats
- Budget-friendly – Costs just pennies per serving, making it perfect for feeding a crowd
- Versatile base – Easily customize with mix-ins like blueberries, chocolate chips, or pecans
- Make-ahead friendly – Batter can be prepared the night before for even faster mornings
- Freezer-friendly – Make a double batch and freeze extras for quick weekday breakfasts
- Nostalgic comfort food – Brings back all those cozy childhood breakfast memories
Ingredient Notes
Understanding your ingredients is key to making the best buttermilk pancakes possible. Here’s what you’ll need and why each component matters:
Buttermilk – The star ingredient that gives these pancakes their signature tang and ultra-tender texture. The acidity in buttermilk reacts with baking soda to create air pockets for maximum fluffiness. Don’t skip this! If you don’t have buttermilk, you can make a substitute by adding 1 tablespoon of white vinegar or lemon juice to 1 cup of regular milk and letting it sit for 5 minutes.
All-Purpose Flour – Provides structure to the pancakes. All-purpose flour is ideal because it has moderate protein content that creates tender pancakes without being too dense. For whole wheat pancakes, substitute up to half the all-purpose flour with whole wheat flour.
Eggs – Add richness, help bind the ingredients together, and contribute to the fluffy texture. Make sure eggs are at room temperature for better incorporation into the batter.
Sugar – Just a touch of sweetness balances the tanginess of buttermilk. Granulated white sugar works perfectly, but you can substitute with honey or maple syrup if preferred.
Baking Powder & Baking Soda – The dynamic duo of leavening agents! Baking soda reacts with the acidic buttermilk immediately, while baking powder provides an extra lift during cooking. Both are essential for achieving maximum fluffiness.
Salt – Enhances all the other flavors and balances the sweetness. Don’t skip the salt—it makes a noticeable difference!
Butter – Melted butter adds rich flavor and keeps the pancakes moist. You can substitute with vegetable oil or melted coconut oil, but butter provides the best flavor.
Vanilla Extract – A splash of vanilla adds warmth and depth to the flavor profile, making these pancakes taste bakery-special.
Equipment Needed
Having the right tools makes pancake-making a breeze. Here’s what you’ll need:
- Large mixing bowl – For combining dry ingredients
- Medium mixing bowl – For whisking together wet ingredients
- Whisk – Essential for mixing batter smoothly and incorporating air
- Measuring cups and spoons – For accurate ingredient measurements
- Griddle or large non-stick skillet – A griddle is ideal for cooking multiple pancakes at once, but a large skillet works perfectly too
- Ladle or ¼-cup measuring cup – For portioning consistent-sized pancakes
- Spatula – A wide, thin spatula makes flipping pancakes easier
- Small bowl or ramekin – For melted butter
- Wire cooling rack (optional) – Keeps pancakes warm in the oven without getting soggy
Soft Buttermilk Pancakes Recipe
- Total Time: 25 minutes
- Yield: 12 pancakes (4-6 servings) 1x
- Diet: Vegetarian
Description
The fluffiest, most tender buttermilk pancakes you’ll ever make! This easy recipe uses simple ingredients to create golden-brown, melt-in-your-mouth pancakes that taste like they came from your favorite diner. Perfect for weekend breakfasts or any morning you want to start the day deliciously.
Ingredients
Dry Ingredients:
- 2 cups all-purpose flour
- 3 tablespoons granulated sugar
- 2 teaspoons baking powder
- 1 teaspoon baking soda
- ½ teaspoon salt
Wet Ingredients:
- 2 cups buttermilk, room temperature
- 2 large eggs, room temperature
- ¼ cup unsalted butter, melted and slightly cooled
- 1 teaspoon vanilla extract
For Cooking:
- Butter or oil for greasing the griddle
For Serving:
- Maple syrup
- Additional butter
- Fresh berries (optional)
- Powdered sugar (optional)
Instructions
Step 1: Prepare Your Ingredients
Remove buttermilk and eggs from the refrigerator and let them come to room temperature (about 20-30 minutes). This helps create a smoother batter. Melt the butter and set aside to cool slightly.
Step 2: Mix Dry Ingredients
In a large mixing bowl, whisk together the flour, sugar, baking powder, baking soda, and salt until well combined. Make sure there are no lumps and the leavening agents are evenly distributed throughout the flour.
Step 3: Combine Wet Ingredients
In a medium bowl, whisk together the buttermilk, eggs, melted butter, and vanilla extract until smooth and well combined. The mixture should be homogeneous with no streaks of egg visible.
Step 4: Make the Batter
Pour the wet ingredients into the dry ingredients. Using a whisk or wooden spoon, gently fold the mixture together until just combined. The batter should be slightly lumpy—DO NOT overmix! A few small lumps are perfectly fine and will result in more tender pancakes. Overmixing develops gluten and creates tough, dense pancakes. Let the batter rest for 5 minutes while you heat your griddle.
Step 5: Heat Your Griddle
Preheat a griddle or large non-stick skillet over medium heat (about 350°F if your griddle has temperature control). Lightly grease with butter or cooking spray. To test if it’s ready, sprinkle a few drops of water on the surface—they should sizzle and evaporate immediately.
Step 6: Cook the Pancakes
Using a ¼-cup measuring cup or ladle, pour batter onto the hot griddle, spacing pancakes about 2 inches apart. Cook until bubbles form on the surface and the edges look set, about 2-3 minutes. The bubbles should pop and stay open—this is your signal to flip!
Step 7: Flip and Finish
Using a wide spatula, gently flip each pancake. Cook for another 1-2 minutes on the second side until golden brown and cooked through. The second side cooks faster than the first. Pancakes should feel springy when gently pressed.
Step 8: Keep Warm and Serve
Transfer cooked pancakes to a plate and keep warm in a 200°F oven while you finish cooking the remaining batter. Serve immediately with butter and warm maple syrup.
Notes
- Don’t overmix the batter – Lumpy batter = fluffy pancakes! Overmixing creates tough, rubbery pancakes.
- Rest the batter – Letting batter rest for 5 minutes allows the flour to hydrate and the leavening agents to activate.
- Maintain consistent heat – If pancakes are browning too quickly, reduce heat slightly. If they’re taking too long to brown, increase heat a bit.
- First pancake test – The first pancake often doesn’t turn out perfect as you’re calibrating the heat. Use it to adjust temperature.
- Room temperature ingredients – Cold ingredients can result in a lumpy batter and less fluffy pancakes.
- Fresh baking powder – Check that your baking powder is fresh (not expired) for maximum rise.
- Prep Time: 10 minutes
- Cook Time: 15 minutes
- Category: Breakfast
- Method: Stovetop
- Cuisine: American
Nutrition
- Serving Size: 2 pancakes (without toppings)
- Calories: 285
- Sugar: 9g
- Sodium: 485mg
- Fat: 9g
- Saturated Fat: 5g
- Unsaturated Fat: 3g
- Trans Fat: 0g
- Carbohydrates: 42g
- Fiber: 1g
- Protein: 8g
- Cholesterol: 75mg
Nutritional information is approximate and calculated per serving (2 pancakes). Actual values may vary based on specific ingredients used.
Tips & Variations
Flavor Variations:
- Blueberry Pancakes – Gently fold ¾ cup fresh or frozen blueberries into the batter (don’t thaw frozen berries)
- Chocolate Chip Pancakes – Sprinkle chocolate chips onto each pancake right after pouring batter on the griddle
- Banana Pancakes – Add ½ cup mashed ripe banana to wet ingredients and top with sliced bananas
- Cinnamon Pancakes – Add 1 teaspoon ground cinnamon to dry ingredients for warm spice flavor
- Lemon Ricotta – Add ½ cup ricotta cheese to batter and 1 tablespoon lemon zest for luxurious, creamy pancakes
- Pumpkin Spice – Replace ½ cup buttermilk with pumpkin puree and add 1 teaspoon pumpkin pie spice
Dietary Modifications:
- Whole Wheat – Replace up to half the all-purpose flour with whole wheat flour
- Gluten-Free – Use a 1:1 gluten-free flour blend in place of all-purpose flour
- Dairy-Free – Use plant-based milk with 1 tablespoon vinegar added, and substitute oil for butter
- Lower Sugar – Reduce sugar to 1-2 tablespoons if you prefer less sweet pancakes
Mix-In Ideas:
- Chopped pecans or walnuts
- Shredded coconut
- Mini chocolate chips
- Diced strawberries
- Crumbled bacon
- Almond extract instead of vanilla
Pro Chef Tips
1. Temperature is Everything – The perfect griddle temperature is 350°F. Too hot and pancakes burn on the outside while staying raw inside; too cool and they’ll be pale and dense. Invest in an infrared thermometer or use the water droplet test—drops should sizzle and evaporate within 2-3 seconds.
2. Don’t Press Down – Resist the urge to press down on pancakes with your spatula while cooking! This deflates all those beautiful air pockets you worked hard to create, resulting in flat, dense pancakes instead of fluffy ones.
3. Separate Your Ingredients First – Professional cooks use the mise en place method—measure and separate everything before you start mixing. This prevents mistakes and ensures you don’t forget an ingredient.
4. The One-Flip Rule – Only flip pancakes once! Multiple flips deflate the batter and create tough pancakes. Wait for those bubbles on the surface, then flip with confidence.
5. Butter the Batter, Not Just the Pan – While many recipes skimp on butter, adding it directly to the batter creates richer flavor and more tender texture. The butter in the batter also helps prevent sticking.
6. Sift for Extra Fluffiness – For absolutely show-stopping pancakes, sift your dry ingredients together. This incorporates air and removes any lumps, creating an even lighter texture.
7. Use Fresh Leavening Agents – Baking powder and baking soda lose potency over time. Test yours by dropping some in water (baking soda) or warm water (baking powder)—it should fizz vigorously. Replace every 6 months for best results.
Common Mistakes to Avoid
1. Overmixing the Batter – This is the number one pancake killer! When you overmix, you develop the gluten in the flour, which makes pancakes tough and chewy instead of light and fluffy. Mix just until the dry ingredients are moistened—lumps are your friend here.
2. Using Old or Expired Leavening Agents – Baking powder and baking soda are responsible for those fluffy air pockets. If they’re expired, your pancakes will be flat and dense no matter what you do. Always check expiration dates and store them in a cool, dry place.
3. Cooking at the Wrong Temperature – Too hot and you’ll get burnt outsides with raw, gooey centers. Too cool and pancakes will be pale, tough, and greasy as they absorb too much butter. Medium heat is ideal—adjust as needed based on how your first test pancake turns out.
4. Flipping Too Early or Too Often – Wait until bubbles form on the surface and the edges look set before flipping. Flipping too early means raw batter will run everywhere. Flipping multiple times deflates the pancakes and makes them dense.
5. Skipping the Batter Rest Time – Those 5 minutes of rest allow the flour to fully hydrate and the leavening agents to start working their magic. Rushing this step results in less fluffy, less evenly cooked pancakes. Use this time to heat your griddle properly.
Storage & Meal Prep
Refrigerator Storage:
Store leftover pancakes in an airtight container or resealable plastic bag in the refrigerator for up to 5 days. Place a piece of parchment paper between pancakes to prevent them from sticking together. Reheat in the toaster, toaster oven, or microwave until warmed through.
Freezer Storage:
Buttermilk pancakes freeze beautifully! Let pancakes cool completely, then arrange in a single layer on a baking sheet and freeze until solid (about 1 hour). Transfer frozen pancakes to a freezer-safe bag or container, separating layers with parchment paper. They’ll keep for up to 3 months in the freezer.
Reheating Instructions:
- Microwave: Place 1-3 pancakes on a microwave-safe plate, cover with a damp paper towel, and heat for 20-30 seconds per pancake
- Toaster: Pop frozen pancakes directly into the toaster on medium setting—they crisp up beautifully!
- Oven: Arrange pancakes on a baking sheet, cover loosely with foil, and warm at 350°F for 8-10 minutes
- Stovetop: Heat a skillet over medium-low heat with a little butter and warm pancakes for 1-2 minutes per side
Batter Storage:
Unbaked batter can be stored in the refrigerator for up to 24 hours in an airtight container. The batter will thicken as it sits—simply stir gently before using and add a splash of buttermilk if needed to reach the right consistency. Note that pancakes made from stored batter may not be quite as fluffy as fresh batter.
Make-Ahead & Freezer Notes
Make-Ahead Options:
For stress-free mornings, you have several make-ahead options. You can mix the dry ingredients up to 1 week in advance and store in an airtight container at room temperature—just add the wet ingredients when you’re ready to cook. Alternatively, prepare the entire batter the night before and store it covered in the refrigerator. Give it a gentle stir in the morning (it will have thickened) and you’re ready to cook.
Best Make-Ahead Strategy:
The absolute best approach for busy households is to make a double or triple batch of pancakes, freeze them using the method described above, and then reheat as needed throughout the week. This gives you homemade pancake quality with instant convenience. Your future self will thank you!
Freezing Instructions:
- Cook pancakes completely and let cool to room temperature
- Arrange in a single layer on a parchment-lined baking sheet
- Freeze until solid (about 1-2 hours)
- Stack frozen pancakes with parchment paper between each one
- Transfer to a labeled freezer bag or container
- Store for up to 3 months
Thawing & Reheating from Frozen:
No need to thaw! You can reheat frozen pancakes directly in the toaster, microwave, or oven using the methods described in the storage section. For the crispiest exterior, use the toaster or oven method. For the fastest option, use the microwave with a damp paper towel to prevent drying out.
Serving Suggestions
Soft buttermilk pancakes are incredibly versatile and pair beautifully with both classic and creative accompaniments. Here are some delicious ways to serve them:
Classic Toppings:
- Warm pure maple syrup and a pat of butter
- Fresh whipped cream and berries
- Powdered sugar dusted on top
- Honey butter or flavored compound butters
- Berry compote or fruit preserves
Protein Additions:
- Crispy bacon strips
- Breakfast sausage links or patties
- Ham slices or Canadian bacon
- Turkey bacon for a lighter option
- Scrambled or fried eggs
Fresh Fruit Options:
- Sliced strawberries, blueberries, or raspberries
- Sautéed apples with cinnamon
- Caramelized bananas
- Fresh peach slices
- Mixed berry medley
Indulgent Treats:
- Chocolate syrup or Nutella
- Peanut butter or almond butter
- Whipped cream and chocolate chips
- Caramel sauce and pecans
- Lemon curd and fresh berries
Beverage Pairings:
- Freshly brewed coffee or espresso
- Hot chocolate or chai latte
- Fresh-squeezed orange juice
- Cold milk (especially for kids!)
- Mimosas for brunch gatherings
Complete Breakfast Spread:
For a full breakfast or brunch spread, serve these pancakes alongside scrambled eggs, crispy bacon or sausage, fresh fruit salad, hash browns, and your favorite hot beverages. Add a pitcher of fresh orange juice and you’ve got a breakfast feast worthy of any weekend celebration!
FAQs Section
Q: Can I make buttermilk pancakes without buttermilk?
A: Yes! If you don’t have buttermilk on hand, make a quick substitute by adding 1 tablespoon of white vinegar or fresh lemon juice to 1 cup of regular milk. Stir and let it sit for 5-10 minutes until it curdles slightly. This creates the acidity needed to react with the baking soda. You can also use plain yogurt thinned with a little milk as a buttermilk substitute.
Q: Why are my pancakes flat and not fluffy?
A: There are several possible reasons: (1) Old or expired baking powder/baking soda won’t provide proper lift, (2) Overmixing the batter develops gluten and deflates air pockets, (3) Letting the batter sit too long before cooking causes the leavening agents to lose effectiveness, or (4) Your griddle temperature might be too low. Make sure your leavening agents are fresh, mix the batter gently, and cook on medium heat.
Q: Can I use milk instead of buttermilk?
A: Regular milk won’t give you the same tangy flavor or fluffy texture because it lacks the acidity that reacts with baking soda. If you must use regular milk, reduce the baking soda to ½ teaspoon and increase baking powder to 3 teaspoons. However, the pancakes won’t be quite as tender and flavorful as the buttermilk version.
Q: How do I know when to flip the pancakes?
A: Watch for three signs: (1) Bubbles form across the surface of the pancake, (2) The bubbles pop and leave small holes that stay open, and (3) The edges look dry and slightly set. This usually takes 2-3 minutes. When you see these signs, it’s time to flip! The second side cooks faster, usually just 1-2 minutes.
Q: Can I make the batter ahead of time?
A: You can refrigerate the batter for up to 24 hours, but pancakes made from fresh batter will be slightly fluffier. The batter will thicken in the fridge, so you may need to add a splash of buttermilk to thin it back out. Stir very gently before using. For best results, mix the dry ingredients ahead and add the wet ingredients just before cooking.
Q: Why are my pancakes tough or rubbery?
A: The most common cause is overmixing the batter, which develops gluten and creates a tough, chewy texture instead of tender, fluffy pancakes. Mix just until the dry ingredients are moistened—lumps are perfectly fine! Also make sure you’re not pressing down on the pancakes while they cook, as this deflates them and makes them dense.
Q: How can I keep pancakes warm for serving?
A: Preheat your oven to 200°F and place a wire rack on a baking sheet. As you cook pancakes, transfer them to the rack in the warm oven. The wire rack allows air to circulate and prevents the bottoms from getting soggy. Cover loosely with foil if keeping them warm for more than 15 minutes. This method keeps pancakes warm and fluffy while you finish cooking the entire batch.
Conclusion
There’s truly nothing like a stack of homemade soft buttermilk pancakes to make any morning feel special. This recipe gives you everything you need to create restaurant-quality pancakes in your own kitchen—that perfect golden-brown exterior, impossibly fluffy interior, and tender crumb that makes breakfast feel like a celebration. Whether you’re making them for a weekend family breakfast, a holiday brunch, or just treating yourself to a cozy morning, these pancakes deliver every single time.
The beauty of this recipe lies in its simplicity and reliability. With basic pantry ingredients and straightforward techniques, you can confidently create pancakes that rival any diner or restaurant. Plus, the make-ahead and freezer-friendly options mean you can enjoy homemade pancake goodness even on busy weekday mornings. Make a big batch this weekend, freeze the extras, and you’ll have delicious breakfasts ready to go all week long!
I’d absolutely love to hear how your buttermilk pancakes turn out! Did you try any of the flavor variations? What toppings did you use? Leave a comment below sharing your experience, and don’t forget to rate this recipe. If you loved these pancakes as much as we do, please share this recipe on Pinterest so other home cooks can discover them too. Save it to your breakfast boards, share it with your foodie friends, and help spread the fluffy pancake love!
Happy cooking, and here’s to many delicious pancake mornings ahead! 🥞✨